To install plugins for Team Fortress 2 on a Hostinger VPS, make sure MetaMod and SourceMod are installed, download plugins made for TF2, upload the .smx files to the 232250/tf/addons/sourcemod/plugins folder in Game Panel File Manager, and restart your server. Plugins add features to your TF2 server, such as new maps, items, bots, and game modes.
Prerequisites
Before you can install plugins, you need to make sure that you already have MetaMod and SourceMod frameworks installed on your server. A step-by-step guide can be found here: How to install Sourcemod and Metamod for Source game servers?
Downloading plugins
Before you install plugins, you first need to find and download them. We’d recommend checking out these forums for SourceMod and MetaMod plugins:
NOTE:
-
SourceMod and MetaMod support multiple games, therefore while looking for plugins, you need to make sure that they are made for TF2.
Installing plugins
-
Login to your Game Panel and select your TF2 instance
-
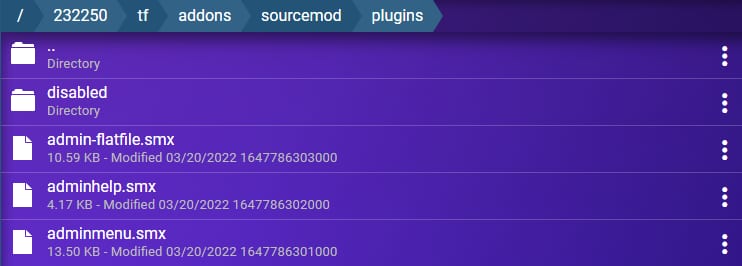
Open up File Manager and navigate to 232250 → tf → addons → sourcemod → plugins folder:

-
Upload your plugins to this folder. Make sure that you are uploading files with .smx format as these are the plugin files themselves. Sometimes you might need to extract archives in order to find the correct file
-
Restart your server
Your Team Fortress 2 server now loads the plugins you uploaded, and their features are available in the game.
NOTES
- See How to host a Team Fortress 2 Dedicated Server at Hostinger for other details about hosting a Team Fortress 2 server on Game Panel.
- See How to host a Counter-Strike 2 dedicated server at Hostinger for other details about hosting a Counter-Strike 2 server on Game Panel.