Events are actions that your website visitors make while browsing your website.
Standard Facebook pixel events are predefined by Facebook and can be used to log conversions, optimize for conversions and build audiences. You can use Facebook’s Event Setup Tool to add standard events and parameters without the need to code.
Set up standard events
- Follow this link to open your pixels list.
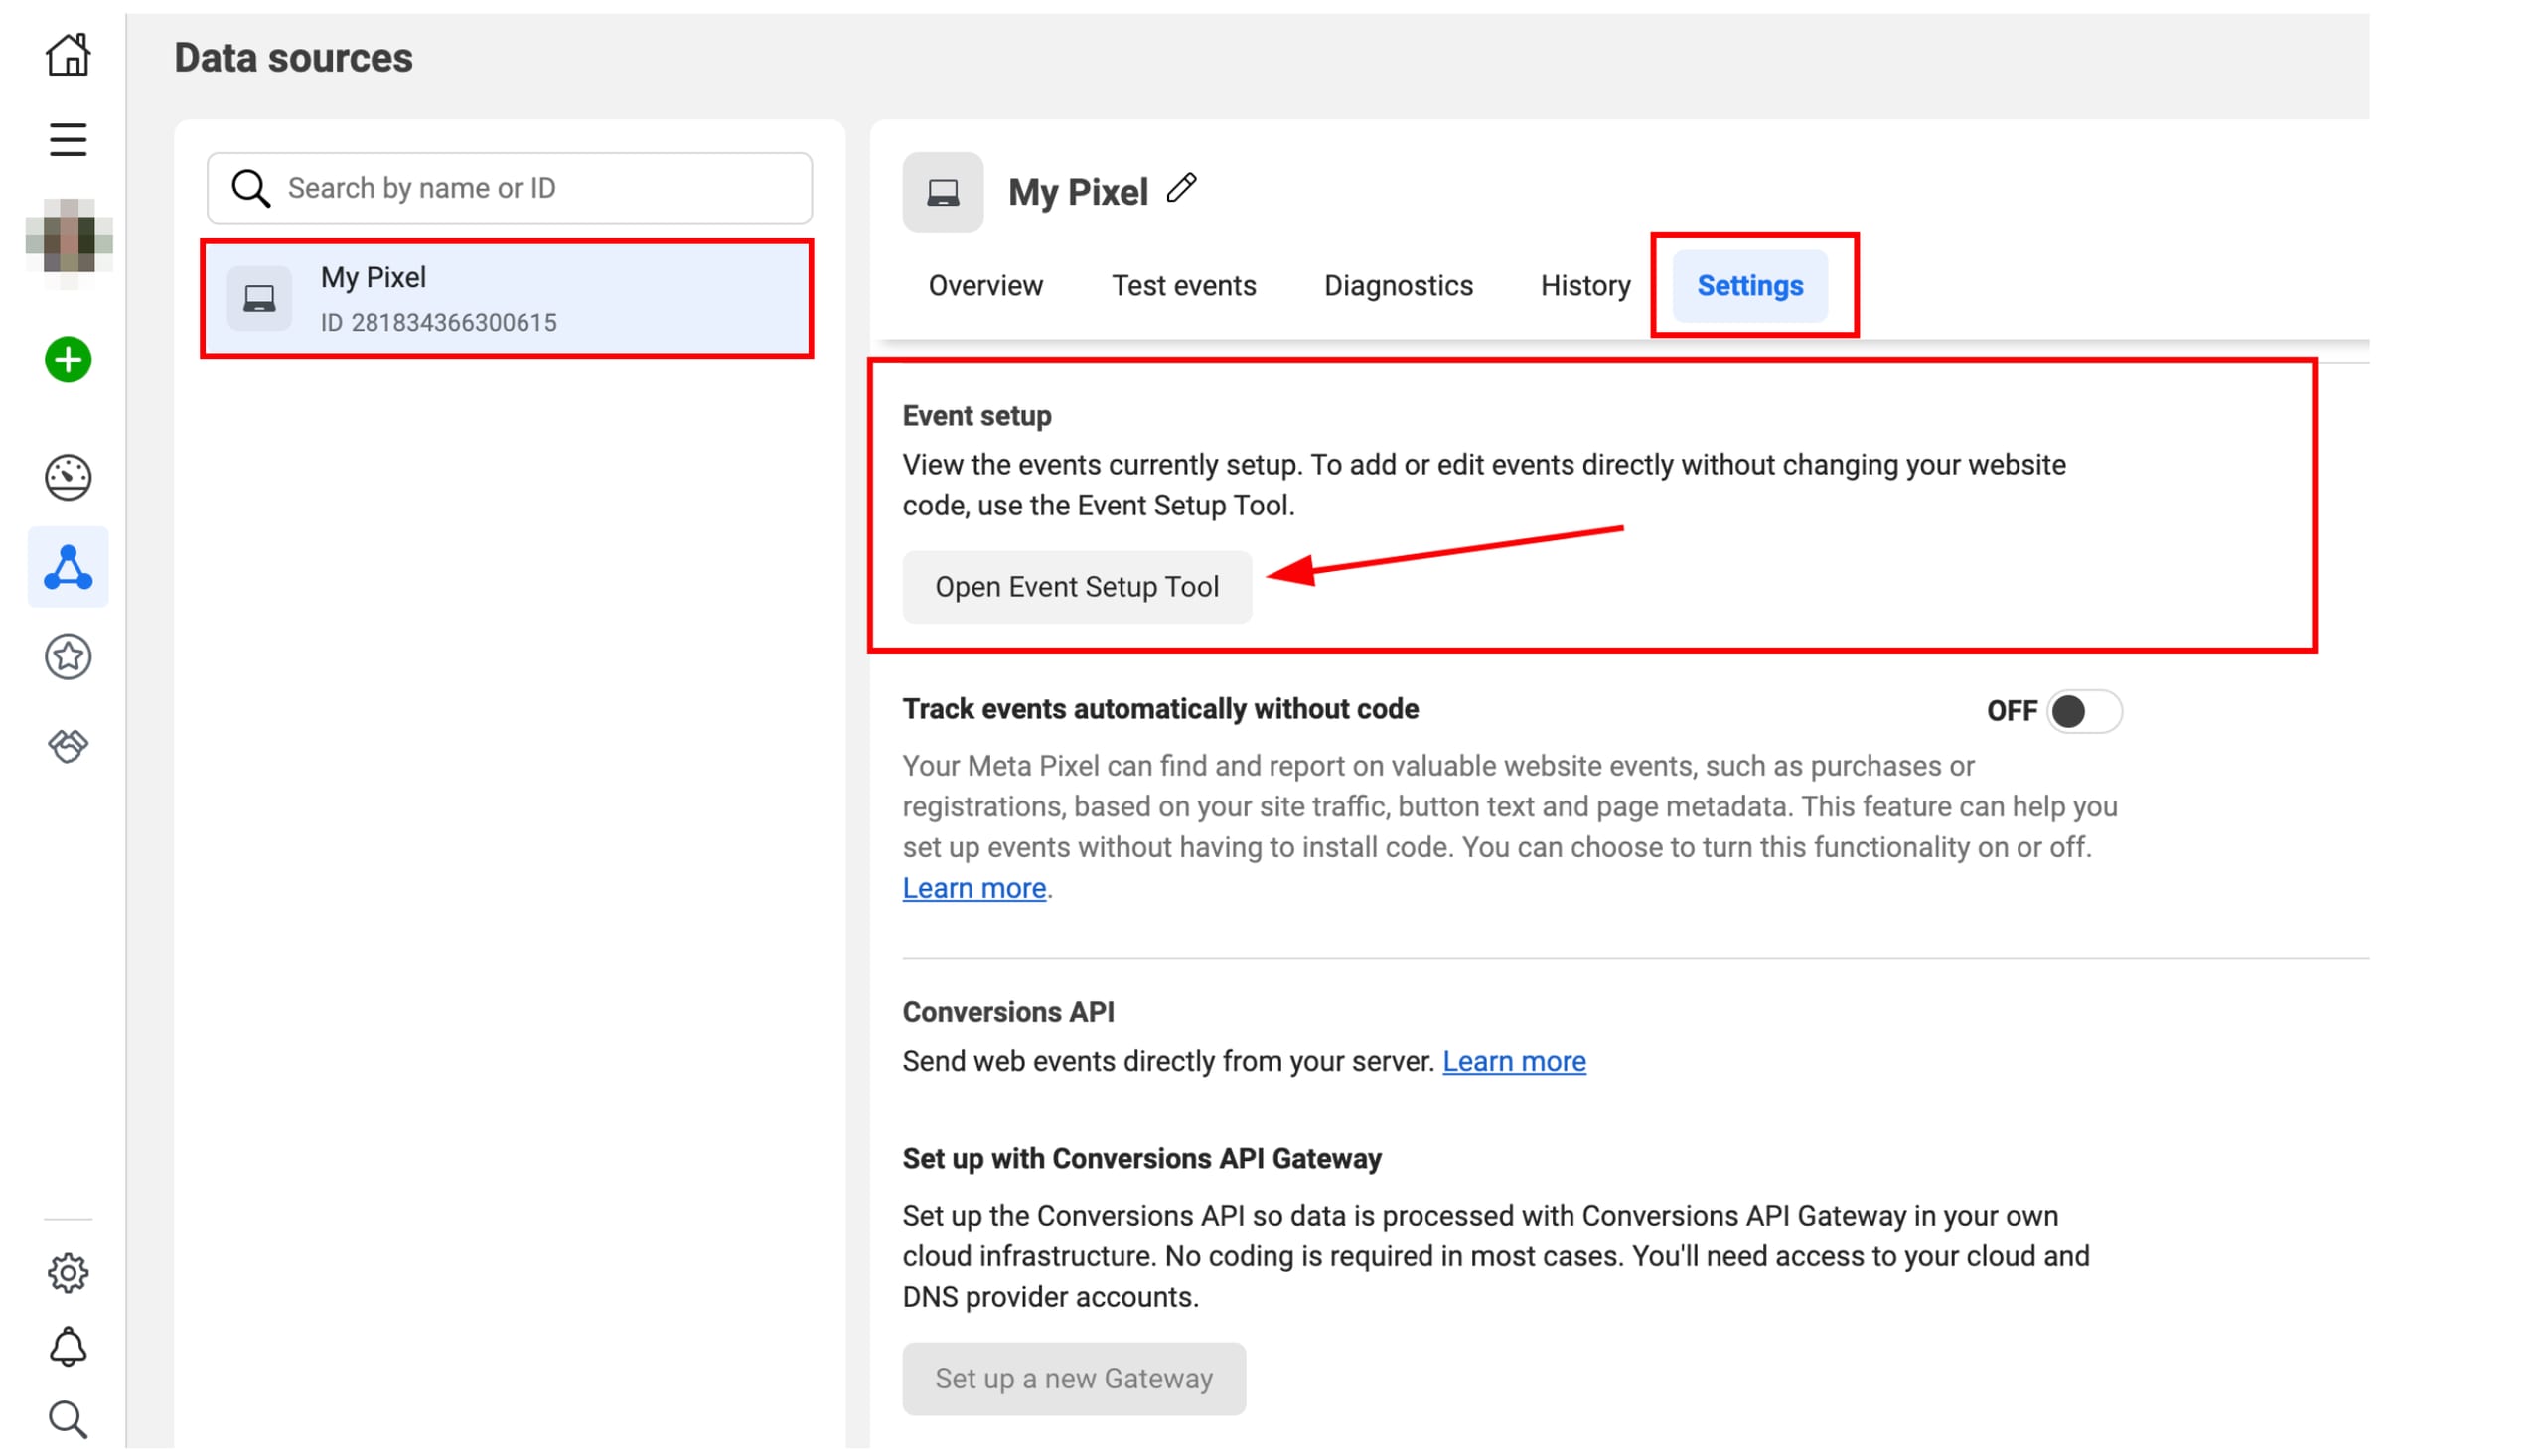
- Select the pixel you’d like to use and open its Settings. Scroll down to find the section Event Setup and click Open Event Setup Tool:

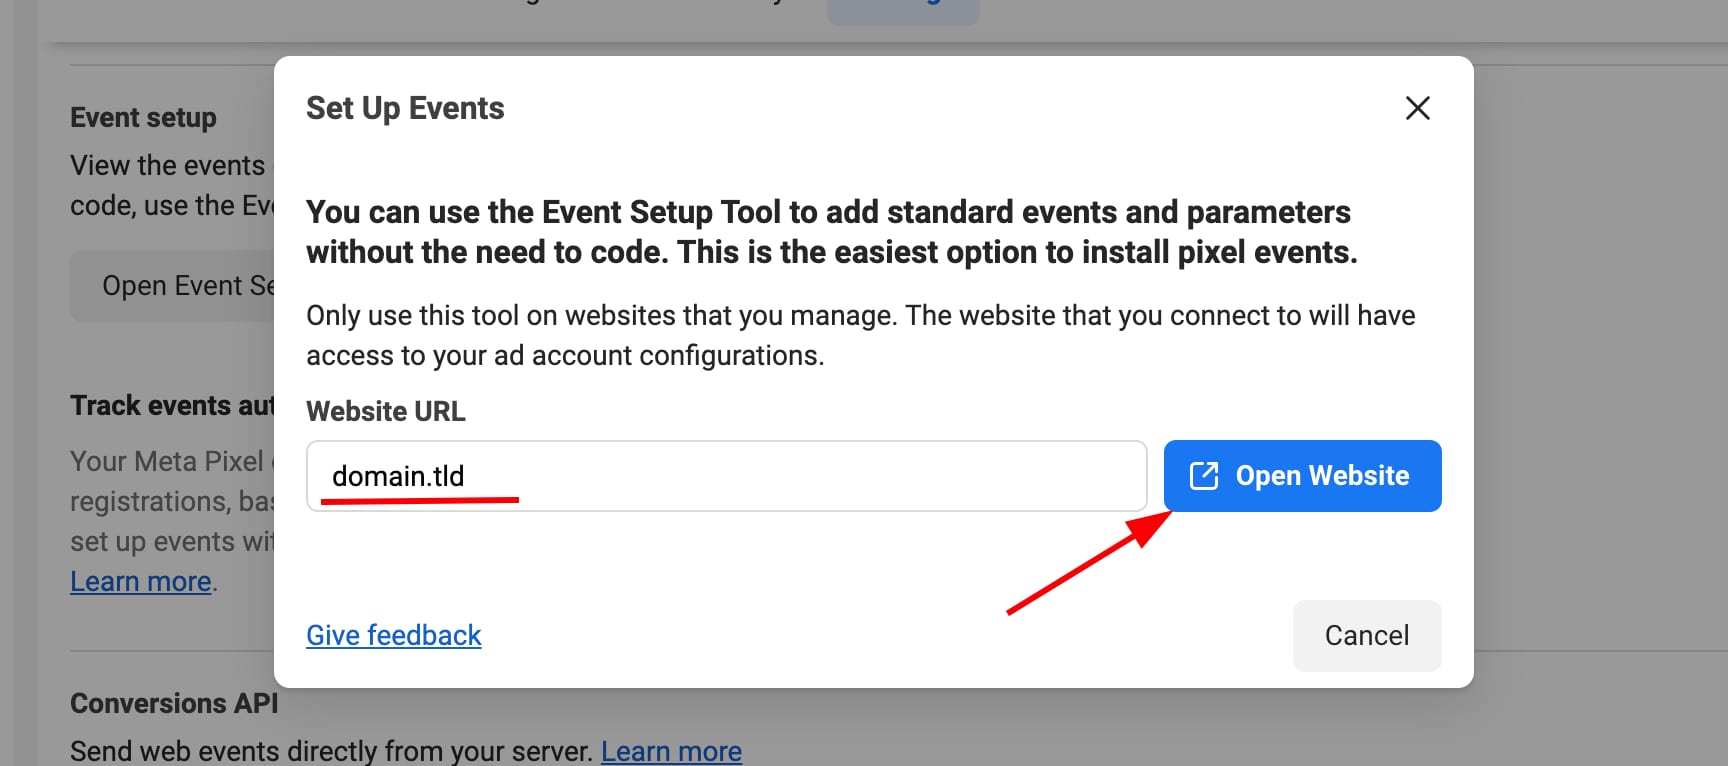
- Enter your website’s URL and click Open Website:

The Event Setup Tool will launch in your browser. You may need to temporarily disable ad blocking extensions on your webpage for this. - Click Review by each suggested event, then select Confirm or Dismiss.
Add custom events
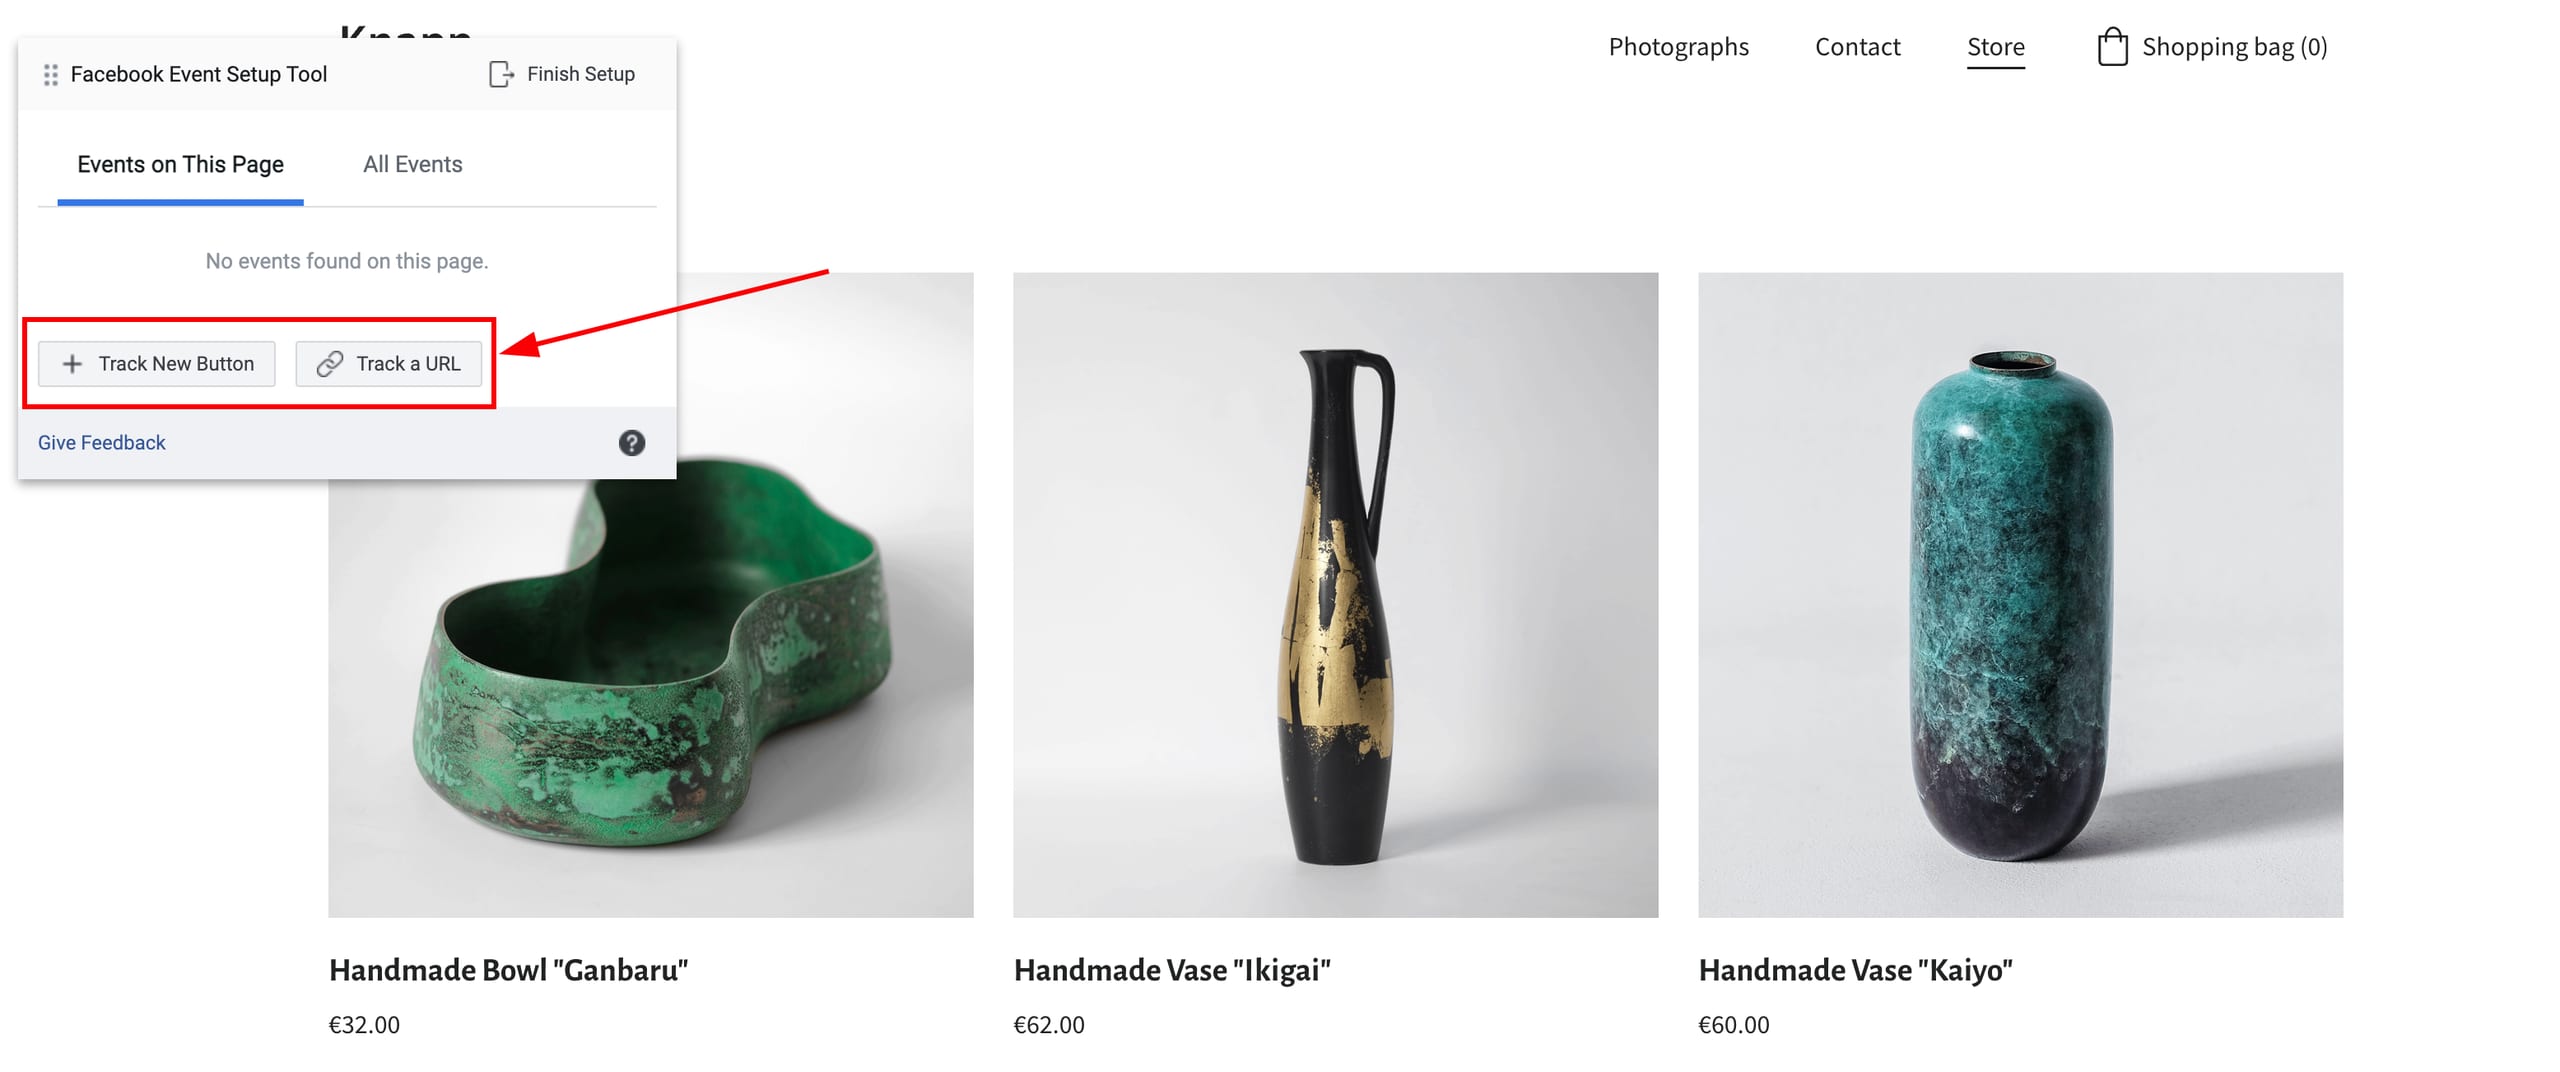
To add events that don’t show up in the suggested list, navigate your website as usual to find the buttons or web pages you want. Select Track New Button or Track a URL and follow the onscreen instructions:
Configure event parameters
- Select an event and set up parameters for your event:
- Set up value and currency parameters:
- Under Value, select Choose value on page if you want to add a value parameter
- The tool will highlight prices on your web page: select the value (price) that corresponds to the event
- Under Currency, select your currency from the dropdown menu
- Set up the content ID and the content type parameters:
- Click Add Content ID and Content Type to set up those parameters with your event
- Select Choose content ID on page if your content ID (product/category ID or title) is visible on your web page
- Select Extract content ID from URL if your content ID shows up in your website URL
- If you have multiple content IDs on the page, add any two of them using Add another content ID
- Follow the on-screen instructions to set your content ID
- Select the content type (a group of products, SKU, etc.)
- Click Confirm
Finish and verify your setup
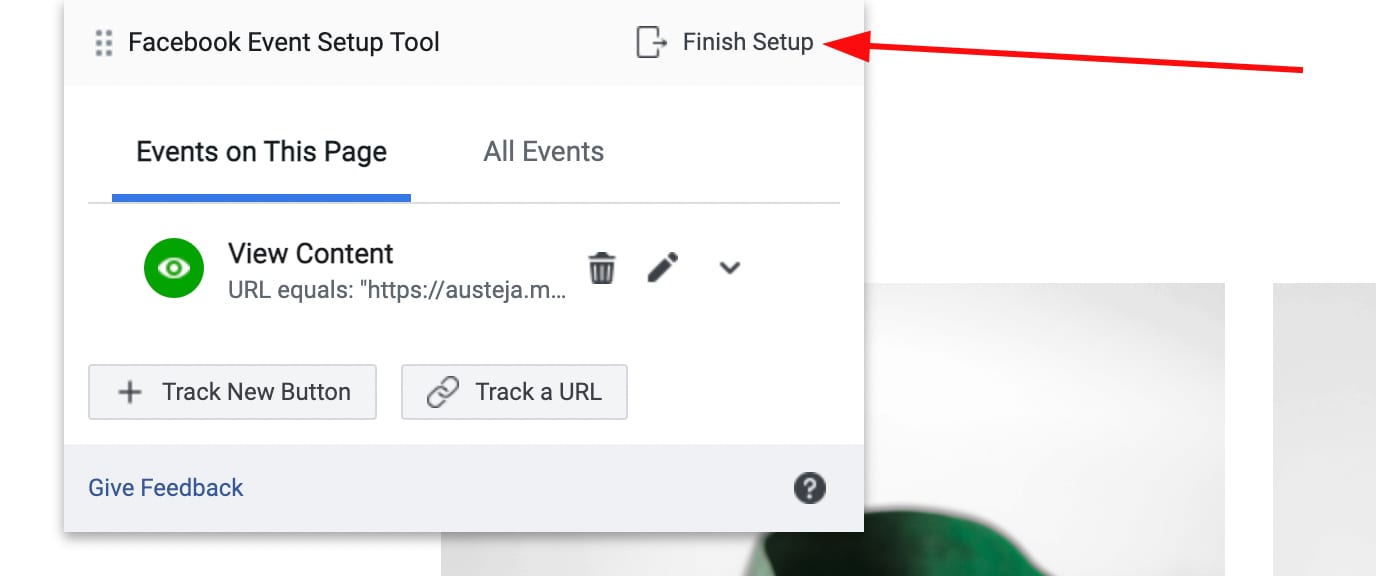
Finally, once you create all necessary events, click Finish Setup in the Event Setup Tool:
To view your events, go to Events Manager, select your pixel and view your event graph and table. To test that your events are firing correctly, go to Events Manager, select your pixel, click the Test Events tab and follow the instructions.