To install plugins for Counter-Strike 2 at Hostinger, install the MetaMod and SourceMod frameworks, download plugins built for CS2, upload the .smx files to the plugins folder in Game Panel File Manager, and restart your server. Plugins add features to your CS2 server, such as new maps, items, bots, and game modes.
Step 1 – Preparations
First, install the MetaMod and SourceMod frameworks on your server. You can find a detailed guide here: How to Install Sourcemod and Metamod
Step 2 – Download Plugins
Find the plugins you would like to install on your server and download them first to your local device. You can search in forums such as the following:
While looking for plugins, make sure they are developed for CS2.
Step 3 – Install the Plugins
- Login to your Game Panel and select your CS2 instance.
- Open the File Manager and navigate to the plugins folder. The path will be similar to the following:
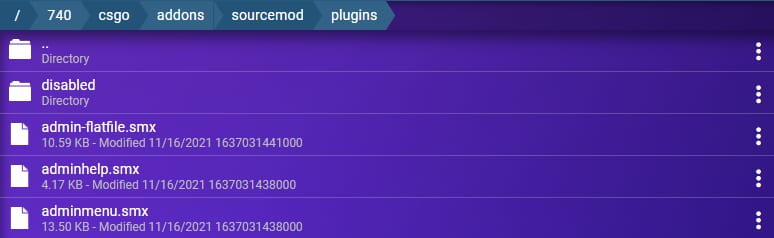
- Upload your plugins to this folder. Make sure you’re uploading files in the .smx format, as these are the plugin files themselves. If the file format is different (e.g., .zip), first extract the archive on your local device to get the correct file.
- Restart your server.
Your Counter-Strike 2 server now loads the plugins you uploaded, and their features are available in the game.