How to serve scaled images on WordPress to improve your website’s performance
Apr 13, 2025
/
Domantas G.
/
9 min Read
Website speed is essential for its success since 47% of visitors are likely to leave a website that takes more than two seconds to load.
While several factors affect your website performance, images require special attention. In addition to using images that adapt to different screen sizes, you should serve scaled images as well.
Serving scaled images involves optimizing images by refitting them into the perfect size – not too small, not too large. Using correctly scaled images will positively affect site speed and performance, improving your site’s SEO (Search Engine Optimization).
This article will explain how to serve scaled images on your WordPress website. We have also included plugin recommendations to help you serve scaled images automatically.
What is a Scaled Image
A scaled image is an image adjusted to fit the exact dimensions that are required on the website.
If you use a small image to fill a larger area, it will be blurry when you scale it up. On the other hand, if you use oversized images, browsers will shrink them to fit the given dimensions, but the image sizes will remain unnecessarily large.
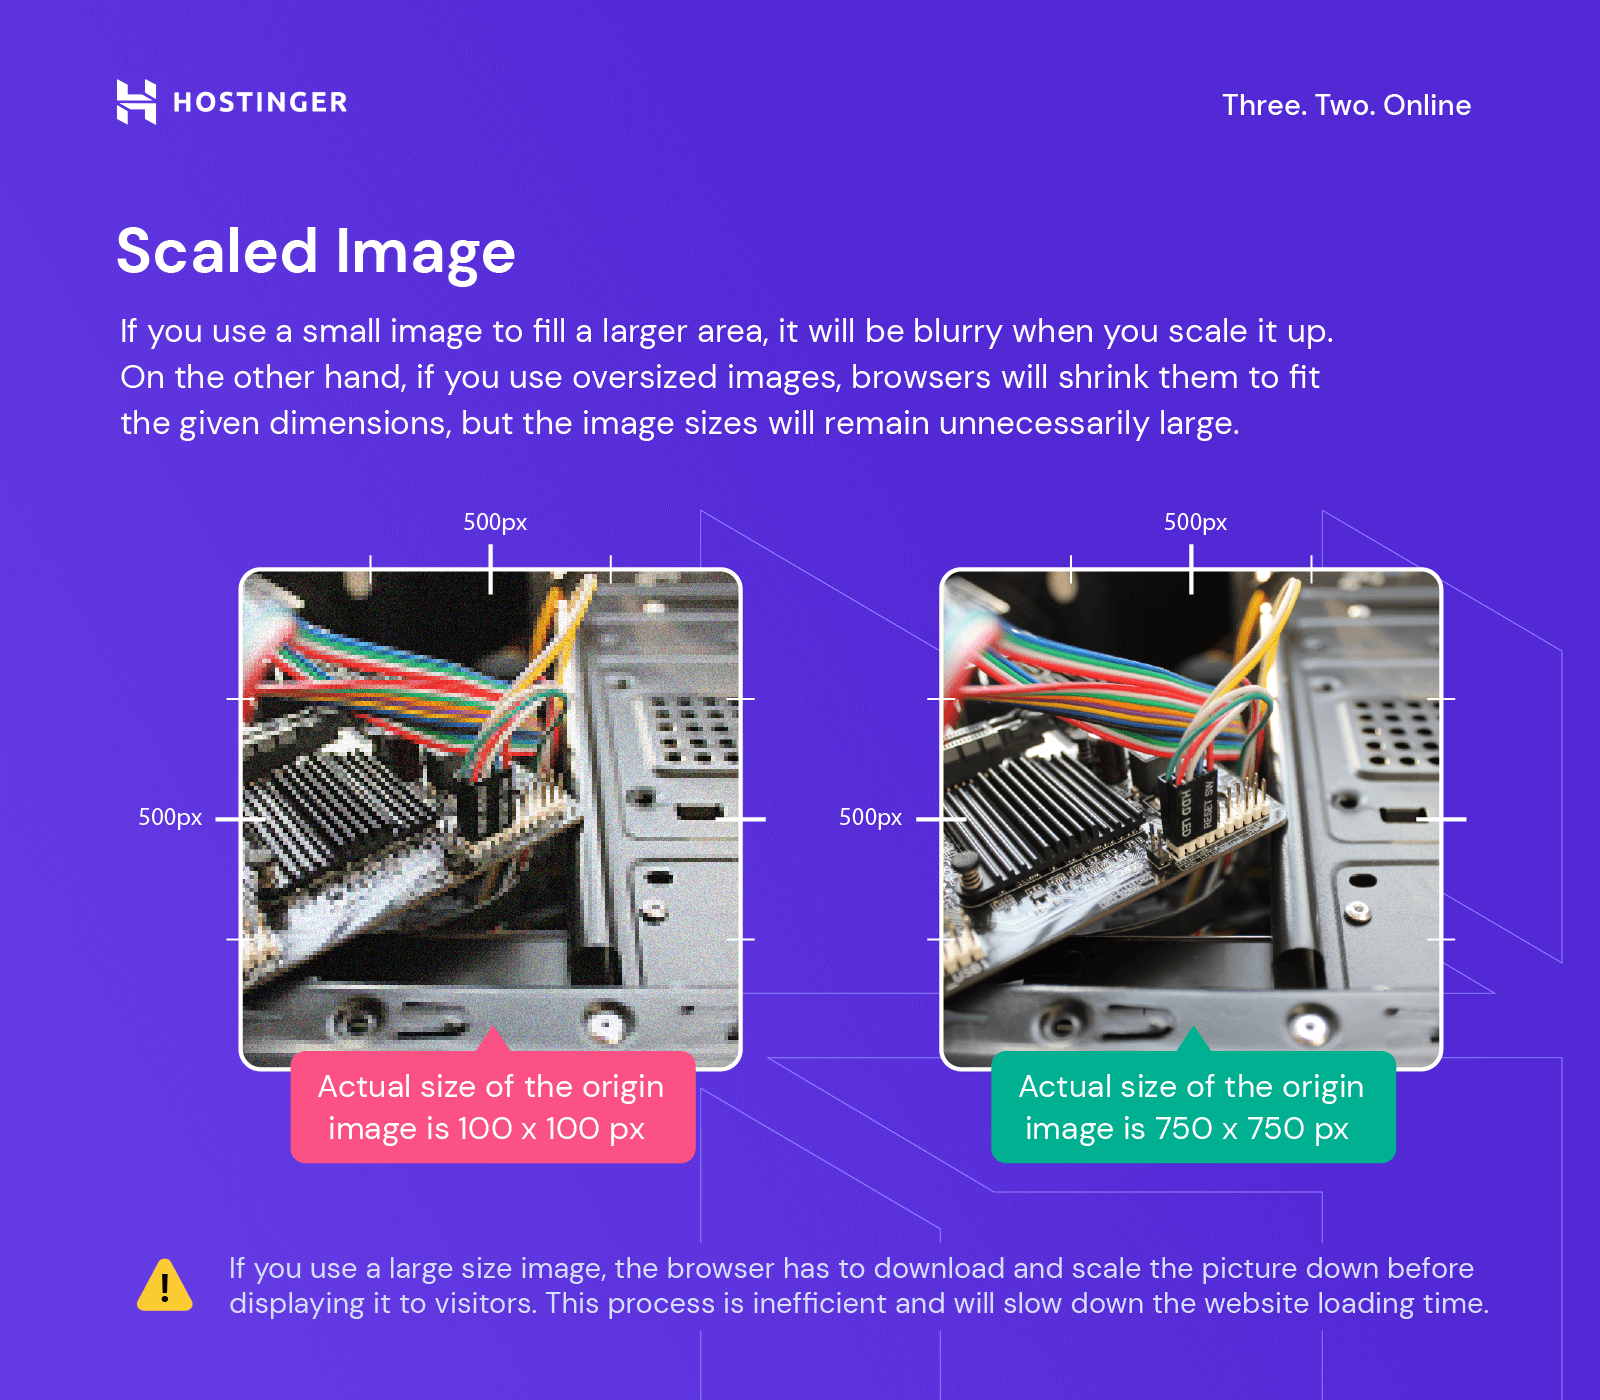
For example, if you use a 500 x 500 px image for a 50 x 50 px thumbnail, the browser has to download and scale the picture down before displaying it to visitors. This process is inefficient and will slow down the website loading time.
However, this problem won’t occur if you optimize your images by serving scaled images.
How to Serve Scaled Images
Now it’s time to learn how to serve scaled images properly on your WordPress site. There are two ways to do so – manually or using a plugin. This section will show you how to scale images manually.
Step 1: Analyze the Website
If you wish to experiment with a handful of images before fully optimizing the entire media library, try scaling images that appear repeatedly on multiple pages on your site. For example, the site logo or header image.
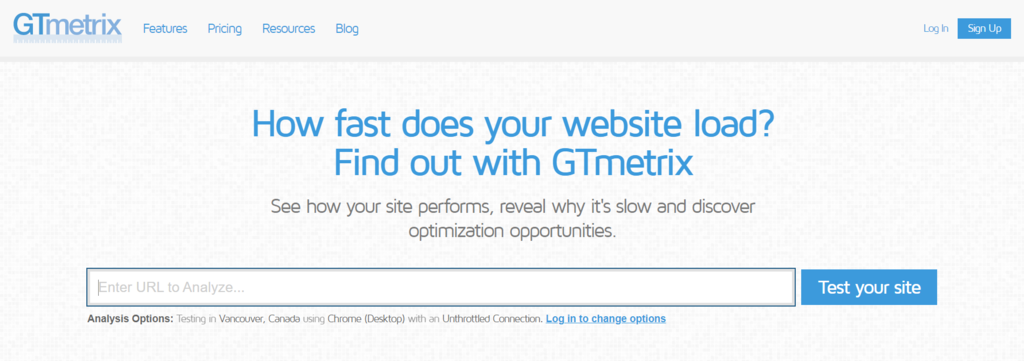
First, you need to find images on the site that need to be rescaled and the proper dimensions to use. To do so, we will use GTMetrix.
- Open GTMetrix and enter your WordPress website URL. Click the Test Your Site button.
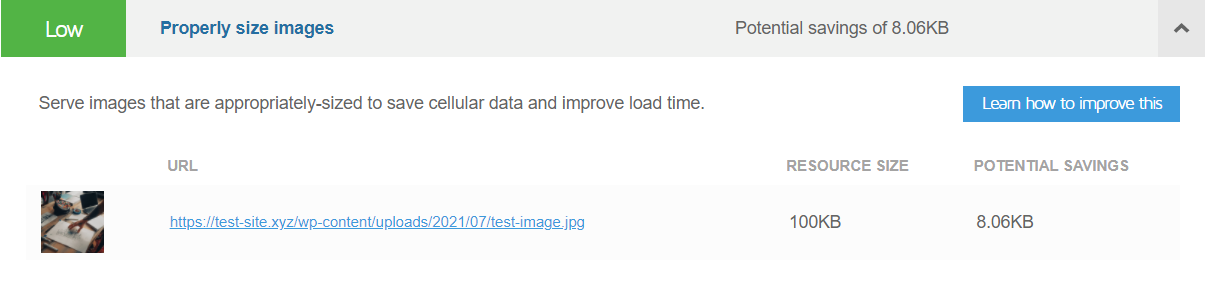
- Once it finishes analyzing your site, go to the Structure tab and click the Properly size images section.

- This section will show which images in your site need to be optimized. The Potential Savings column will display the potential savings as a result of serving scaled images. Save the images’ URLs for later.
Step 2: Use the Inspect Tool to Find Out the Maximum Display Size
WordPress already includes a native feature for image optimization called srcset, which makes your images responsive.
srcset creates several sizes for each image uploaded to the site. For example, if you upload an image that is 2000 x 2000 px, WordPress will automatically create copies in several other sizes, such as:
- Medium – 400 x 400 px
- Thumbnail – 200 x 200 px
Then, it offers those various sizes to the browser, which will only download the most optimized size.
However, relying entirely on srcset doesn’t improve site performance as significantly as when you serve scaled images. To further optimize your WordPress website, it’s still necessary to find out the largest size an image is displayed at.
For example, there’s no need to upload a 2000 x 2000 px image if the maximum display size is 500 x 500 px. Thus, to find out the maximum display size of an image, use the inspect element tool:
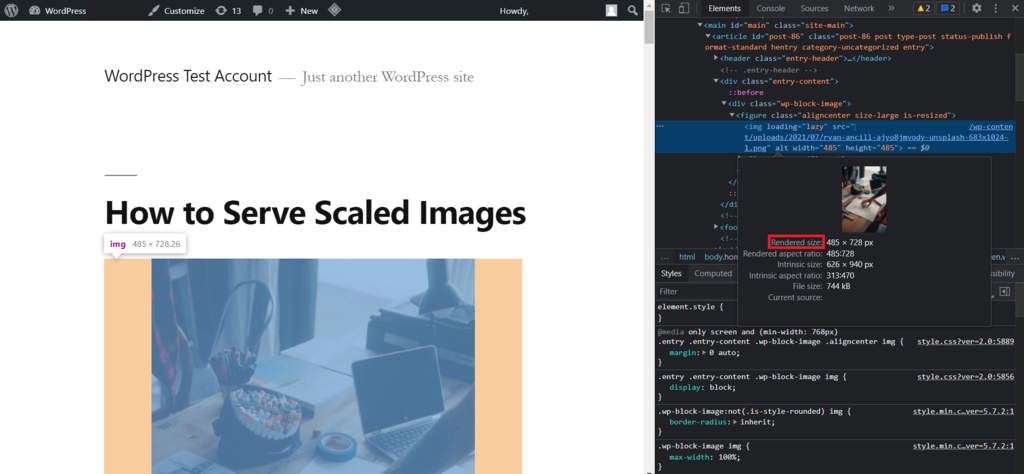
- In Chrome, right-click the image and click Inspect. If you use Firefox, choose Inspect Element, or in Edge, select Developer Tools. In this example, we’ll use Chrome.
- The DevTools panel will show up on the right side of the browser window. There, the image code will be highlighted. Hover over the code to see the image’s Rendered size and Intrinsic size.

- Note down the Rendered size, as it is the maximum display size. Meanwhile, the Intrinsic size is the actual dimension of the image, which is the one the user’s browser downloads.
Step 3: Rescale the Images
The next step is to rescale the incorrectly sized images. There are various methods to do so: using an image editor, the WordPress Media Library, or media settings. Let’s look into each of them.
Via an Image Editor
The first method to scale images in WordPress sites is by using an image editor. There are tons of online and offline image editor tools available.
Examples of offline tools to edit images include Photoshop and GIMP. In this tutorial, we will use the online image editor PicResize.
- Open PicResize and select From URL.
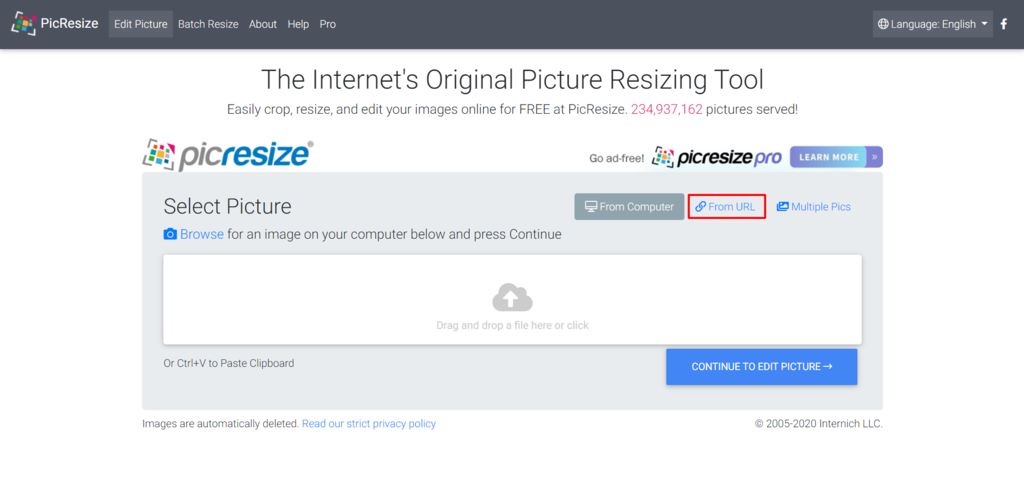
- Paste the URL of the image you want to edit, and click Continue to Edit Picture.
- There’s a drop-down menu under the Select a new size for your picture option. Choose Custom Size.
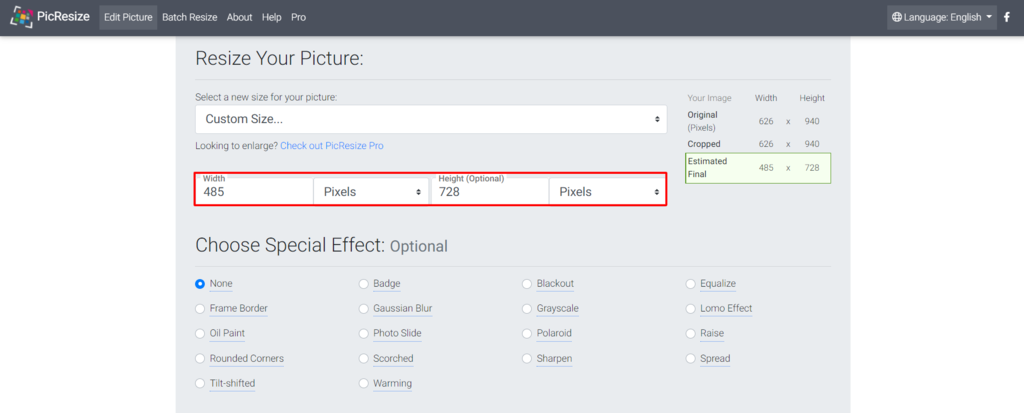
- For the new image dimensions, input the Width and Height according to the Rendered size suggested by the Inspect tool.
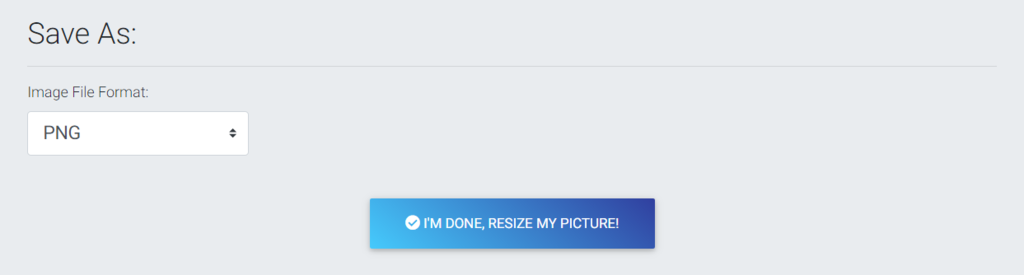
- Scroll down and hit the I’m Done, Resize My Picture! button.
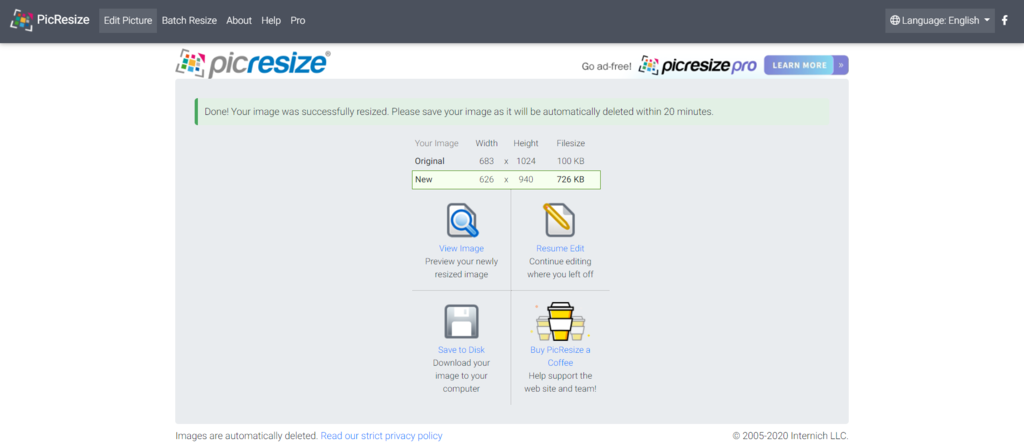
- Save the image by clicking Save to Disk. Do it immediately since PicResize will automatically delete the image after 20 minutes.
- Rename the images back to their original names by removing rsz_ at the beginning of the file name.
Via WordPress Media Library
To serve scaled images with this method, you’ll crop images using the WordPress Media Library. Here’s how to do so:
- On the WordPress dashboard, go to the Posts tab.
- Find the post with the image you want to rescale, and click Edit.

- On the post, click the image you want to scale. Select Replace -> Open Media Library.

- A Media Library pop-up will appear. There, navigate to the right column, and click the Edit Image link.

- Under the Scale Image section, you’ll see the size of the original image. Type in the new scaled dimensions on the field below it – based on the Rendered size from the previous step. Notice that when you type the horizontal dimensions, the vertical dimensions will automatically adjust. Click Scale.
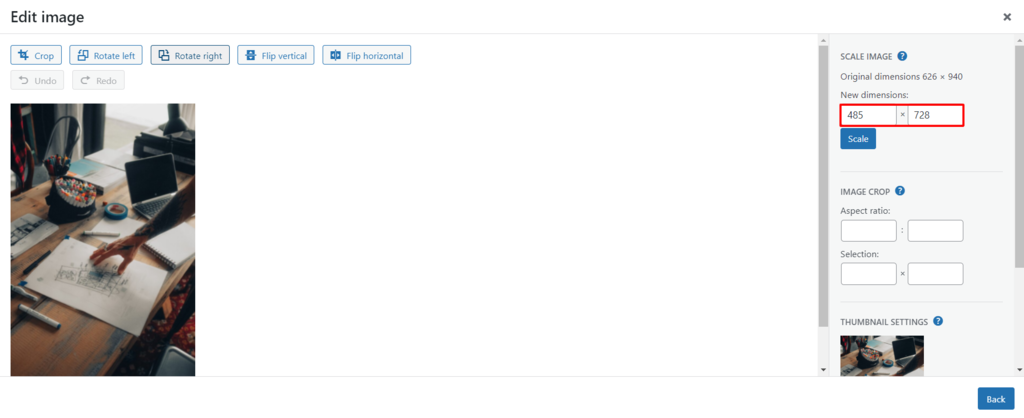
The image is now successfully scaled.
Via Admin Media Settings
The last method is to scale images by directly adjusting the Media Settings:
- On the WordPress site dashboard, navigate to Settings -> Media.
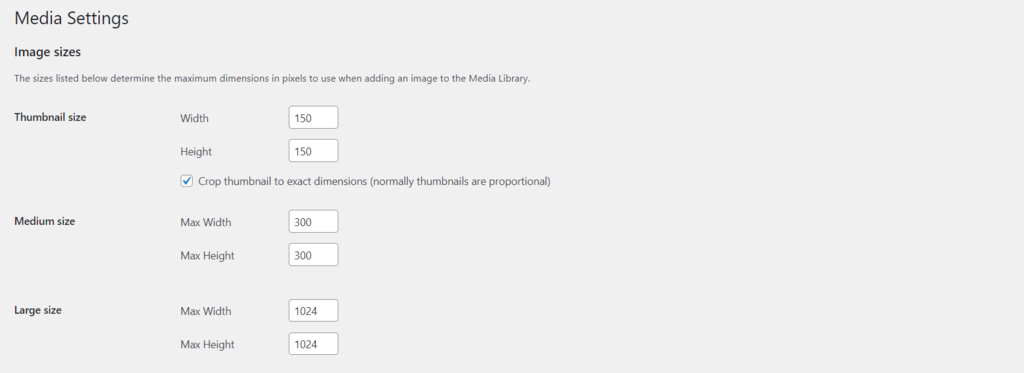
- You’ll see the Media Settings page, where the default image sizes are set. It includes the sizes for medium and large images, as well as the thumbnail settings.
- Set the maximum width and height for each image dimension. Once you set the preferred image sizes, click the Save Changes button.
These settings will prompt WordPress to automatically scale images that you upload in the future.
Step 4: Replace the Images
To manually scale images, you will have to replace the existing images as well. In this example, we’re going to use a WordPress plugin called Enable Media Replace.
- Install and activate the plugin Enable Media Replace from the Plugins menu.
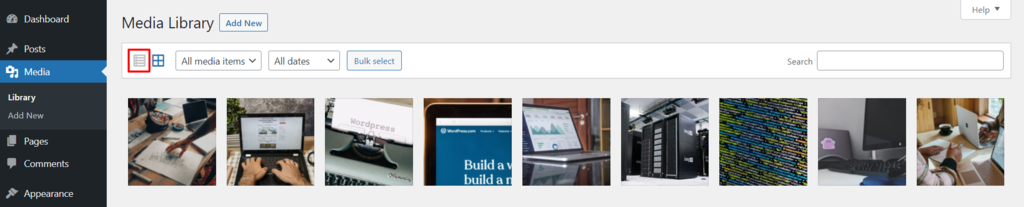
- Navigate to Media -> Library and change the layout from Grid to List.
- Hover over the image you want to replace, then select Replace Media.

- Click the Choose File button to select the scaled image you’ve saved.
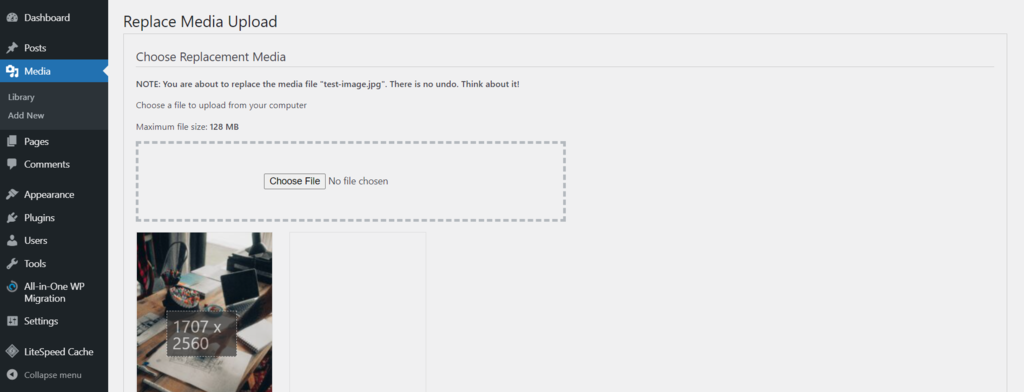
- Set up the Replacement and Date options, then click Upload.

For the Replacement Options, choose Just replace the file if the scaled versions use the same format. Meanwhile, for the Date Options, it is recommended to keep the original date.

5 Top Plugins to Serve Scaled Images
Now that you’ve learned how to manually scale images, let’s go over how to do so by using a WordPress plugin.
While the manual process allows for more precision, this method makes it easier and faster to serve scaled images since the plugin will automate the process.
Here are our picks for the five best plugins to serve scaled images in WordPress.
1. Smush
Smush Stats:
- Downloads: 1 million+
- Rating: 4.8/5
- Notable features: bulk image compression and optimization, incorrect image size detection
- Best suited for: all types of sites
- Price: freemium (from $60/year)
Smush is one of the most popular plugins for WordPress image optimization purposes. It helps resize and compress images without compromising the image quality.
This plugin helps to serve scaled images on your WordPress website with features such as:
- Bulk Smush – Provides quality image compression and optimization for up to 50 images at once to help save time.
- Incorrect size image detection – Locates unoptimized images that slow down the site speed.
- Directory Smush – Compresses images that are located in directories outside the WordPress media library. This includes images from other WordPress plugins and theme packages so that you can serve scaled images effectively on the entire site.
- Built-in lazy load – Serves only the images that site visitors are viewing while delaying other images far down the page. The lazy load feature helps boost the site speed significantly, especially if the site has lots of images.
- Smush Configs – Save your preferred Smush configuration settings and apply them to the site in just a few clicks, improving your workflow.
Smush’s free version provides excellent tools to serve scaled images in WordPress websites. It optimizes unlimited images, as long as each image size is up to 5 MB.
Meanwhile, the premium plans come with many additional features, such as 200% faster optimization when compared to the free version and the option to keep EXIF data intact, which is ideal for photographers.
2. Optimole
Optimole Stats:
- Downloads: 80,000+
- Rating: 4.8/5
- Notable features: optimization for slower connections, automatic watermark
- Best suited for: e-commerce sites, illustrators or photographers’ sites
- Price: freemium (from $28.58/month)
Optimole is another excellent plugin to serve scaled images in WordPress. Once you set it up, it will automatically resize images to fit various screen sizes.
Scaling images with Optimole is quite simple thanks to tools such as:
- Format-based optimization – Optimizes unlimited images based on the format that the visitor’s browser supports. For example, if a visitor uses a WebP-capable browser, Optimole will convert the image files to WebP.
- Watermark addition – Automatically add watermarks to the images. This is great to protect images from unauthorized use, especially if you intend to upload original images on the site, such as your own illustrations or photographs.
- Downgrade quality for slower connections – Optimole will reduce the image sizes to up to 40% when it detects a slower network.
- Cloud library support – Keep your site images on Optimole Cloud, which will help save server storage space and cross-share images between multiple Optimole-connected websites.
- Retina support – Detects retina screens and automatically loads retina images when applicable.
With Optimole’s free plan, scale images for a WordPress website with up to 5,000 visitors/month. To use it on websites with higher traffic, it’s necessary to subscribe to a premium plan.
3. EWWW Image Optimizer

EWWW Image Optimizer Stats:
- Downloads: 900,000+
- Rating: 4.7/5
- Notable features: unlimited file size, bulk optimization
- Best suited for: all types of sites
- Price: freemium (from $7/month)
EWWW Image Optimizer is an image optimization tool that helps scale images on your WordPress site.
Serve scaled images with EWWW Image Optimizer by using their range of excellent features, such as:
- Unlimited file size optimization – Optimize images of all sizes. If you’d like to optimize images that are larger than the sizes EWWW Image Optimizer has tested, simply contact them.
- Bulk optimize – Work more efficiently by optimizing all the images on a single page, including images outside the Media Library directory.
- Remove metadata – Strip the images from unnecessary data.
- Adaptive conversion – EWWW Image Optimizer supports JPG, PNG, GIF, and WebP image formats. Its intelligent conversion automatically detects the best image format, for example, converting PNG to JPG or the WebP format if applicable.
- Compatibility with other plugins – This plugin is compatible with hundreds of WordPress plugins and themes, such as Perfect Images Retina to optimize retina images automatically during upload.
EWWW Image Optimizer’s core plugin is free, but the paid plans offer more robust features. They can handle image optimization on multiple websites and come with increased bandwidth allowances.
[DOWNLOAD]
4. ShortPixel
ShortPixel Stats:
- Downloads: 300,000+
- Rating: 4.6/5
- Notable features: glossy optimization, automatic image resizing
- Best suited for: photographers, non-profit organizations
- Price: freemium (from $3.99/month)
Shortpixel effectively improves WordPress site performance by providing quality image compression.
This plugin will help serve scaled images by using features such as:
- Automatic image resizing – Automatically resize images as you upload them for a more effective workflow.
- Glossy optimization – This type of image compression offers top-notch image quality but may cause a slight loss of page loading speed. This is useful for photographers as it favors image quality over page speed.
- Keep or remove EXIF data – Great for photographers to provide necessary data on selected images only, optimizing the site performance.
- Skip optimized images – ShortPixel doesn’t over-optimize the site images as it will skip any images that are already optimized.
- Bulk optimization – Optimize images in your Media Library tab or other site directories with a single click.
Its free version optimizes up to 150 images/month. Meanwhile, its paid version consists of monthly and one-time plans with various image quotas. Additionally, ShortPixel offers free optimization credits for non-profit organizations.
5. Perfect Images
Perfect Images Stats:
- Downloads: 100,000+
- Rating: 4.8/5
- Notable features: retina images creation, media library view
- Best suited for: all types of websites that aim to accommodate retina display
- Price: freemium (from $24/year)
Perfect Images helps optimize WordPress images for retina displays. This plugin’s features include:
- High-definition scaled images – Automatically generate retina images, providing optimized images for ultra high-resolution screens.
- Media library view – Makes it easier to review which images need to be turned into retina images. Especially useful for websites with lots of images.
- Thumbnail regeneration – Helps regenerate thumbnails for every image change. This can be done in bulk to save time.
- Image threshold control – WordPress may automatically resize big images, while retina images will deliberately be kept large in both resolution and size. Perfect Images lets you control this feature by disabling the image threshold.
- Image replacement – Quickly and easily replace images with their retina versions.
In addition to a free plan, this WordPress plugin offers paid versions that support lazy loading, automatically resize images in the site’s Media Library, and can be used on multiple websites.
Conclusion
One of the best ways to improve a WordPress site performance is by serving scaled images. This means resizing the site images to fit the exact dimensions of the area where they are placed.
Optimizing images can significantly improve your site’s loading time and ranking on search engine results, consequently increasing the site’s traffic and reducing bounce rates.
Plus, it is not difficult to serve scaled images in WordPress websites. You can do it manually or using WordPress plugins.
If you choose to follow the manual method, the steps include:
- Analyzing the website – find images on the site that need to be rescaled.
- Finding out the images’ maximum display sizes – find out the largest size an image is displayed at by using the inspect tool.
- Scaling images – scale images to their proper sizes by using an image editor or specifying the maximum image dimensions via media settings. Alternatively, crop images via the WordPress Media Library.
- Replacing the original images – replace the existing images with the correctly scaled images.
If you prefer to serve scaled images with a more practical approach, use a plugin. Doing so will serve scaled images in WordPress sites automatically so you can focus on other essential site aspects.
Want to learn more about image optimization?
Progressive JPEG images
Website Optimization: Top 10 Strategies to Improve Speed, UX, SEO
All of the tutorial content on this website is subject to Hostinger's rigorous editorial standards and values.

Domantas leads the content and SEO teams forward with fresh ideas and out of the box approaches. Armed with extensive SEO and marketing knowledge, he aims to spread the word of Hostinger to every corner of the world. During his free time, Domantas likes to hone his web development skills and travel to exotic places.