How to check your website’s PHP Error log
Dec 22, 2025
/
Merkys M. & Leonardus N.
/
8 min Read
Any website can go through some troubles and stop working. When this happens, it will display an error message to you and the visitors. Unfortunately, messages such as HTTP 500 don’t provide a lot of information on why the error occurred and what you should do to fix it.
This is where the PHP error log comes into play. It’s a file that contains information about PHP errors that happen on a website.
Finding and checking the PHP error log can be tricky for a less tech-savvy user. Thus, this article will guide you on how to enable PHP error logging, check it, and understand the information logged.

How to Enable PHP Error Logging
It is only possible to check the PHP error log if it’s enabled on your web hosting account. Unfortunately, the error logging on a website’s directory is disabled by default in most cases.
However, before tweaking some code and the web hosting configuration, take a look at the PHP info to know whether PHP logging is enabled on your hosting account. Here are the steps to do so in hPanel:
- Log in to your hPanel account.
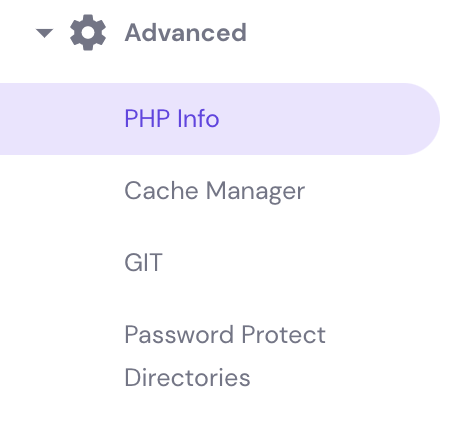
- Head to the Advanced section and click PHP Info.
- Press CTRL + F for Windows or Command + F for MacOS to open the search bar. Type log_errors to find the log_errors row. If the value is Off, then the PHP error logging is disabled.

Or, if you don’t use hPanel, create a phpinfo.php file to access the PHP info. Use an FTP client or the hosting’s file manager and perform the following steps:
- Open the public_html directory.
- Create a phpinfo.php file. If the file already exists, open it and make sure it contains the code from Step 3.
- Open the file and insert the following line:
<?phpphpinfo();?>
- Save and close the file.
- Go to yourdomain.com/phpinfo.php., replacing yourdomain with the actual domain name. It will show the PHP configuration details, like this:
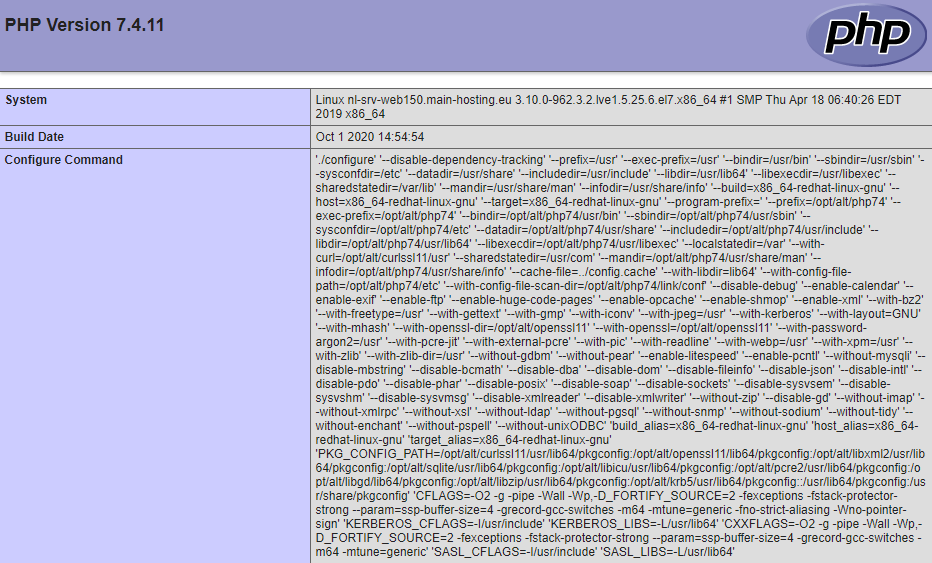
- Press CTRL + F for Windows or Command + F for MacOS to open the search bar on your web browser. Type log_errors to find the log_errors row. If the value is Off, then the PHP error logging is disabled.
There are three ways to turn on the PHP error log, depending on the hosting platform:
- Accessing the hPanel if you are Hostinger’s WordPress, cloud or standard web hosting plans.
- Editing the .htaccess file.
- Editing the php.ini file if you are a Linux desktop or Linux VPS hosting user.
How to Enable Error Log Using hPanel
Enabling PHP error logs on hPanel is easy as there’s a dedicated setting for that. Follow these simple steps:
- Access the hPanel.
- Head to the Advanced section and click PHP Configuration:
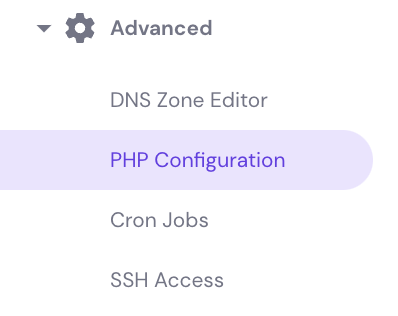
- Open the PHP options and tick the logErrors box:

- Scroll down to the bottom of the section and click Save.
The system now will generate the error_log file when the site encounters an error, such as 502 bad gateway. Follow these steps to open the file:
1. Open the File Manager and the Access all files of Hosting option:

2. Go to the .logs directory.
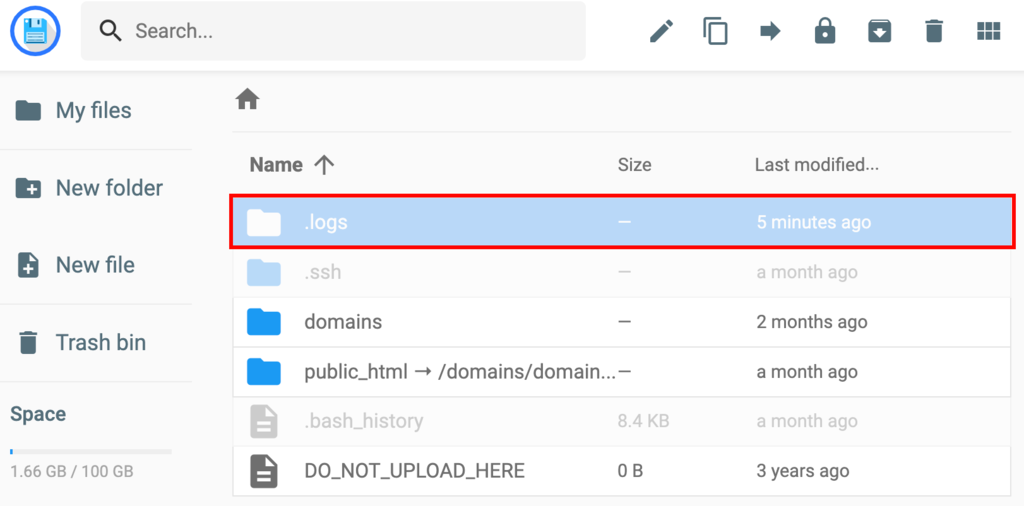
3. Find the error_log_[domain] file.
When you open the file, it will show the error log messages, including the date when the error occurred, the type of error, and even the details of the file and line that need correction.

In the example above, the error log specifies an unexpected IF syntax on line 109 of the functions.php file. Such information helps to locate the error quickly and take corrective action.
How to Use hPanel to Display Errors
Additionally, hPanel lets you easily enable the displayErrors option. For that, refer to the following steps:
1. Access the hPanel.
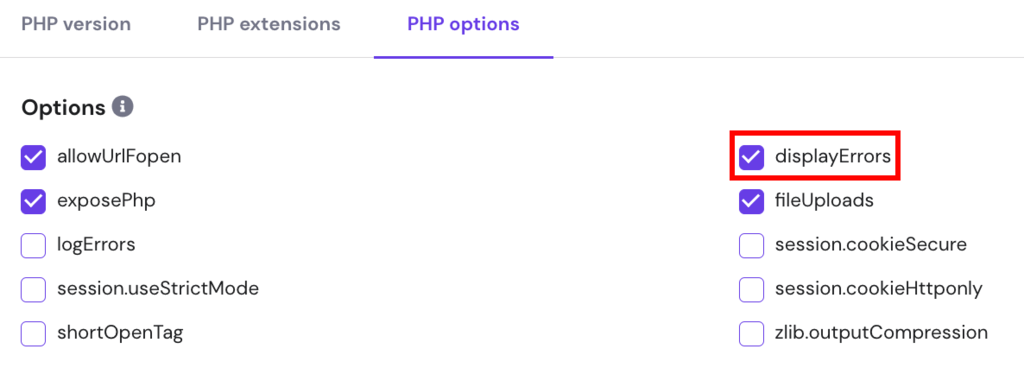
2. Head to the Advanced → PHP Configuration section:

3. Open the PHP options and tick the displayErrors box:
4. Save the changes
5. Lastly, visit your website, and the PHP error will be displayed:

How to Enable Error Log Using the .htaccess File
If you don’t use Hostinger and can’t find any PHP error log settings on the provider’s control panel, enable it by editing the .htaccess file.
Locate the .htaccess file using the file manager or an FTP client. It should be located inside the site’s root directory. However, the file is hidden in some cases. In that case, go to the settings on the control panel or FTP client to display hidden files.
Important! Back up the .htaccess file before making any changes.
Once you’ve found the .htaccess file, follow the following steps:
- Open the .htaccess file and insert the following code:
php_flag log_errors onphp_value error_reporting 32767php_value error_log "error_log.txt"
- Create a file titled error_log.txt in the public_html directory
- Save and close it. All PHP error logs will be reported in the error_log.txt file.
Now the PHP error logging is enabled. You can check it by using the PHP info again, and the Local Value should be on. Don’t worry if the Master Value is still off, as the local value will override it.
If the site encounters any trouble, open the error_log.txt, and you’ll see the PHP error logs.
How to Enable Error Log Using php.ini File
The third method to enable the PHP error log is by editing the php.ini file. It contains the default web server configuration for running PHP applications.
Note that the php.ini file is not accessible for standard hosting users as it requires server root access. Instead, this method is an alternative for Linux or VPS hosting users.
Locating the php.ini File
The directory may differ depending on whether it’s on the command line interface (CLI) or the web server’s operating system, such as Apache and NGINX.
Locate the php.ini file by accessing the PHP info. Once you open it, press CTRL + F for Windows or Command + F for MacOS to open the search bar and look for the Loaded Configuration File section. You’ll find the directory of the php.ini file.

Another method to find the configuration file is using the command line. Connect to the web server by using an SSH client and execute the following command:
php -i | grep php.ini
It should print an output like this:

That said, here are the common directories for php.ini file depending on the operating system:
- CLI –
/etc/php/7.4/cli/php.ini. Note that changing the PHP configuration in CLI won’t affect the web server. - Apache –
/etc/php/7.4/apache2/php.ini. - NGINX or Apache with PHP-FPM –
/etc/php/7.4/fpm/php.ini.
Important! If necessary, replace 7.4 with the PHP version you actually use.
Editing the php.ini File
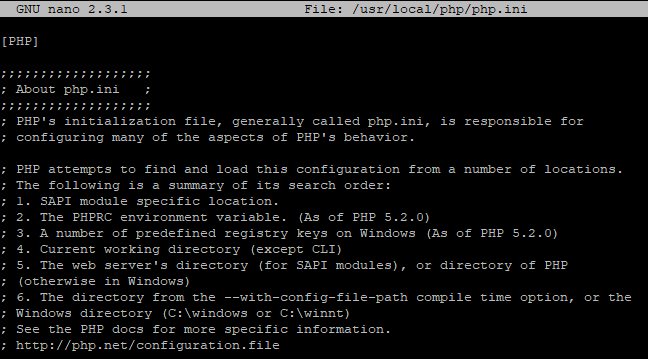
Once you locate the php.ini file, open and edit it with the Nano text editor using the following command:
nano etc/php/7.4/apache2/php.ini
Note that you should adapt the command depending on the php.ini path. It should print an output like this:
Once you open the php.ini file, it will display the configuration directives. Change the values of these directives to configure the PHP setup on your web server.
When it comes to PHP error logging, there are three primary directives:
- log_errors – toggles the PHP error logging. The default value is 0, which indicates that PHP error logging is disabled.
- error_log – sends the error message to the error log file. The default value is 0, and you should set the absolute path for the error log file.
- error_reporting – defines the minimum error reporting level. The value is null by default, and you should change its parameters to report all types of errors.
To configure those directives, simply use the following commands on the text editor:
log_errors = on
error_reporting = E_All
error_log = /path/filename
Be sure to replace /path/filename with the desired path and file name of the error log file. Alternatively, use this command to log errors in the system log:
error_log = syslog
Apart from these three main directives, several others are related to PHP error logging, such as:
- display_errors – defines whether to display errors on the error output. We recommend disabling this as a security measure.
- log_error_max_length – defines the maximum length of logged errors. Set the value to zero to disable the limit.
- track_errors – specifies whether to store the last error message in the
$php_errormsgvariable.
Most Common PHP Error Log Types
One of the details that the PHP error log provides is the type of error that occurred. In general, there are four types of PHP errors. Understanding them is essential to know how to fix and prevent the same errors from happening again.
Warning Error
This error warns about a problem that may cause a more significant issue in the long run. However, it doesn’t stop the script execution.
The most common cause is using a file path that doesn’t exist. If you encounter this error, check the file name on the script or directory as a typo can make the script unable to find it.
Notice Error
A notice error is similar to a warning error, as it still allows the execution of the script. However, it usually indicates an undeclared or undefined variable in the script instead of a missing file.
Simply check the variable indicated in the error message.
Parse Error
A parse or syntax error indicates a wrong symbol, unclosed quote, missing semicolon, or misspelling in the script syntax. It terminates the script and can trigger error messages on WordPress sites.
The error logs will indicate the specific symbol or syntax that caused it, along with the file and code line, making it easy to fix the syntax error.
Here’s an example of a parse error message:
PHP Parse error: syntax error, unexpected ‘2’ (T_LNUMBER), expecting ‘)’ in /home/u802426761/domains/username/public_html/wp-config.php on line 54
This error log indicates that there is a “2” character that’s not supposed to be in line 54 of the wp-config.php file. To fix it, open the file and delete the problematic character.
Pro Tip
When you open a file using hPanel’s File Manager, the text editor will mark the problematic line with an X. It helps find the error quickly and alerts you for parse errors when tweaking files.
Fatal Error
A fatal error happens when the script calls a function, but the function itself is not defined. Unlike the other types of PHP errors, a fatal error can crash the application. There are three types of fatal errors based on the time of occurrence:
- Startup fatal error – occurs when the system can’t run the code due to an error during the installation.
- Compile-time fatal error – occurs when the programmer tries to use an undefined class, function, or non-existent data.
- Runtime fatal error – similar to a compile-time fatal error, but it happens during the program execution.
Find the undefined function given in the error log and make sure to define and call the correct function. Also, check for any misspelling if you’re using an inbuilt function.
Here’s an example of a PHP fatal error:
PHP Fatal error: Call to undefined function get_header() in /var/www/username/public/blog/wp-content/themes/theme/index.php on line 37
In this case, open the index.php file mentioned in the error log and check the function on line 37 to ensure it is defined correctly.
Another common reason for a fatal error is exceeding the maximum execution time, which simply means that the PHP script takes longer to complete than the predetermined time limit. If this happens, the error log should look like this:
Fatal error: Maximum execution time of 30 seconds exceeded in /home/username/domains/domain.com/public_html/wp-includes/class-phpmailer.php on line 737
To fix it, you need to configure the PHP maximum execution time. It is possible to do it by editing the .htaccess file, configuring hPanel settings, or installing a WordPress plugin.
Conclusion
PHP error log helps you troubleshoot problems on a website by logging the error details, including the PHP file and code line that needs to be fixed. Having PHP error logging is a must, but, unfortunately, it’s not enabled by default.
Let’s recap the three methods to enable PHP error logging:
- Using hPanel – only applicable if you’re using Hostinger’s standard, WordPress, or cloud hosting service. It lets you easily enable PHP error logging or PHP error display in a few clicks.
- Editing the .htaccess file – applicable to almost all hosting users. Simply insert a few code lines into the .htaccess file.
- Editing the php.ini file – applicable to VPS and Linux hosting users who have root access. This method involves tweaking the PHP configuration in the server and defining the PHP error log file path.
Once you’ve got the PHP error logging enabled, check the error log file in the website directory unless you have specified the path differently.
However, it’s always best to prevent errors from happening. Thus, always make sure to type the correct PHP syntax when tweaking the website’s files. Also, pay attention to the indicator on the text editor when there’s a syntax mistake.
Suggested Reading
Website Uptime and Downtime: What It Is, How to Monitor It and Improve Performance
Website Maintenance Cost
How to Diagnose and Fix a Hacked Website
How to Download a Website Backup (hPanel + cPanel)
How to Clear Browser Cache and History (Chrome, Firefox, Safari)
All of the tutorial content on this website is subject to Hostinger's rigorous editorial standards and values.

Merkys is a server administrator and Linux expert. He keeps everything up & running while tackling advanced server management issues. Besides that, he’s a big fan of blockchain technology, web development, and bodybuilding.

Leo is a Content SEO Specialist and WordPress contributor. Armed with his experience as a WordPress Release Co-Lead and Documentation Team Representative, he loves sharing his knowledge to help people build successful websites. Follow him on LinkedIn.