How to migrate a WordPress site
Jan 13, 2026
/
Hasna A. & Marco C.
/
9 min Read
There are various reasons for migrating a WordPress website, such as switching to another hosting provider for better performance and security. Fortunately, the WordPress migration process is easier and more beginner-friendly than you might think.
In this article, you’ll learn various methods to migrate a WordPress site. Whether you’re moving a small blog or a large online store, this tutorial ensures that your site migration will be seamless and error-free.
What you need to do before migrating a WordPress site
Proper preparation before migrating your WordPress site will help safeguard your data, minimize downtime for your visitors, and allow you to reevaluate your site’s setup before introducing it to a new hosting environment.
- Create a full backup – always start with a complete backup of your WordPress website. This includes all files, folders, and the database. Back up your entire site into a ZIP file using a plugin or your current hosting provider’s backup tool. This backup file will be your safety net should you need to restore your original site.
- Install WordPress on the destination host – if you’re moving to a new web host, ensure you have a fresh WordPress installation ready on the destination server. This will be the foundation for importing your existing WordPress website, making the transition smoother.
- Put the website in maintenance mode – to prevent changes to your site during the migration that might confuse your visitors, put your site in maintenance mode. We also recommend disabling caching plugins, as they might interfere with the migration process.
- Review and adjust settings – check your current site for any specific configurations that need to be replicated on the new WordPress site. This includes permalink structures, widget settings, and theme options. Ensuring consistent configuration will help maintain the look and functionality of your site post-migration.
- Clean up your site – a migration is an excellent opportunity to declutter your site. Remove any unused plugins, themes, or media files. A lighter site means a quicker migration and better performance.
How to do a WordPress migration: 5 easy methods
In this section, we’ll cover five migration methods for WordPress sites. Choose the one that best fits your preferences and technical skills.
Note that the first three methods are specifically for migrating to Hostinger. If you’re looking to migrate to a different provider, please proceed directly to the fourth or fifth method.
Suggested Reading
If you are moving your WordPress site from Siteground or Squarespace, you can follow our dedicated guides:
How to migrate from Siteground to Hostinger
How to migrate from Squarespace to Hostinger
How to migrate your WordPress site using hPanel
Difficulty level: Easy
Hostinger’s free migration service is the easiest way to migrate a WordPress site to Hostinger. Simply fill out a migration request on hPanel, and our dedicated team will manage the entire migration process for you.
Before initiating a migration request, please disable any two-factor authentication (2FA) or anti-bot features on your current hosting account and wp-admin area. Also, ensure there is sufficient disk space on your current server to facilitate a backup.
Next, choose a managed WordPress hosting plan at Hostinger. You can continue using your existing domain by pointing it to Hostinger after the migration process is completed.

Here are the steps to request a migration using hPanel:
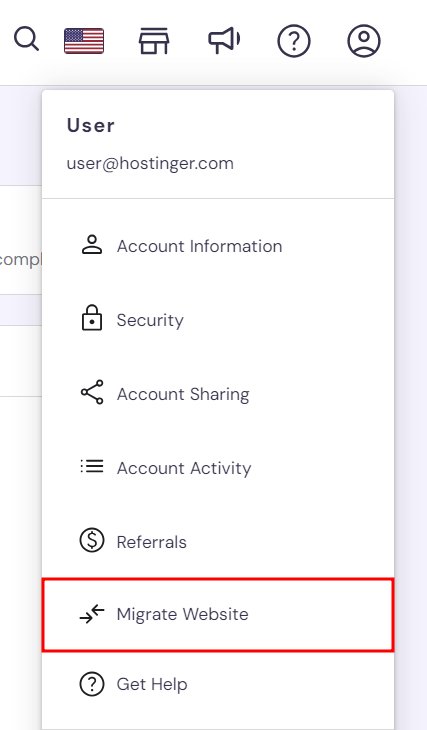
- Log in to hPanel and navigate to Account → Migrate Website.
- On the Manage Migration Requests section, click Add request.
- Enter your website’s domain name in the provided field and click Next.
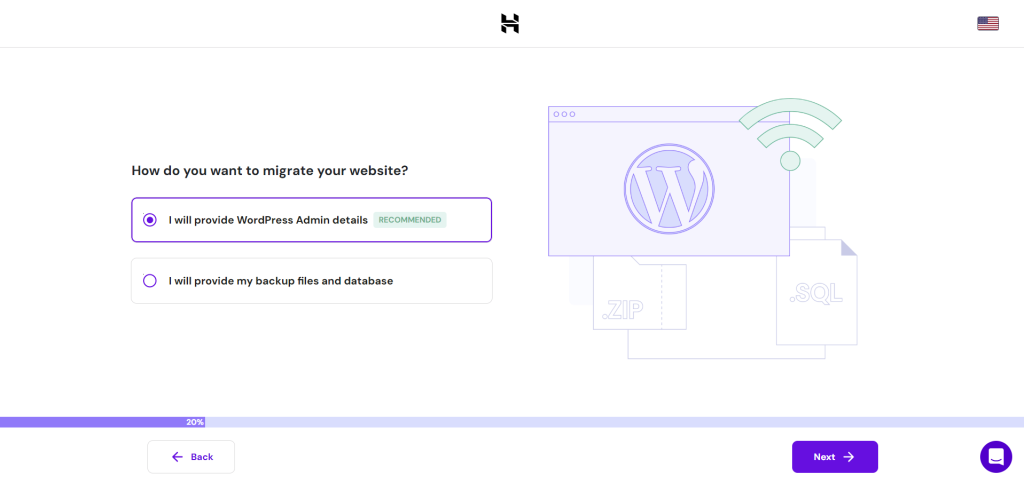
- For a live WordPress site, choose I will provide WordPress Admin details and enter your WordPress credentials for verification. Keep in mind not to change your domain’s DNS settings until the transfer is complete.
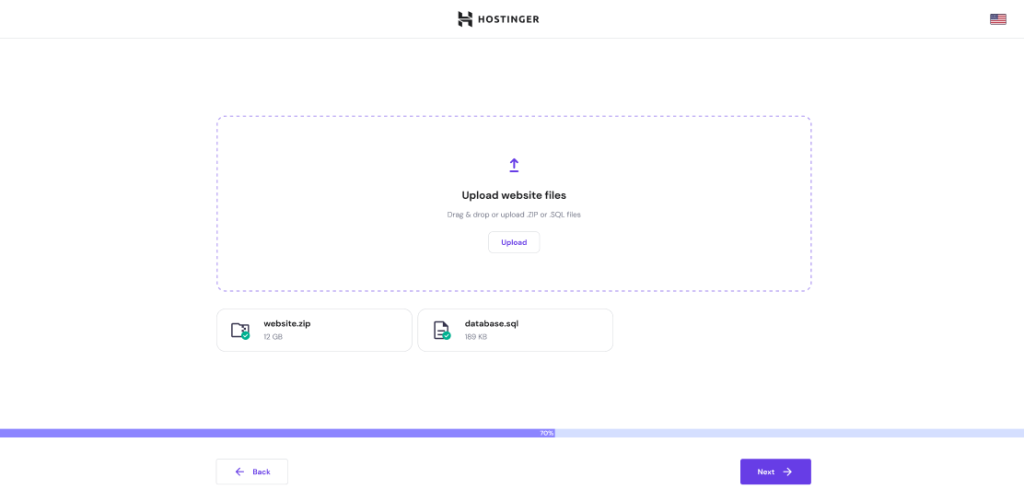
If your website is offline, choose I will provide my backup files and database. Drag and drop your website files in .zip format, and your database in .sql format.
- Select the destination domain from the dropdown list.
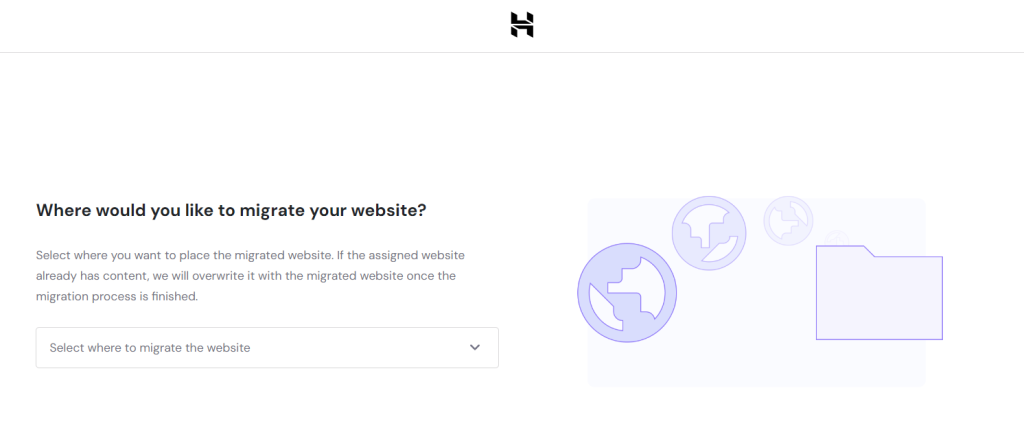
- Review the migration request summary. Confirm that all details are correct before selecting Submit Request.
Please allow between 2-48 hours for the migration to complete. You can track the progress on the Migrations Requests page or in the Websites section of hPanel.
After migrating, point your old domain to Hostinger. The domain name system (DNS) propagation process typically takes 24-48 hours. The propagation status will be shown in your hPanel. To double-check if the transfer is successful, you can also enter your Hostinger plan’s IP address on SkipDNS.
Important! Regardless of the migration method you choose, consider using a WordPress staging environment to test your site first on the new host. This helps ensure a smooth transition without impacting your live site’s functionality or user experience.
How to migrate your WordPress site manually using hPanel
Difficulty level: Moderate
For Hostinger users, migrating your WordPress site manually using hPanel gives you complete control over the transfer process. This method suits those who prefer a detailed approach or have specific customization goals for their website.
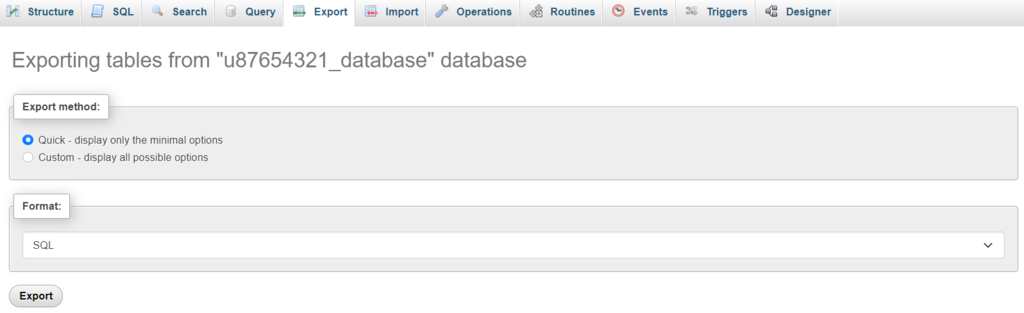
Start by logging into your current hosting control panel and accessing phpMyAdmin. Select your WordPress database, then click the Export tab. Opt for the Quick export method and SQL format, then download your database file.
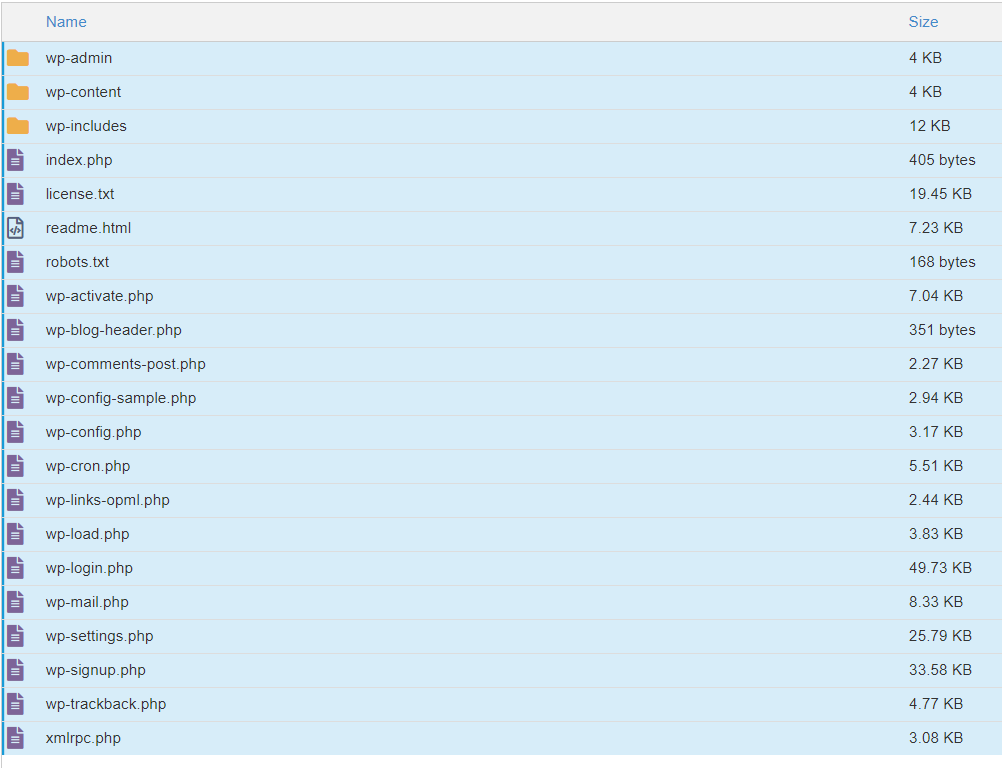
Next, navigate to the root directory of your site via the File Manager or an FTP client like FileZilla. Download all your WordPress files to your computer, including the wp-content folder, which contains your themes, plugins, and media files.
With your WordPress database and website files ready, purchase a web hosting plan at Hostinger and follow these instructions:
- Access your hPanel dashboard and click on Databases.
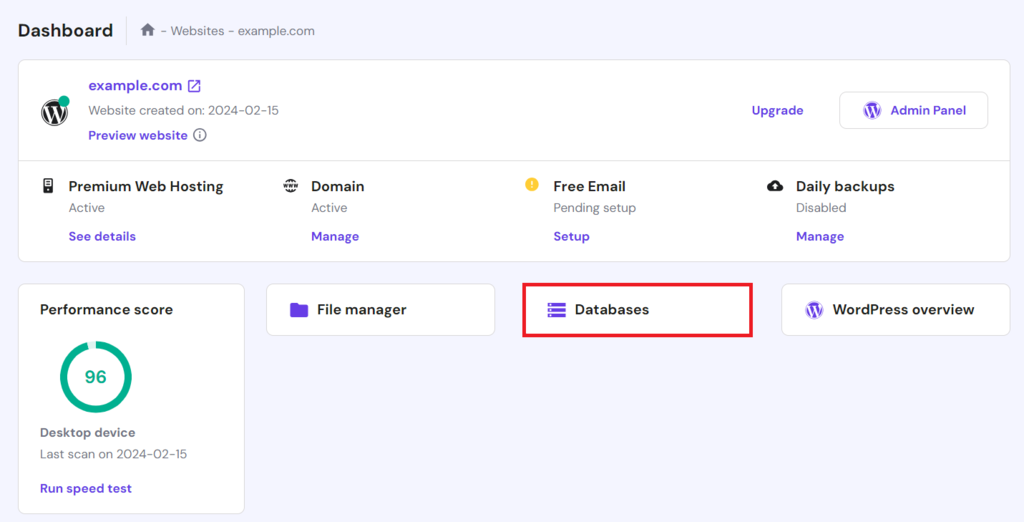
- Create a new database by filling in the available fields and then click Create. Note down the database name, username, and password, as you’ll need these details later.
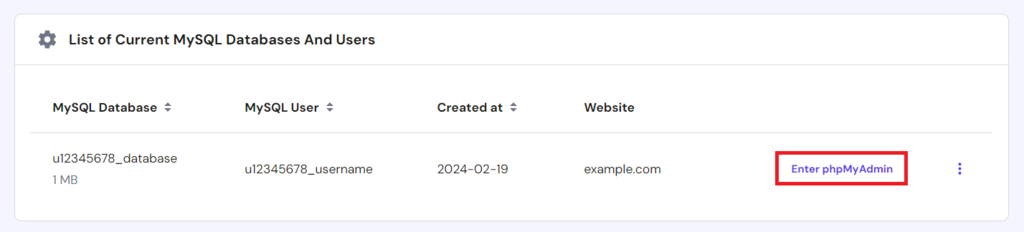
- Click Enter phpMyAdmin next to your newly-created database.
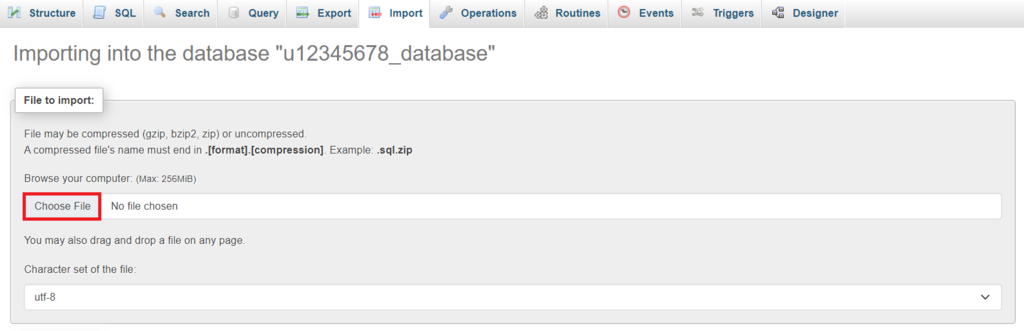
- In phpMyAdmin, navigate to the Import tab. Click Choose File to upload your SQL file, and then select Import.
- Once your database is uploaded, return to the hPanel dashboard and select File manager.
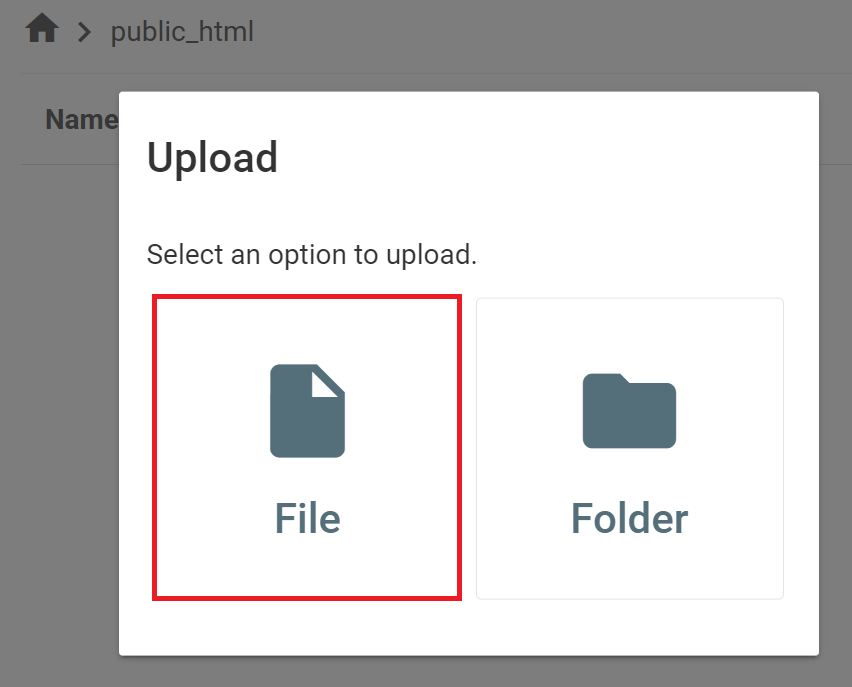
- In Hostinger’s File Manager, open the public_html directory. Click Upload → File to upload your site files.
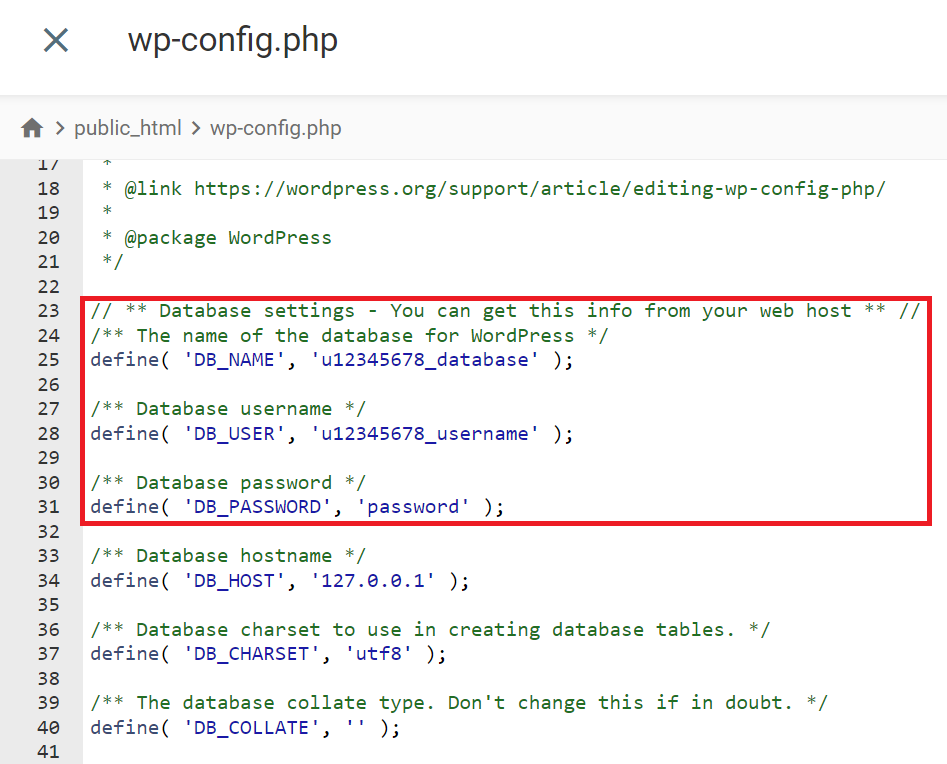
- After uploading the files, locate the wp-config.php file, right-click on it, and select Edit.
- Update the values next to the DB_NAME, DB_USER and DB_PASSWORD lines to reflect your new database details. Once done, click Save in the top right corner.
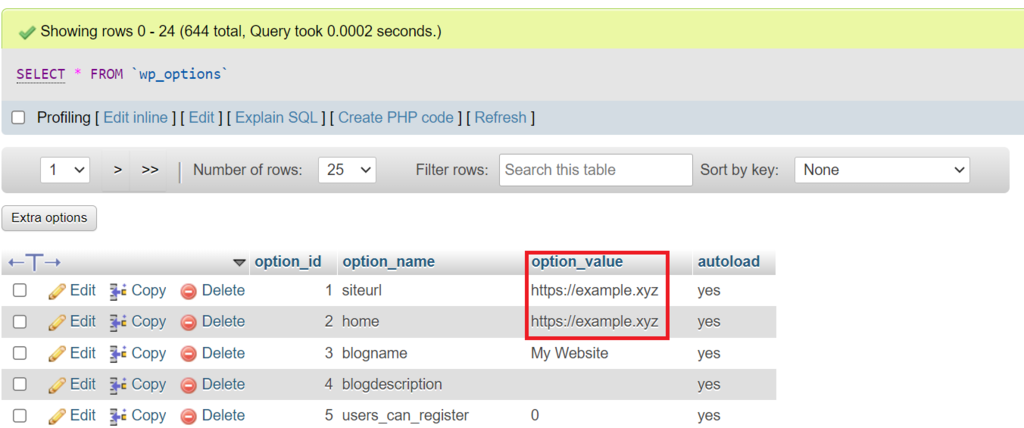
If you’re adopting a new Hostinger domain name, update the site address details in the database. To do this, open your database in phpMyAdmin and access the wp_options table. Edit the option_value for siteurl and home with your new URL.
If you prefer to use your old domain instead, point that domain to Hostinger. Then, wait for DNS propagation to be completed.
Finally, thoroughly check your site to ensure that all pages, links, and media are loading correctly.
Check out our video tutorial on how to manually migrate a WordPress site to a new hosting server.

How to migrate a WordPress website by copying it
Difficulty level: Easy
Hostinger users can take advantage of the convenient Copy Website feature. It allows you to clone your existing site to a new location under the same hosting plan without affecting the original site’s files.
This method is ideal if you aim to migrate your site within the same web host instead of switching to a different one.
Before starting, ensure you’ve purchased a domain name or created a new subdomain within your plan. To duplicate your old site, follow these steps:
- In hPanel, go to the Dashboard for the site you want to copy, then navigate to WordPress → Copy Website in the left sidebar.
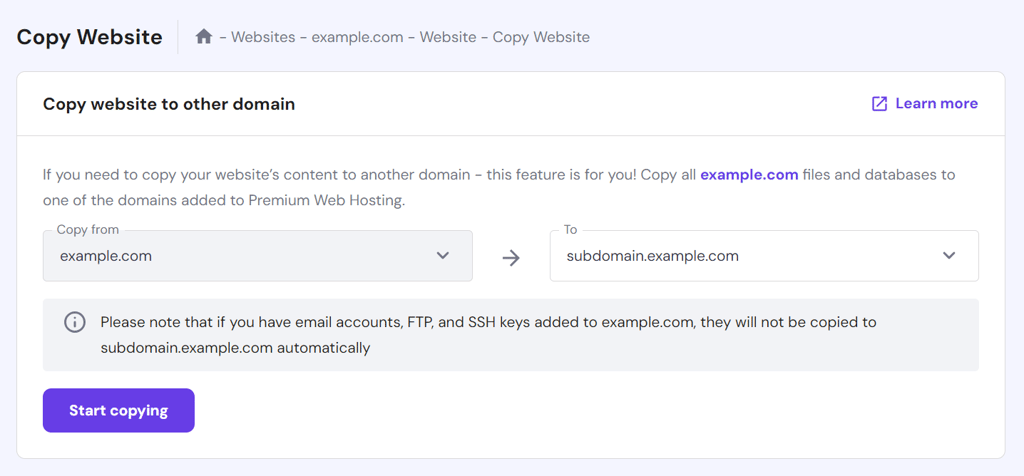
- In the Copy from section, you’ll see the domain of the original site. From the To section, select your new domain or subdomain for the new site.
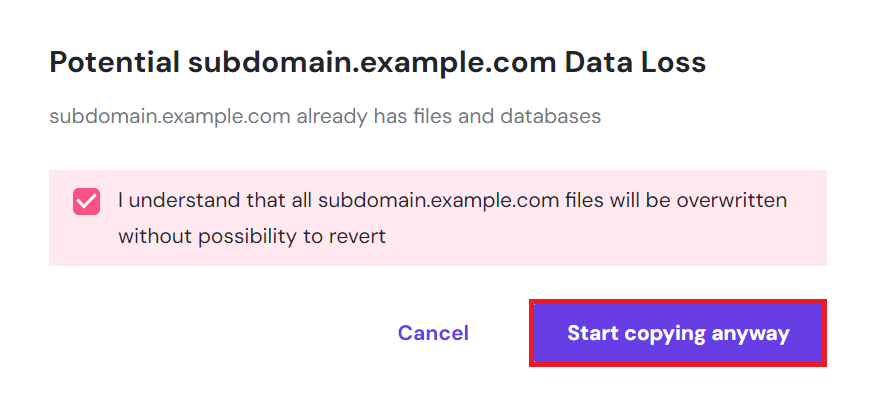
- Click Start copying. A warning about potential data loss will appear. If you’re ready to proceed, check the “I understand…” box and click Start copying anyway.
The copying process may take up to 15 minutes, depending on your website’s size. You can track the progress on the same Copy Website page. Once completed, the status will update to indicate successful duplication.

Please note that only website files and databases are copied. You’ll need to manually configure any associated email accounts, FTP accounts, and SSH keys for the new domain.
How to migrate WordPress with a plugin
Difficulty level: Easy
You can also migrate your WordPress website by using a plugin. Several WordPress migration plugins, such as Duplicator and All-in-One WP Migration, automate many steps involved in transferring your site. We will illustrate the migration process using All-in-One WP Migration.
Note that All-in-One WP Migration has a maximum upload file size limit of 256MB. If your backup file exceeds this limit, increase your WordPress site’s maximum file upload size first. You should also install WordPress on your new hosting account before proceeding.
Follow these steps to migrate your site with All-in-One WP Migration:
- Install and activate the plugin on both your old and new WordPress sites.
- Log in to your old site’s WordPress dashboard and go to All-in-One WP Migration → Export.
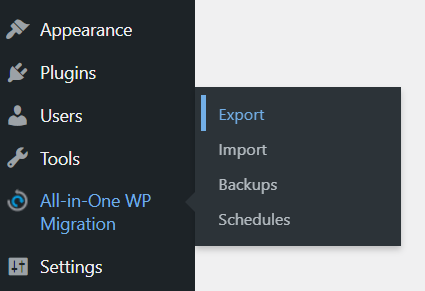
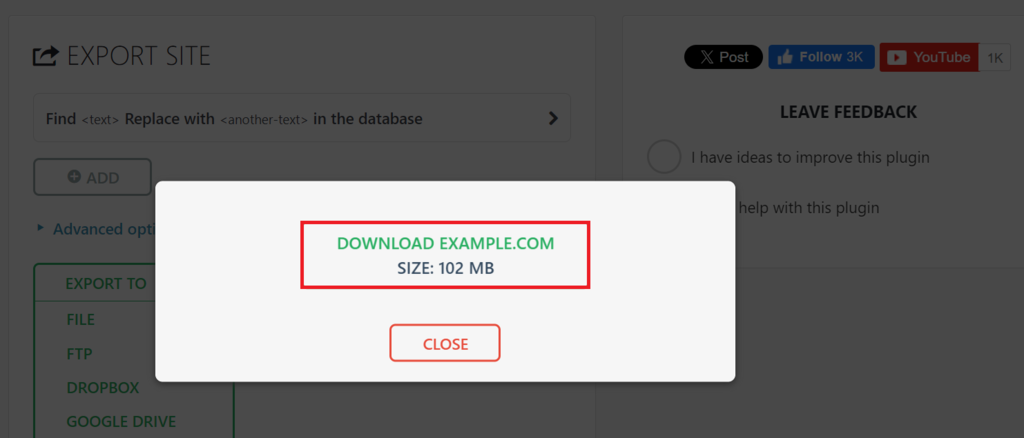
- Click Export To → File. This WordPress plugin will package all your site files into a single WPRESS file.
- Once the process is complete, a download link will appear in a pop-up window. Click this link to download the file to your computer.
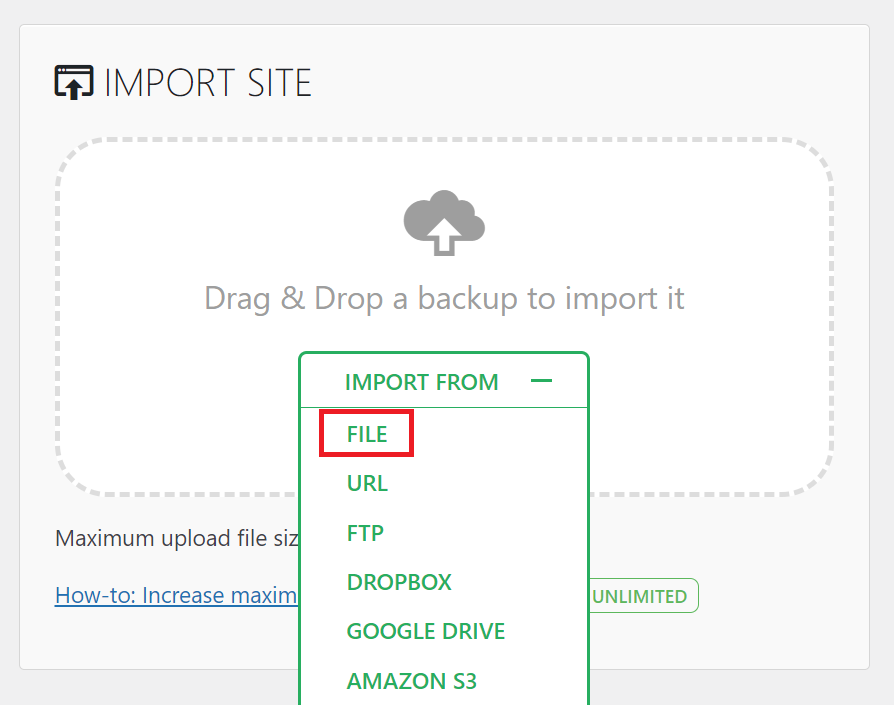
- Log in to your new site’s WordPress dashboard and navigate to All-in-One WP Migration → Import.
- Choose Import From → File and upload the WPRESS file you previously downloaded.
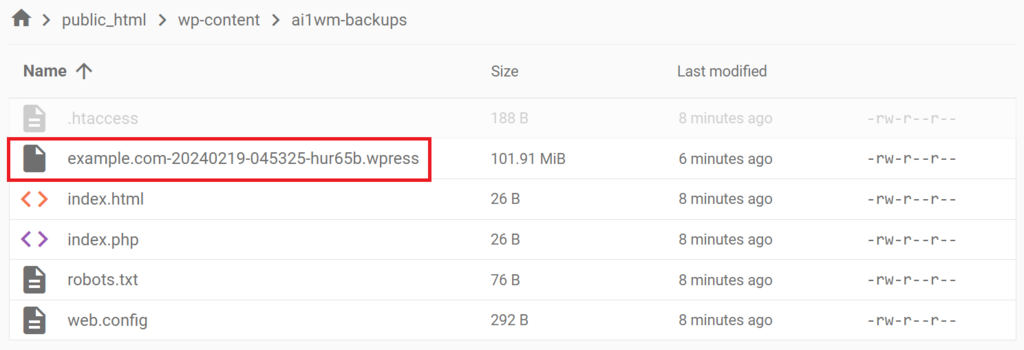
If the upload process takes too long or fails, consider manually uploading the file via FTP or File Manager and then using the Restore option. Here’s how to do this via File Manager:
- Log in to your hosting provider’s control panel and open the File Manager application.
- Navigate to public_html/wp-content/ai1wm-backups and upload the file there.
- Go to All-in-One WP Migration → Backups in your WordPress dashboard. The WPRESS file should now be listed there.
- Click the three dots icon and select Restore.
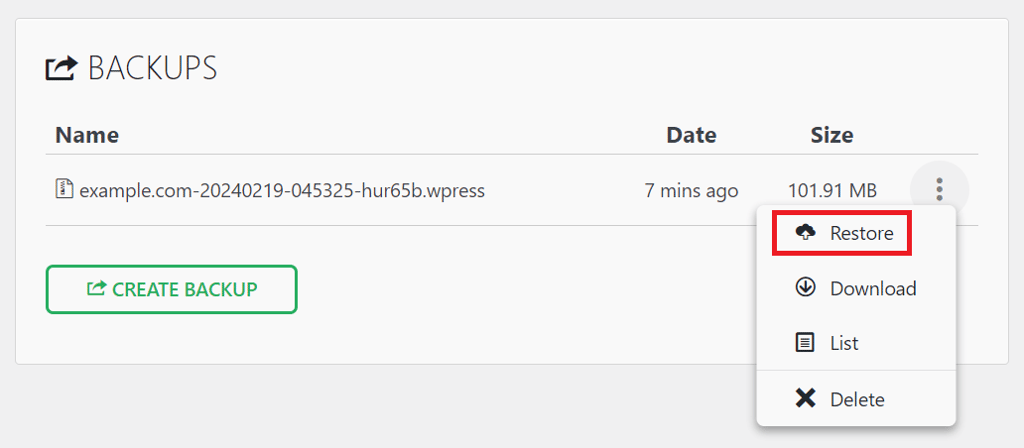
- Click Proceed to begin the restoration process.
After the import is complete, update your permalink structure twice to ensure it matches that of your old site to effectively rebuild the .htaccess file on your new website:
- Go to Settings → Permalinks in your WordPress dashboard.
- Select a different structure and click Save Changes. If using a Custom Structure, copy it somewhere else before making changes.
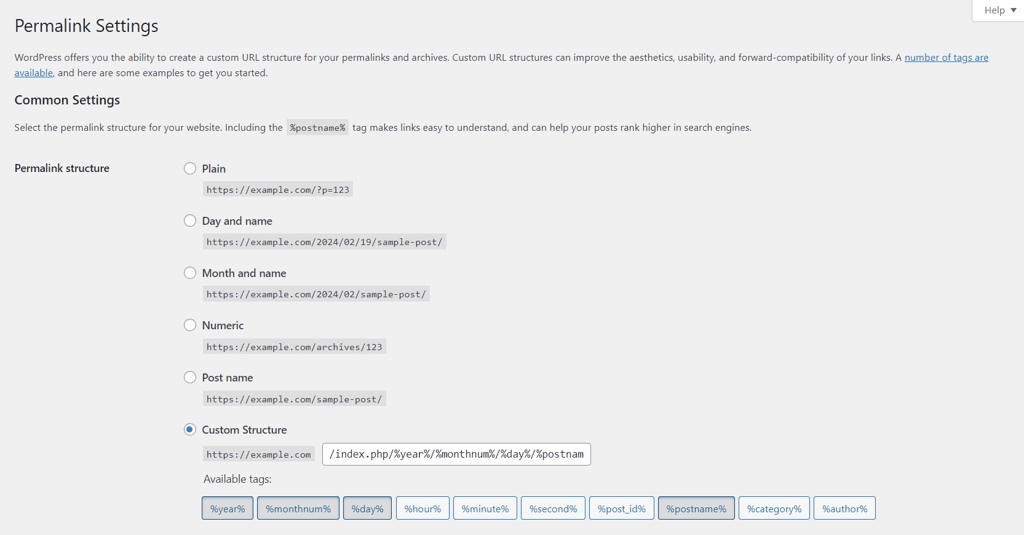
- Reload the page.
- Choose or paste your custom structure, and click Save Changes again.
How to migrate your site manually using cPanel
Difficulty level: Advanced
If you want to migrate a WordPress website from or to a hosting provider using cPanel, its Backup Wizard feature can streamline the process. While cPanel facilitates full backups, you’ll need to restore website files and databases separately.
Follow these steps to migrate a WordPress site using cPanel manually:
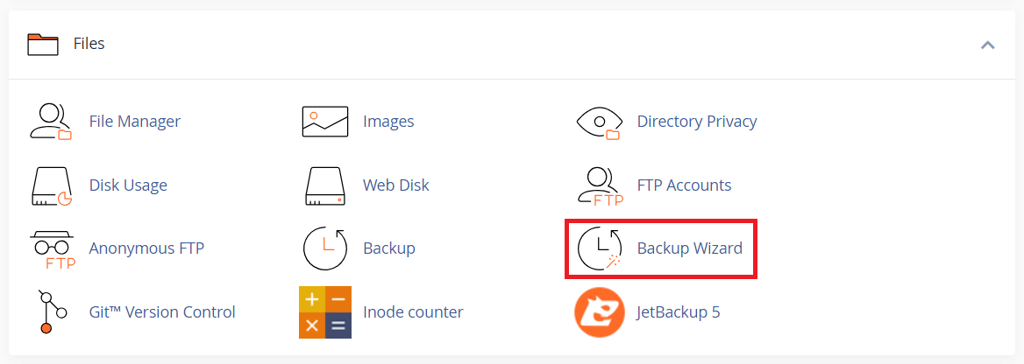
- On your old hosting account, log into the cPanel dashboard and go to Files → Backup Wizard.
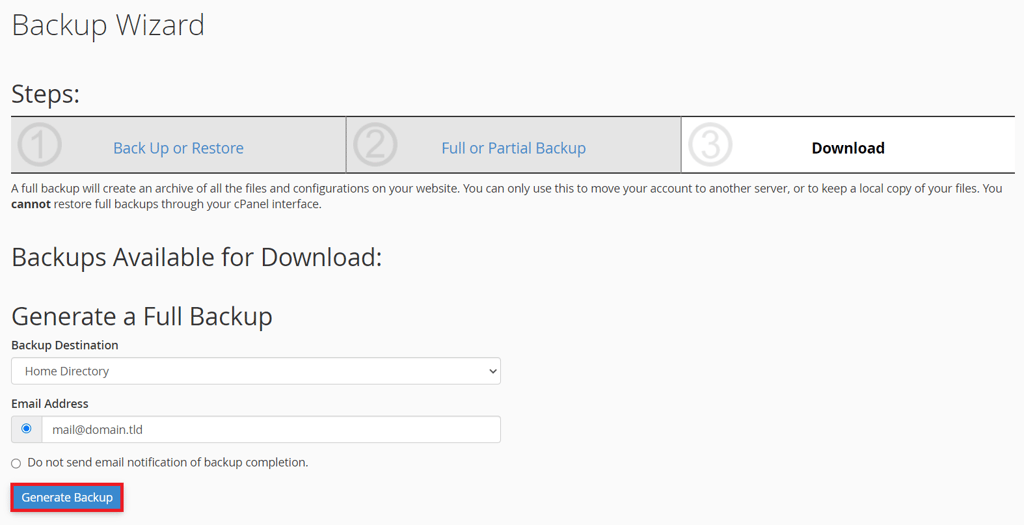
- Select the Back Up → Full Backup. Choose a destination for the backup file and enter your email address in the provided fields.
- Click Generate Backup.
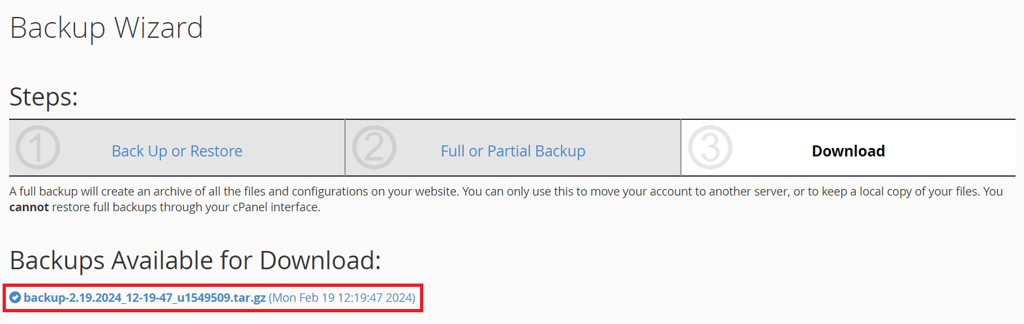
- Wait for the backup process to complete. You will receive an email once the backup is ready.
- Return to the previous page to download the .tar.gz backup file, which contains your home directory, email forwarders and filters, and MySQL databases.
- Extract the full backup file on your computer to separate the files for your website, email data, and databases.
- Log into your new web hosting account and go to the cPanel’s Backup Wizard.
- Select the Restore option.
- Choose Home Directory and upload the extracted home directory file to restore your website files, including plugin and theme files.

- Return to Backup Wizard → Restore. This time, choose MySQL Databases to upload and restore your WordPress database.
- After restoring all the files, access the wp-config.php file via cPanel’s File Manager. Update the PHP file with your new server’s database details, which can be found in the MySQL Databases menu.
Suggested Reading
Looking for a quick refresh? Check our WordPress tutorials to brush up on the basics, explore advanced topics, and discover the latest articles you might have missed.
When do you need to migrate your WordPress site?
There are several scenarios where migrating your WordPress website becomes necessary. Understanding these situations can help you make an informed decision about the right time to make a move:
- Upgrading to a better web host – if you’re experiencing downtime, slow site speeds, or poor customer support, switching to a new web host can dramatically improve your website’s performance and reliability, as well as your customer experience.
- Moving to a more authoritative domain name – a domain name significantly impacts your brand and SEO. Migrating to a more relevant or authoritative domain can enhance your online presence.
- Changing hosting types – whether you’re scaling up from shared to VPS hosting or you need the full control provided by a dedicated server, changing your hosting type requires WordPress migration.
- Accessing better WordPress-specific features – some hosting providers offer WordPress-centric plans with optimized performance, security, and support tailored to WordPress sites.
- Moving server location – migrating to a server closer to your primary audience can improve site speed and user experience. This involves updating the server IP address in your hosts file.
- Consolidating websites – if you’re managing multiple sites across various hosting providers, consolidating them under a single, more efficient WordPress hosting provider can simplify management and reduce costs.

Conclusion
In this article, you’ve learned how to migrate a WordPress site to a new host using various methods. Whether using Hostinger’s free migration service or installing a migration or duplicator plugin, each method provides unique benefits and suits different levels of technical expertise.
Remember, the key to successful migration lies in careful planning, thorough backups, and diligent testing. Implementing these strategies will help maintain your site’s integrity and performance throughout the migration process.
WordPress migration FAQ
This section will answer the most common questions about WordPress migration.
Can Hostinger Migrate a WordPress Site for Me?
As a leading web hosting provider, Hostinger offers free WordPress site migration. Simply submit a migration request and provide your WordPress website’s credentials. You can also upload your backup files through hPanel, and our team will take care of the rest.
Can I Migrate My WordPress Site to Another Host?
Yes, you can migrate your WordPress website to a new host. Various methods, including plugins and manual migration, facilitate the process and ensure your site runs smoothly on the new hosting provider.
How Do I Migrate My WordPress Site to Another Host?
To migrate your WordPress site to another host, firstly, back up your site’s files and database. Then, upload them to the new hosting server. Finally, update your domain’s DNS settings to point to the new server, completing the migration process.
How Long Does a WordPress Site Migration Take?
The duration of a WordPress site migration can vary from a few hours to 48 hours, depending on your site’s size and your new web hosting account’s specifications. Remember, DNS propagation may extend this timeframe, so plan for potential downtime accordingly.
All of the tutorial content on this website is subject to Hostinger's rigorous editorial standards and values.

Hasna is passionate about tech, culture, and the written word. She hopes to create content that helps people succeed on the web. When not writing, rearranging, or polishing sentences, she enjoys live music and overanalyzing movies.

Marco Chiesi is the Head of WordPress at Hostinger, with over 20 years of experience as a software engineer in the web industry. He specializes in open-source technologies and the WordPress ecosystem, where he has contributed in different areas: Plugin Developer (with over 10 million downloads), WordCamp speaker and organizer, Meetup organizer, Translator, and Core Contributor. He is passionate about leading his team to create innovative solutions for Hostinger's web hosting product, which hosts over 5 million WordPress installations. Follow him on LinkedIn.


