Sep 24, 2025
Emman Z. & Auksė
14min Read
A website is a digital space on the internet for sharing information, showcasing details about yourself, your business, or a cause. It’s a crucial tool for anyone looking to build a digital presence.
Whether you’re a small company, a large corporation, or a freelancer, a website is one of the most effective ways to increase your online visibility and connect with a wider audience.
Building a website from scratch requires planning your content, choosing your tools, and launching effectively. Here are the exact steps to create your own website:
By following these steps, you can build a professional website that converts visitors into customers, showcases your expertise, and ranks well in search results.
Understanding the primary goal of your website is essential. Consider the following questions:
What is the main objective of your website?
Here are some examples to help you identify the goal of your website:
| Purpose | Features Needed | Ideal For |
| Sell products | Ecommerce features, payment options, email marketing, product catalog, shopping cart | SMBs, side hustlers/creators, entrepreneurs and startups |
| Provide information | Blog or article section, search functionality, clear navigation, contact forms, SEO tools | Bloggers, educators, nonprofits, consultants, service-based businesses |
| Showcase portfolio | Image galleries, project showcases, client testimonials, downloadable resume, contact forms | Freelancers, artists, photographers, designers, creative professionals |
| Generate leads | Contact forms, newsletter signup, landing pages, CRM integration, call-to-action buttons | Service providers, B2B companies, consultants, agencies |
| Build community | Forums, comment sections, user registration, social media integration, membership features | Content creators, influencers, hobby groups, professional associations |
| Offer online services | Booking systems, payment processing, service descriptions, client portals, scheduling tools | Coaches, consultants, therapists, fitness trainers, tutors |
Who is your target audience?
Who exactly will visit your website, and what do they need from it? Create detailed audience personas, including demographic information, interests and hobbies, and pain points your website can help solve.
Conduct surveys or interviews to gather insights directly from potential users, and analyze competitor audiences to identify gaps or opportunities.
Research competitors
Define your unique value proposition
Focus on the features or services your website offers that competitors do not. This can be exclusive content, superior product quality, or exceptional customer service.
Make sure your unique value proposition is clear and prominent on your website through taglines, key messages on your homepage, or specific content highlighting your strengths.
Set measurable goals
Decide what success looks like for your website. This could include metrics such as:
Selecting the right platform speeds up the website creation process, especially for beginners. The platform you choose will determine how easily you can build, customize, and manage your website.
| Type | What is it? | What to look for? |
| Website Builder | User-friendly platforms with drag-and-drop interfaces, pre-designed templates, and built-in hosting, making them great for beginners. Example: Hostinger Website Builder | Ease of use, customization options, budget-friendly pricing, scalability, customer support |
| Content Management System (CMS) | Flexible platforms that offer extensive customization through themes and plugins, ideal for users who want more control. Example: WordPress | Technical skill requirements, customization needs, hosting compatibility, plugin availability |
| Custom Development | Built from scratch by developers, offering complete control over design and functionality but requiring significant technical expertise and budget | Development costs, maintenance requirements, scalability needs, technical expertise availability |
Website Builders
Website builders are tools that help you create sites without any coding knowledge. Hostinger Website Builder is an excellent choice, with powerful AI capabilities that help with content creation, design, and even SEO. This builder offers powerful marketing integrations and email, and comes with free domain for one year, starting from just $1.99/month.
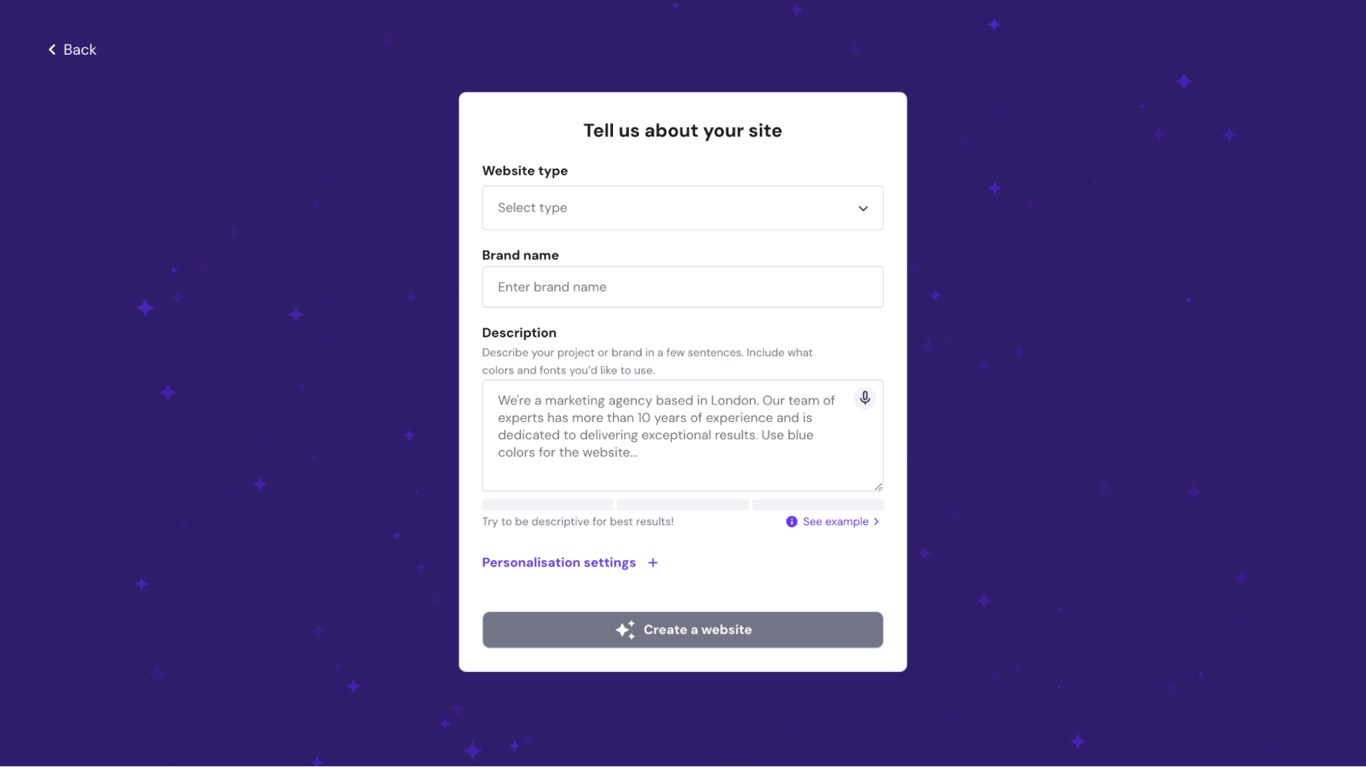
The platform includes built-in hosting, templates, and essential features like contact forms and SEO tools, making it perfect for beginners who want to get their website up and running quickly.
WordPress
The platform provides flexibility for growing websites but requires more technical knowledge compared to website builders.
WordPress offers extensive customization options through thousands of themes and plugins like WooCommerce for ecommerce and Yoast SEO for search engine optimization. You can benefit from our WordPress AI website builder by purchasing the Business or Cloud plan of Hostinger’s managed hosting for WordPress.

Choosing the right domain name involves several considerations to ensure it effectively represents your brand and appeals to your audience:
Check availability and choose a domain extension
Use a domain search tool to check if your desired domain names are available. While .com is most familiar, consider alternatives like .net, .org, or industry-specific extensions like .store or .blog. If possible, register multiple variations of your domain name to protect your brand and prevent competitors from using similar names.
Register your domain name
Use Hostinger’s domain search tool to find and register your desired domain name. Our user-friendly dashboard lets you manage domain settings, DNS records, and renewals in one place. Bundling your domain registration with hosting services can save money and simplify renewals.
➡️ For more detailed guidance, check our guide on how to choose a domain name.
Instantly check domain name availability.
Your choice of web hosting directly impacts your website’s performance, speed, and reliability.
If you’re using Hostinger Website Builder, hosting is already included in your plan, so you don’t need to worry about this step. However, if you’re using self-hosted platforms like WordPress, let’s look at how to select and secure a hosting plan that suits your needs.
Here are the main types of hosting available, each offering different levels of resources, control, and pricing:
| Types of Hosting | Advantages | Price |
| Shared Hosting | Cost-effective, beginner-friendly, easy to manage | Starting from $1.99/month. |
| VPS Hosting | More resources and control, better performance, increased security | Starting from $6.49/month. |
| Cloud Hosting | High availability, scalable, handles traffic spikes efficiently | Starting from $6.99/month. |
| Dedicated Hosting | Maximum resources and control, top performance and security | Premium pricing |
| Managed hosting for WordPress | WordPress-optimized, automatic updates, enhanced security features | Starting from $1.99/month. |
When selecting a hosting plan, consider the following factors to ensure the hosting package meets your website’s requirements:
A clear and logical site structure offers several benefits for both users and search engines. The most important elements are intuitive navigation, improved SEO rankings, and organized content management.
Create a sitemap
List all the pages you want to include (Home, About, Services, Products, Blog, Contact) and organize them hierarchically, with main pages at the top and subpages underneath. Use clear, descriptive labels and consistent naming conventions. To visualize the overall structure, you can also use tools like Lucidchart or GlooMaps.
Optimize navigation flow
Place navigation menus consistently at the top of each page, use clear labels for menu items, implement breadcrumbs for a better user experience, and add search functionality for larger websites. Also, consider using a sticky menu that remains visible as users scroll.
Prioritize important content
Highlight important information on your homepage, such as main products, services, or latest blog posts. Include clear call-to-action buttons on key pages to guide users toward desired actions, and organize content logically to guide users naturally from one page to the next.
Plan for scalability
Design a flexible structure that can accommodate new pages without disrupting the existing hierarchy. Consider future expansion of categories and sections, ensure your navigation can handle additional items without becoming cluttered, and periodically review your site structure for relevance and effectiveness.
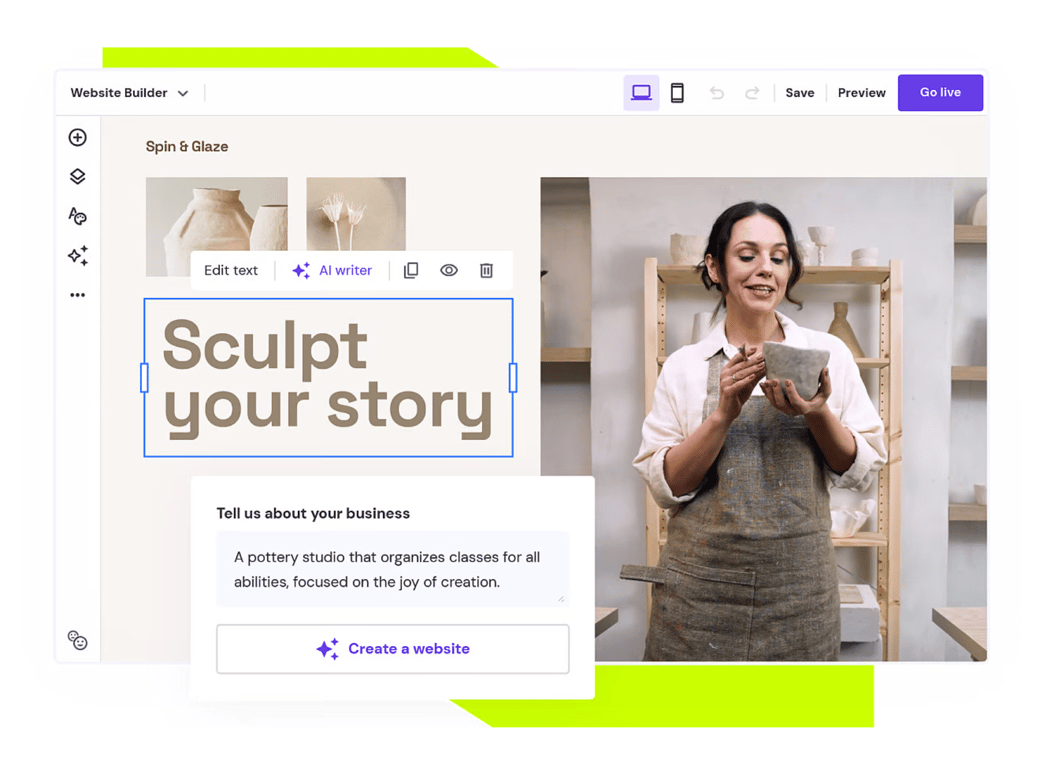
Designing a website involves several processes, such as deciding on the website’s theme, tweaking the layout, and testing how the design works. Here’s how to design an effective website layout with Hostinger Website Builder:
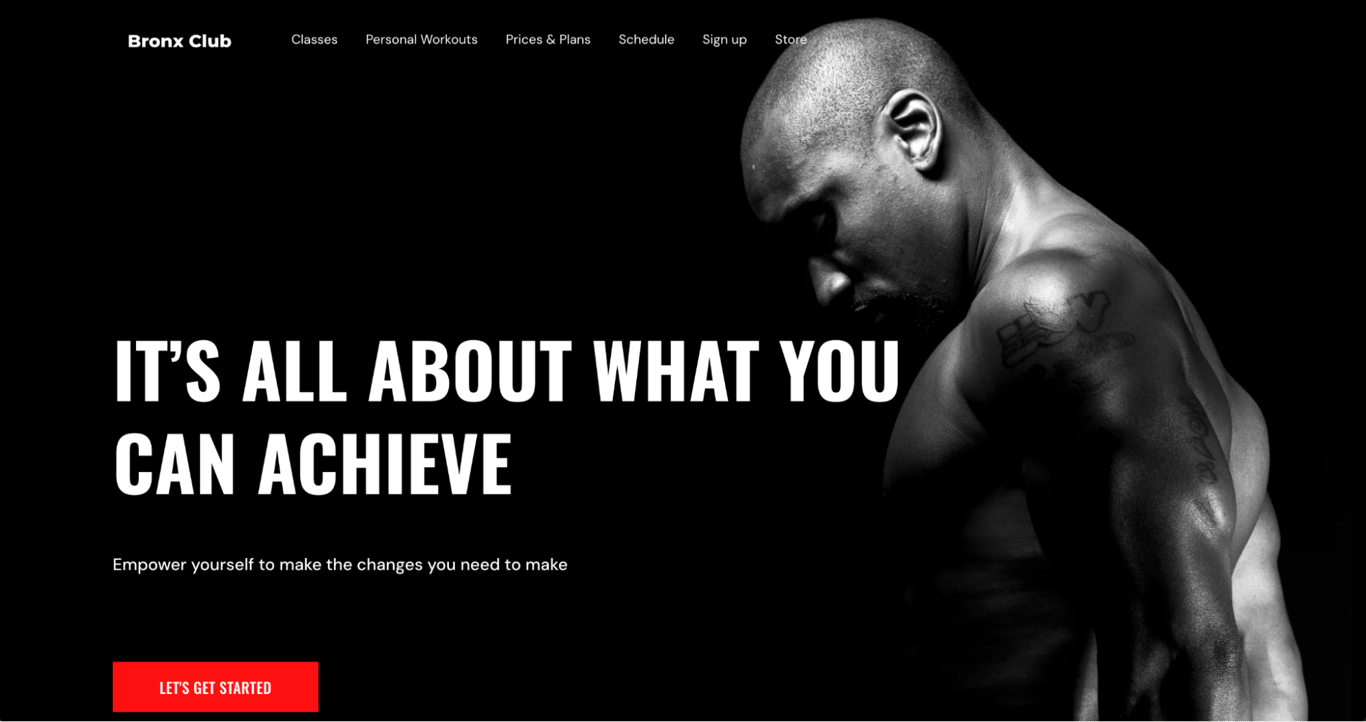
Select a template or theme

Choose a template that reflects your brand’s style and identity. This can include colors, fonts, and overall aesthetics that align with your brand values.
Consider your site’s purpose and choose a template that supports the functionalities you need. For example, if you’re building an ecommerce site, ensure the template includes features like product pages and a shopping cart.
You can also explore Hostinger’s template library, which contains over 150 templates conveniently sorted by categories.
Customize your website
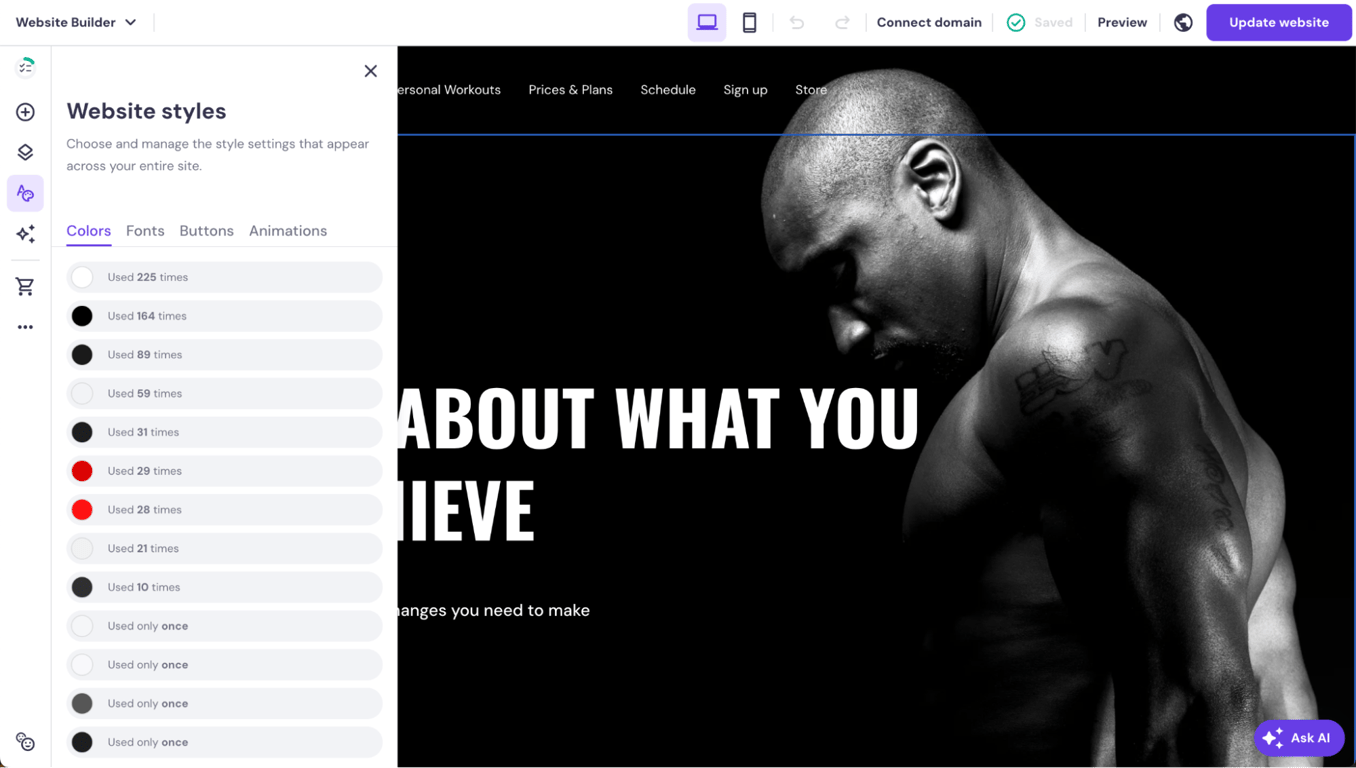
Pick a color scheme that reflects your brand and evokes the desired emotions. Select readable, consistent fonts to create a cohesive look, and incorporate high-quality visual elements like images and icons that enhance your content and reinforce your brand’s tone. Also, consider Hostinger’s drag-and-drop interface to make real-time customizations.
Focus on user experience
Organize navigation logically with clear labels and avoid clutter. Break up text with headings, subheadings, and bullet points to improve readability. Use whitespace strategically to keep the design clean and include compelling call-to-action buttons throughout your site.
Test and refine your layout
After designing your layout, conduct user testing to gather feedback and identify areas for improvement. Use A/B testing to compare different layout versions and see which performs better. Utilize analytics tools to track visitor behavior and make data-driven decisions for design adjustments.
Adding essential pages to your website provides visitors with valuable information and guides them through their journey on your site, with each page serving a specific purpose that contributes to the overall user experience.
Here are the key pages every website should include to create a comprehensive and user-friendly experience:
Homepage
The homepage shapes visitors’ first impressions and should be inviting and informative, setting the tone for the rest of the site.
Start with a brief overview of your website’s purpose and the value you offer, clearly communicating what your site is about and what visitors can expect to find. Use eye-catching visuals such as high-quality images or a hero banner that captures attention and aligns with your brand identity.
Include key navigation elements like menus, search bars, and contact information to help visitors navigate easily. Incorporate persuasive call-to-action buttons that encourage visitors to take specific actions such as exploring products, signing up for newsletters, or contacting you.
➡️ Learn more about the differences between a landing page vs homepage to optimize your approach.
About page

The About page shares your story, mission, and values, helping visitors connect with you and your brand on a personal level. Provide background information about yourself or your company, including history, achievements, and expertise, while highlighting what sets you apart from competitors and explaining your mission and core values.
Use personal anecdotes or stories that share the journey that led you to create your website or business, making the page more relatable and engaging. If applicable, introduce key team members or contributors, showcasing their roles and expertise to add a personal touch and build trust with your audience.
Products or services page
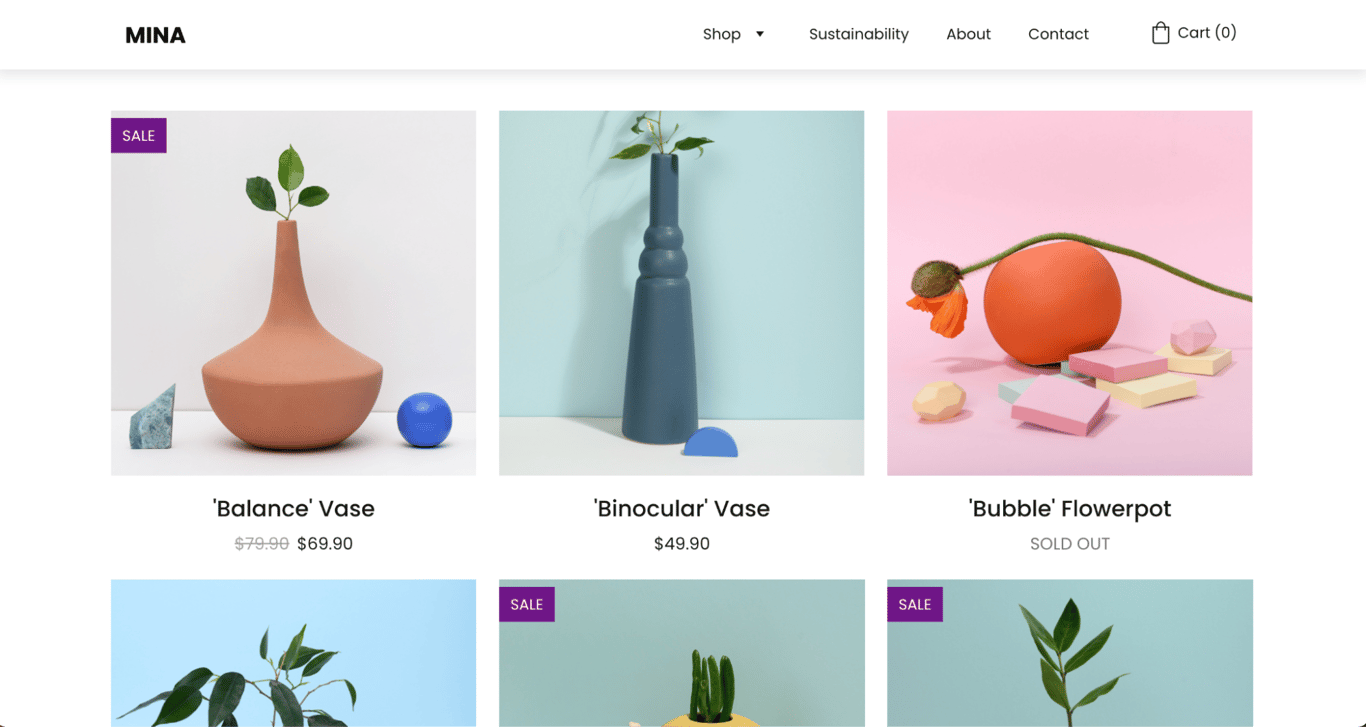
This page provides detailed information about what you offer, helping visitors make informed decisions about your products or services.
Clearly describe each offering with features, benefits, and specifications using concise and persuasive language that conveys value, and use high-quality images or videos to showcase your products effectively.
Offer transparent pricing information, including any available packages or options, to make it easy for visitors to understand and compare your offerings. Include strong call-to-action buttons to guide visitors toward purchasing or inquiring about your products or services, using phrases like “Buy Now,” “Learn More,” or “Contact Us” to encourage action.
Contact page
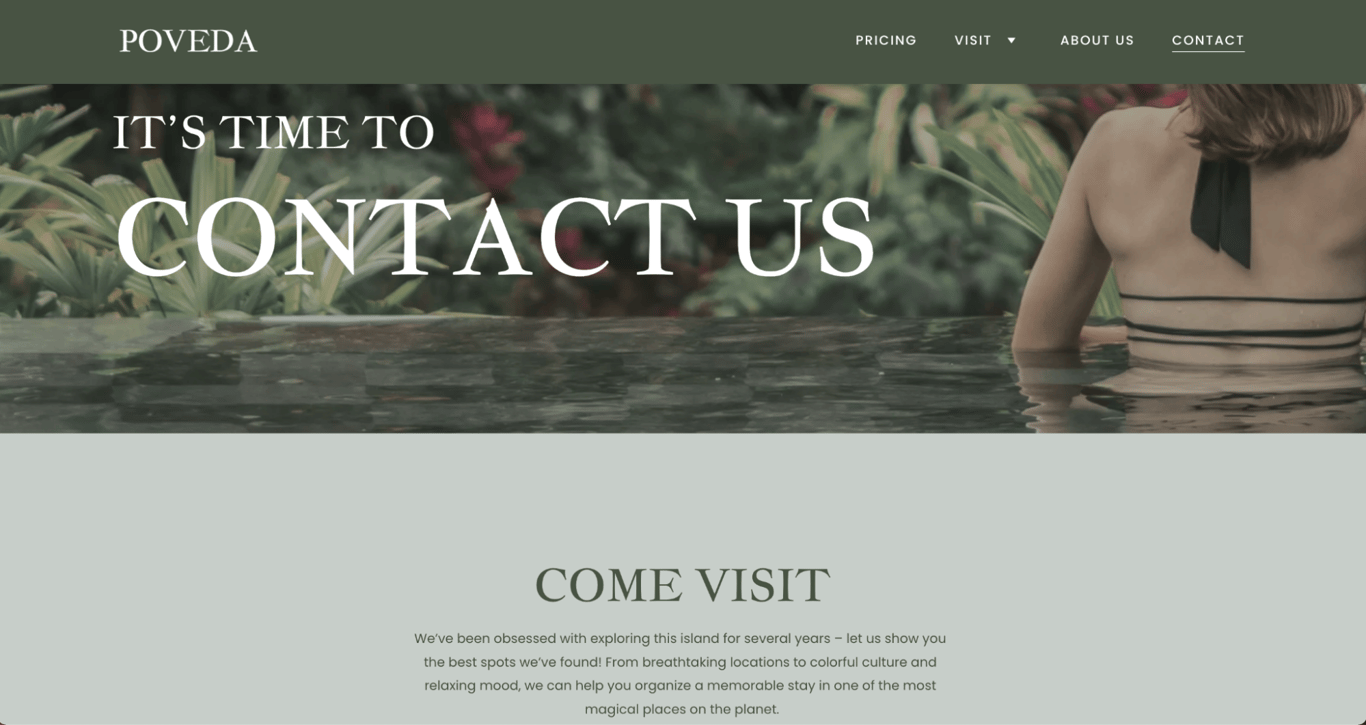
The Contact page allows visitors to reach you with questions or inquiries, serving as a crucial connection point between you and potential customers. Include a simple contact form with minimal fields to encourage submissions, keeping it user-friendly by only asking for essential information like name, email, and message.
Provide accurate contact information, including email address, phone number, and physical address if applicable, ensuring this information is easy to find and up-to-date. Add links to your social media profiles to help visitors connect with you on different platforms, and consider embedding a Google Map if you have a physical location to help visitors find you easily.
➡️ For inspiration, check out our curated list of the best Contact us page examples.
Blog
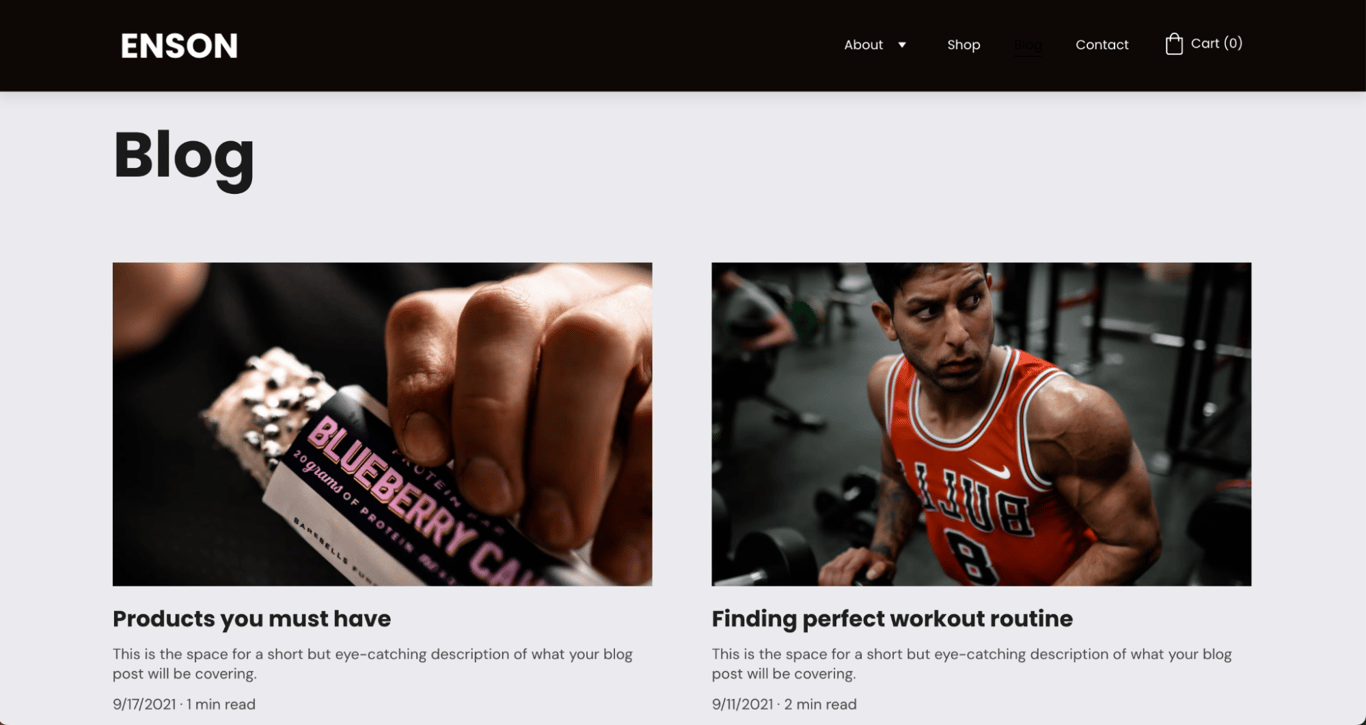
Adding a blog to your website can significantly improve SEO and engage your audience by providing valuable, regularly updated content. Develop a content strategy that plans and creates content resonating with your audience and aligning with your website’s purpose, focusing on topics related to your niche that provide value, solve problems, or entertain your readers.
Optimize your blog posts for search engines using relevant keywords, meta tags, and alt text to attract organic traffic and improve visibility. Encourage interaction by responding to comments on your blog posts and including social sharing buttons to encourage readers to share your content with their networks.
➡️ Learn more about what is a blog and its benefits for your website.
Additional pages
Consider including additional pages that cater to specific needs and enhance user experience. For example:
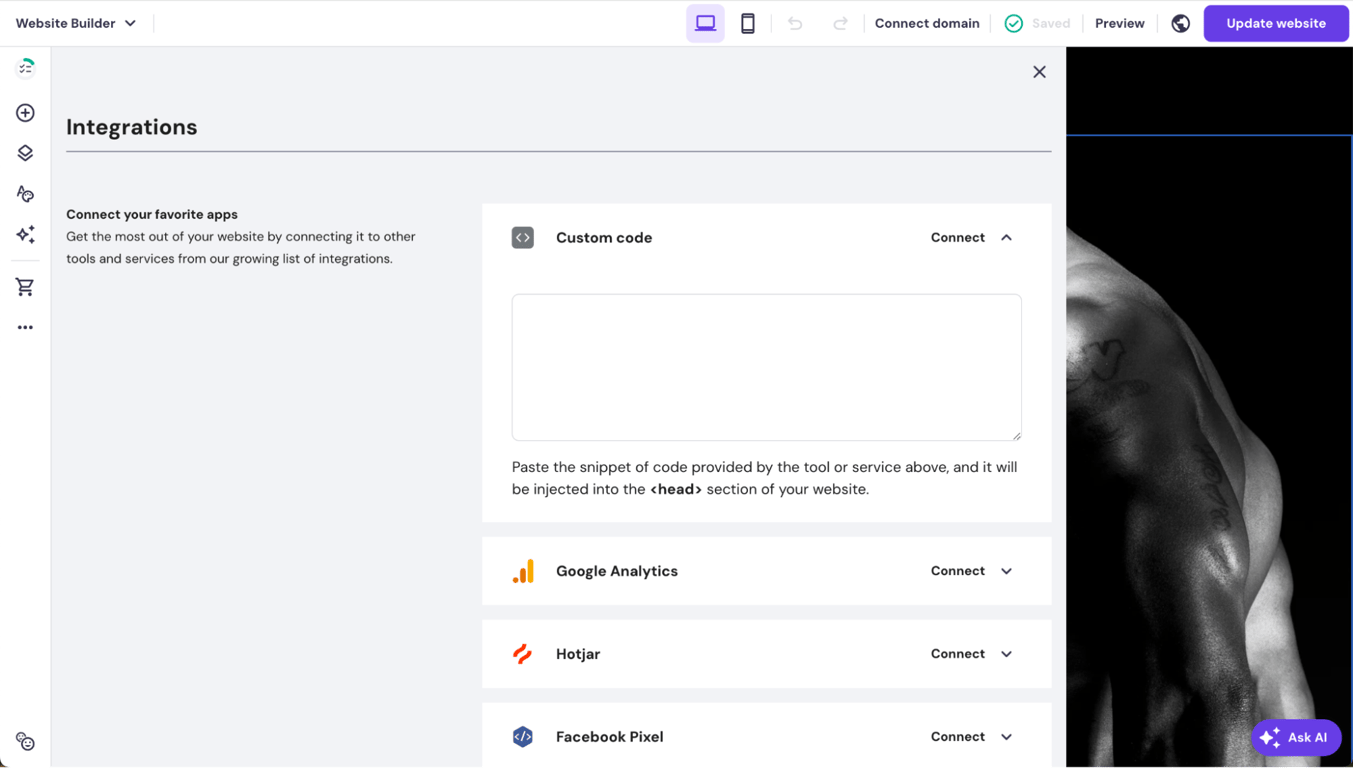
Beyond customizing your template’s appearance, you can enhance your site’s functionality and user experience with additional features available in Hostinger Website Builder. Popular features include:
The Integrations settings in Hostinger Website Builder make it easy to manage and add these various tools directly from the builder interface, allowing you to enhance your website’s functionality without technical expertise.
Focus on producing content that informs, entertains, or solves problems for your audience.
Tailor content to address your target audience’s needs using language and tone that resonate with them, ensuring your content is valuable and relevant by offering insights, tips, or solutions they find helpful or interesting.
Hostinger Website Builder’s AI Writer and AI SEO Assistant help you create content quickly and effectively. They suggest relevant content ideas, create drafts, and maintain a consistent tone throughout your website while optimizing for search engines.
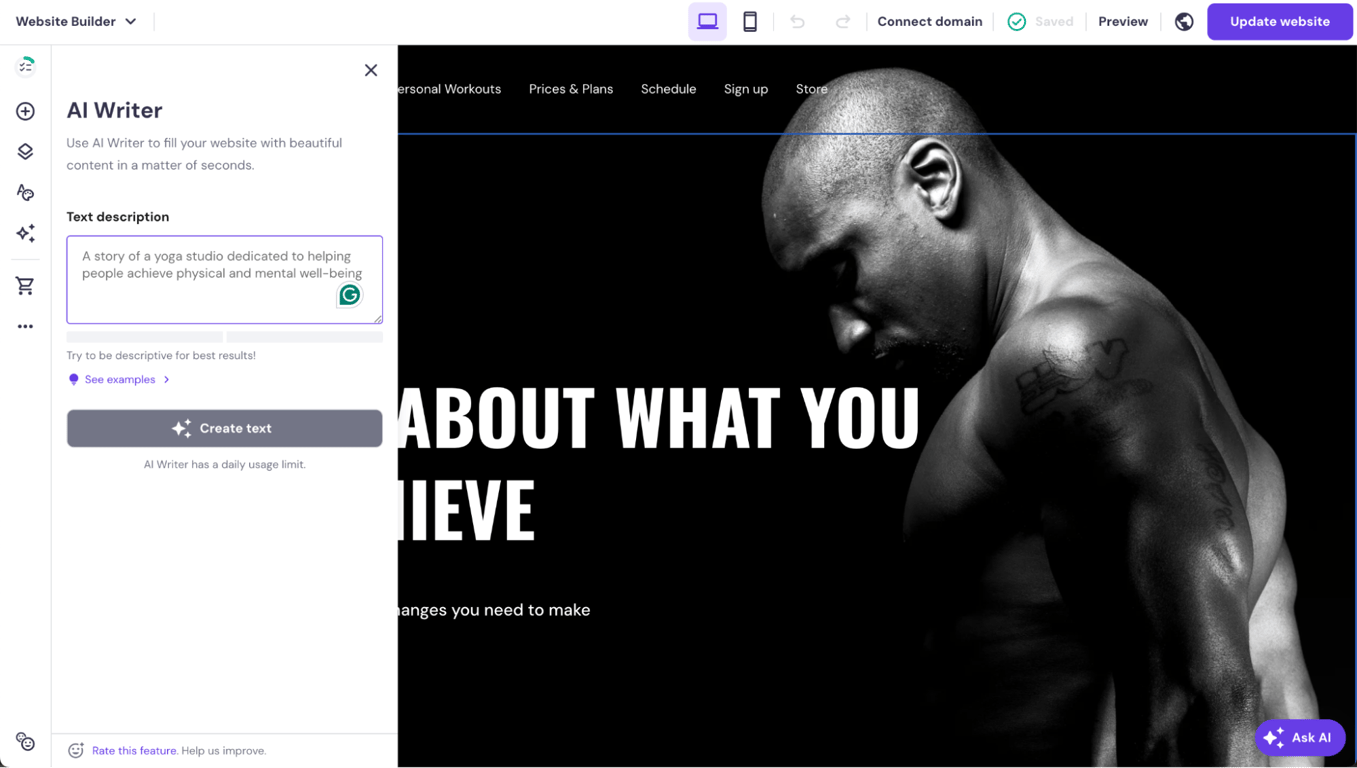
These tools are very helpful if you’re short on time or need assistance starting your content creation journey, and maintaining a consistent posting schedule helps build a loyal following whether you publish blog posts, articles, or videos.
Also, make sure to incorporate various content types to enhance user experience and keep visitors engaged:
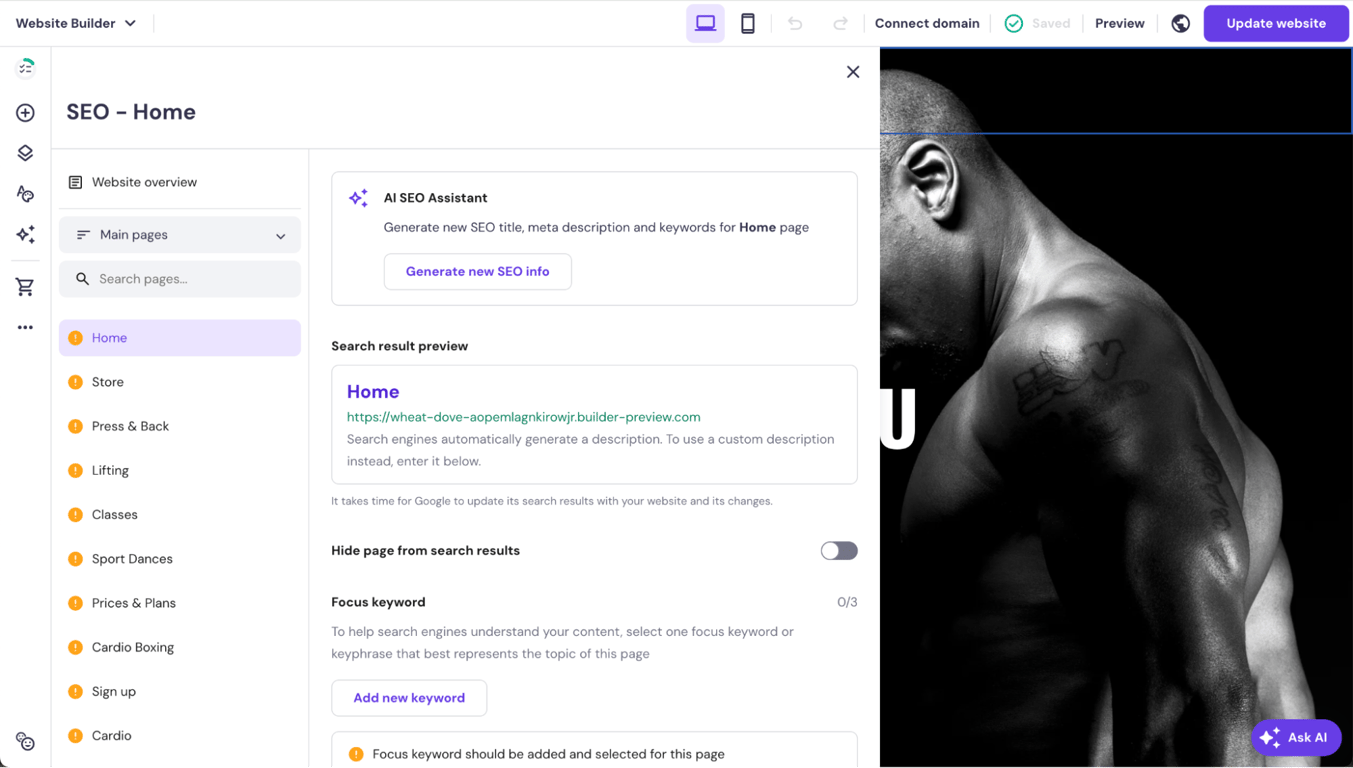
Implementing the best SEO practices is crucial for increasing your website’s visibility and attracting organic traffic:
Hostinger Website Builder offers built-in SEO tools, including detailed SEO analysis with actionable recommendations, customizable meta tags and descriptions, editable image alt tags, and custom URL creation for better search engine indexing.
Before launching your website, conducting thorough testing is crucial to identify and resolve any issues that could affect user experience.
Start with cross-browser testing to ensure your site functions properly on popular web browsers like Chrome, Firefox, and Safari, and perform device testing to verify responsiveness and compatibility across smartphones, tablets, and desktops.
Test all interactive elements, including links, forms, buttons, shopping carts, and search bars, to ensure they work correctly and provide a seamless user experience. Review your content for accuracy by proofreading for spelling and grammar errors, fact-checking all information, including statistics and data, and testing all internal and external links to eliminate any broken connections.
Once testing and content review are complete, it’s time to launch your website by publishing it live. After going live, submit your website to search engines like Google and Bing for indexing using tools like Google Search Console and Bing Webmaster Tools to ensure your site can be discovered by users searching for relevant content.
After your website goes live, promoting and maintaining it is essential for attracting visitors and ensuring long-term success. Develop a comprehensive marketing strategy that includes multiple channels to maximize your reach and engagement.
Develop a marketing plan
Create a multi-channel approach to increase your website’s visibility through social media marketing. Share your content on platforms like Facebook, Instagram, X, and LinkedIn while actively engaging with your audience.
Implement email marketing with regular newsletters to keep subscribers informed about new content, products, or promotions, and continuously optimize your website’s content for search engines to maintain competitive rankings.
Focus on content marketing by creating valuable, shareable content such as blog posts, videos, or infographics that attract and retain your audience.
Consider using paid advertising
Boost your website’s visibility through targeted advertising campaigns. Use Google Ads to display your website in search results for specific keywords your target audience is searching for. Run social media ads on platforms like Facebook, Instagram, and LinkedIn, tailoring them to reach specific demographics or interests.
Also, consider display advertising with retargeting campaigns to bring back users who previously visited your site but haven’t taken action.
Regularly update your website
Maintain your website’s relevance and performance by regularly adding fresh content, such as new blog posts, articles, or product listings. This will keep visitors engaged and signal to search engines that your site is active.
Using analytics tools to monitor key performance indicators (such as traffic, bounce rates, and conversion rates) and utilize this data to make informed decisions about design improvements, content updates, and marketing strategy adjustments.
➡️ Learn more about how to promote your website for free.
A professional website builds credibility, showcases your products or services 24/7, and serves as a central hub for all your marketing efforts. It allows customers to find you easily, learn about your offerings, and contact you directly, ultimately driving business growth and success.
Whether you’re a small business owner, freelancer, or entrepreneur, a website provides the foundation for digital marketing strategies, improves customer trust, and gives you complete control over your brand’s online representation.
In an increasingly competitive market, having a website isn’t just beneficial – it’s essential for staying relevant and accessible to your target audience.
The cost varies significantly depending on your chosen platform, domain, and hosting services. With Hostinger Website Builder, you can create a complete website with web hosting and domain registration starting from just $1.99/month, making it an affordable option for most budgets.
Costs can range from free website builders with basic limitations to thousands of dollars for custom development projects. Factors affecting price include design complexity, functionality requirements, and ongoing maintenance needs.
➡️ For detailed pricing breakdowns and cost-saving tips, check our comprehensive guide on how much does it cost to build a website.
Website planning is important because it provides a roadmap for your entire project. When you map out your site’s purpose, target audience, and key features upfront, you avoid expensive redesigns later. With good planning, you can avoid potential issues early, establish clear goals and success metrics, and create a structured approach that guides decision-making throughout the development process.
The website planning process starts with defining your website’s purpose and identifying your target audience through research and persona development. You’ll need to analyze competitors to understand market expectations and identify opportunities for differentiation.
Next, you’ll need to create a comprehensive site map that outlines your content structure and user journey, determining what pages you need and how they’ll connect to each other.
During planning, you’ll also need to establish your brand identity, including visual elements, tone of voice, and messaging strategy.
Technical considerations like hosting requirements, platform selection, and feature specifications should also be determined early.
Finally, create a realistic timeline and budget that accounts for all aspects of development, content creation, and ongoing maintenance.
Planning also involves setting up measurement systems to track your website’s performance after launch. This includes defining key performance indicators, setting up analytics tools, and establishing processes for regular content updates and site maintenance.
For a comprehensive guide on website planning that covers each step in detail, read our complete tutorial on how to plan a website. This resource will help you create a solid foundation before you begin building your site.
All of the tutorial content on this website is subject to Hostinger's rigorous editorial standards and values.

Emman is a Content Writer at Hostinger where she helps simplify complex topics for readers around the world. With over 5 years of experience in crafting SEO content, she’s passionate about making tech topics easy to understand. In her free time, Emman enjoys traveling and watching Formula 1 races. Follow her on LinkedIn.

Auksė Žirgulė is the Head of Website Builder at Hostinger, where she focuses on creating real value for customers. With a career that started in QA, her journey into product management broadened her perspective and deepened her understanding of what it takes to build a successful product. Auksė is known for her energetic approach and a passion for leading teams to achieve impressive growth. Follow her on LinkedIn.
Many website owners look beyond Webflow when they need simpler tools, lower costs, or features that better match their projects. ...

Image optimization is the process of reducing image file size and delivering images in the right format and dimensions to ...
Weebly is a beginner-friendly website builder known for its drag-and-drop editor and simple setup process, and it works well for ...