How to install Joomla
Dec 22, 2025
/
Domantas G.
/
5 min Read
Joomla is one of the best CMS platforms that you can use to make a website. As a content management system, it offers everything you need to manage your publications and create new pages with ease. As of today, it’s regarded as one of the top WordPress alternatives out there.
In this guide, we’ll show how to install Joomla using two methods with your web host, including Hostinger’s Joomla hosting:

So, let’s see what it takes to get this script up and running!
Installing Joomla manually
First, we’ll cover the manual Joomla installation. To complete it, you’ll need to get your hands dirty and do a little extra work. Overall, there are 5 simple steps that you’ll need to follow:
1. Create a MySQL database and user
To begin, navigate to your hosting control panel and go to Websites → Dashboard on your chosen website. Then, open the Databases → Management section. Specify your database name, user, and password as shown in the example below:
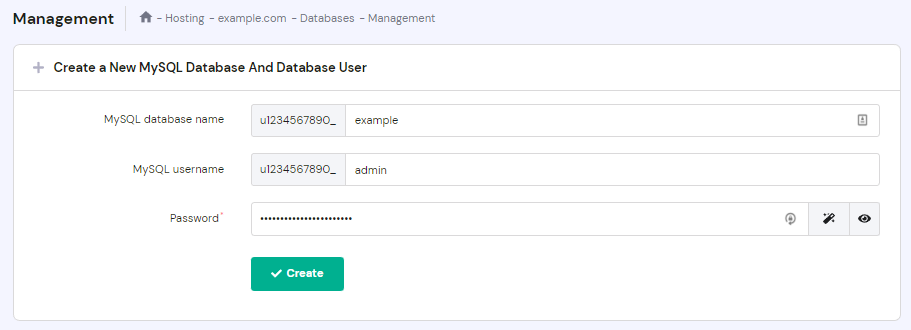
Make sure to write down the details somewhere, as you’ll need to use them later on.
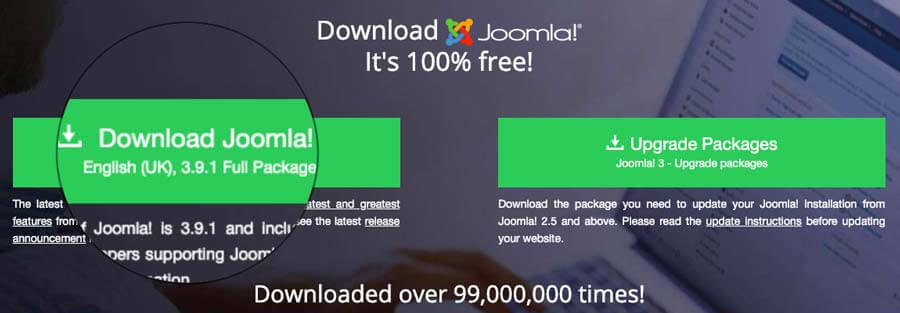
2. Download the latest Joomla version
Next, grab the official Joomla installation package free of charge from their website. To get the latest version, press Download Joomla! and your request will be completed shortly.
3. Upload the Joomla archive and extract it
At this point, you’ll need to upload the compressed file to your domain’s root and extract it.
Using a file manager
Most hosts offer web-based file managers for everyday tasks. Since Joomla doesn’t take up a lot of disk space, it’s the perfect tool for the job. To start, go to Websites → Dashboard on the website where you wish to install Joomla. Then, select Files → File Manager on the left sidebar. Choose which files you want to access.

By default, you should appear in the public_html directory, which is your domain’s root folder. Then, follow these instructions to upload the Joomla installation archive to your account:
- Select the Upload Files icon in the upper-right corner.
- Click on Select Files and find the archive on your computer.
- Hit the Upload button to begin the process.
- Wait for the process to finish, and you’ll see the File Manager interface once again.

Now, you should retrieve the contents of the zipped file by right-clicking and choosing the Extract function. You can type in a dot in the prompted box to extract directly to public_html.
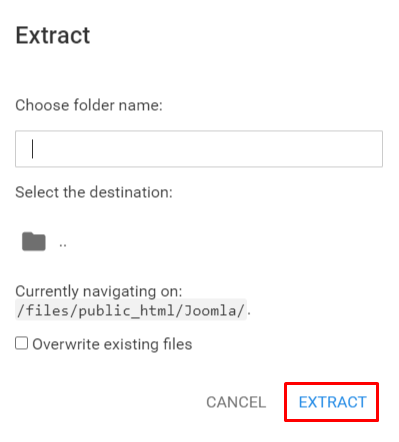
Since the script has many files, this operation can take a few extra minutes to complete.
Using an FTP client
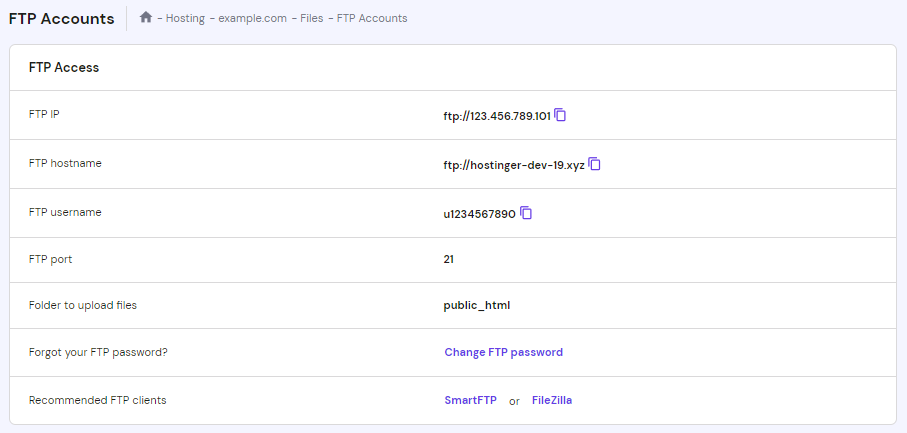
Alternatively, you may do it with an FTP client. To use it, you’ll need your Host IP, FTP username, password, and port. You can find them via Files → FTP Accounts in your control panel.
Configure your FileZilla FTP client and click the Quickconnect button. Ideally, you should extract the contents on your computer first, as FileZilla does not have a feature to do it. Then, drag and drop the files from your local storage to the public_html directory as shown below:
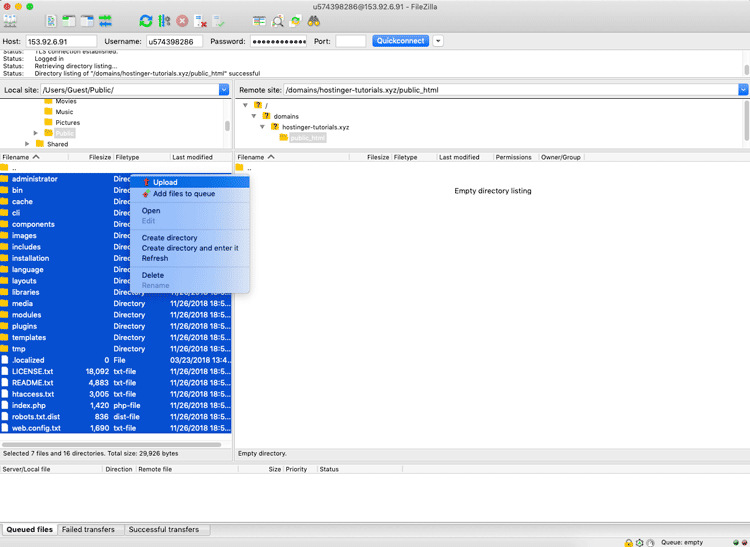
Since there are many separate files, this may take from 10 to 15 minutes to complete.
4. Make sure Joomla files are in the root directory
In order for Joomla to work via YourDomain.com, all the files must be placed in public_html. In case you did not type in the dot while extracting or uploaded the whole directory, an extra folder will be present. You’ll need to access it and move everything to public_html instead.
If you used our File Manager, you’ll need to:
- Enter the additional directory.
- Select all the files.
- Right-click and select the Move function.
- Specify the destination as /public_html.
- Click Move once more to proceed.

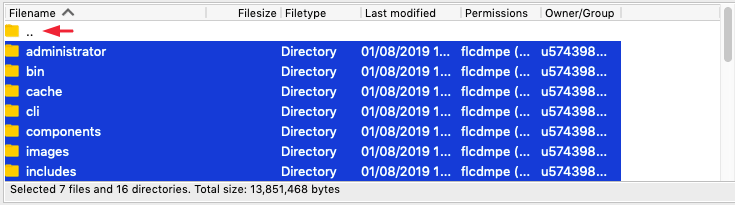
If you used a FileZilla FTP client, you should:
- Enter the additional folder.
- Select all the files within it.
- Drag them one directory up, represented by a folder with two dots.
- Wait for the process to finish.
5. Run the Joomla setup
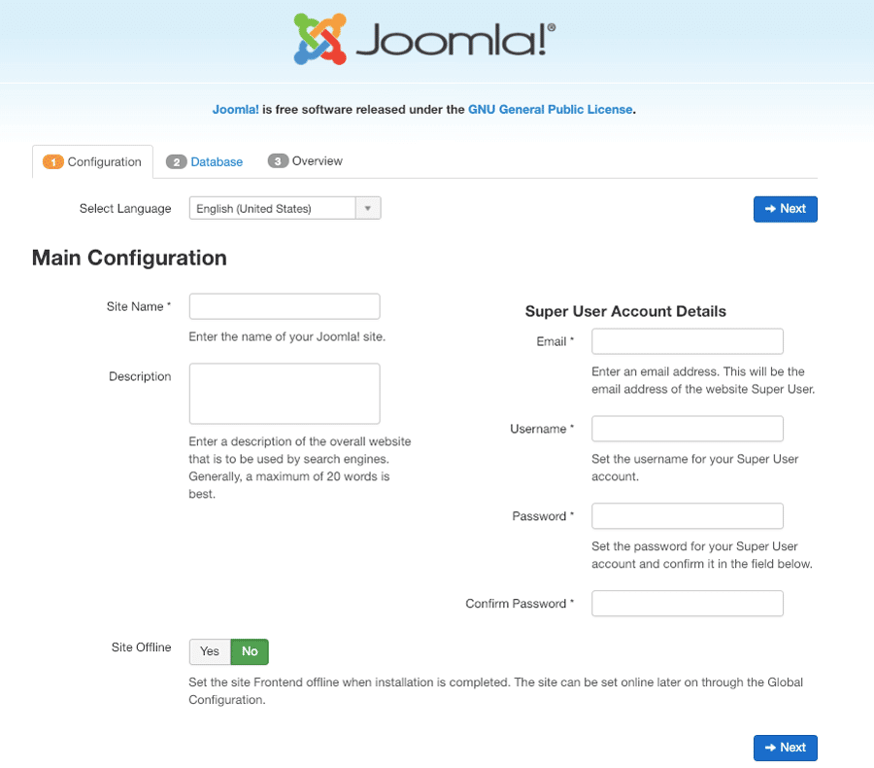
At this point, you can begin the Joomla installation. Start by visiting your domain through any browser and make sure to have your MySQL host, user, database, and password values nearby.
Firstly, you’ll need to enter your Joomla site name, description, and set up an admin user.
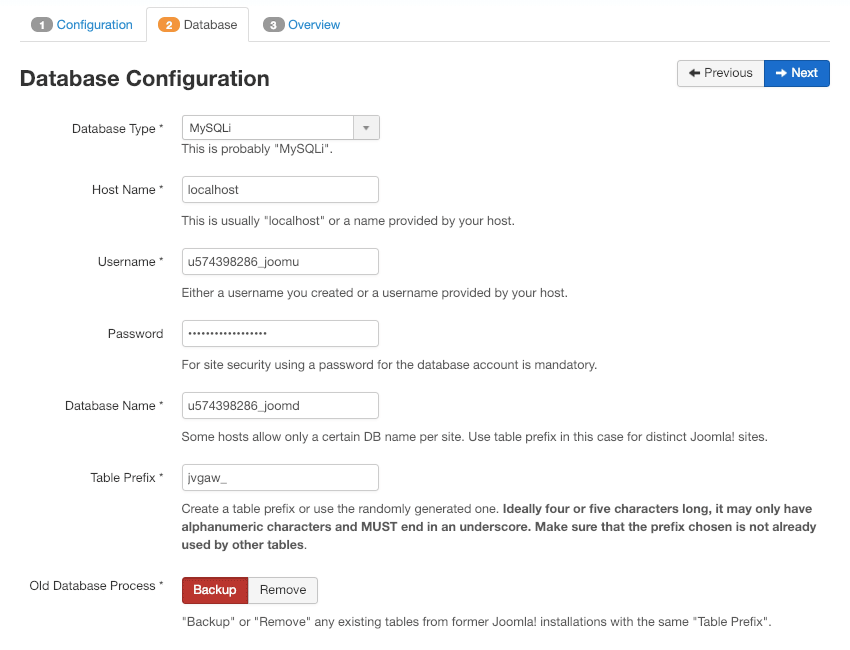
Next, you’ll need to fill in the MySQL database details, which we retrieved in step 1. In most cases, the hostname is localhost, but this can vary depending on your provider.
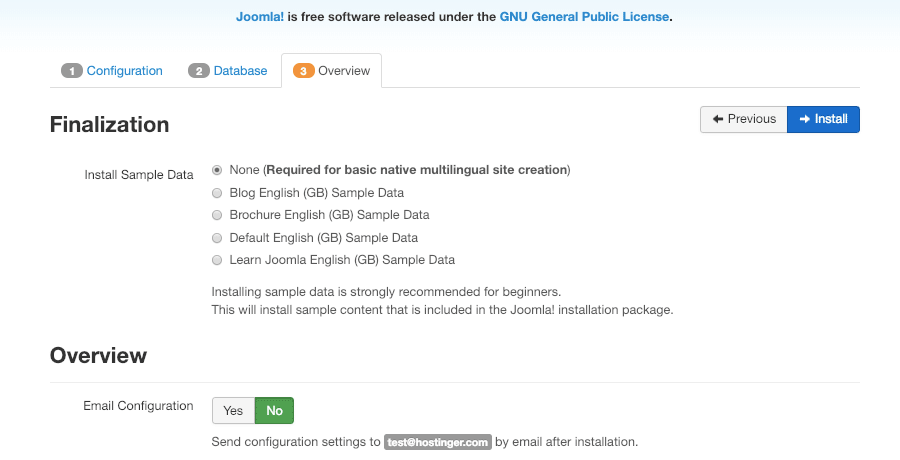
In the last step, you’ll need to review your details and choose additional modules if needed.
That’s it! You’ve successfully installed Joomla CMS on your web hosting account. To start building your site, go to the administrative area located at YourDomain.com/administrator.
Installing Joomla with an auto-installer
Alternatively, Hostinger users can use the Auto Installer feature to set up Joomla in less than a few minutes. You’ll only need to specify a few details, and the system will do the rest!
1. Access the auto-installer
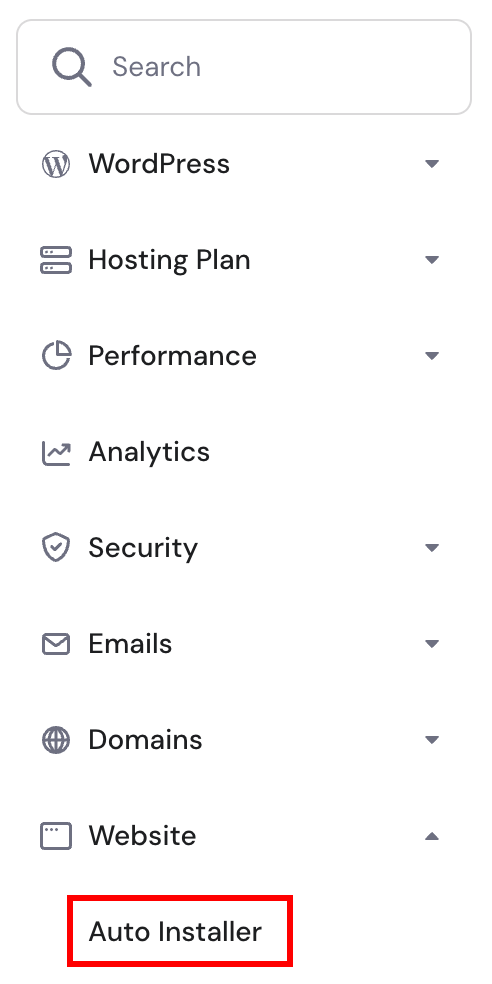
Open up your hPanel dashboard, go to Websites → Dashboard on the website where you wish to install Joomla, then click on Website → Auto Installer on the left side bar.
2. Locate Joomla CMS
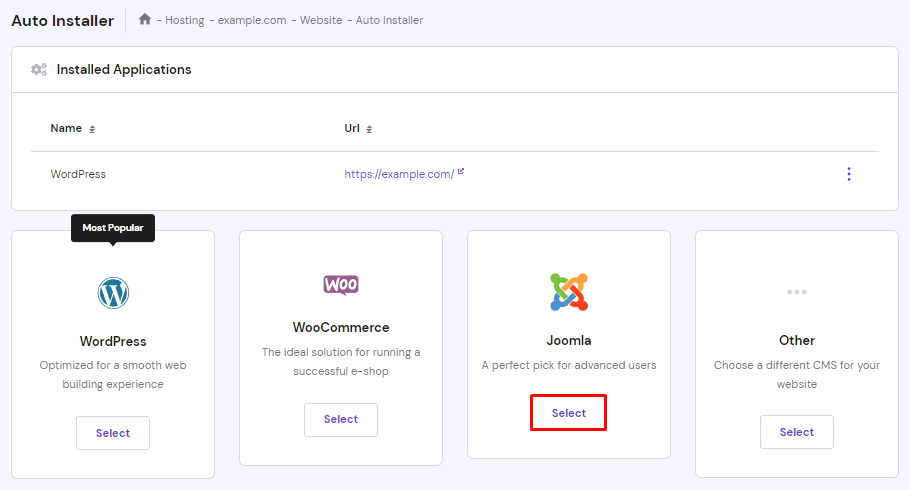
You should see a list of the most popular scripts first. Select Joomla from the list to proceed.
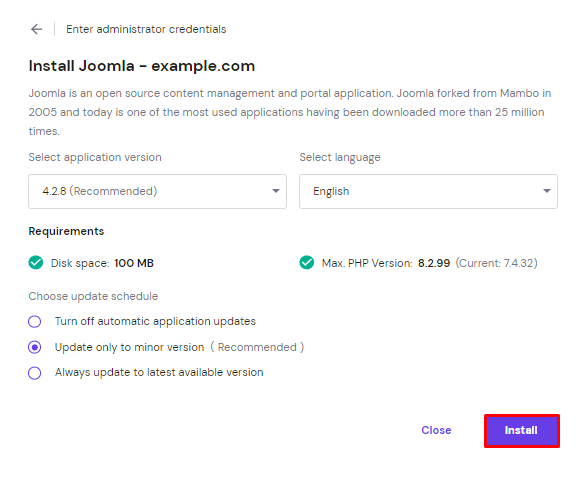
3. Run the initial setup wizard
Fill in the basic configuration, such as the installation URL and language. Also, make sure to write down the admin email, username, and password. Then, click the Install button.
That’s all it takes to install Joomla on Hostinger! To start building, go to your Joomla dashboard at YourDomain.com/administrator and use the newly created admin credentials to log in.
Troubleshooting Common Joomla Installation Errors
Sometimes, you can run into errors if some details are entered incorrectly. Here is a short list of the most frequent cases and short explanations of how to fix them:
Error – Confirm that you are the owner of this website

This issue can occur if you enter the wrong details multiple times. To fix it, navigate to the installation folder (public_html) and remove the automatically generated file.
Error – Could not connect to the database

The message signals that your MySQL database, user, or password are incorrect. Double check if they match the values that you created in step 1, or try to reset your password.
Error – MySQL database names and table names may not begin or end with spaces

This can happen if you put an accidental space at the beginning or the end of your database configuration. Double check it and make sure to remove any additional spaces that you find.

Installing Joomla on VPS
Hostinger users who use VPS hosting can also benefit from the operating system template on hPanel. Installing Joomla using the OpenLiteSpeed Joomla One-Click app is faster and more convenient.
This feature will automatically install OpenLiteSpeed, Joomla!, and any dependencies. It also automates initial setup for components like PHP OPCache to reduce the time it takes to optimize a web server.
Additionally, this Joomla, OpenLiteSpeed, and LSCache combo image tends to be much faster than a regular Joomla image.
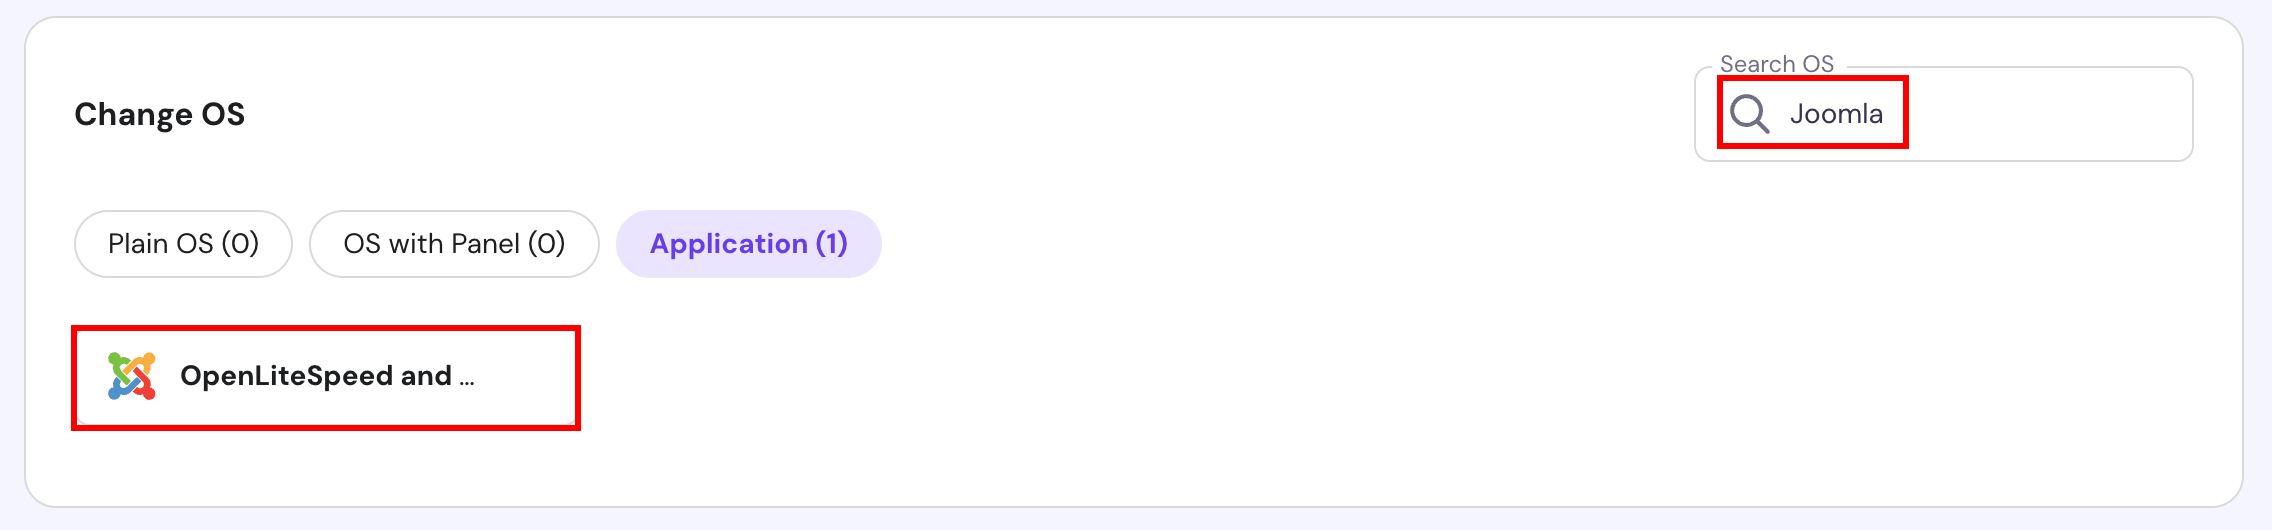
To use this feature, open hPanel, then click on VPS → Manage on your chosen server. Then, head over to OS & Panel → Operating System on the left side bar.
You will find the Change OS section here, where you can look for the OpenLiteSpeed and Joomla template using the Search OS input. Then, click on it and select Change OS.
After that, wait until the process is finished. If you’re changing from an older operating system, be sure to back up your files before installing a new one.

Final word
By finishing this guide, you’ve learned two different ways of setting up Joomla on your web hosting account. You are also able to identify and troubleshoot the most common Joomla installation errors. For a more in-depth approach, consider checking our complete Joomla tutorial.
All of the tutorial content on this website is subject to Hostinger's rigorous editorial standards and values.

Domantas leads the content and SEO teams forward with fresh ideas and out of the box approaches. Armed with extensive SEO and marketing knowledge, he aims to spread the word of Hostinger to every corner of the world. During his free time, Domantas likes to hone his web development skills and travel to exotic places.