How to customize WordPress login page: 4 easy methods + best custom login page plugins
Jun 21, 2024
/
Aris S.
/
11 min Read
When building a membership WordPress website, consider customizing the visitor login page. Even if the default page is sufficient, customizing it can benefit your site.
Personalizing the default WordPress login page design improves the user experience and strengthens branding. Moreover, you can add extra security features to help prevent cyber criminals from attacking your site.
This article will cover four easy methods to customize your WordPress login page and share the best plugins for it. We will also explain the most effective ways to secure your site’s login page.
Download all-in-one WordPress cheat sheet
How to Create a Custom WordPress Login Page (4 Methods)
In this section, we’ll go over four methods to customize your WordPress login page. You may use whichever method is most suitable for your needs.
How to Customize the WordPress Login Page with a Free Plugin
The simplest way to customize your WordPress login page is to use a plugin. Installing a plugin is easy, and this method lets you edit the login page directly via the WordPress dashboard.
There are many custom login page WordPress plugins with varying features and personalization options. They also come at different prices, with some available for free.
For this tutorial, we will use the most popular WordPress login page customization plugin, LoginPress. It lets you edit various areas of your login screen, such as:
- Login logo. Replace the default WordPress logo with your own branding. You can also change the size, padding, URL, and position.
- Background. Add a custom color or replace the default background with an image. Alternatively, insert a video to enable an animated background.
- Welcome and error messages. Write a message to display when users land on your site or encounter an error. You can create multiple error messages for different scenarios.
- Form. Change your forget password and login forms’ appearance. You can customize the color, size, and padding of the username and password field labels.
- Footer. Include elements like navigation and reset password links in your custom login page footer.
In addition to visual customization, this plugin has features that improve your login page’s security, like reCAPTCHA.
To demonstrate, we will use LoginPress to change the logo on the admin login page. After you log in to the WordPress dashboard, follow these steps:
- Download and install the plugin.
- Navigate to the WordPress sidebar → LoginPress → Customizer.
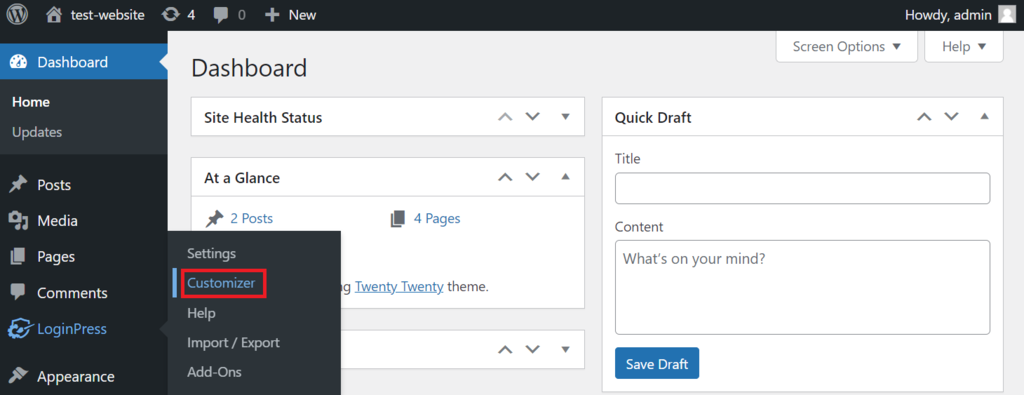
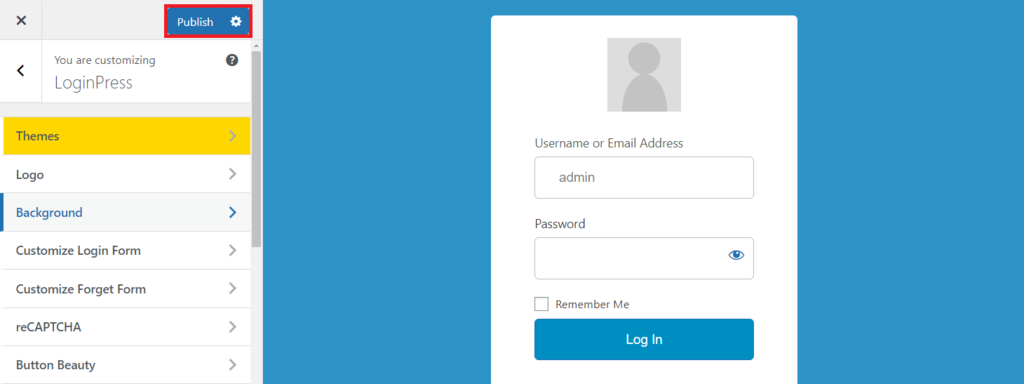
- On the Customizer screen, click logo → Select image.
- In the Upload files tab, hit Select files.
- Pick a new image and click Open.
- Enter the required information, like the caption and alt text, then click Choose image.
- Click Publish to apply the changes.
For non-visual customization, go to LoginPress → Settings. Here, you can enable several features, reset the plugin’s settings to default, and change the required login credentials.
How to Customize the WordPress Login Page Using WPForms
The WPForms plugin lets you create any custom forms for your site. While the plugin itself is free, the login page customization feature is only available with the premium User Registration add-on.
To unlock this add-on, you must purchase the $199.50/year Pro plan. As such, we recommend this method for those who already have the premium WPForms plan.
In addition to custom login functionality, WPForms also comes with other form templates and features. Here are some customizations you can do:
- Custom fields. WPForms has different field types for your login page, like a drop-down menu, multiple choices, and checkboxes. You can also change the label, description, and size.
- Security features. The WPForms login page add-on comes with anti-spam protection and reCAPTCHA features. They help prevent bots from passing your login screen.
- Custom confirmations. Apply different confirmation methods after a user logs in. For instance, show a custom message or redirect them to a specific URL.
This plugin doesn’t offer comprehensive visual customization features. While you can still add your own logo, you can’t change the login form’s background without CSS code.
Before customizing your WordPress login page, you must first activate the required extension. To do this, open your WP admin dashboard and follow these steps:
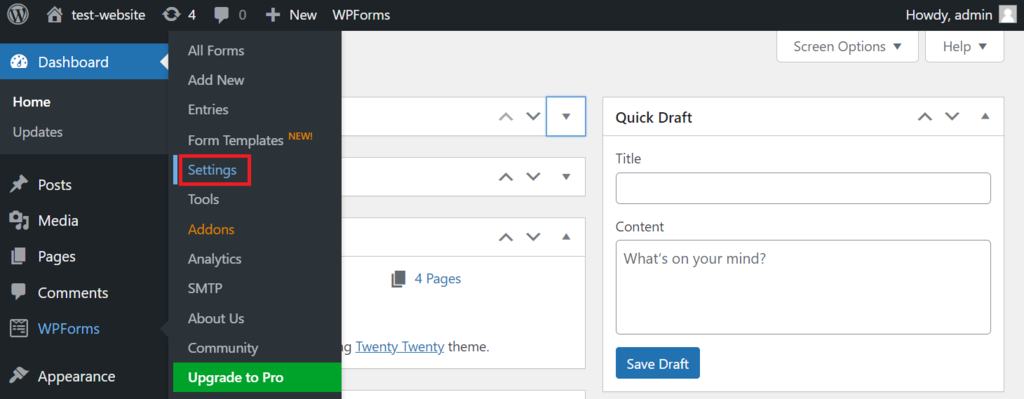
- Go to the sidebar menu → WPForms → Settings.
- Under the General tab, find the License Key field under the License category.
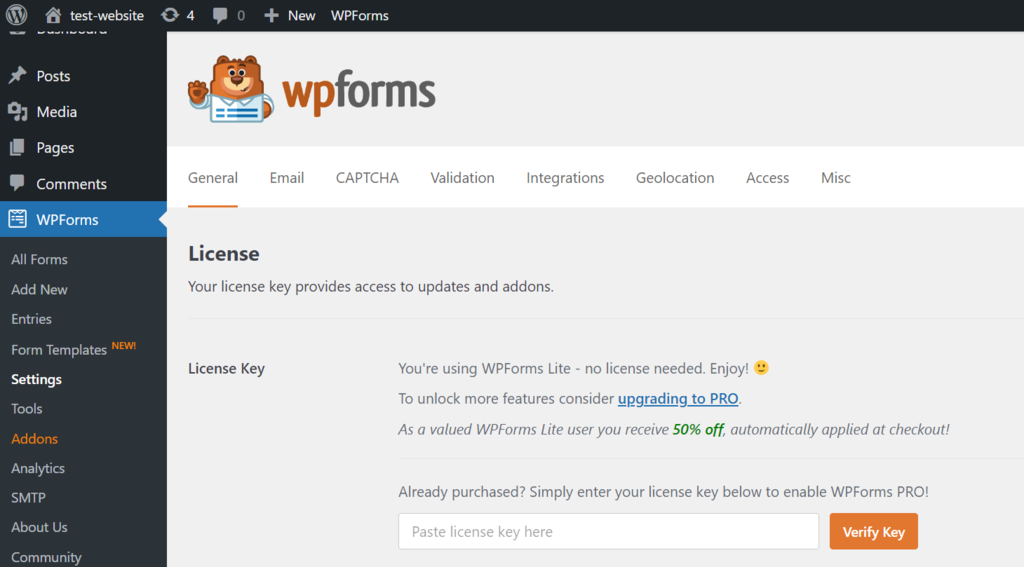
- Paste your license key and click Verify Key.
- Go to Addons, then search User Registration Addon → Install Addon.
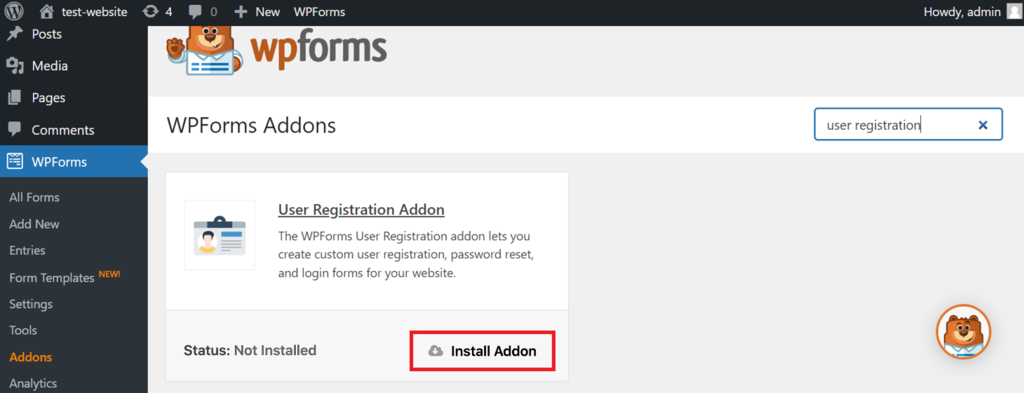
- After the installation process is finished, click Activate.
Once activated, create your custom login form using the provided template. In this tutorial, we will also show you how to enable the forgot password button and redirection:
- Go to WPForms → Add New.
- Enter your form name in the designated field.

- Find the User Login Form template and click Use Template. It will automatically add the username and password fields to your form.
- Click the Password field.
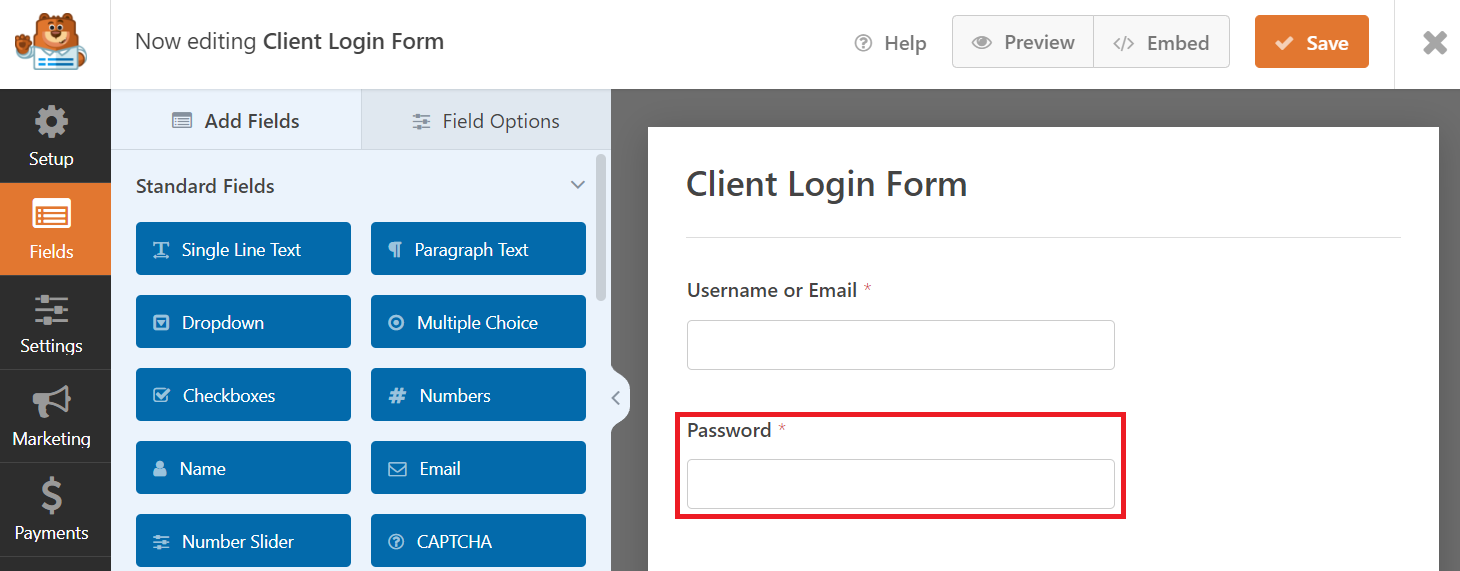
- In the Field Options tab, enter the following description:
Forgotten your password? <a href={url_lost_password} >Click here</a> to reset it.- Navigate to the WPForms sidebar → Settings → Confirmations.
- From the Confirmation Type drop-down menu, select Go to URL (Redirect).
- Enter the Confirmation Redirect URL.
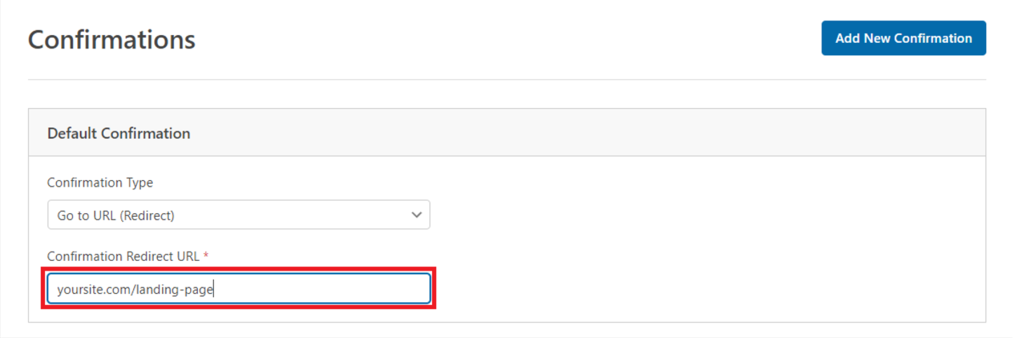
- Click Save to apply the changes.
Important! Note that the password reset link only works if you have a user registration form made with WPForms.
WPForms lets you embed your custom login form anywhere on the site using a reusable block or shortcode. This means you can also create multiple login pages for different user roles.
For example, we will add the form to a new client login page using a custom block:
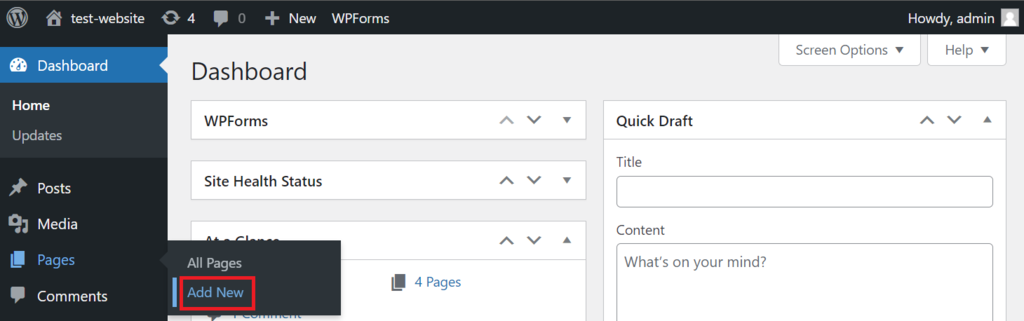
- Navigate to the WordPress sidebar → Pages → Add New.
- On the editor screen, enter the page’s title.
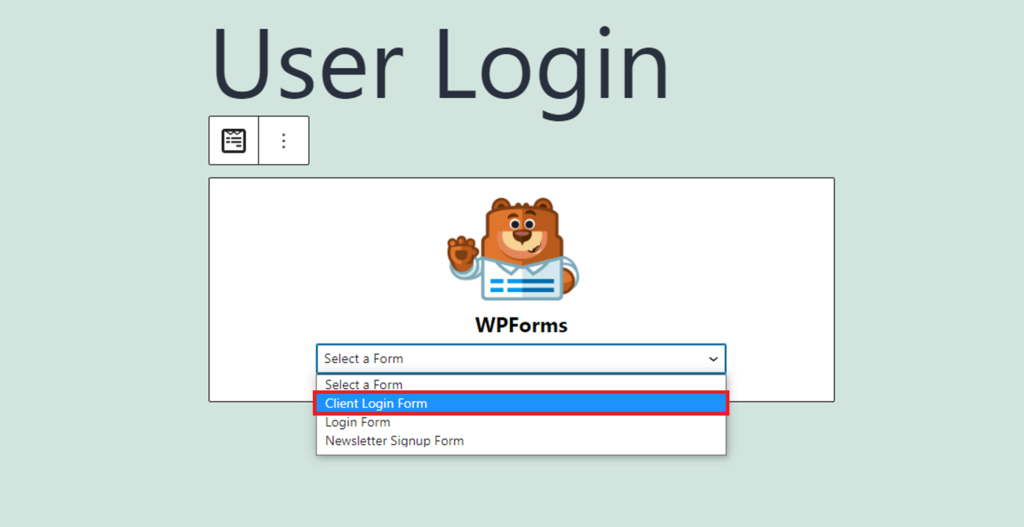
- Click the plus (+) icon to add a new block and select WPForms.

- From the drop-down menu, choose your user login form.
- Click the Publish button to make the form live.
How to Customize the WordPress Login Page with a Page Builder
By default, your login screen inherits the active theme’s appearance. If you want to personalize it or build it from scratch, use a page builder plugin like SeedProd.
Its drag-and-drop builder makes the plugin suitable for WordPress beginners. You can add content to your custom WordPress login page and change every visual element without coding.
The free version of SeedProd doesn’t come with the Login Form. However, it is included in the premium plans, which start at $31.60/year.
Here’s how to use SeedProd to create a custom WordPress login page:
- Install and activate the premium version of SeedProd.
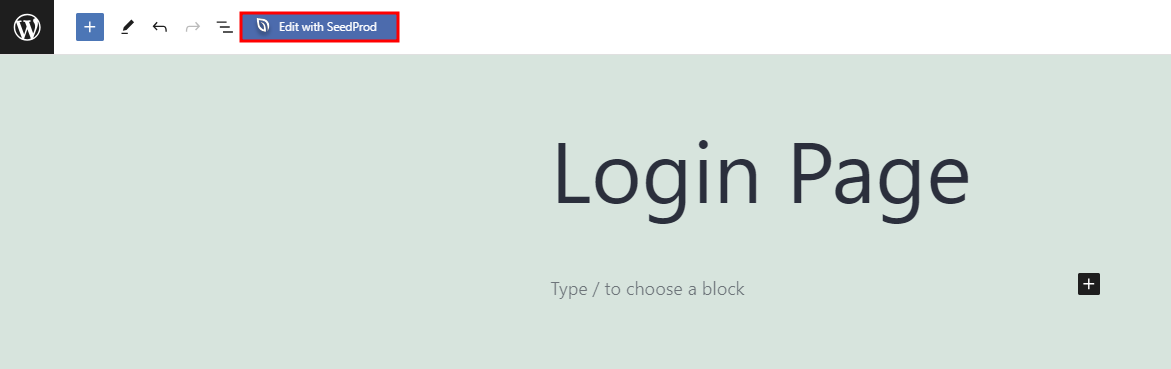
- On the WordPress sidebar, click Pages → Add New.
- Enter the new page’s name and click Edit with SeedProd.
- Select the Login filter and pick a template.

- Drag and drop the Login Form widget from the Blocks tab. Configure your custom WordPress login form’s appearance and functionality.
- Click Publish.
Alternatively, navigate to SeedProd → Landing Pages and select Set up a Login Page. Activate the page once you’re done customizing it.
How to Customize the WordPress Login Page Using Custom CSS
If you prefer not to use plugins, write custom CSS code to customize the default WordPress login page. However, we don’t recommend this method if you are unfamiliar with coding.
To do this, you must add custom code to your theme’s functions.php file. Before proceeding, create a child theme to ensure the code remains after an update.
Important! Create a backup of your theme’s functions.php file before making any changes. This lets you revert any changes quickly in case of errors.
You may style every HTML element of your WordPress login screen with custom CSS. If you want to write your own code, read the WordPress Codex page for more details.
In this tutorial, we will insert CSS code to change the login page’s default WordPress logo:
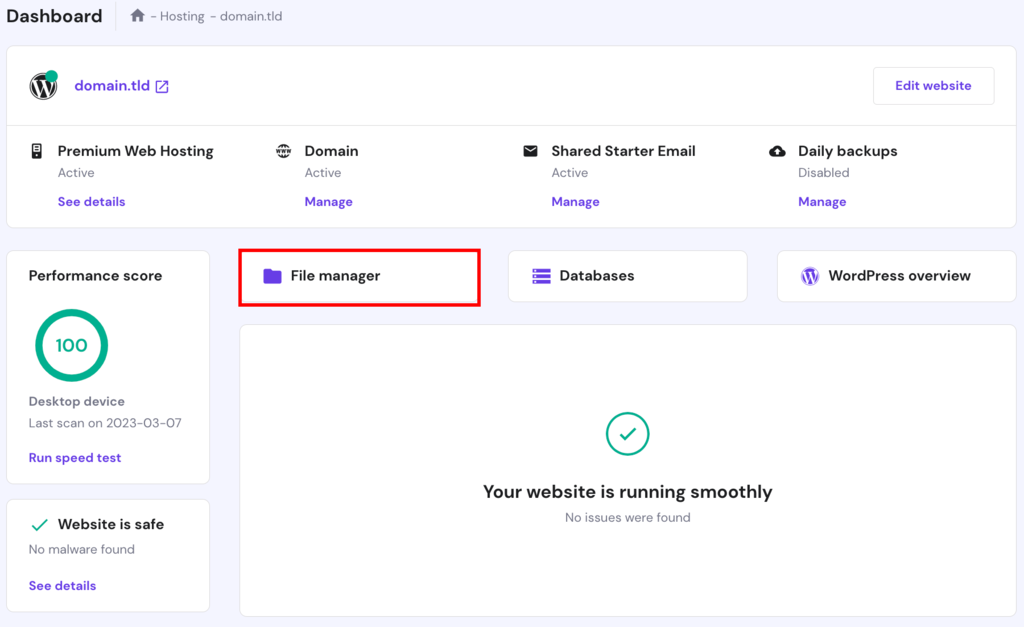
- Access your WordPress site’s folder using an FTP client. If you use Hostinger’s hosting services, go to hPanel → Dashboard → File Manager.
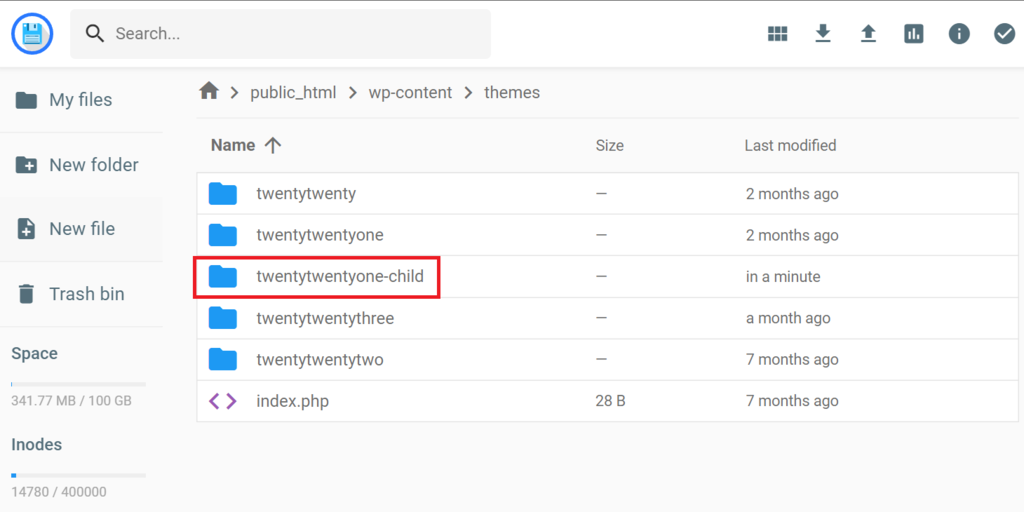
- Navigate to public_html → wp-content, then access the themes folder.
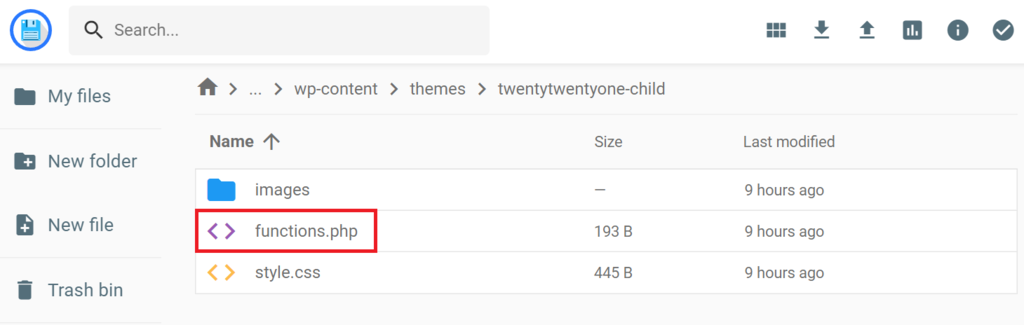
- Open your currently active WordPress theme. In our case, it is twentytwentyone-child.
- Create a folder for the logo by clicking the New Folder icon on the left side of your screen. Name it images and click Create.
- Move your logo to the folder.
- Return to the child theme folder and double-click the functions.php file.
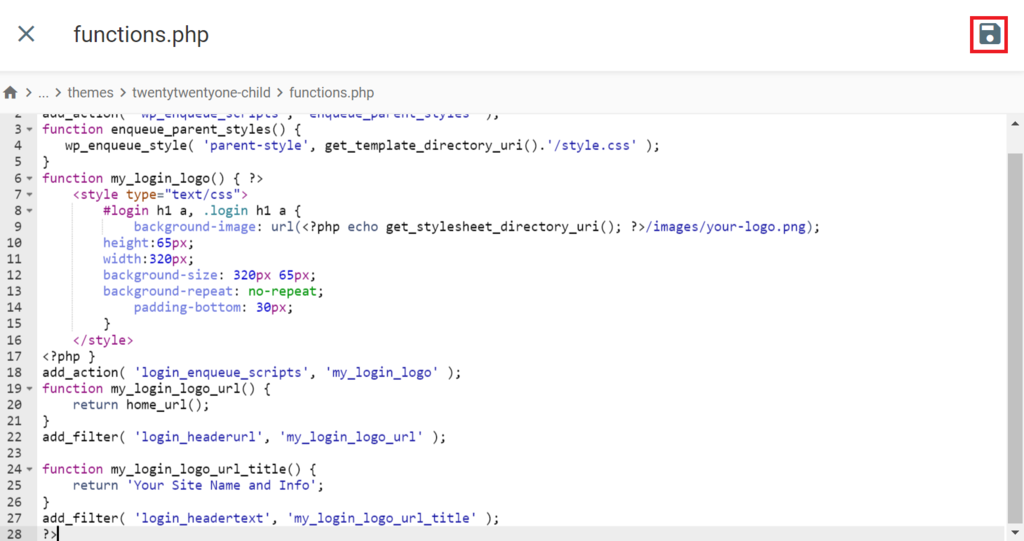
- Copy and paste the following code snippet before ?>. Replace your-logo.png with your image’s file name:
function my_login_logo() { ?>
    <style type="text/css">
        #login h1 a, .login h1 a {
            background-image: url(<?php echo get_stylesheet_directory_uri(); ?>/images/your-logo.png);
		height:65px;
		width:320px;
		background-size: 320px 65px;
		background-repeat: no-repeat;
        	padding-bottom: 30px;
        }
    </style>
<?php }
add_action( 'login_enqueue_scripts', 'my_login_logo' );- Underneath the snippet in the previous step, add the following code so the logo link points to your site:
function my_login_logo_url() {
    return home_url();
}
add_filter( 'login_headerurl', 'my_login_logo_url' );

function my_login_logo_url_title() {
    return 'Your Site Name and Info';
}
add_filter( 'login_headertext', 'my_login_logo_url_title' );- Click the disk icon to save the changes.
We recommend creating a custom login style sheet for more advanced customization. It lets you organize your WordPress login page styles in one file and keeps the functions.php code clean. Here’s how to do it:
- Access your active child theme’s directory.
- Create a new file and name it style-login.css. This is where you will add custom CSS code to style your WordPress login page.
- Locate and edit the child theme’s functions.php file.
- Add the code snippet below. This will load the newly created CSS file and apply the styles to your WordPress login page:
function my_login_stylesheet() {
   		wp_enqueue_style( 'custom-login',
get_stylesheet_directory_uri() . '/style-login.css' );
wp_enqueue_script( 'custom-login', get_stylesheet_directory_uri() . '/style-login.js' );
}
add_action( 'login_enqueue_scripts', 'my_login_stylesheet' );- Click the disk icon to finish editing.
Best Custom Login Page Plugins for WordPress
In this section, we will list the best custom login page plugins to help you select one that suits your needs.
1. LoginPress
Plugin stats:
- Downloads: 200,000+
- Ratings: 4.8/5
- Price: freemium (starts at $49/year)
LoginPress is the ideal plugin if you need plenty of visual customization options. It also has additional features that improve the functionality of your WordPress login page.
All the visual customization options are free. However, features like reCAPTCHA, social login, widgets, and custom redirects are only available in the premium version.
The best part about this plugin is its user-friendly editor screen. Its interface is similar to the WordPress editor and lets you preview any changes in real time.
It also enables you to import and export login form settings to speed up the customization process. This plugin is suitable for beginners due to its simplicity and intuitive tools.
2. Forminator
Plugin stats:
- Downloads: 400,000+
- Ratings: 4.8/5
- Price: freemium (starts at $7.50/month)
Forminator is the best WPForms alternative for creating a custom WordPress login page. It offers some of WPForms’ premium features for free, including the custom login form.
It also provides a customizable template to simplify the login form creation process. In addition to appearance, you can change the form’s behavior and integrate it with various applications.
Like WPForms, Forminator lets you insert the login form with a custom block or shortcode via the page editor. It also provides additional security for your WordPress site with reCAPTCHA and its Akismet and Honeypot spam protection features.
Forminator Pro offers many additional features for your custom WordPress login page, such as dynamic pre-filling and WordPress Multisite support.
3. Nextend Social Login and Register
Plugin stats:
- Downloads: 300,000+
- Ratings: 4.9/5
- Price: freemium (starts at $49 for one site)
For convenience, many users prefer alternative login methods, such as using their social media accounts. However, this solution is usually only available in premium plugins.
The Nextend Social Login and Register plugin lets you enable this feature for free. It supports integration with over 15 third-party platforms, but only Facebook, Twitter, and Google are available in the free version.
The plugin lets you add multiple social login methods on your forms to give visitors more options. In addition, you can quickly customize your login page appearance with the included preset.
Unlike other custom login WordPress plugins, Nextend doesn’t offer comprehensive customization options. We recommend this plugin only if you need its free social login feature.
4. Ultimate Member

Plugin stats:
- Downloads: 200,000+
- Ratings: 4.4/5
- Price: freemium (premium add-on subscription starts at $249/year)
Ultimate Member is an all-in-one custom form plugin for a membership WordPress site. By default, it comes with various form templates for lost password recovery, login, or registration.
This plugin is ideal for creating a simple and functional custom WordPress login page. However, if you want extensive visual customization, you may need to use other plugins.
Ultimate Member offers free and premium extensions to expand its functionality, such as online users, verified users, and user reviews. Even if you only need it to create a custom login page, these add-ons may be useful.
5. RegistrationMagic

- Downloads: 10,000+
- Ratings: 4.5/5
- Price: freemium (starts at $89 for one site)
The RegistrationMagic plugin lets you implement a feature-rich login system to your site. It has a dashboard where you can manage your login form easily through a single interface.
This plugin provides a visual graph showing the login success and failure rate over time. Such data helps you identify abnormalities on your login screen, which can indicate technical issues or attempted cyber attacks.
RegistrationMagic also offers comprehensive security features, including reCAPTCHA, IP filters, and two-factor authentication (2FA).
Compared to other plugins, RegistrationMagic doesn’t have many visual customization options. We mainly recommend it if you need robust security and analytic features for your WordPress login page.
6. Branda
- Downloads: 20,000+
- Ratings: 5/5
- Price: freemium (starts at $7.50/month)
Branda lets you perform simple and in-depth customization to your site’s admin login page. This flexibility makes the plugin suitable for both beginners and advanced users.
Beginners can choose the ready-to-use login templates and do simple edits like changing the logo, font size, or background image.
For more advanced users, Branda enables them to create a custom login page from scratch. They can also change the login fields, set up redirects, or add custom CSS code for more advanced customization.
This plugin suits users who prioritize visual customization, as it lacks security and alternative login features. However, its customization menu doesn’t preview the changes you make in real time.
3 Ways to Secure Your WordPress Login Page
Cyber criminals often exploit WordPress’ default login page to access an account with brute force or launch a DDoS attack. Customizing it lets you add an extra layer of security to help protect your site and users’ data.

Set Up Two-Factor Authentication (2FA)
2FA is an additional verification step required to access an account. It helps protect users’ accounts when their passwords and usernames are compromised.
This security feature typically sends a verification link to connected devices via text or email. Another method is to use an application like Google Authenticator to generate a random verification code.
To access a 2FA-protected account, a user must click the verification link or enter the code in addition to inputting the login credentials. It is an important safety measure since hackers can easily guess or obtain login information through phishing, which is a common WordPress security issue.
We recommend enabling 2FA even if your site doesn’t collect sensitive information like credit card numbers. It makes site visitors feel more secure, improving their trust in your website.
To enable 2FA on your WordPress website, use a plugin like Wordfence Security. It also lets users register their devices to your site, allowing them to log in without 2FA for 30 days. Here is how to activate it:
- After installing the plugin, go to Wordfence → Login Security → Two-Factor Authentication.
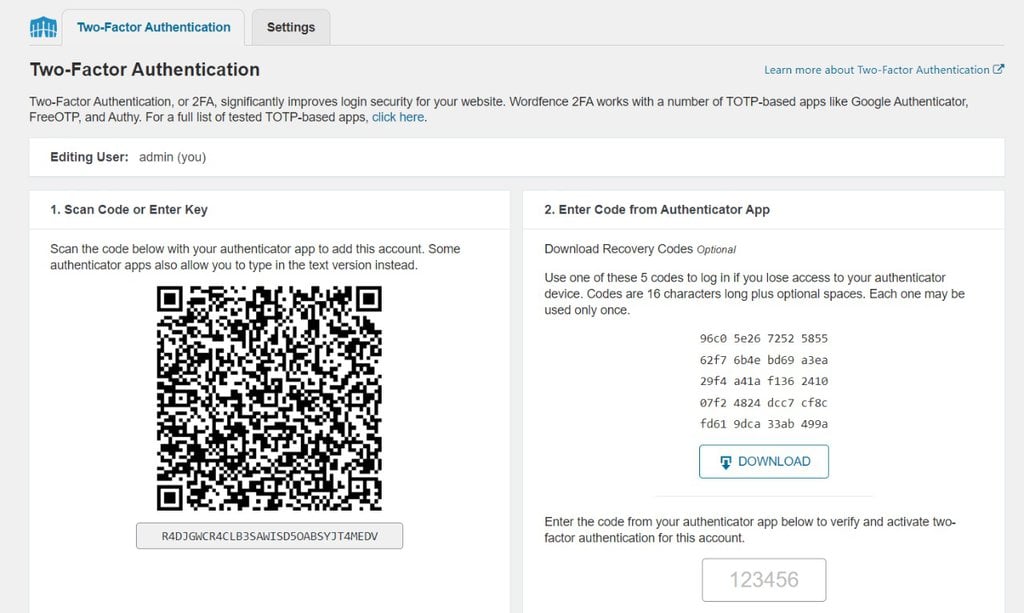
- Scan the QR code with an authenticator app on your mobile device. Alternatively, type out the provided code.
- Enter the number generated on your mobile app into the field under the recovery codes section.
- Click the ACTIVATE button to complete the setup process.
Use reCAPTCHA
Hackers who don’t have login credentials may attempt to guess them using bots. These programs generate possible username and password combinations until they find the right one.
Bots will try thousands of combinations rapidly, resulting in a request spike. If your site can’t handle the requests, it may slow down or become inaccessible.
Enabling reCAPTCHA helps prevent bots from making login attempts. It is a security task used to verify if the login requests come from humans or real users, typically in the form of a simple puzzle.
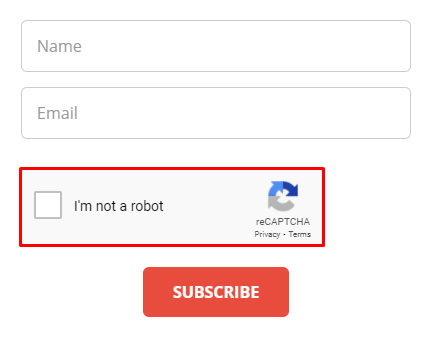
Since bots can’t log in, they can’t verify if the generated credentials are correct. It helps minimize login requests, maintaining your website’s performance and uptime.
Use plugins like LoginPress and WPForms to enable reCAPTCHA on your login screen. For text CAPTCHA, provide audio assistance and use a colorblind-friendly palette to improve usability.
Reduce the Maximum Login Attempts
By default, WordPress doesn’t limit the number of login attempts users can make. It makes WordPress websites with the default login page vulnerable to brute-force attacks.
Limiting the number of login attempts using a plugin helps reduce this risk. When hackers fail to log in, it temporarily locks the account and notifies the site administrator about a potential breach.
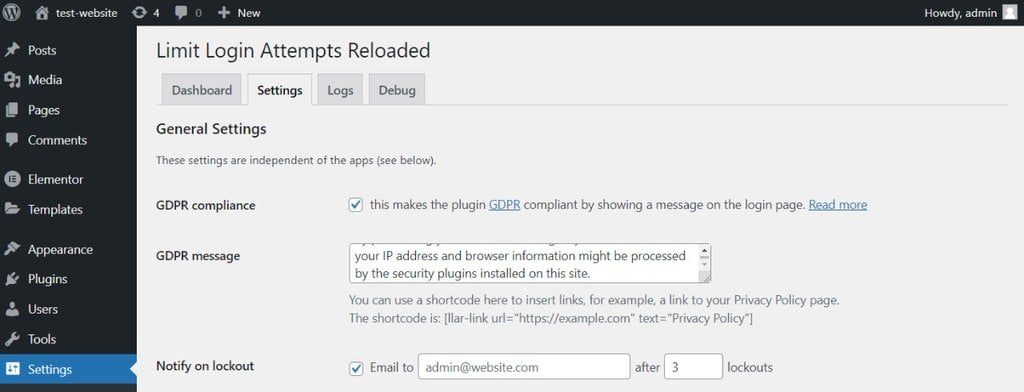
Some WordPress custom login page plugins offer this feature as a premium add-on. Alternatively, you can enable it for free with Limit Login Attempts Reloaded:
- Once you install the plugin, go to the WordPress sidebar → Limit Login Attempts.
- Go to the Settings tab.
- Check the GDPR compliance box and customize the message.
- Click the Notify on lockout box and enter your email address and the maximum number of lockouts.
- Scroll down to the App Settings section.
- On the Lockout settings, enter your desired values in each field.
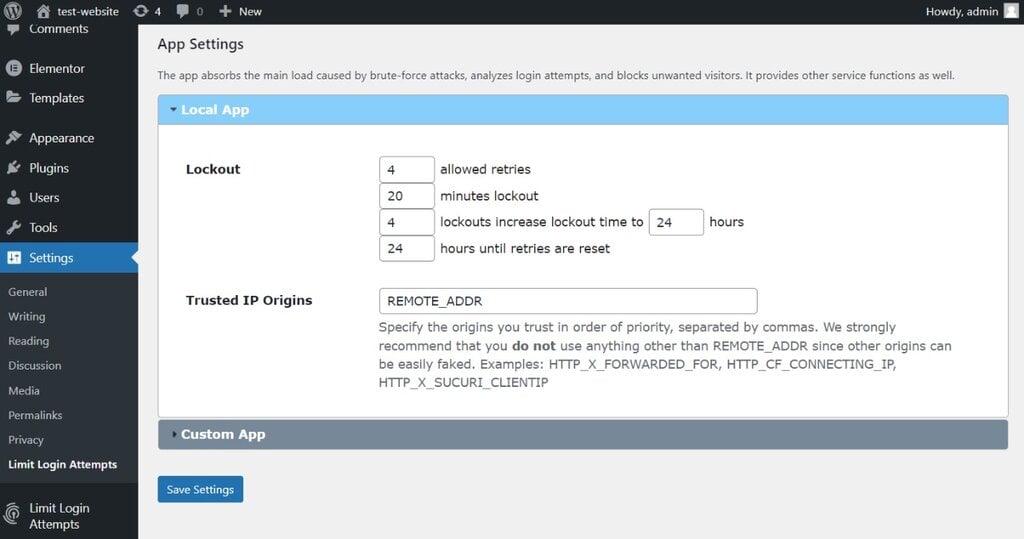
- Click Save Settings to apply the changes.
Conclusion
Customizing your WordPress site’s login page has various benefits. In addition to visual enhancements, you can add features to improve the user experience and website security.
In this article, we have explained four methods to customize your WordPress login page. Here is a short recap:
- Use a custom login page plugin like LoginPress. It is simple and free, which is ideal if you need basic features and customization options like changing the logo and background image.
- Enable WPForms’ User Registration add-on. Add a custom login form anywhere on your website. Since it is a paid solution, use this method if you already have a premium WPForms subscription.
- Utilize a page builder like SeedProd. It lets you create a custom login page from scratch and add advanced features like social media login.
- Add custom CSS code to your WordPress theme’s functions.php file. This method is suitable for users who are familiar with coding and don’t want to install a plugin.
In addition, there are several WordPress custom login page plugins offering different features. We recommend LoginPress if you want to focus on visual customization and Forminator as the best all-rounder freemium plugin.
Remember to apply additional security measures to your login page since cyber criminals may exploit it to launch attacks. The best methods are setting up 2FA, using reCAPTCHA, and limiting the maximum login attempts with a plugin.
All of the tutorial content on this website is subject to Hostinger's rigorous editorial standards and values.

Aris is a Content Writer specializing in Linux and WordPress development. He has a passion for networking, front-end web development, and server administration. By combining his IT and writing experience, Aris creates content that helps people easily understand complex technical topics to start their online journey. Follow him on LinkedIn.


