Node.js tutorial: How to start using Node.js after installation
May 10, 2026
/
Ariffud M.
/
6 min Read
Node.js brings JavaScript to the server side, letting you run scripts, handle requests, and build backend logic from the terminal.
Once you install Node.js on your preferred environment, whether it’s your local computer, a virtual private server (VPS), or a managed hosting service, you can start running scripts, creating servers, and managing packages right away.
Here’s what you’ll do after setting up Node.js:
- Write and run your first Node.js script.
- Read files using built-in modules like fs.
- Build a basic HTTP server from scratch.
- Install and use third-party packages with npm.
- Understand how Node.js handles asynchronous code.
- Choose what to build next, like a REST API or a full-stack app.
What is Node.js
Node.js is a free, open-source, cross-platform JavaScript runtime environment that lets you run JavaScript outside a web browser. It uses Google’s V8 engine to compile code directly into machine code.
Before Node.js launched in 2009, JavaScript stayed inside the browser, handling tasks like button clicks and page updates.
Node.js changed that by bringing JavaScript to the server side, where it can read files, connect to databases, and power backend logic.
Today, developers use Node.js to build REST APIs, real-time apps, command-line tools, and scalable network services. Its architecture handles many simultaneous connections efficiently without creating a separate thread for each one.
How to run Node.js applications
You can run Node.js in three main environments: locally on your computer, on a remote server like a VPS, or through a managed hosting platform. Each option fits a different stage of development and deployment.
How to run Node.js locally for development
Running Node.js locally is the go-to setup for development and testing. You can get started in a few minutes:
- Download the Long Term Support (LTS) version from the official Node.js website.
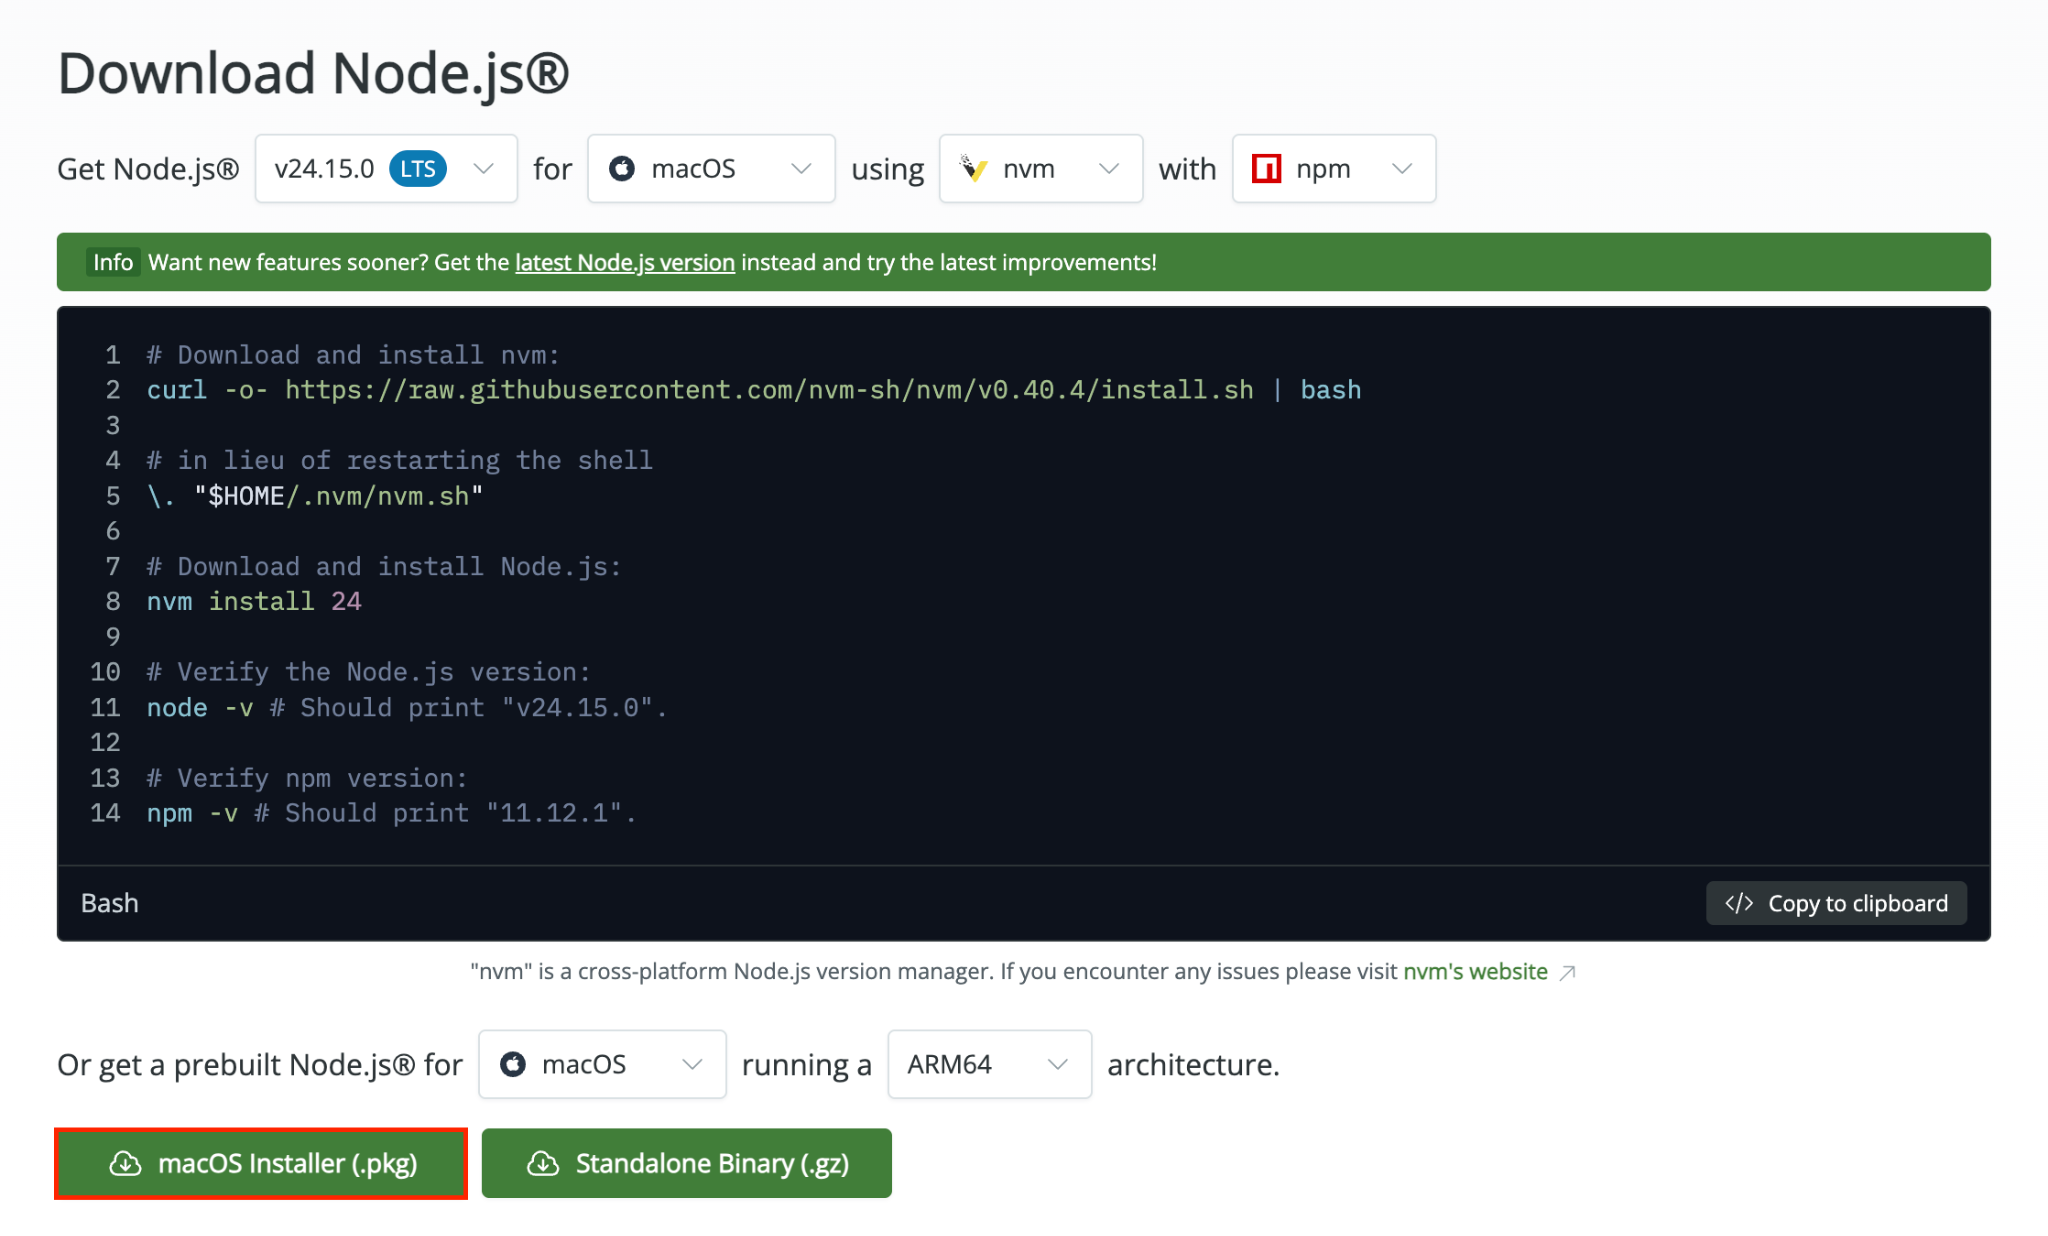
- Install it using the package for your operating system.
- Open a terminal and run node -v to verify the installation. If it returns a version number, Node.js is ready to use.
How to run Node.js on Ubuntu
A VPS gives you a remote server environment where you can deploy and run Node.js apps in production. You connect to it over SSH from your local terminal.
Here’s the general process to install Node.js on Ubuntu:
- Connect to your VPS via SSH.
- Install Node.js using a package manager or a version manager like NVM.
- Run your app with the node command.
How to run Node.js using managed hosting
Managed hosting takes Node.js server configuration off your plate. The hosting provider handles the runtime environment, dependencies, and deployment pipeline for you.
For example, Hostinger’s managed Node.js hosting handles npm builds, environment variables, and automatic vulnerability monitoring.
It also supports other JavaScript frameworks, such as React, Vue.js, Angular, Next.js, Express.js, and NestJS, so you can set it up once and run everything in one place.
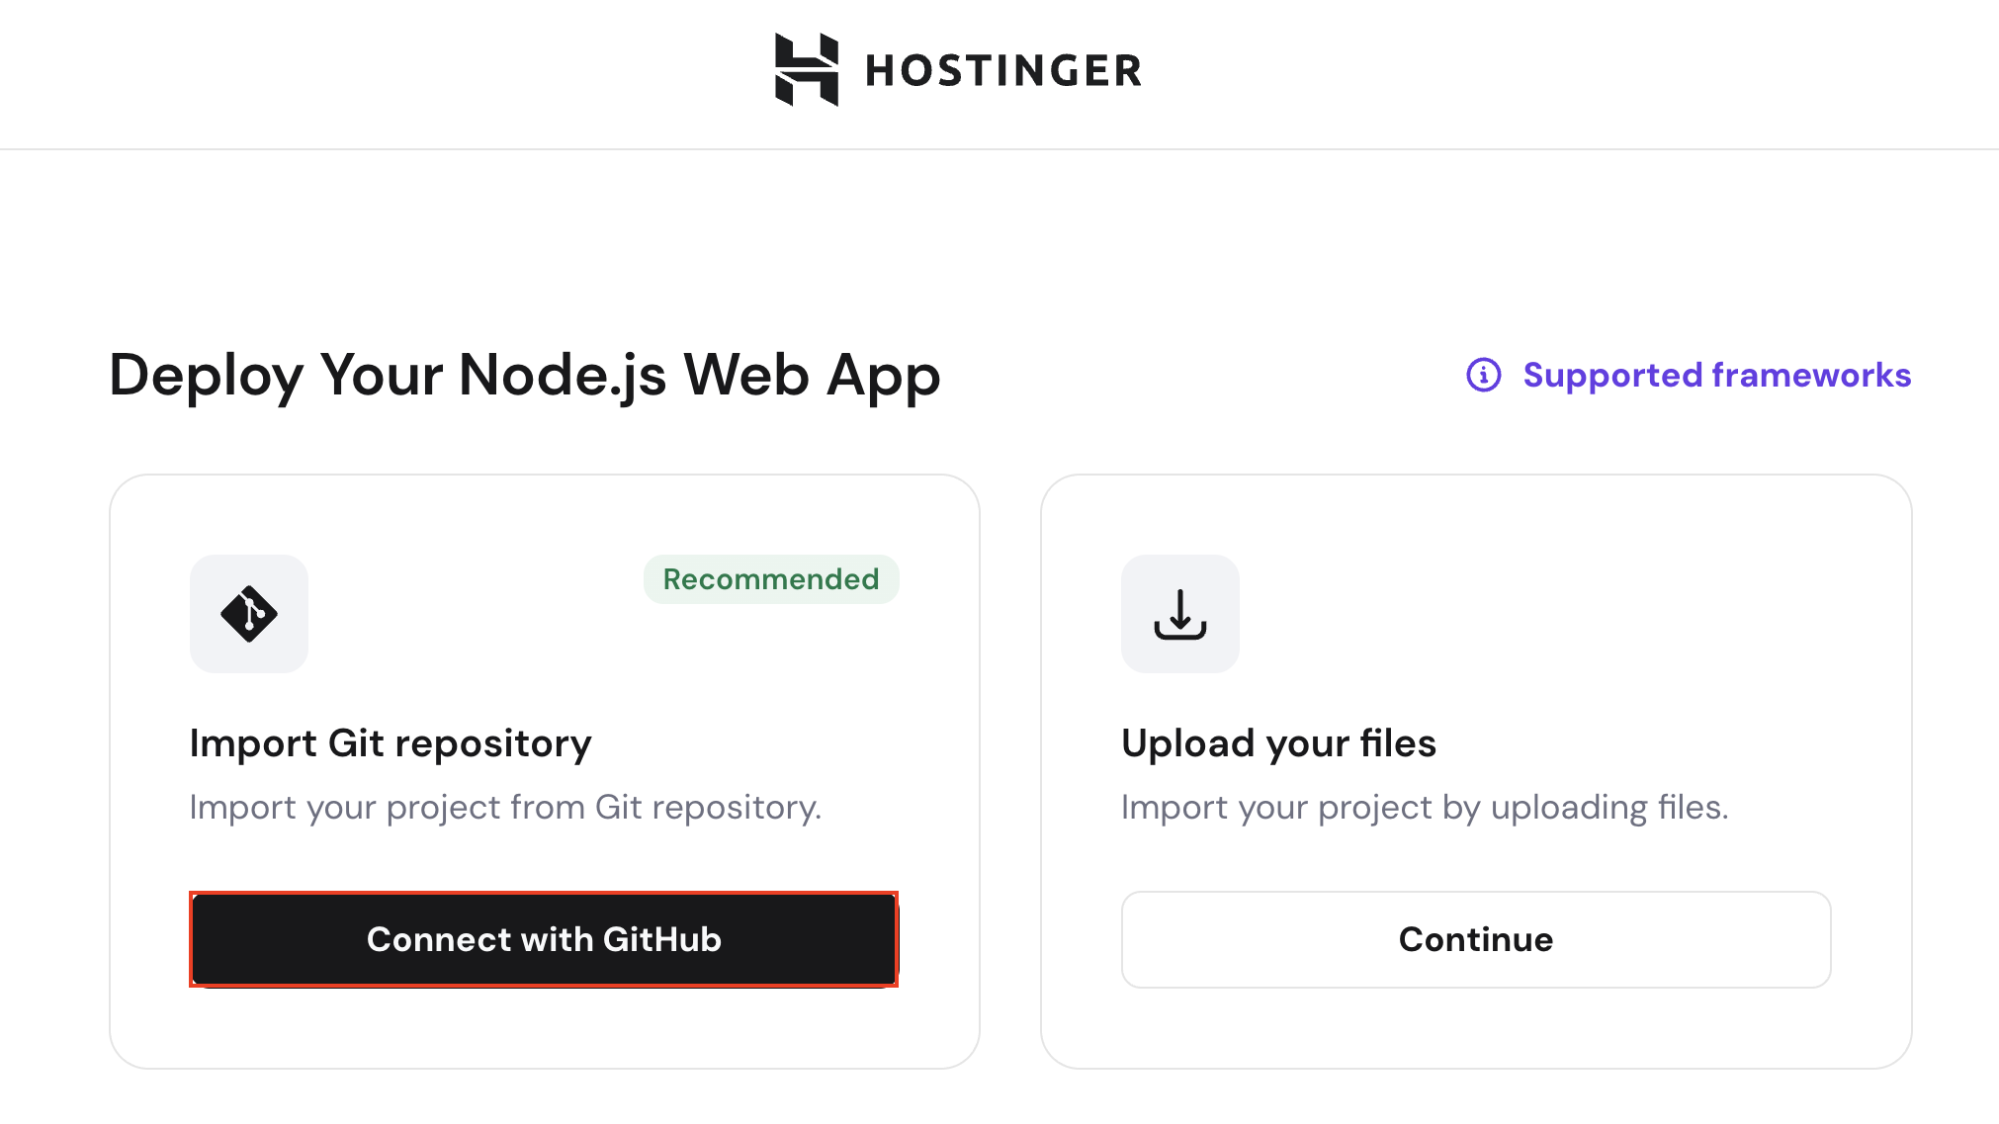
To deploy a Node.js website on Hostinger, follow these steps:
- Purchase a Business or Cloud Startup hosting plan.
- Navigate to Websites → Add Website → Node.js Web App in hPanel.
- Connect a GitHub repository or upload a compressed project file.
- Confirm the auto-detected build settings for your framework.
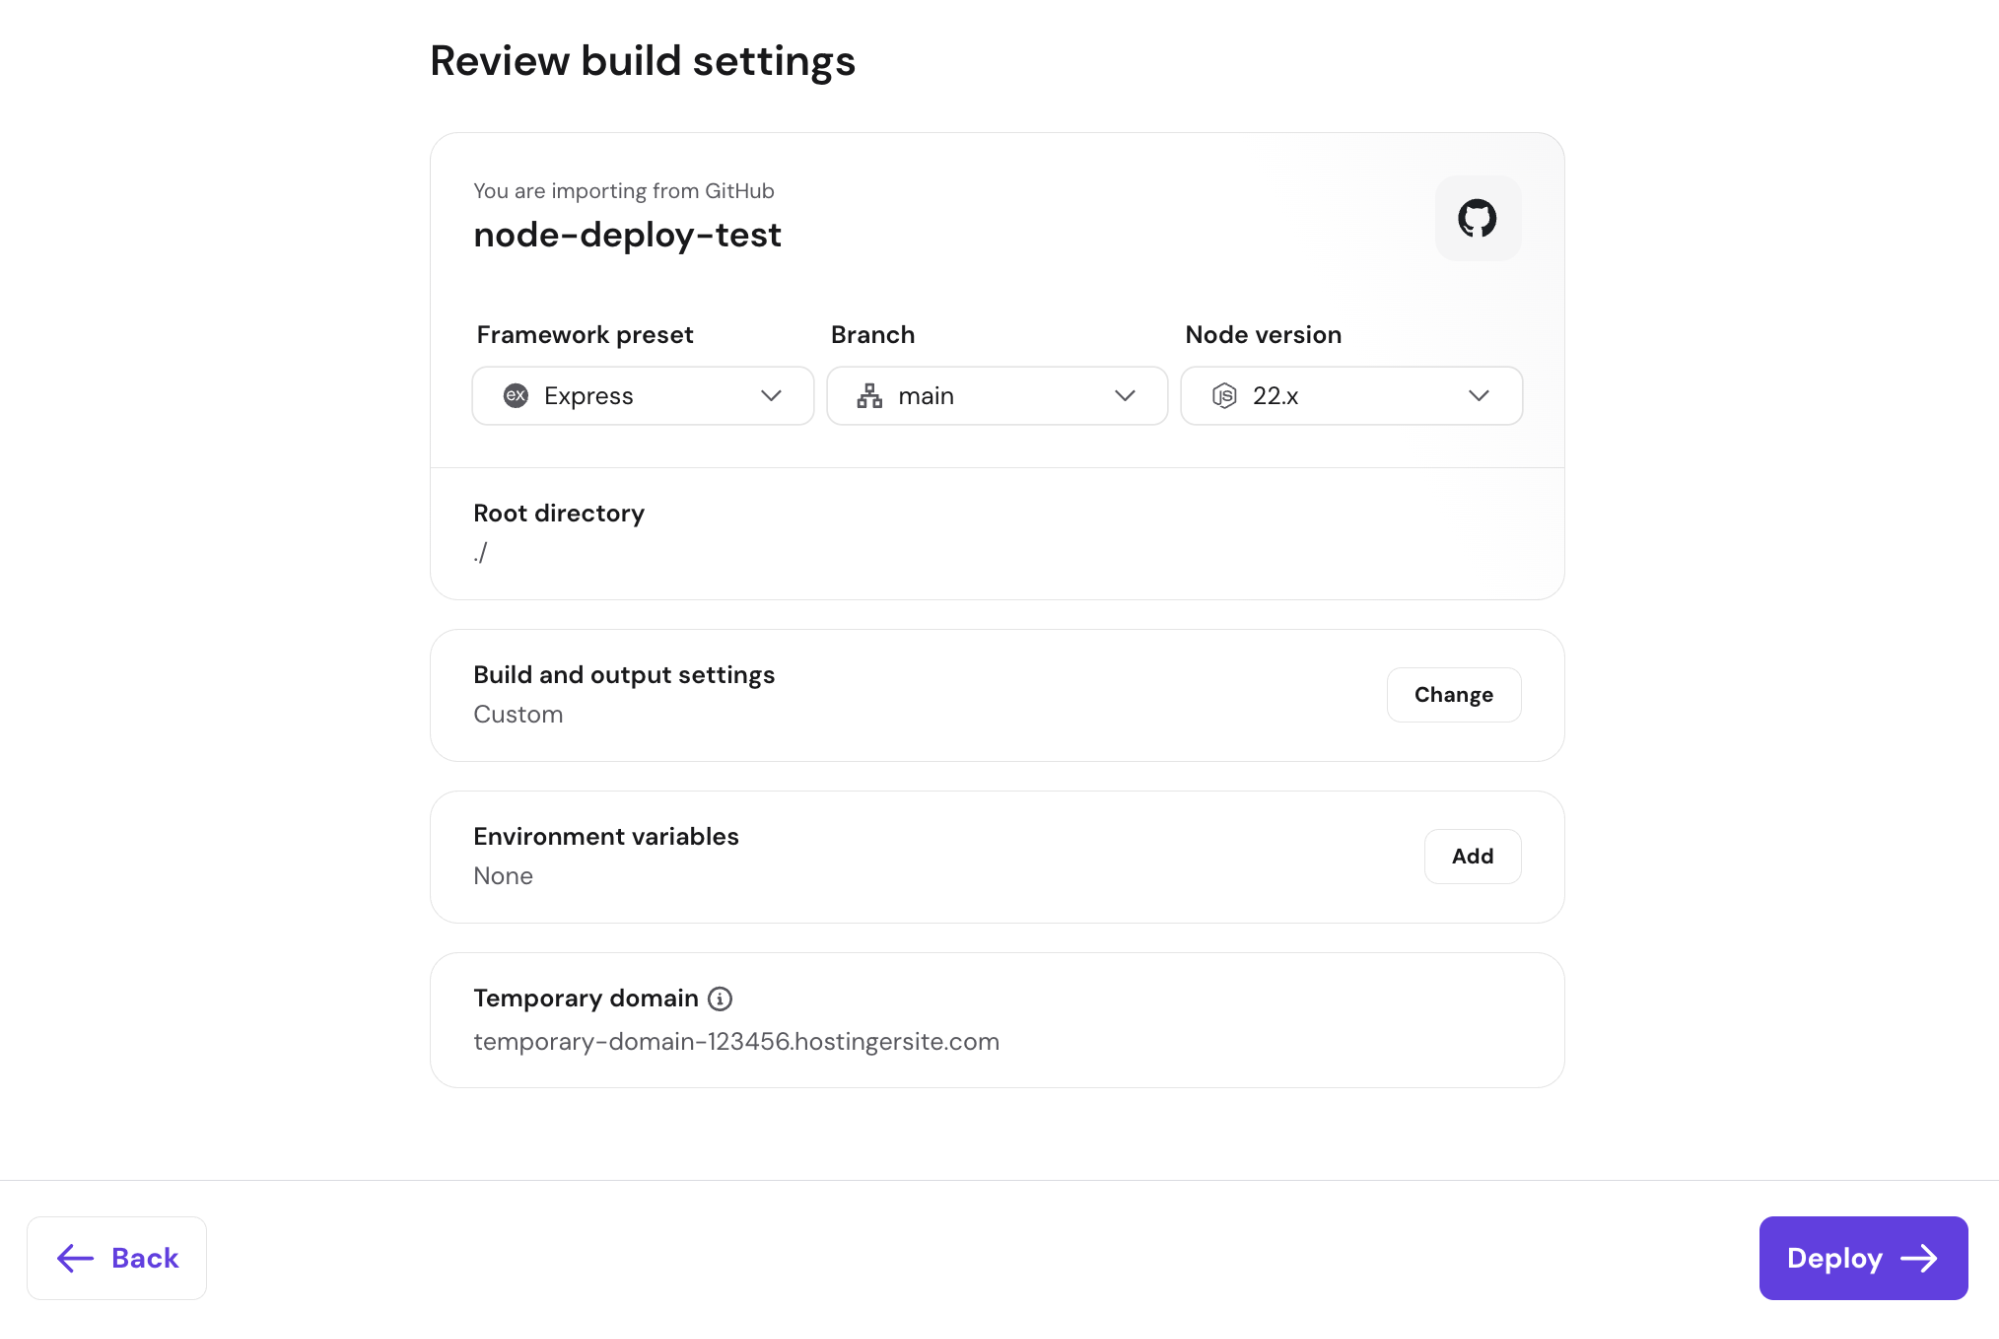
- Click Deploy to build and launch your Node.js app.

How to create your first Node.js script
Writing a script is your first hands-on step after installing Node.js. You can start with a single file and one line of code, and you’ll have a working script.
- Open a terminal on your machine and create a new file with the nano text editor:
nano hello.js
- Type the following line inside the editor:
console.log('Hello, World!');- Save the file and exit nano by pressing Ctrl + X → Ctrl + Y → Enter.
- Run the script:
node hello.js
The terminal should show:

console.log() prints text to the terminal. You’ve probably used it in browser dev tools before, but here it runs directly on your machine instead of inside a browser.
If you’re on a local computer and prefer using a graphical code editor like VS Code or Sublime Text, create hello.js there instead.
Save the file, open a terminal, navigate to the file’s folder with cd path/to/folder, and run the same node hello.js command.
How to use Node.js modules
In Node.js, modules let you break your code into reusable components. Node.js includes dozens of built-in modules, such as fs for file system operations, http for creating servers, and path for working with file paths.
To see one in action, use the fs module. First, create a file called sample.txt with some content:
This is a sample text file.
Next, create read-file.js in the same folder:
const fs = require('fs');

const content = fs.readFileSync('sample.txt', 'utf8');
console.log(content);
The first line imports the built-in fs module using require(). Then, readFileSync() reads the file and returns its contents as a string.
The utf8 argument specifies how Node.js should read the file. Without it, you’d get something like , which represents the file’s content as raw bytes instead of readable text.
Once done, run the following command in your terminal:
node read-file.js
The terminal prints whatever you added to sample.txt.

How to create a basic server with Node.js
Building an HTTP server with Node.js is where things start to feel like real backend development. To do this, include the built-in http module in your file.
- Create the server file. Make a file called server.js and add the following:
const http = require('http');

const hostname = '127.0.0.1';
const port = 3000;

const server = http.createServer((req, res) => {
   res.statusCode = 200;
   res.setHeader('Content-Type', 'text/plain');
   res.end('Hello from Node.js server!\n');
});

server.listen(port, hostname, () => {
   console.log(`Server running at http://${hostname}:${port}/`);
});- Start the server by running this command:
node server.js
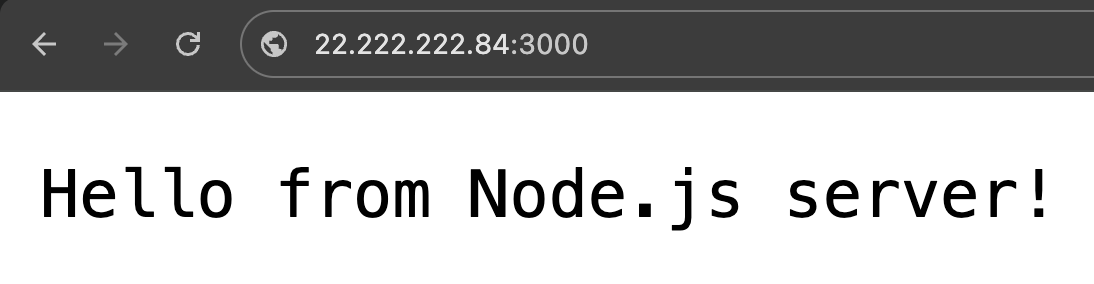
You should see “Server running at http://127.0.0.1:3000/.”
- Open it in a browser. Visit http://127.0.0.1:3000/, and you’ll see “Hello from Node.js server!” on the page.
The server keeps running until you stop it with Ctrl+C in the terminal.
Here’s what each part of server.js does:
- The hostname 127.0.0.1 means the server only accepts connections from your local machine.
- http.createServer() creates the server. The callback runs every time a client sends a request.
- res.statusCode = 200 sets the HTTP status code to 200 (OK), indicating that the request succeeded.
- res.setHeader(‘Content-Type’, ‘text/plain’) tells the browser the response is plain text, not HTML.
- res.end() sends the response body and closes the connection.
- server.listen() starts the server and binds it to the specified port and hostname.
If you’re running this on a VPS, change the hostname to 0.0.0.0. After saving the file, open the port in your Uncomplicated Firewall (UFW):
sudo ufw allow 3000
Then open a browser and go to http://your-vps-ip:3000/.
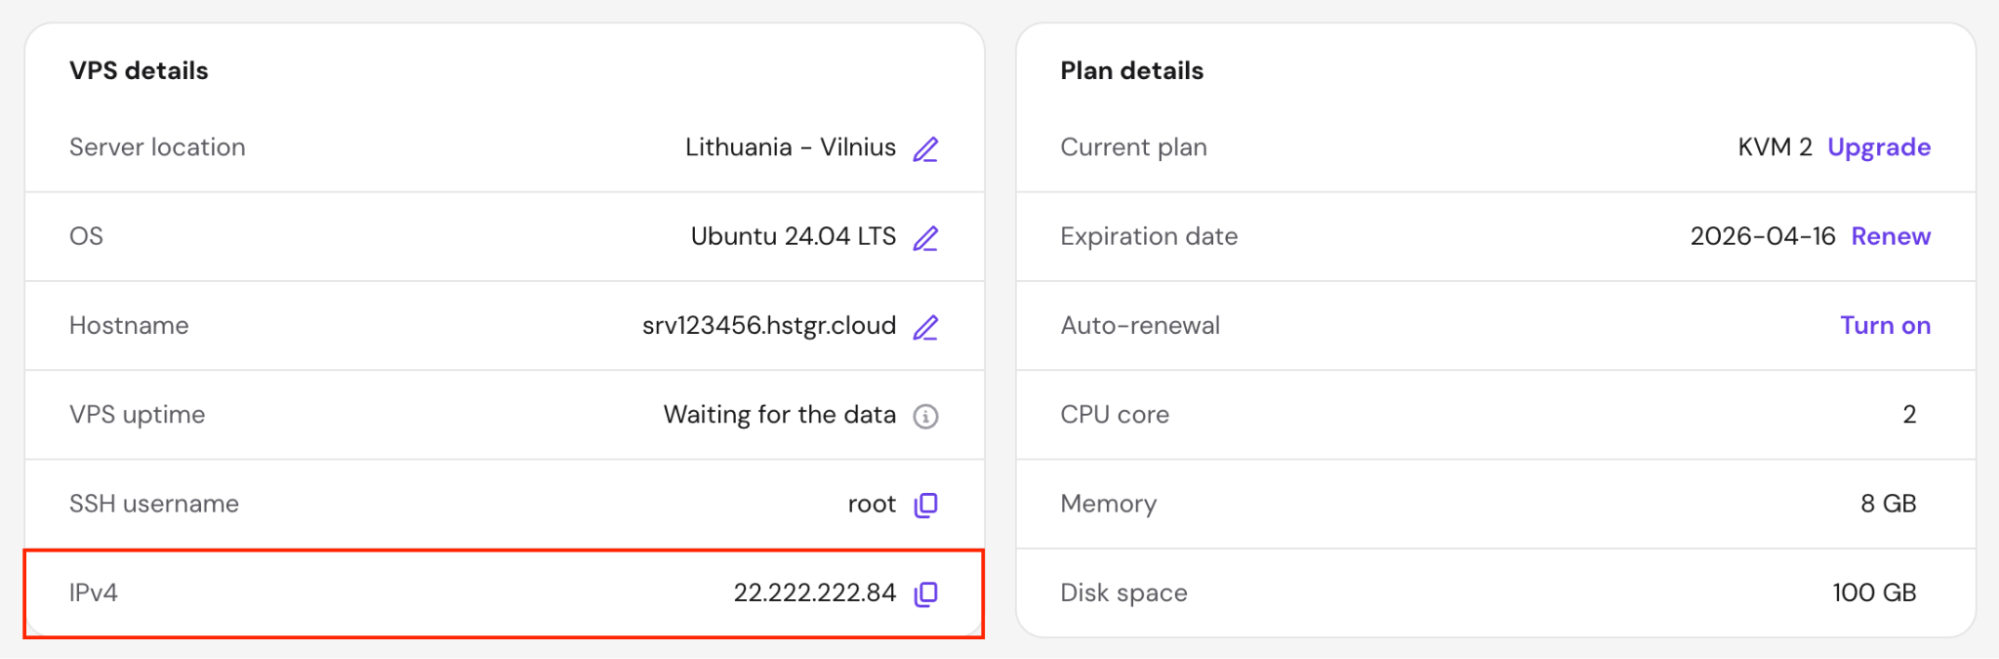
Hostinger VPS users can find their IP address in hPanel by going to VPS → Manage → Overview → VPS details.

How to install and use packages with npm
Node Package Manager (npm) comes bundled with Node.js and gives you access to over two million open-source packages.
Unlike built-in modules like fs or http, third-party packages must be installed with npm before you can use them. Here’s how:
- Create a project folder. Through the terminal, create a new folder in your home directory and open it:
mkdir node-project
cd node-project
- Initialize the project. Run this command to generate a package.json file with default settings:
npm init -y
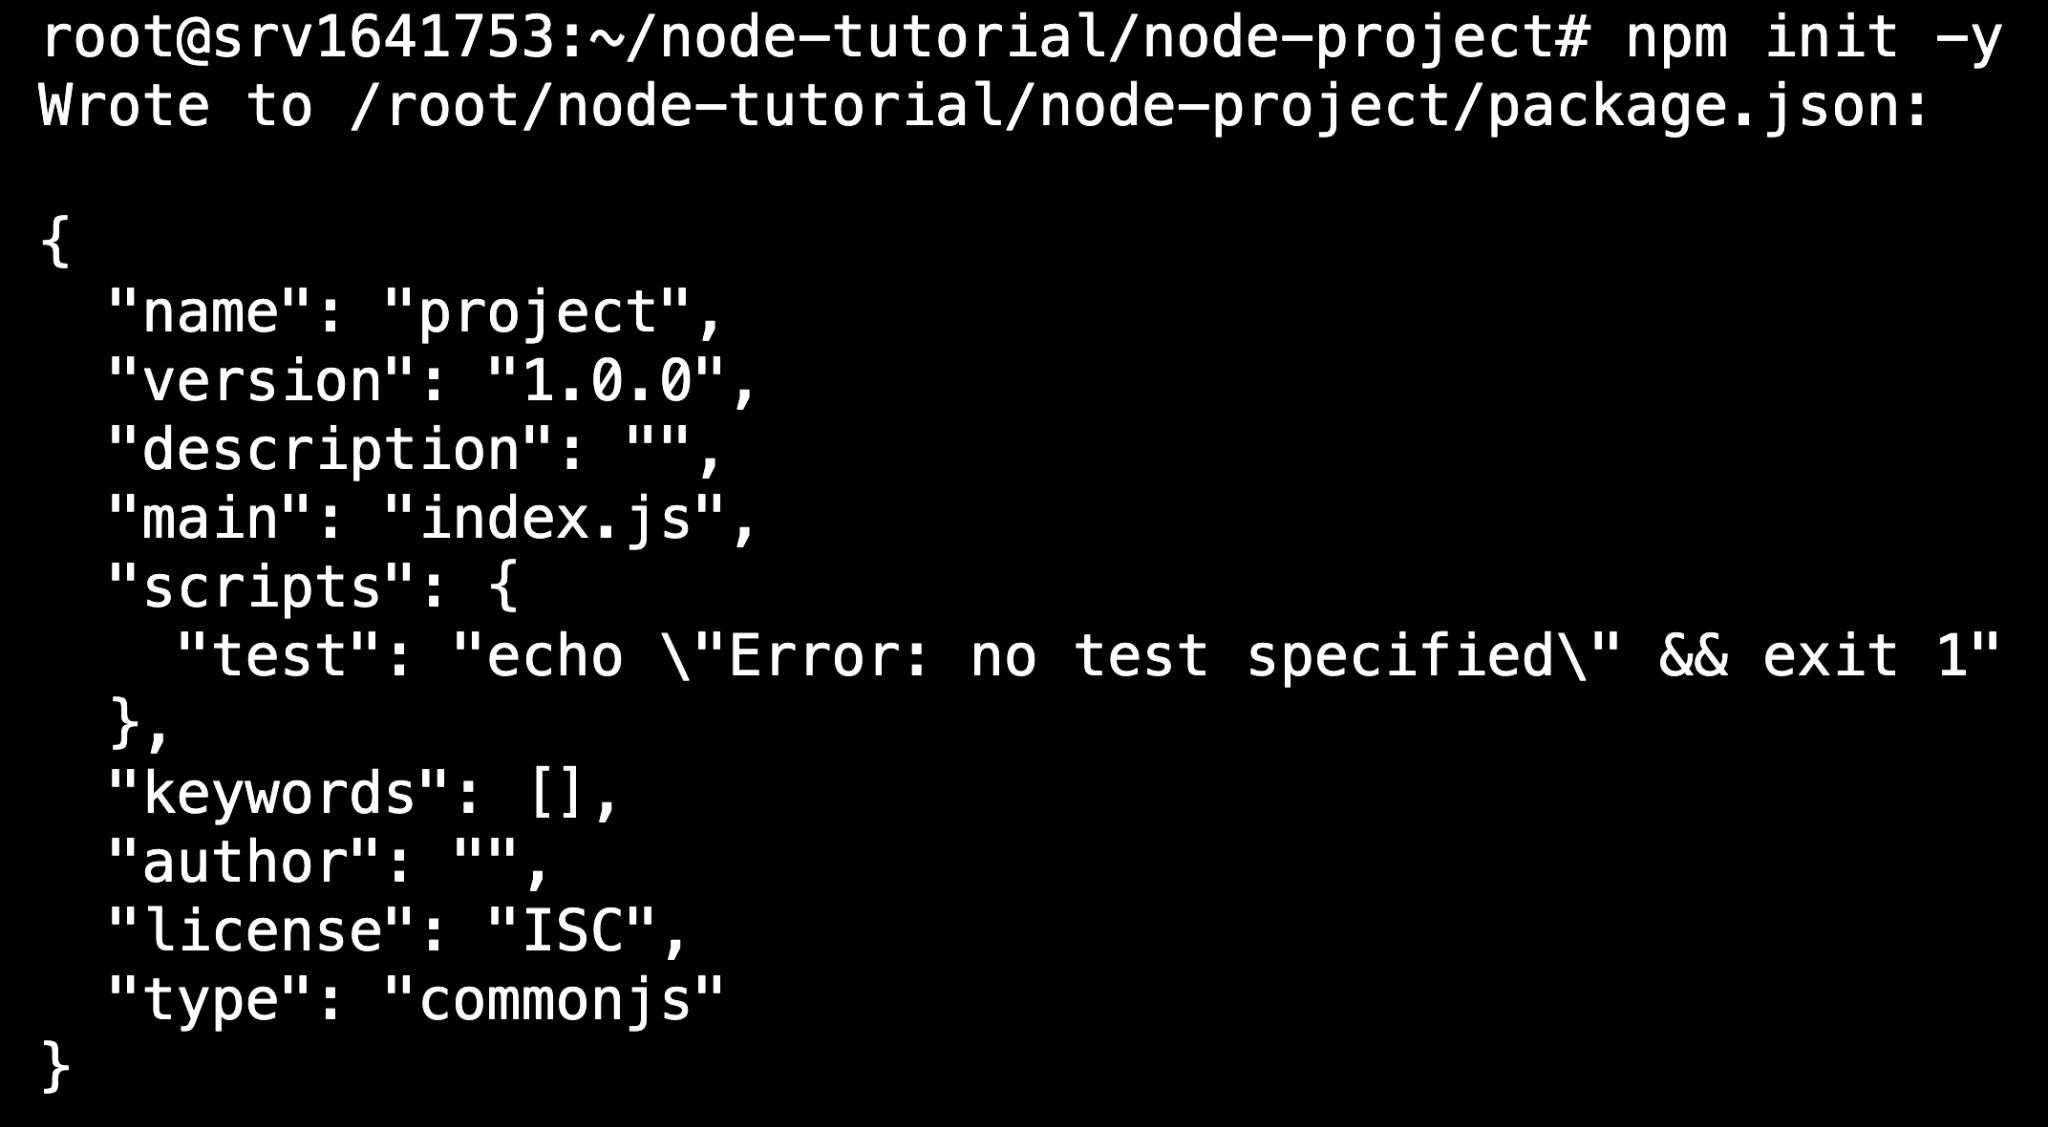
Think of package.json as your project’s manifest. It tracks dependencies, scripts, and metadata in one place.
- Install a package. For this example, install dayjs, a lightweight date manipulation library:
npm install dayjs

This command downloads the package into a node_modules folder, adds dayjs to the dependencies field in package.json, and creates a package-lock.json file that locks the exact installed version.
- Use the package in your code. Create a file called index.js:
const dayjs = require('dayjs');

const now = dayjs().format('MMMM D, YYYY');
console.log(`Today is ${now}`);
When you call require(‘dayjs’), Node.js looks for the package in the node_modules folder.
After that, run node index.js. You’ll see the current date:

How does Node.js handle asynchronous code?
Node.js handles asynchronous code by running slower operations in the background while the rest of your code keeps moving. Here’s a quick example:
First, create async-example.js:
console.log('First');

setTimeout(() => {
   console.log('Second (after 2 seconds)');
}, 2000);

console.log('Third');
Next, run node async-example.js to see this output:

Notice that “Third” prints before “Second” even though it comes later in the code. This happens because setTimeout() schedules the callback for “Second” to run after 2,000 milliseconds, and Node.js doesn’t wait for it to finish.
It registers the timer, moves to the next line, and prints “Third” right away. After two seconds, the callback runs and “Second” appears.
This non-blocking model lets a single Node.js server handle thousands of connections simultaneously. While one request waits for a database query, a file read, or a network call, the server continues processing other requests.
What to build after learning Node.js basics
Once you’re comfortable with the Node.js fundamentals, the best way to level up is to build something real. Here are four solid directions:
- Build a REST API. Use the http module or a framework such as Express.js to create endpoints for GET, POST, PUT, and DELETE requests. This forms the foundation of most backend work with Node.js and is widely used in projects, such as the WordPress REST API.
- Create a full-stack application. Combine Node.js with a frontend framework like React or Vue.js. Build something small, like a to-do list or a notes app that reads from and writes to a database. This helps you understand how to separate the frontend and backend and how they work together.
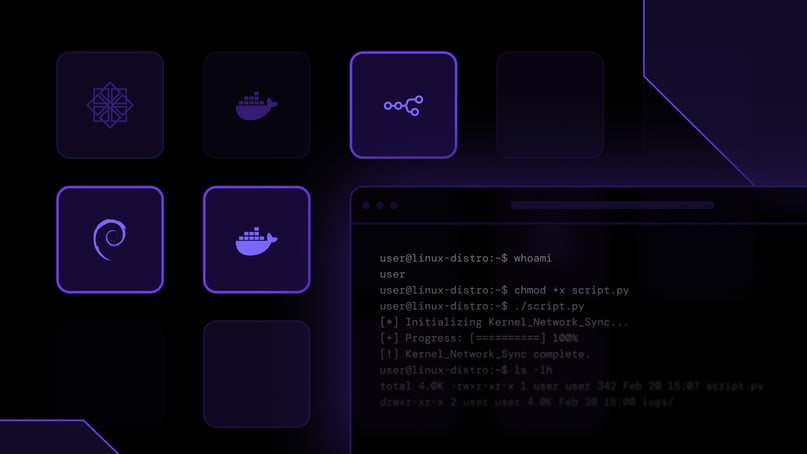
- Package your app with Docker. Running your Node.js app in a Docker container keeps dependencies consistent across environments. What works on your local computer will work the same way as your production server, even if you’re moving to a different server. This solves the classic “it works on my machine” problem.
- Deploy to a live server. Move beyond local development by deploying your Node.js app to a VPS or a managed hosting service. Here, you’ll work with environment variables, process management, and production configuration. You’ll also learn how to push code updates and redeploy your app.
All of the tutorial content on this website is subject to Hostinger's rigorous editorial standards and values.

Ariffud is a Technical Content Writer with an educational background in Informatics. He has extensive expertise in Linux and VPS, authoring over 200 articles on server management and web development. Follow him on LinkedIn.