The Hostinger Ecommerce plugin connects your WordPress site to the Hostinger Ecommerce platform so you can sell products without installing WooCommerce. WordPress handles your content, SEO, and page design, while Hostinger Ecommerce manages products, orders, inventory, payments, and analytics behind the scenes. To start selling, install the plugin, connect or create a store, add a payment method, and add your first product.
Before you start
- An active Hostinger hosting plan.
- Access to the WordPress Admin area.
Install the Hostinger Ecommerce plugin
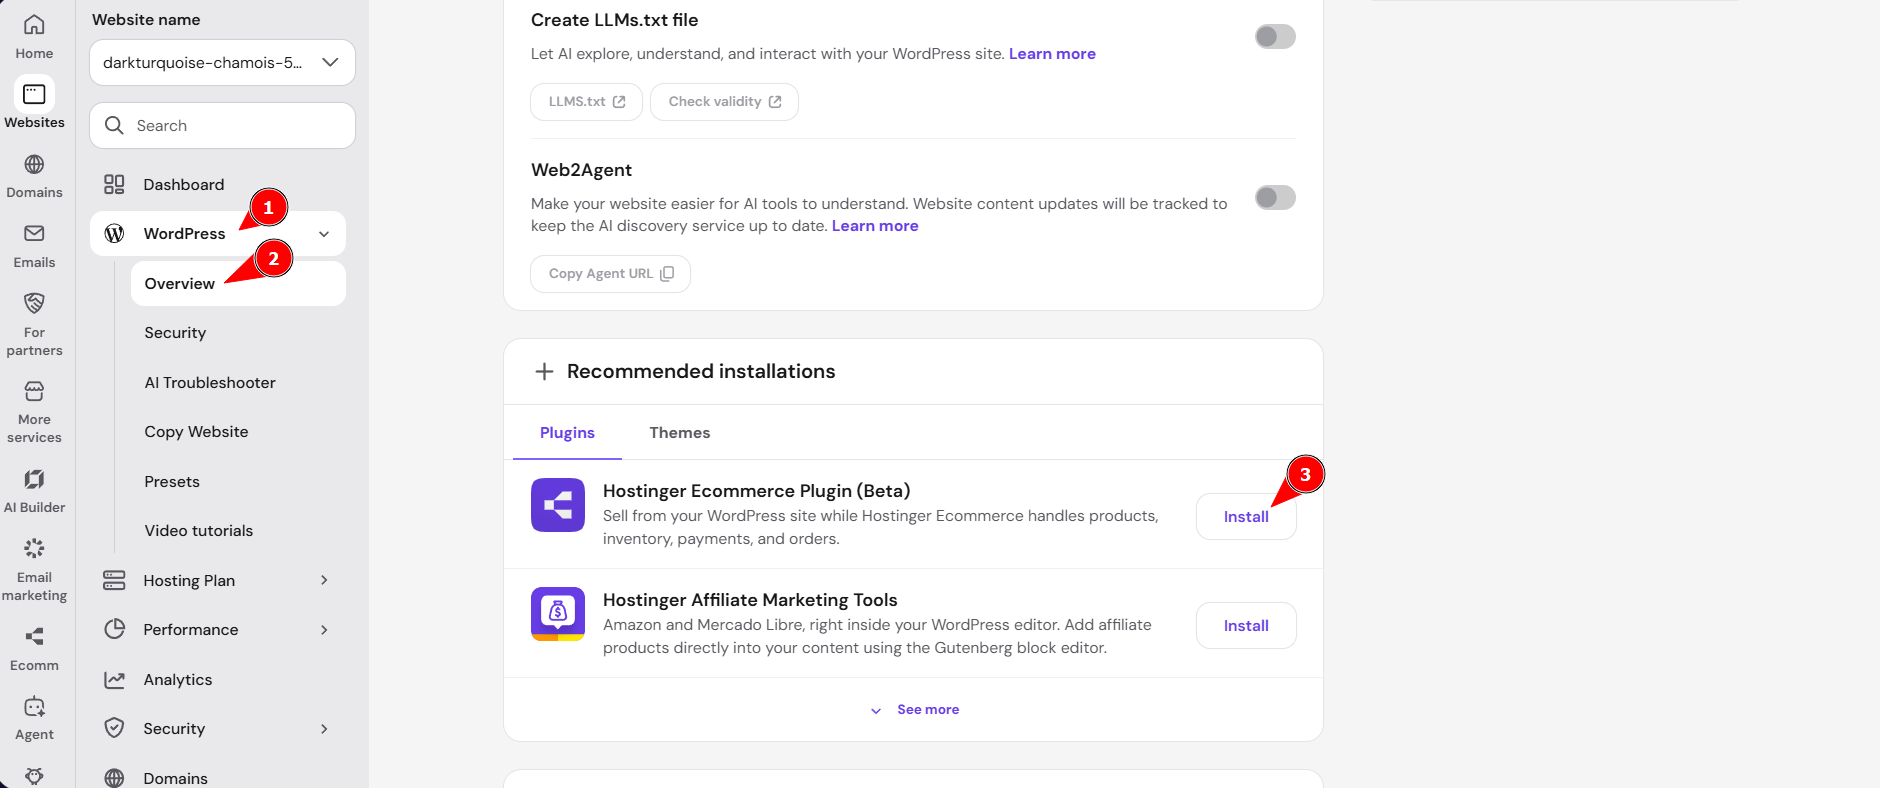
- Log in to Hostinger dashboard and go to Websites.
- Select the website you want to add a store to, then go to WordPress → Overview.
- Scroll down to Recommended installations and select the Plugins tab.
- Locate Hostinger Ecommerce Plugin and select Install.

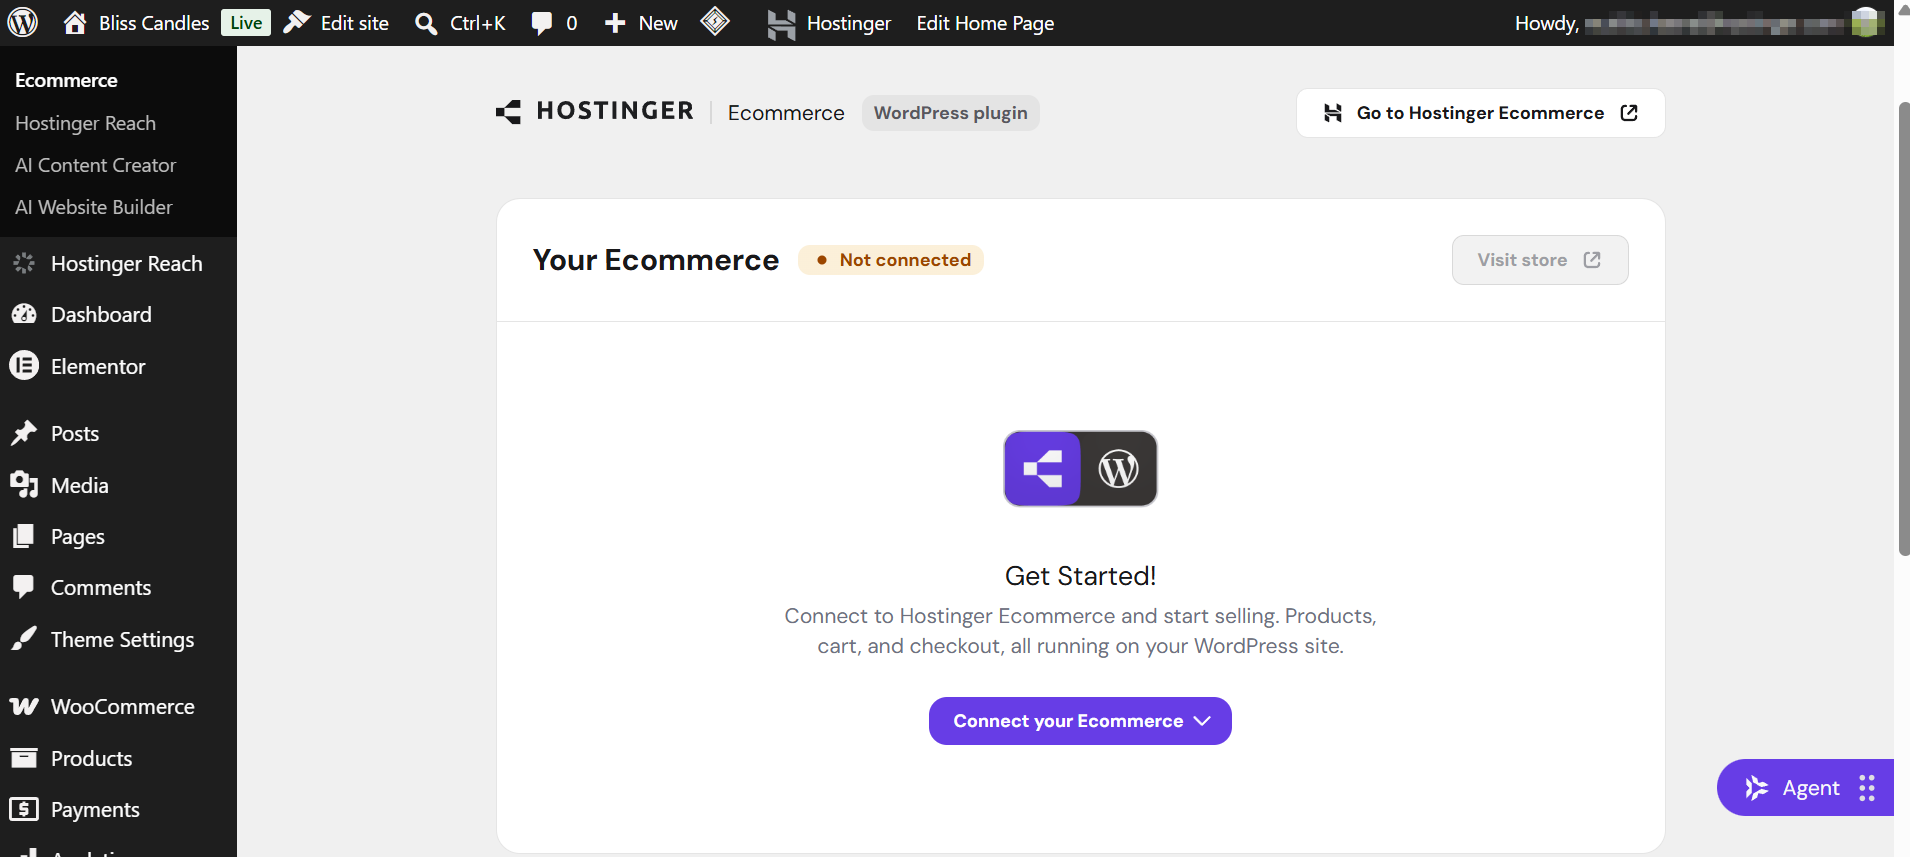
The plugin adds an Ecommerce menu item to your WordPress Admin area sidebar next to the other Hostinger WordPress plugins.
Connect or create a Hostinger Ecommerce store
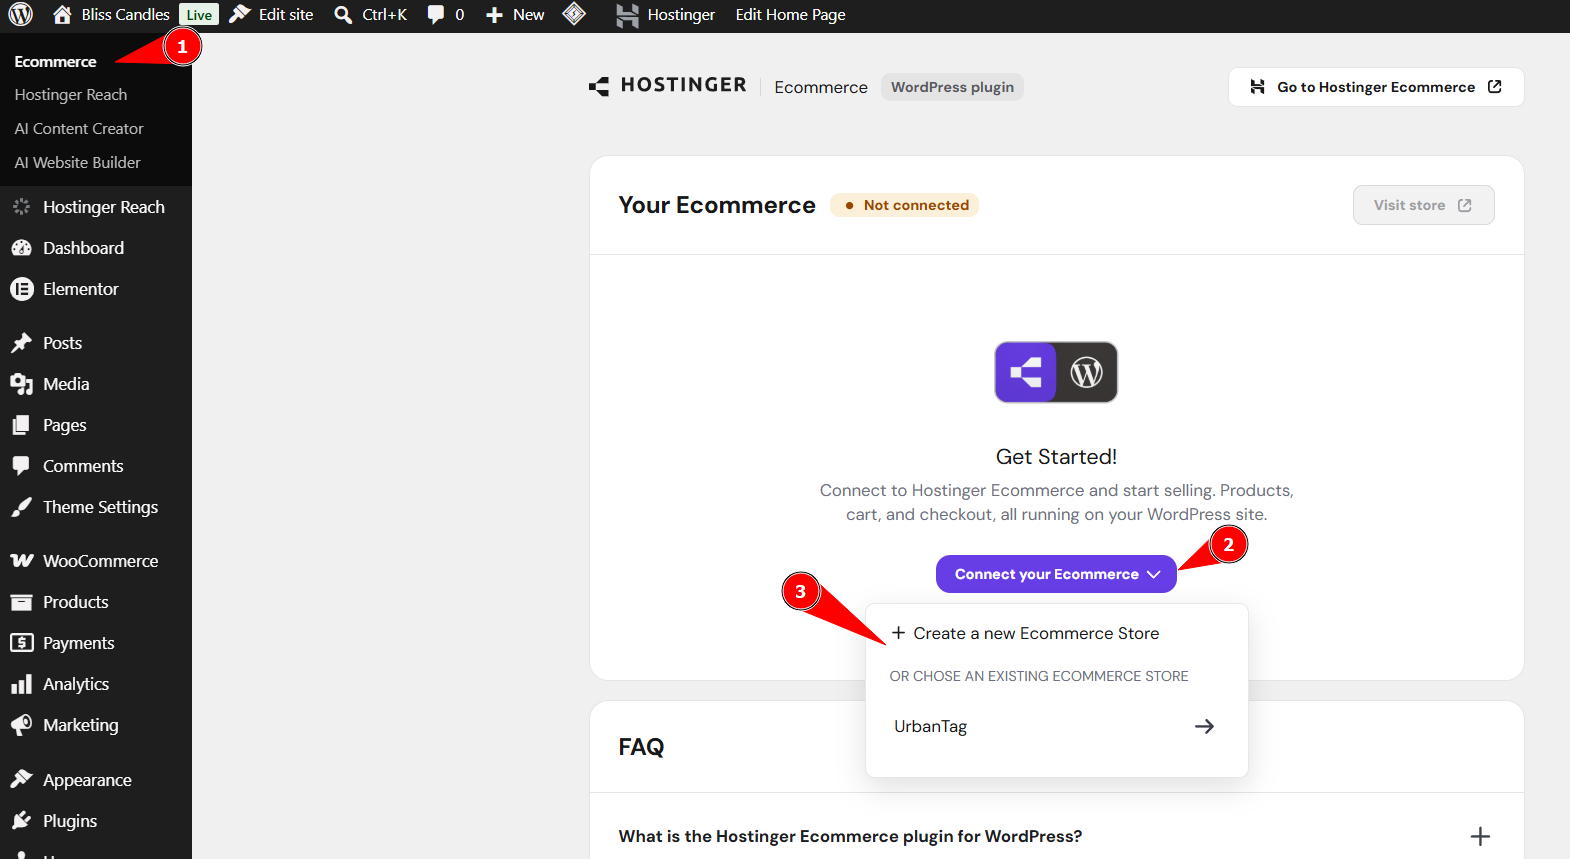
- In the WordPress Admin area, go to Ecommerce.
- Select Connect your Ecommerce.

- Choose one of the following options:
- Select Create a new Ecommerce Store to set up a new store. Enter a store name, select a country, and select a currency, then select Create store.
- Select an existing Ecommerce store from the list if you already manage one with Hostinger Ecommerce.
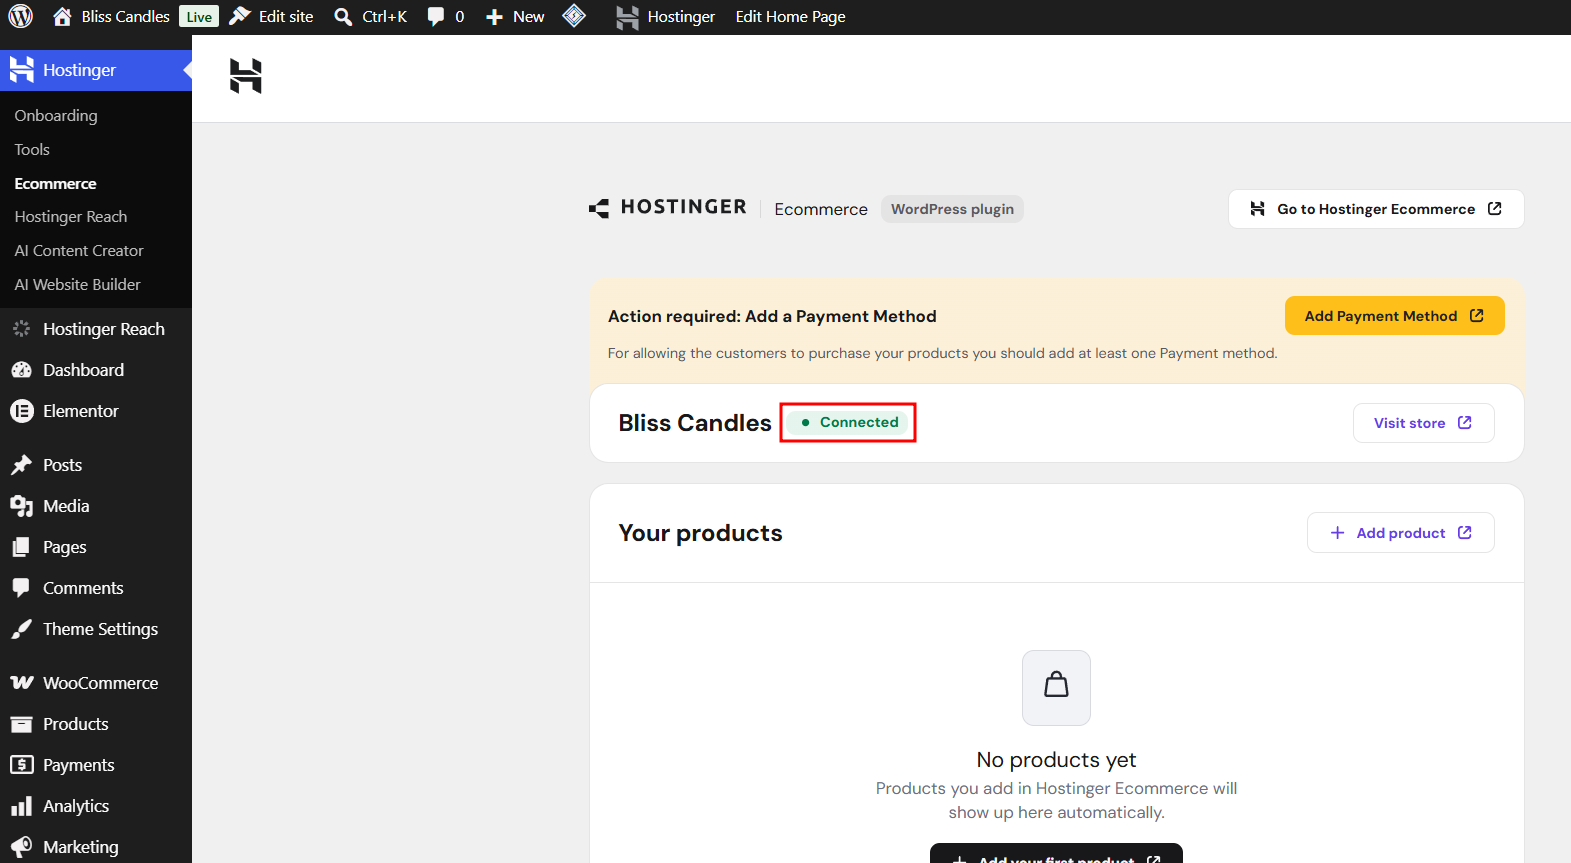
Once connected, the store’s status changes to Connected.
Add a payment method
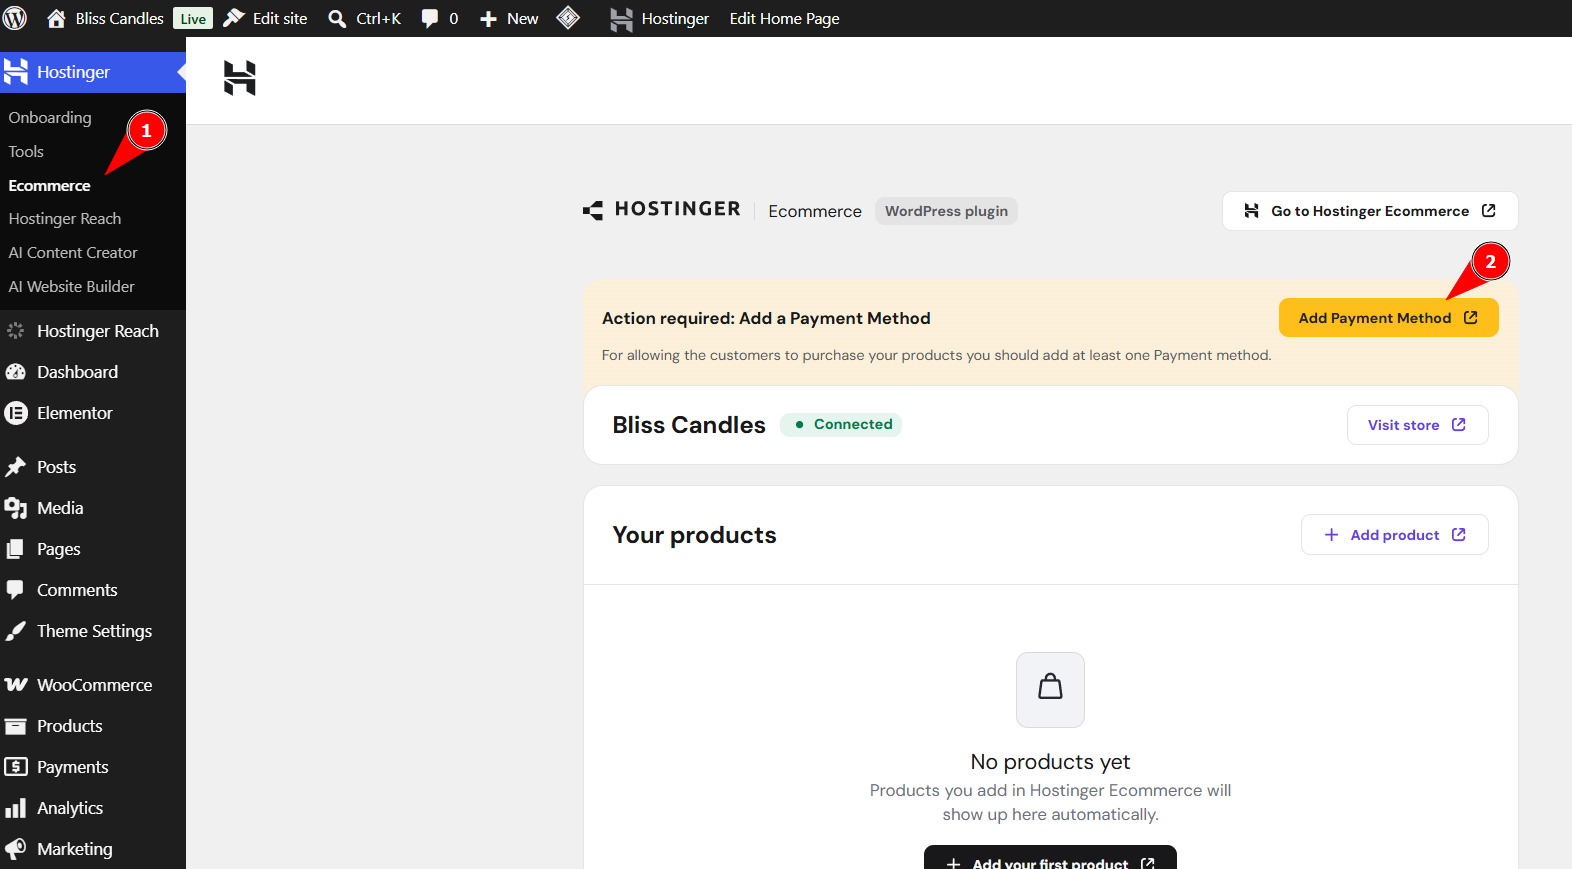
- In the WordPress Admin area, go to Ecommerce.
- Click Add payment method.

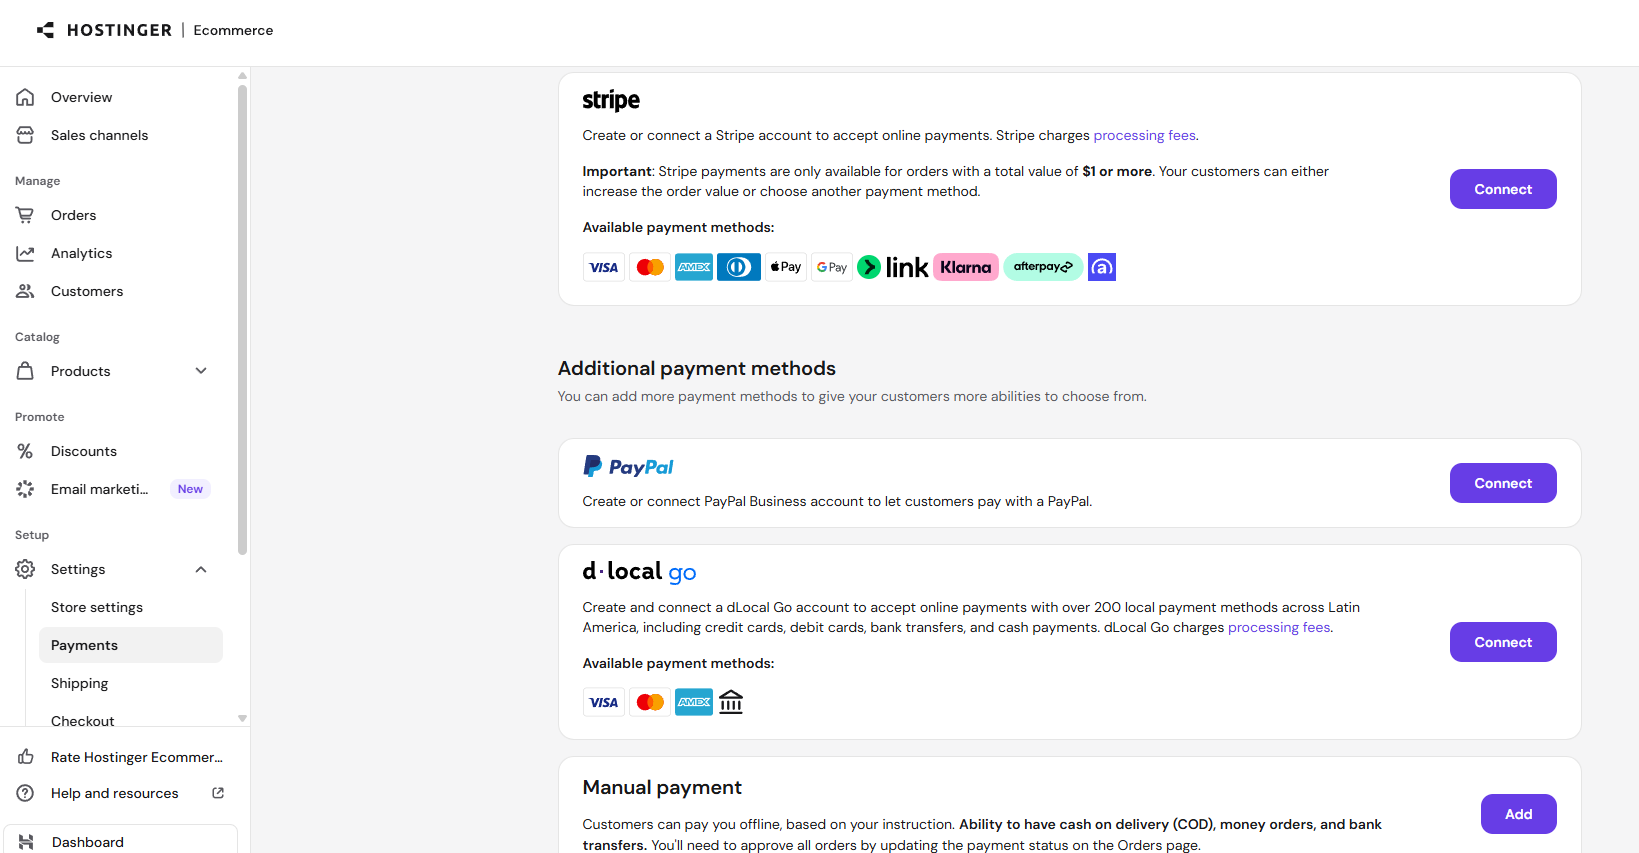
- You will be redirected to Hostinger Ecommerce → Settings → Payments.
- Choose one of the available payment options:
- Stripe – accepts card payments and digital wallets. Stripe charges processing fees, and orders must total $1 or more.
- PayPal – accepts payments through a connected PayPal Business account.
- dLocal Go – accepts local payment methods across Latin America, including cards, bank transfers, and cash payments. dLocal charges processing fees.
- Manual payment – lets customers pay offline through cash on delivery, money orders, or bank transfers. You approve these orders manually by updating the payment status on the Orders page.
- Select Connect next to Stripe, PayPal, or dLocal Go to link an existing account or create a new one. To add manual payment instead, select Add, choose a payment type, enter a payment method name, and add instructions for your customers.

Add your first product
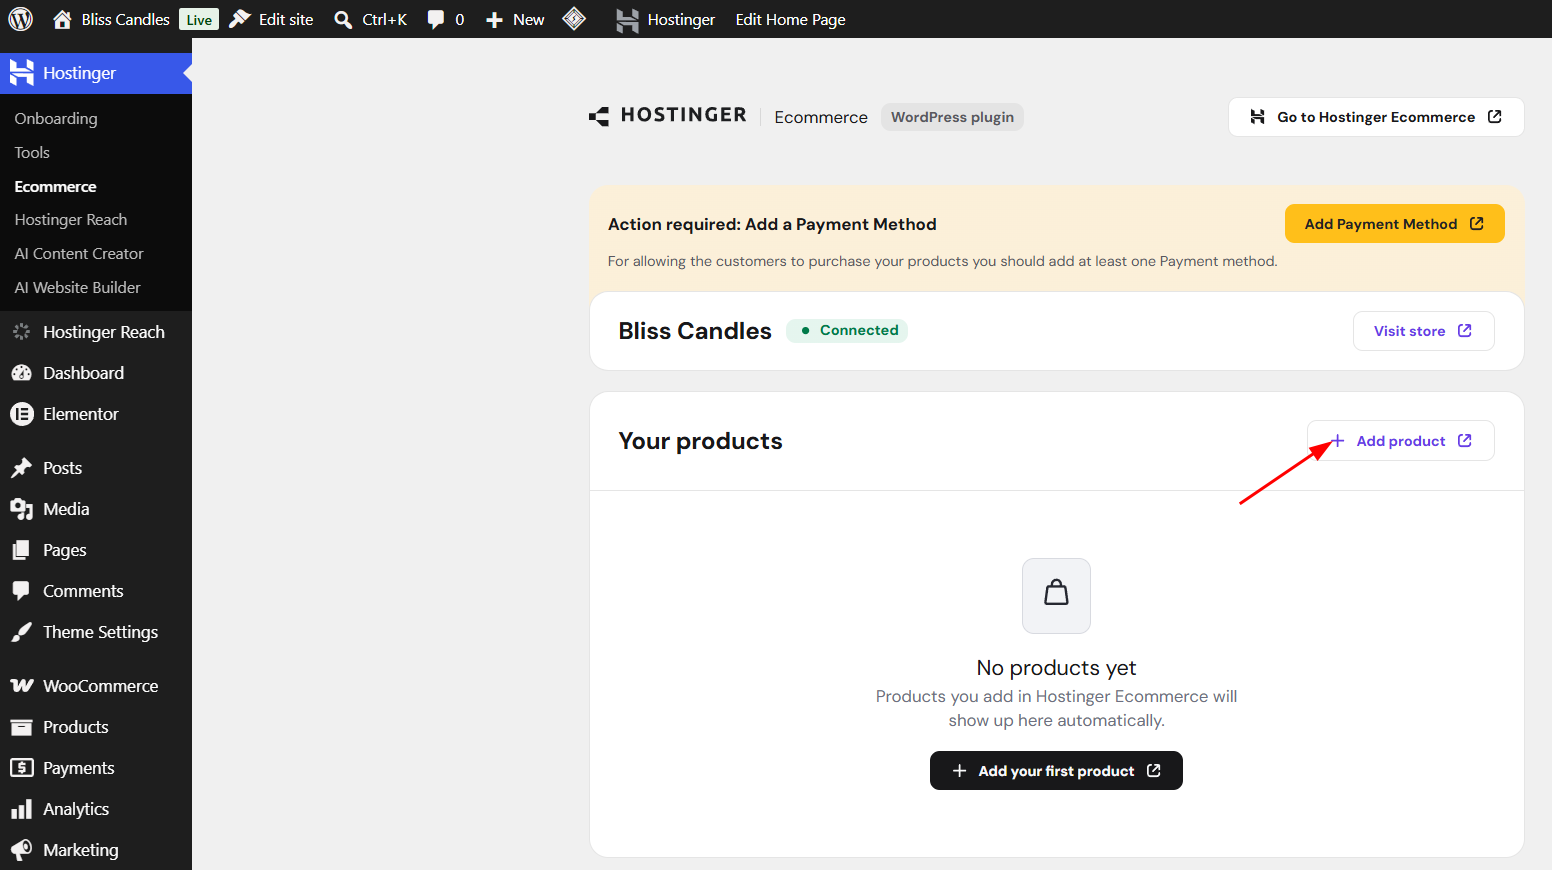
- In the WordPress Admin area, go to Ecommerce.
- Click Add products.

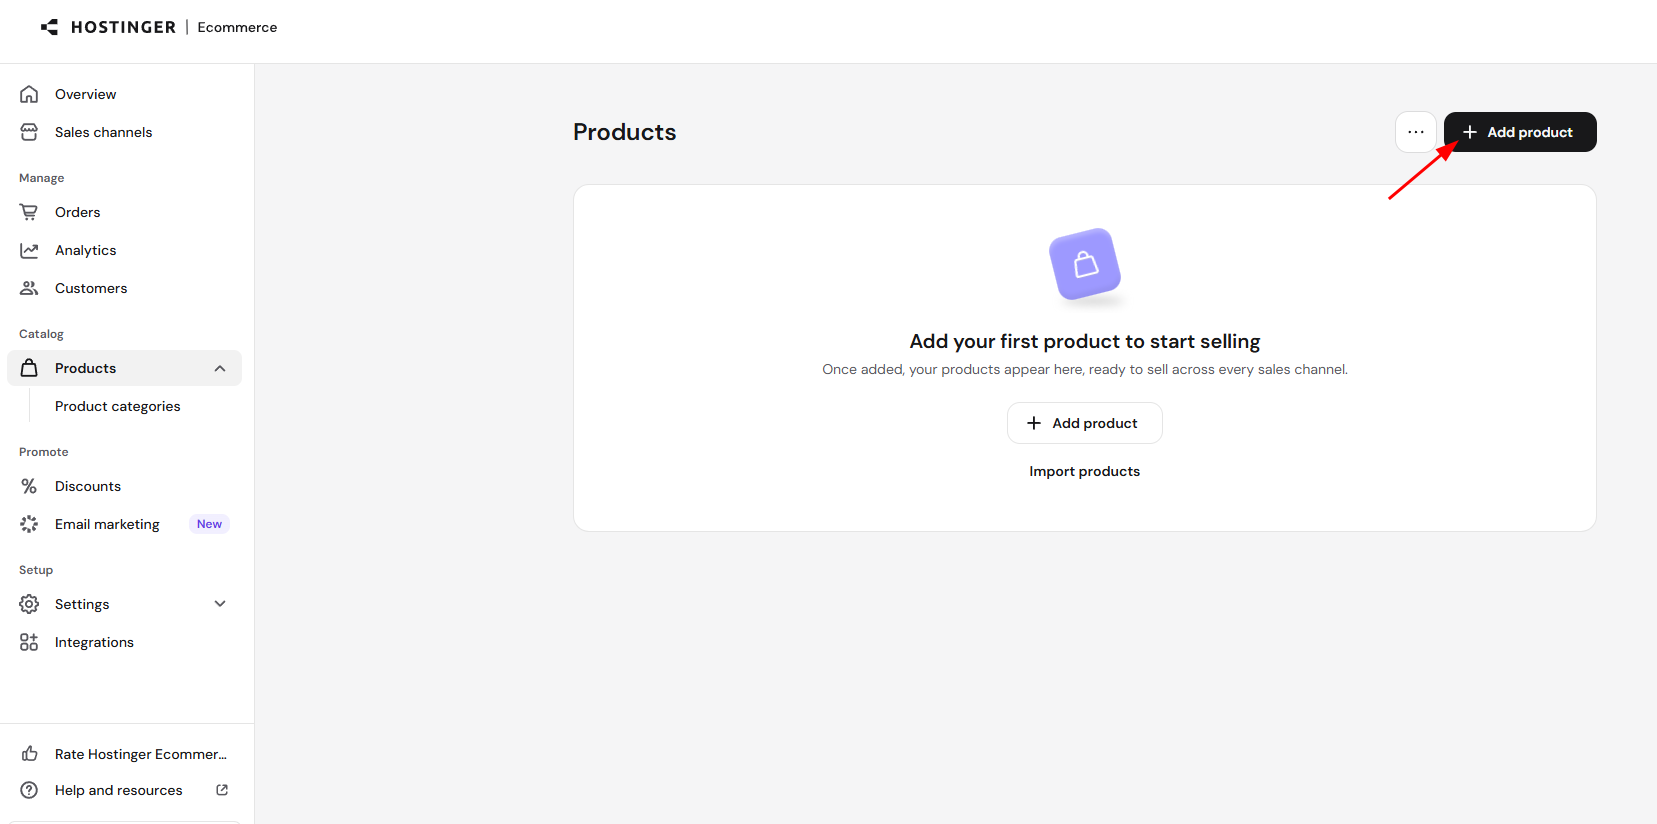
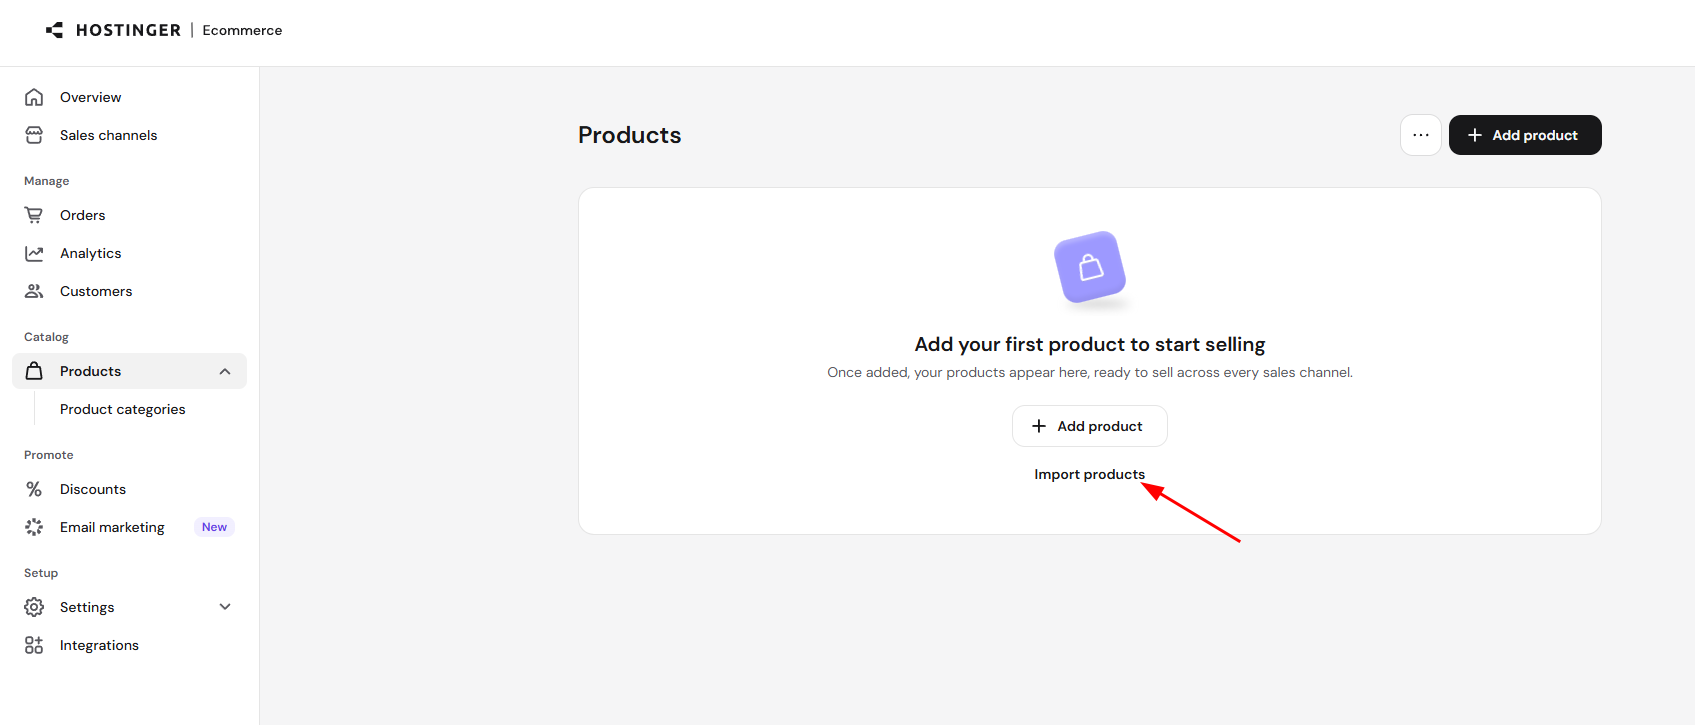
- You will be redirected to Hostinger Ecommerce → Products and select Add product.

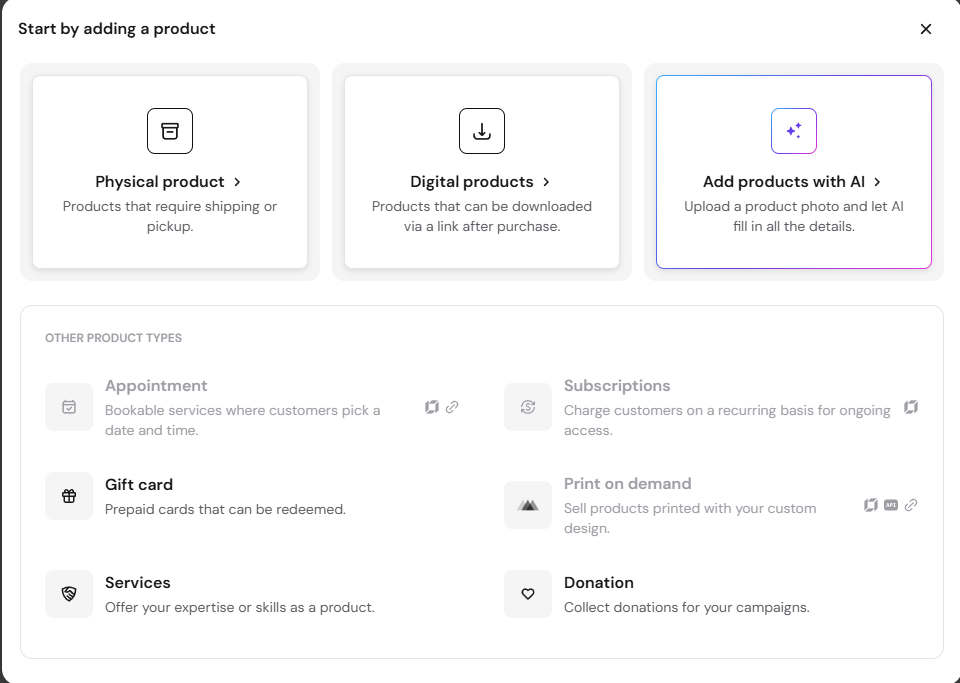
- Select a product type:
- Physical product – for products that require shipping or pickup.
- Digital products – for products customers download via a link after purchase.
- Add products with AI – upload a product photo and let AI fill in the product details. You can customize the details afterward.
- Gift card, Services, and Donation are also available directly.
 Appointment, Subscriptions, and Print on demand require a Hostinger AI Builder sales channel and don’t apply to the WordPress plugin.
- Enter or review the product details, then save. Alternatively, select Import products from the Products page to add multiple products at once.

Each product you add appears in the Products list with its price, variants, inventory status, SKU, and status.
Products you add in Hostinger Ecommerce sync automatically to your WordPress store. Use Gutenberg blocks, Elementor widgets, or shortcodes to display your product listing, product detail, and cart pages anywhere on your WordPress site.
Your WordPress site is now connected to Hostinger Ecommerce and ready to accept orders once a payment method and at least one product are added.