If you deployed your Node.js application using a temporary domain, you can connect your own custom domain at any time. Connecting a custom domain makes your application accessible through a domain name you own.
You can start the domain connection process from two locations in Hostinger dashboard:
-
Websites list
-
Website Dashboard of the Node.js application
Option 1 — Connect a domain from the Websites list
-
Log in to Hostinger dashboard.
-
Open the Websites list.
-
Locate your Node.js application using a temporary domain.
-
Click Connect domain next to the website.
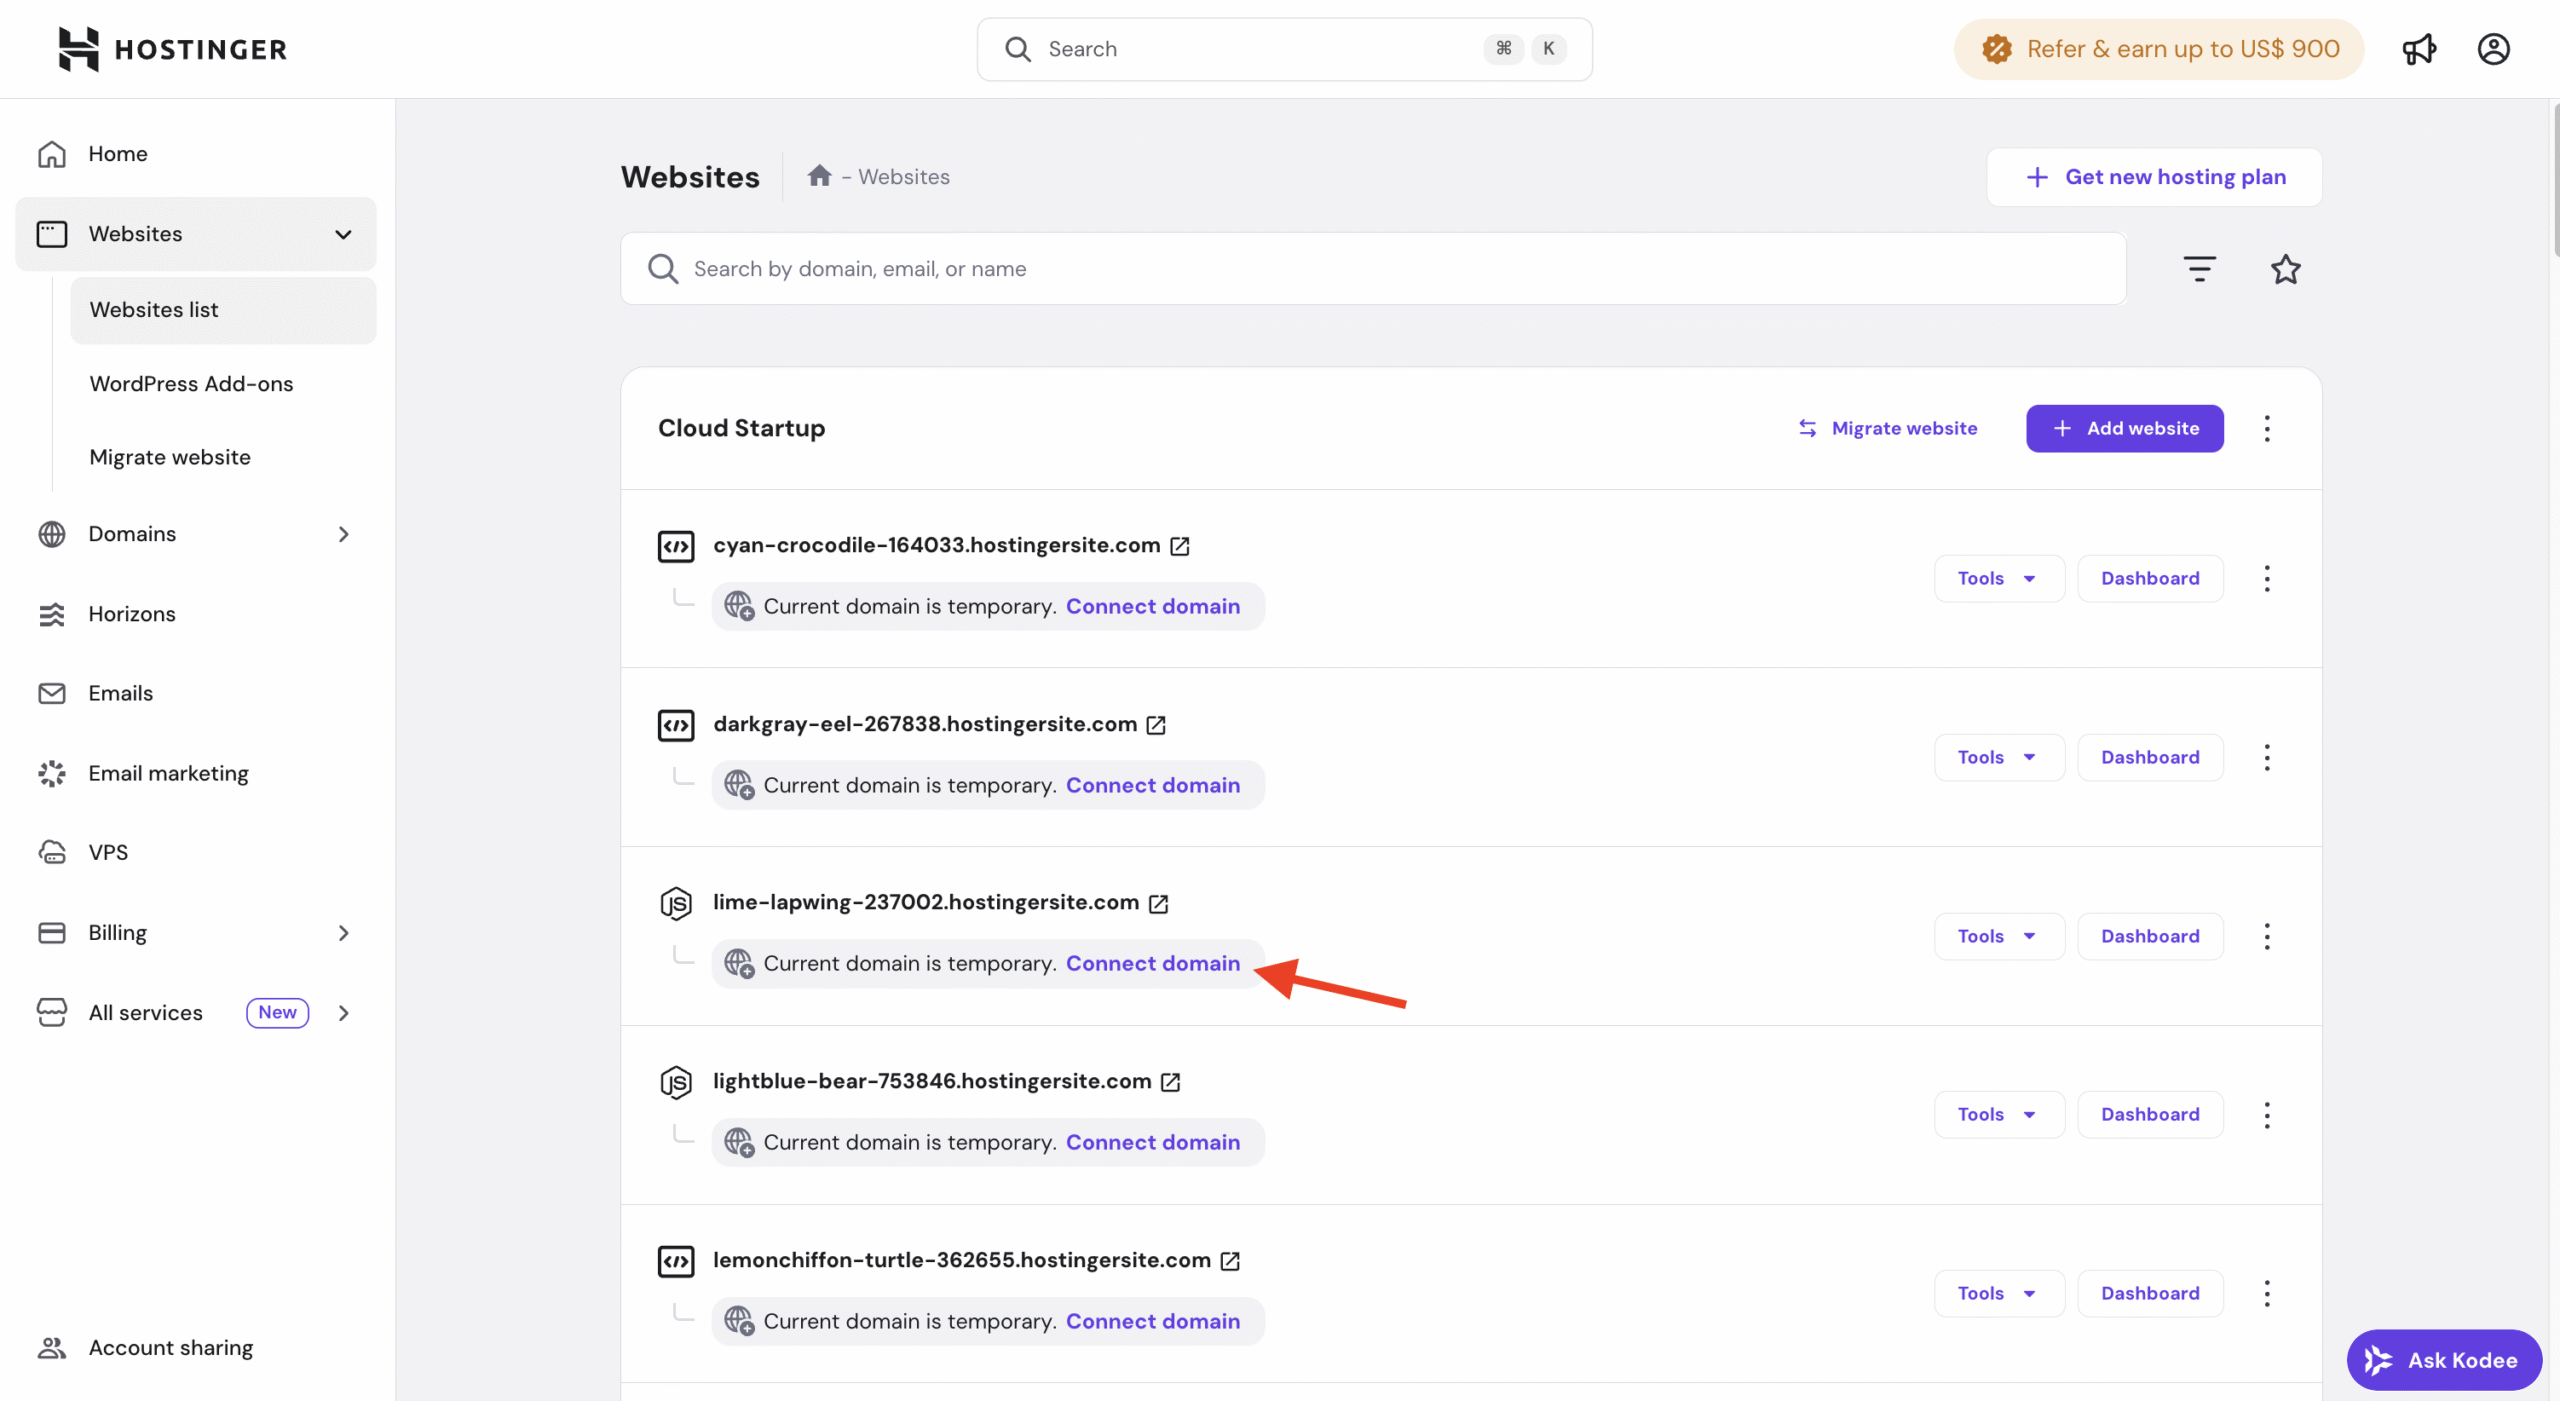
You will be redirected to the domain connection flow.
Option 2 — Connect a domain from the Website Dashboard
-
Open the Website Dashboard for your Node.js application.
-
Click Connect domain.
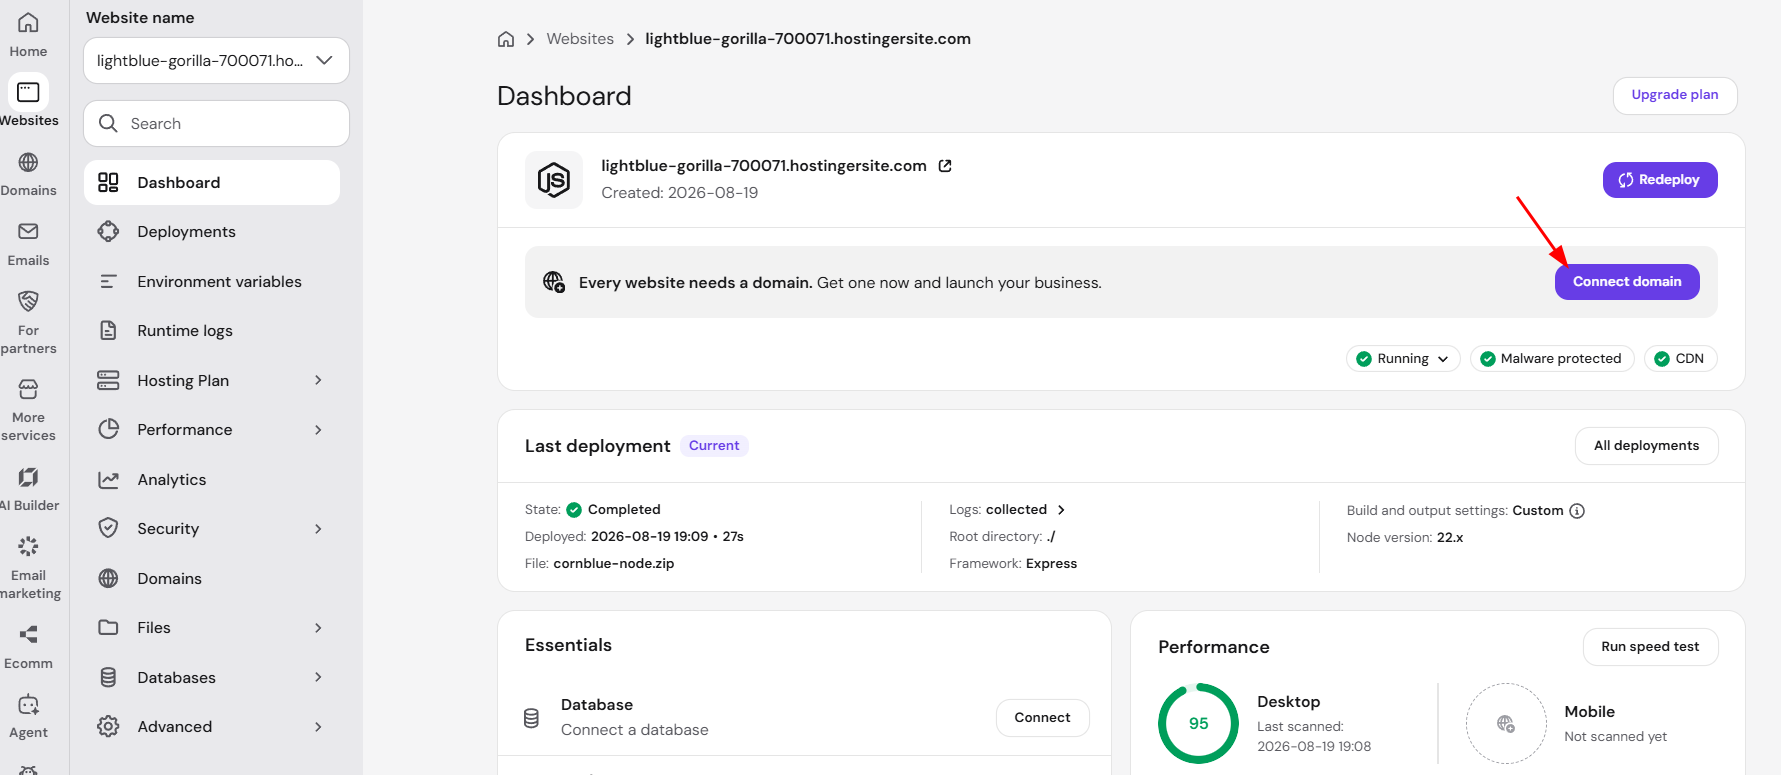
This will open the domain connection page.
How to connect your custom domain
Once you start the domain connection flow:
-
Enter the custom domain you want to use (for example, domain.com ).
-
Confirm the domain selection.
-
Follow any on-screen instructions if DNS changes are required.
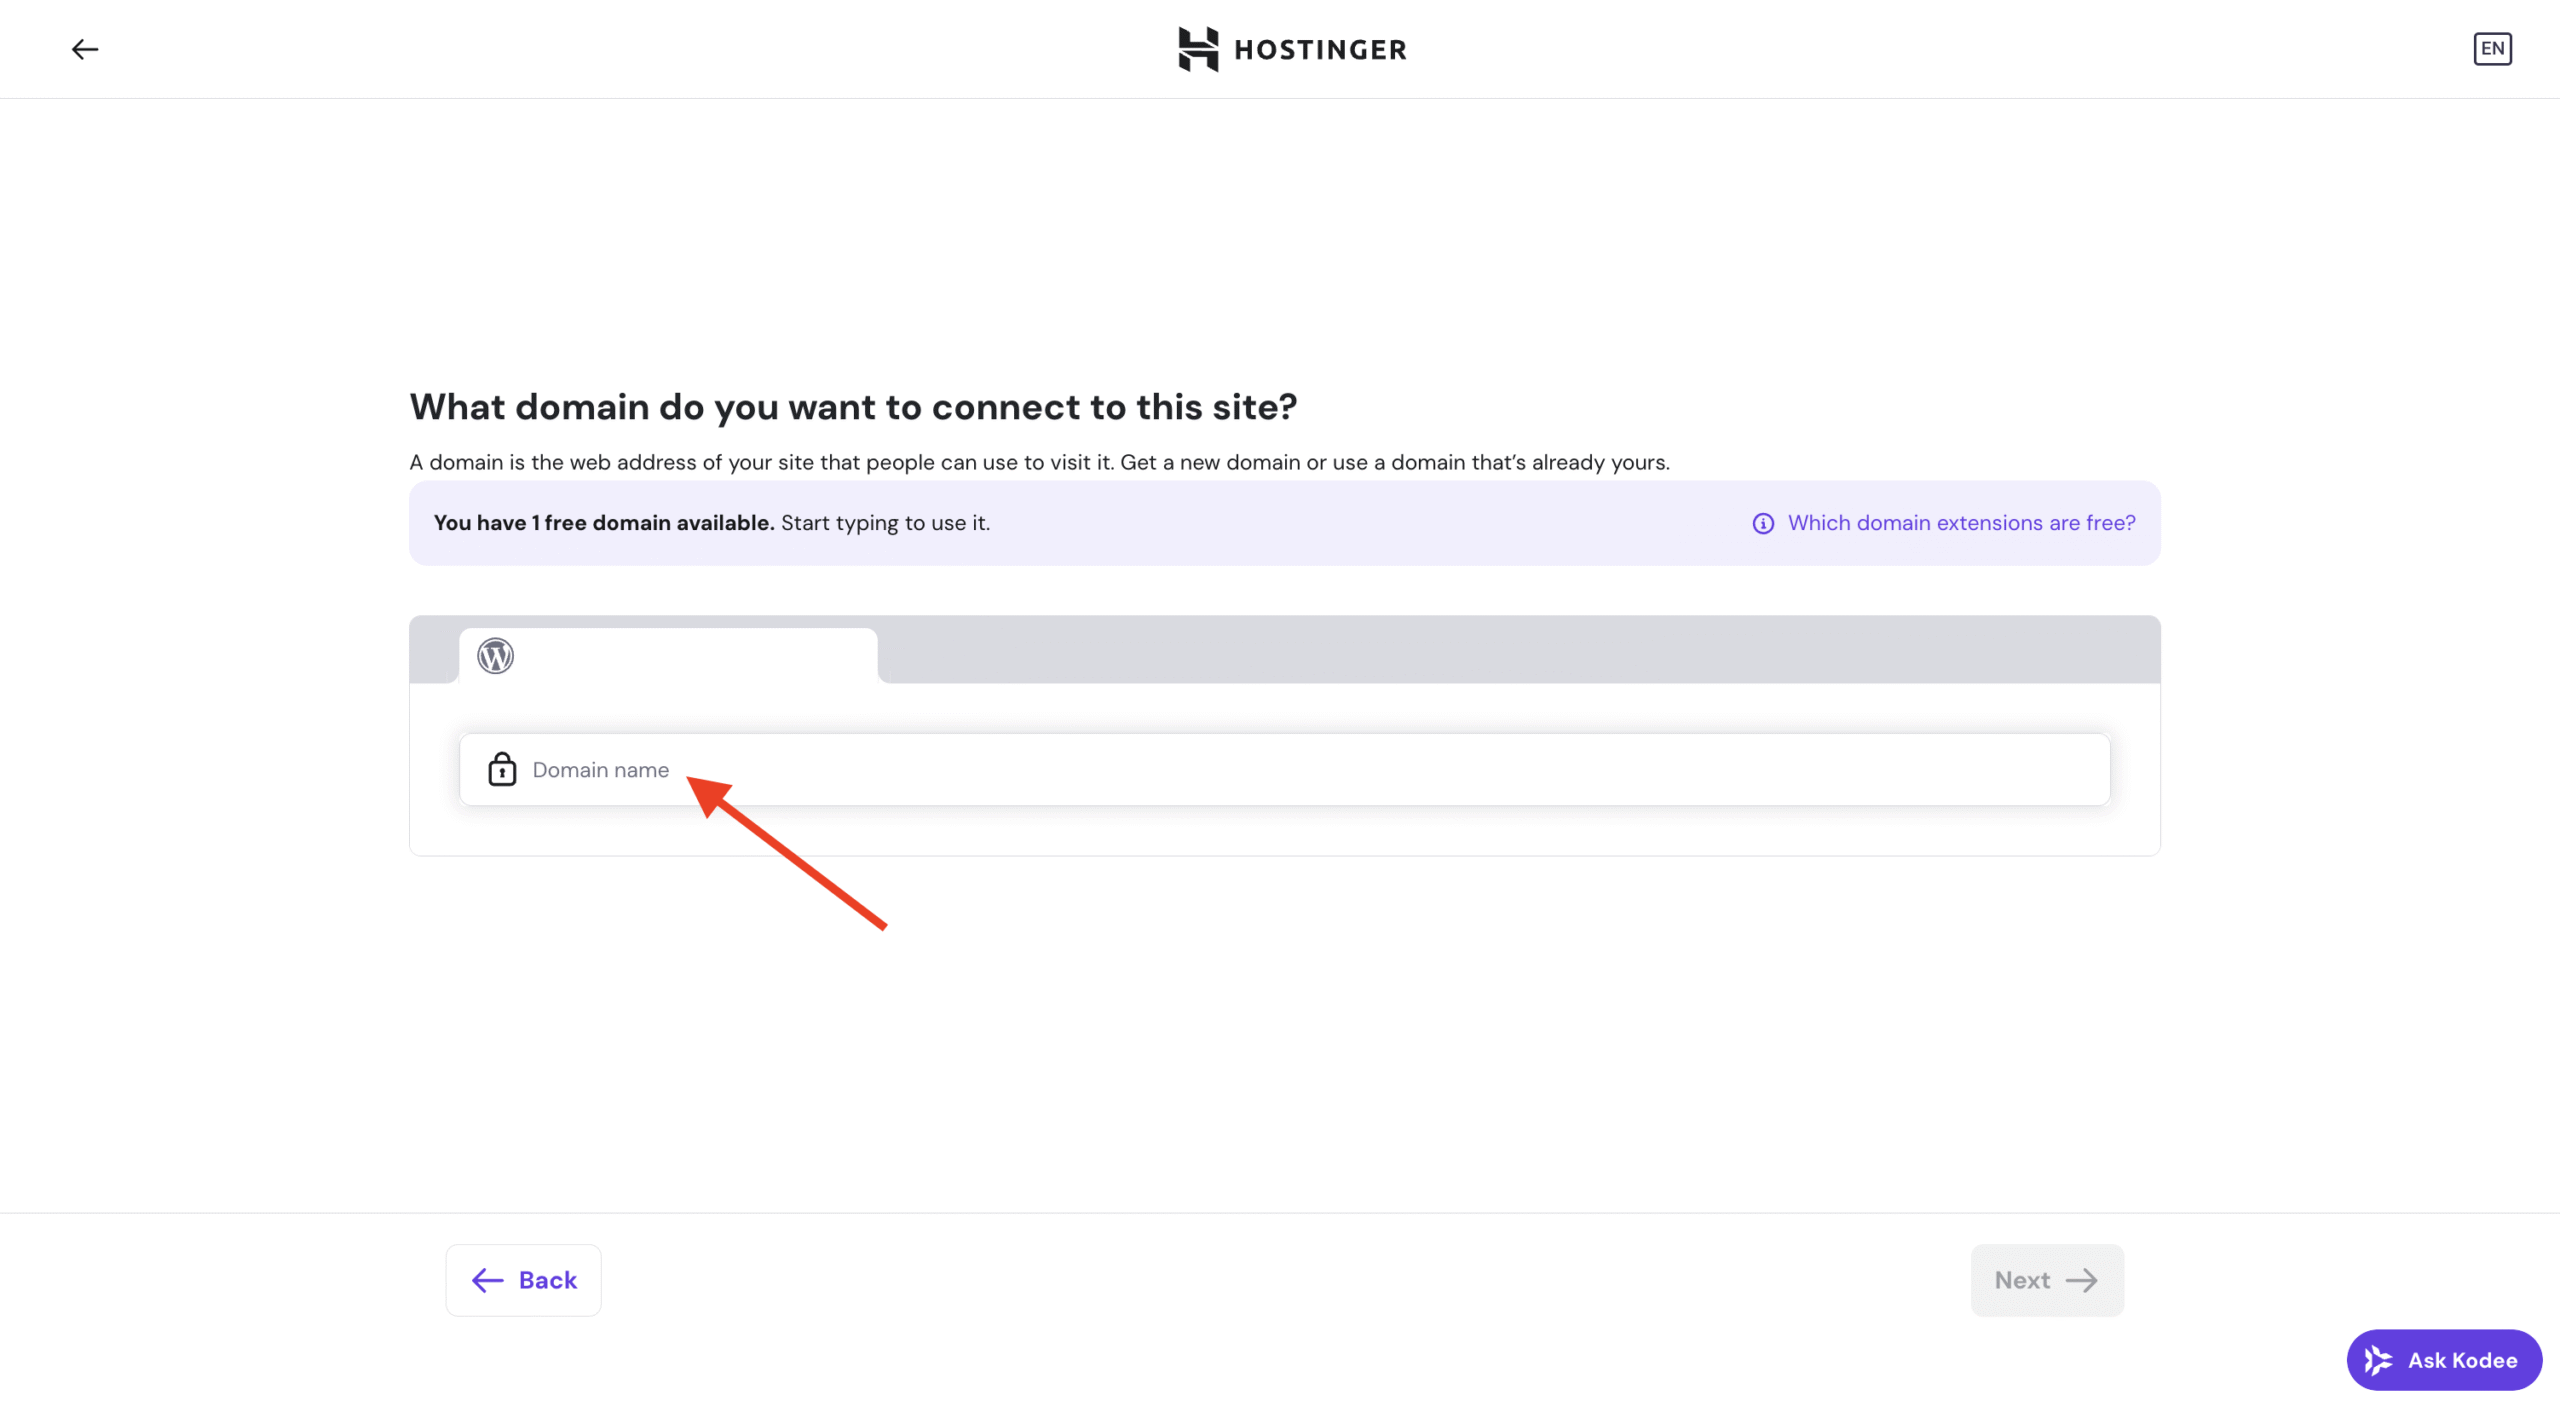
Domain connection and SSL
Domain connection may take up to 24 hours, depending on DNS propagation. Once the process is completed:
- Your Node.js application will be accessible via the custom domain
- SSL certificates will be installed automatically
NOTES
- You can change or replace the connected domain later if needed.
- During DNS propagation, your application may still be accessible via the temporary domain.
- If your domain is registered outside Hostinger, make sure the required DNS records are added correctly.