To create and upload a database on a CyberPanel VPS at Hostinger, create the database from the Databases menu in CyberPanel, then import your .sql or .sql.zip file through phpMyAdmin.
How to create a database
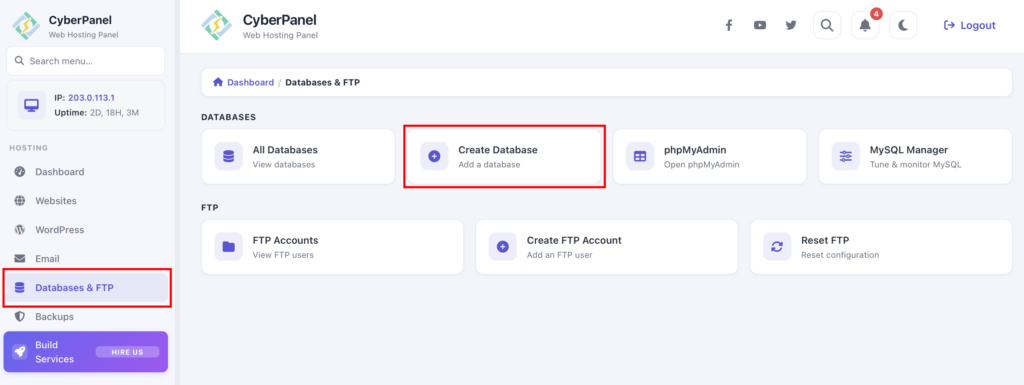
To create a database, in the Available functions section, choose Databases → Create Database:
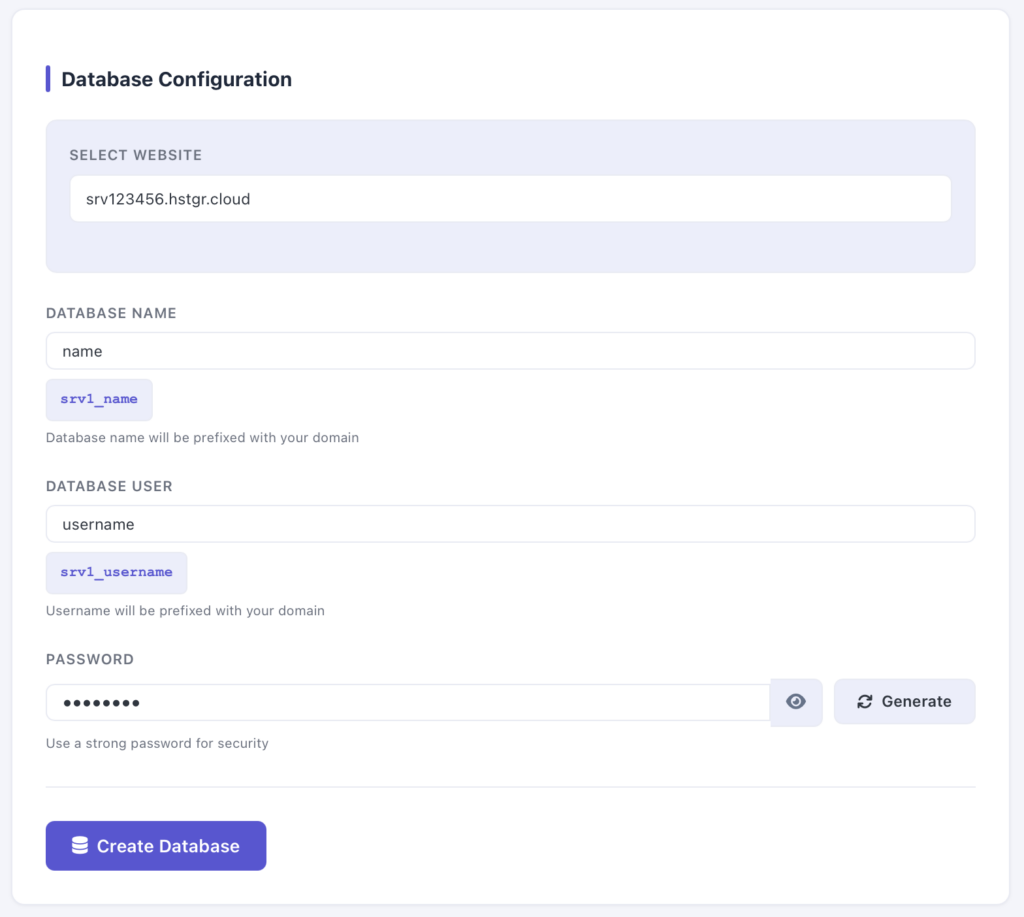
On the opened page, you will need to insert the following information:
-
A website for which you want to create a database
-
A database name
-
A database username
-
A strong password
After this data is filled, click on Create Database.
How to upload or import a database
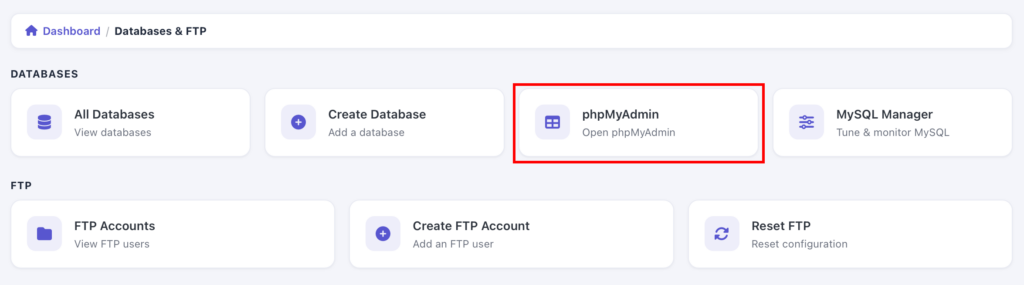
After you have your database created, all you need to do is access its phpMyAdmin. It can be done via a separate button in your CyberPanel:
There, just click on the database name in the left column, choose Import, and select your database file (in .sql or .sql.zip format).
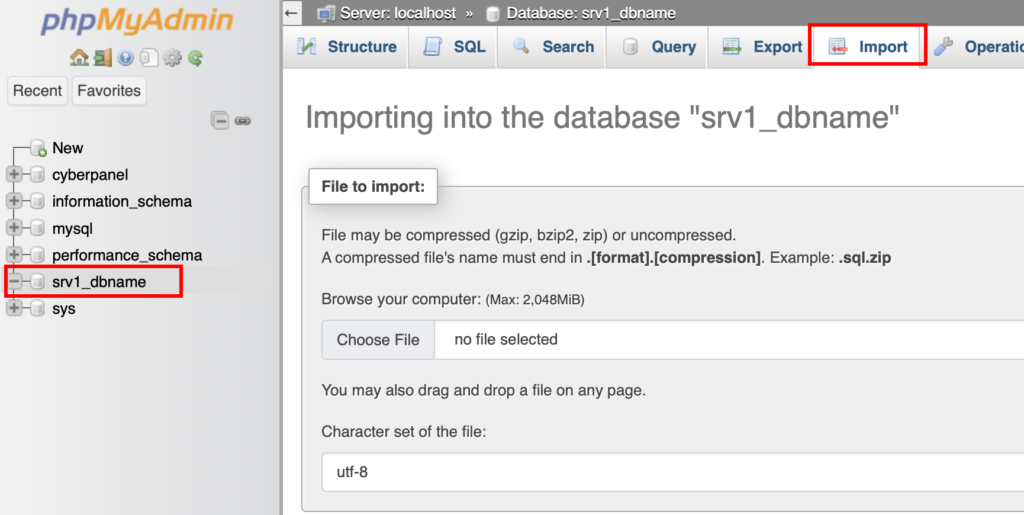
Then scroll down the page and click on Go – your database will be successfully uploaded.
Your database is now created and uploaded on your CyberPanel VPS, and you can connect it to your website.
More CyberPanel guides