To change the DNS resolvers on a Hostinger VPS, open your server’s Settings page, select Change DNS resolvers, enter the new addresses in the IP address 1 and IP address 2 fields, and click Save DNS resolvers. A DNS resolver is a server that converts domain names into IP addresses, and Hostinger provides recommended DNS resolvers for your VPS by default. Without a working DNS resolver, your website stays reachable by IP address but not by its domain name.
How to change the DNS resolvers
While not recommended, you can still use your own DNS resolvers by navigating to the VPS section and choosing Manage next to your chosen server: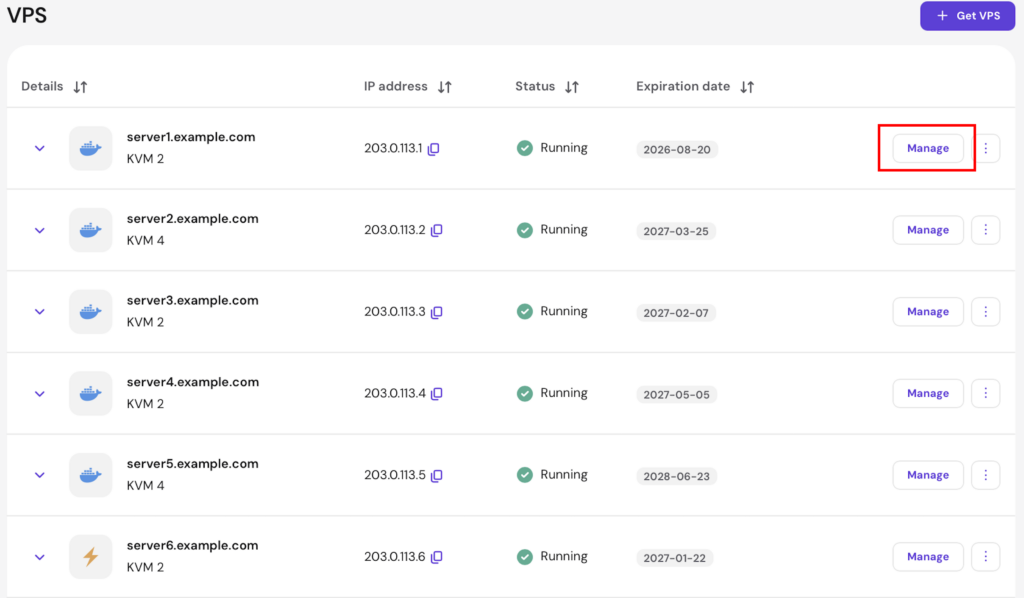
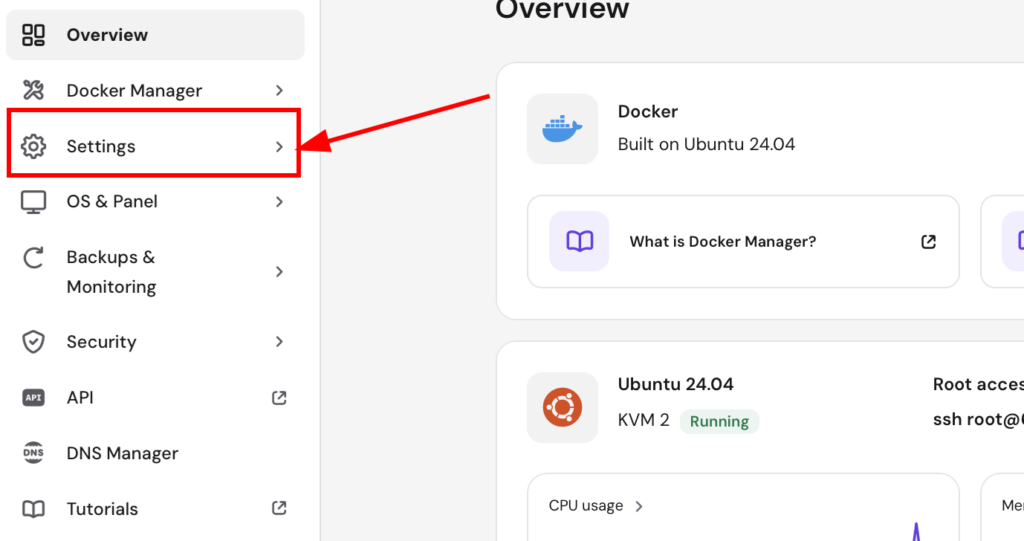
Then, open the Settings page:
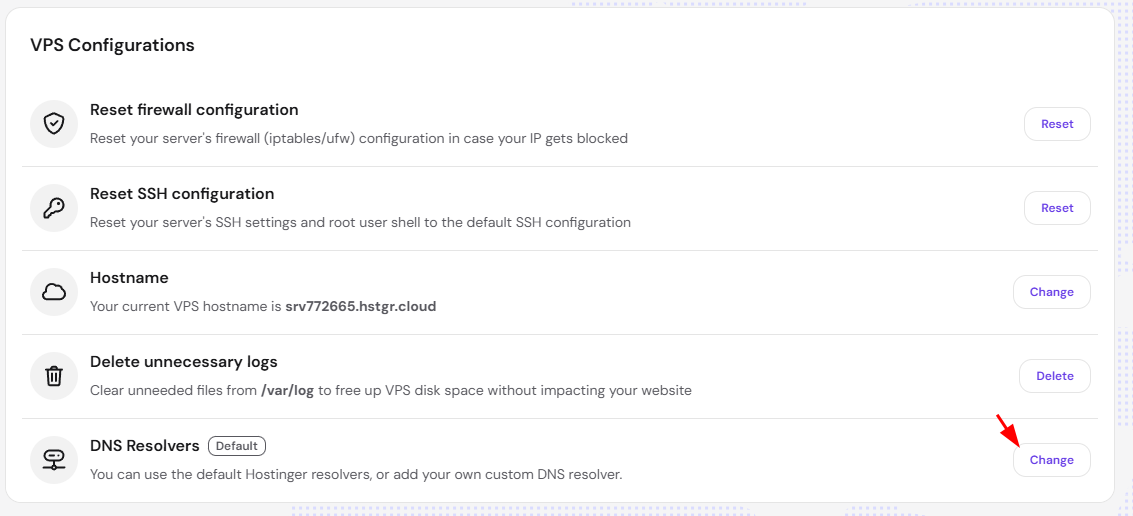
Next, scroll down and select Change DNS resolvers:
Enter the new DNS resolvers on the IP address 1 and IP address 2 fields and click on Save DNS resolvers.
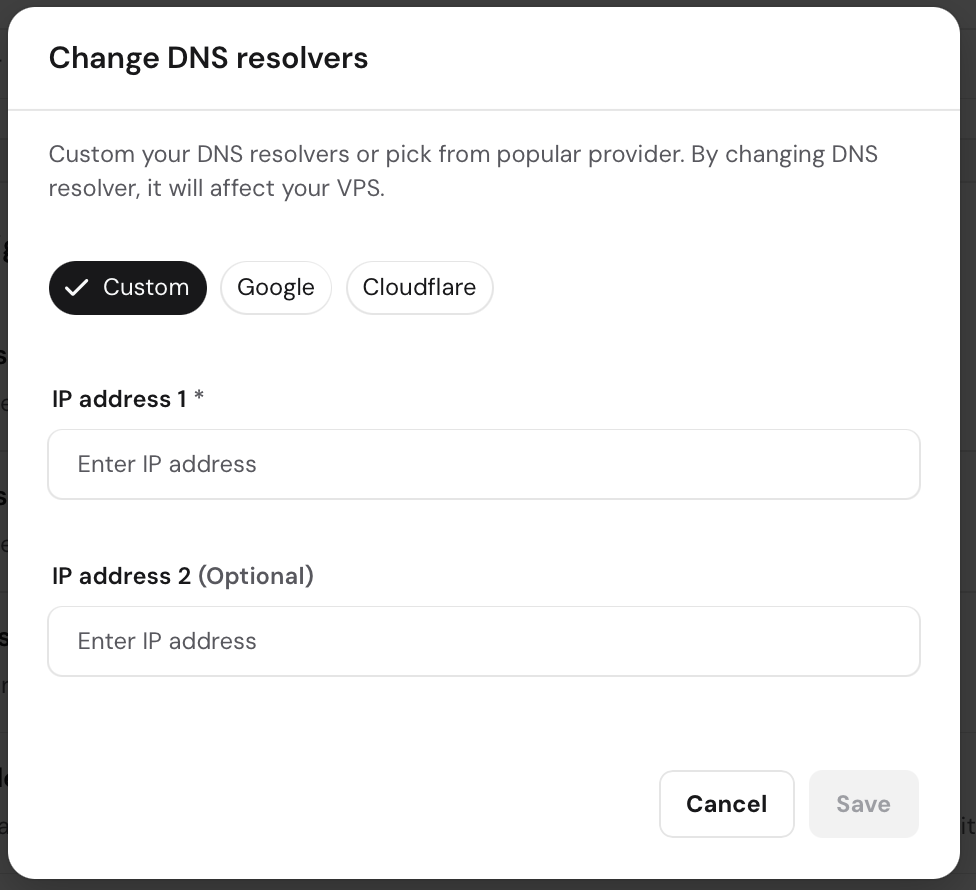
This feature works by automatically updating the resolv.conf file on your VPS; therefore, you won’t need to edit this file manually when specifying the new DNS resolvers.
Your VPS now uses the DNS resolvers you entered.