Set up your domain for Hostinger Email automatically if your nameservers already point to Hostinger — Hostinger adds the required MX, SPF, and DKIM records for you.
Before you start
- Your domain must use Hostinger nameservers. If you’re not sure, check your domain nameservers first.
- If your domain doesn’t use Hostinger nameservers, see set up domain for Hostinger Mail for the manual setup option instead.
Connect your domain automatically
- In your Hostinger account, navigate to the Emails section of Hostinger dashboard and click Mailboxes next to your domain name
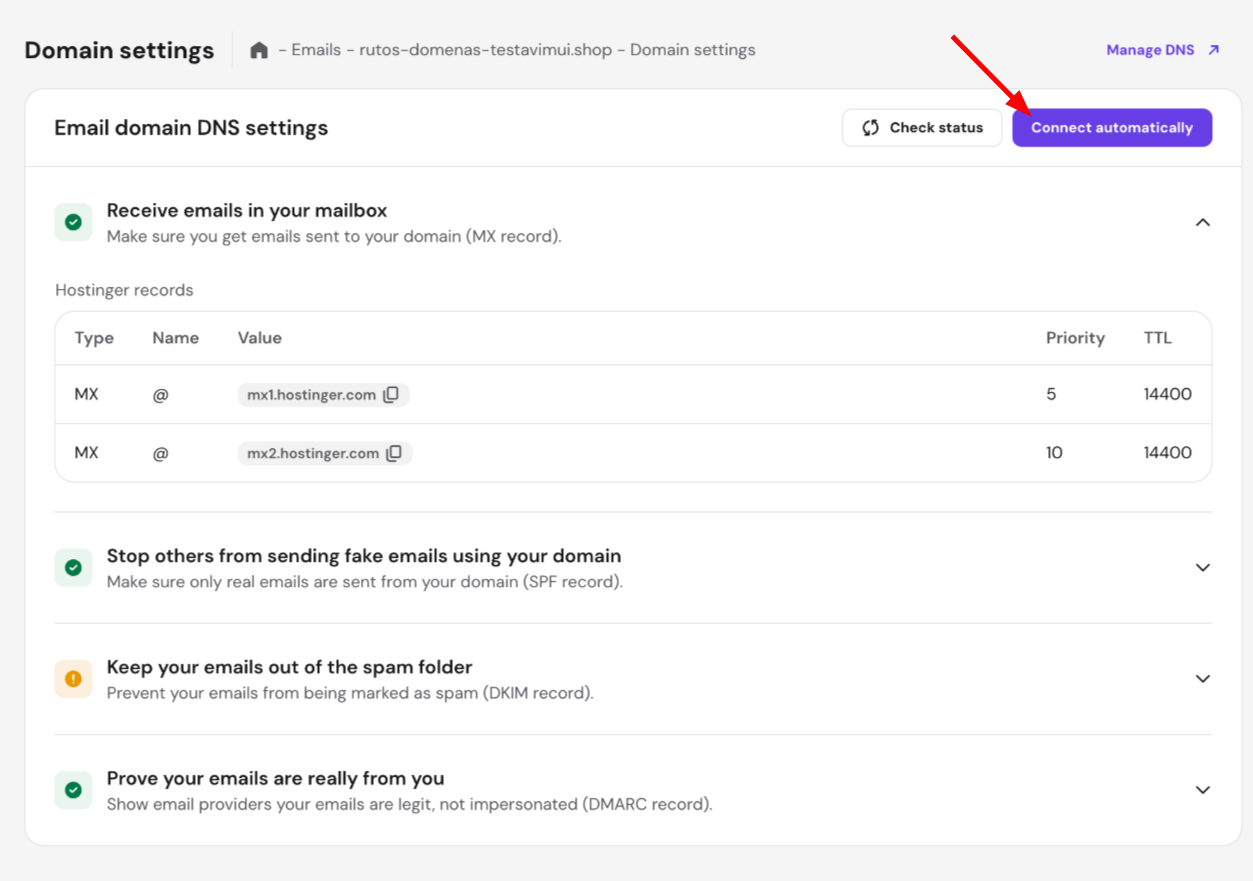
- Open the Domain settings section on the left and click on Connect automatically
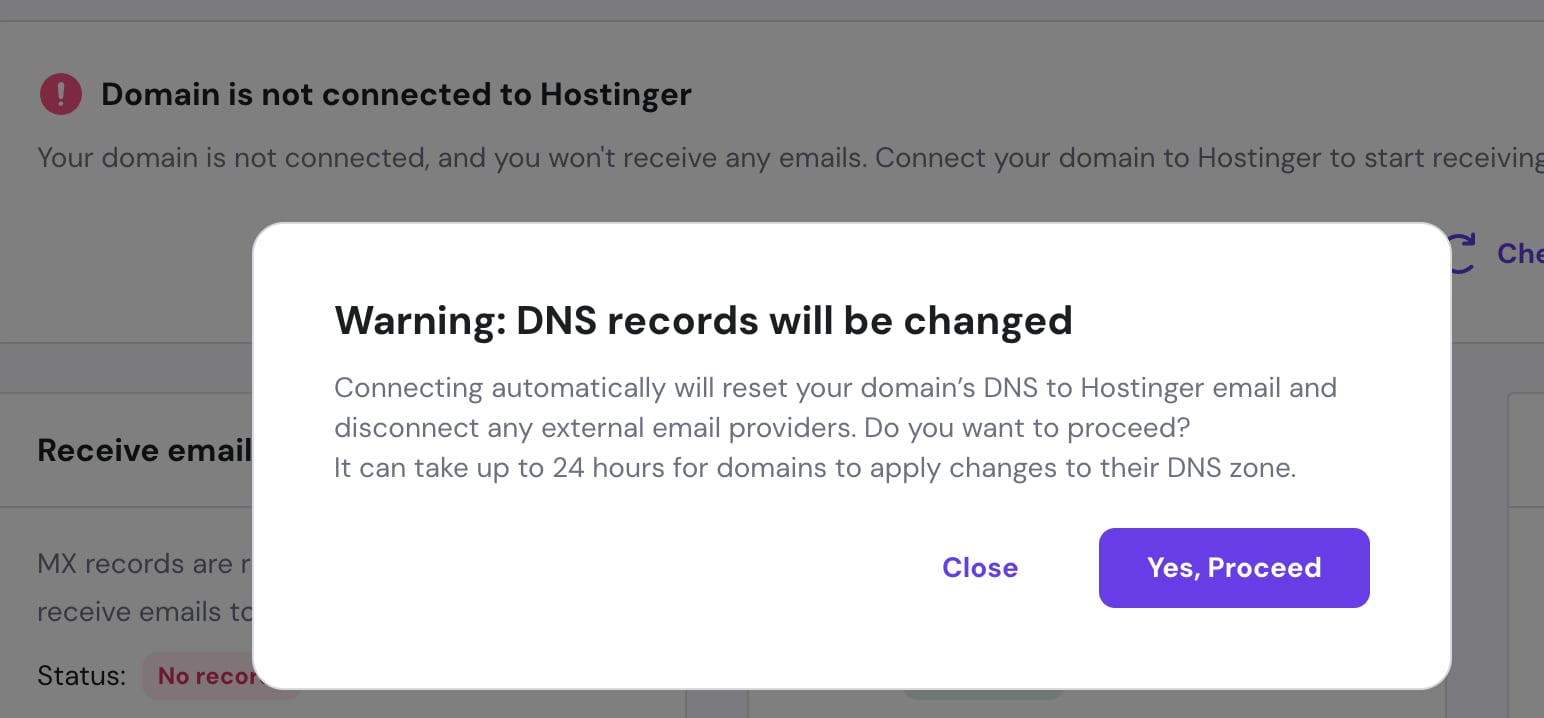
- Click on Yes, proceed to confirm and apply the changes to your domain
This way, the necessary MX, SPF, and DKIM records are automatically added to your domain’s DNS zone connecting to Hostinger Email server.
Add a DMARC record
Additionally, we recommend you add a DMARC record to your domain’s DNS zone manually. While not mandatory for basic email operations, it’s highly recommended for enhanced security. It helps protect your domain from phishing and spoofing attacks.
After making these changes, your email service might take up to 24 hours to start working due to DNS propagation. It’s a completely expected and unavoidable process, so you only need to give it some time. Once this period passes, you’ll be able to send and receive emails without any issues 💡