To install a Let’s Encrypt SSL certificate on a Hostinger VPS with CloudPanel, log in to CloudPanel, open your website’s SSL/TLS tab, and create a new Let’s Encrypt certificate. CloudPanel then installs the certificate for your domain.
Prerequisites
-
A VPS with installed CloudPanel
-
A domain name pointed to your VPS
Steps 1 — Log in to CloudPanel
Access your VPS dashboard, navigate to the Panel access tab, and log in with your credentials:
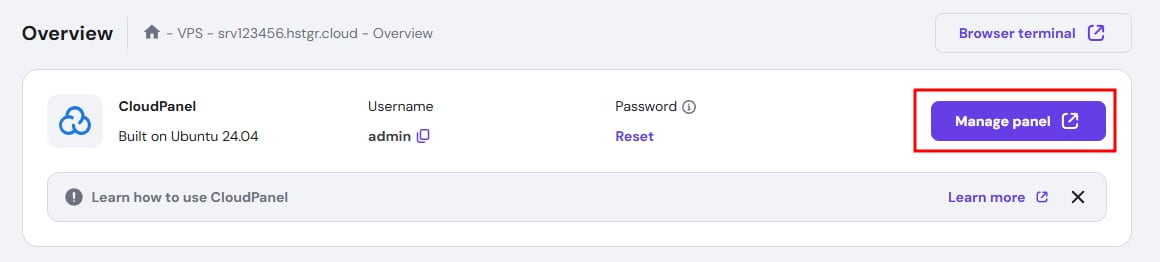
Step 2 — Select a website
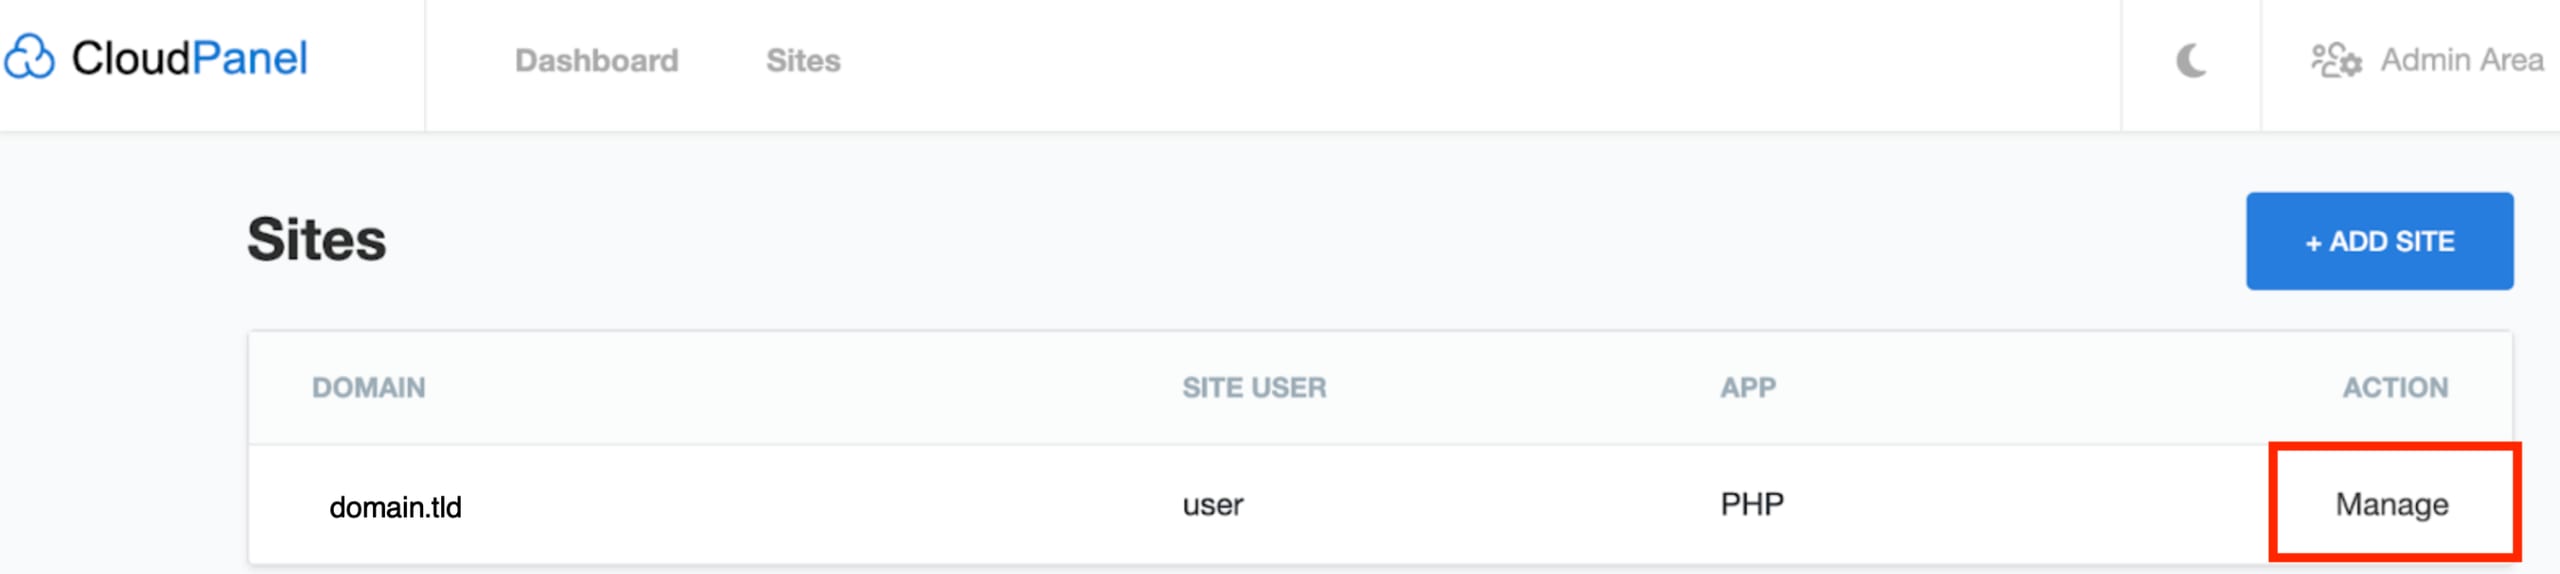
Once logged in to CloudPanel, find the website you want to install the SSL to, and click on Manage next to it:
Step 3 — Generate an SSL certificate
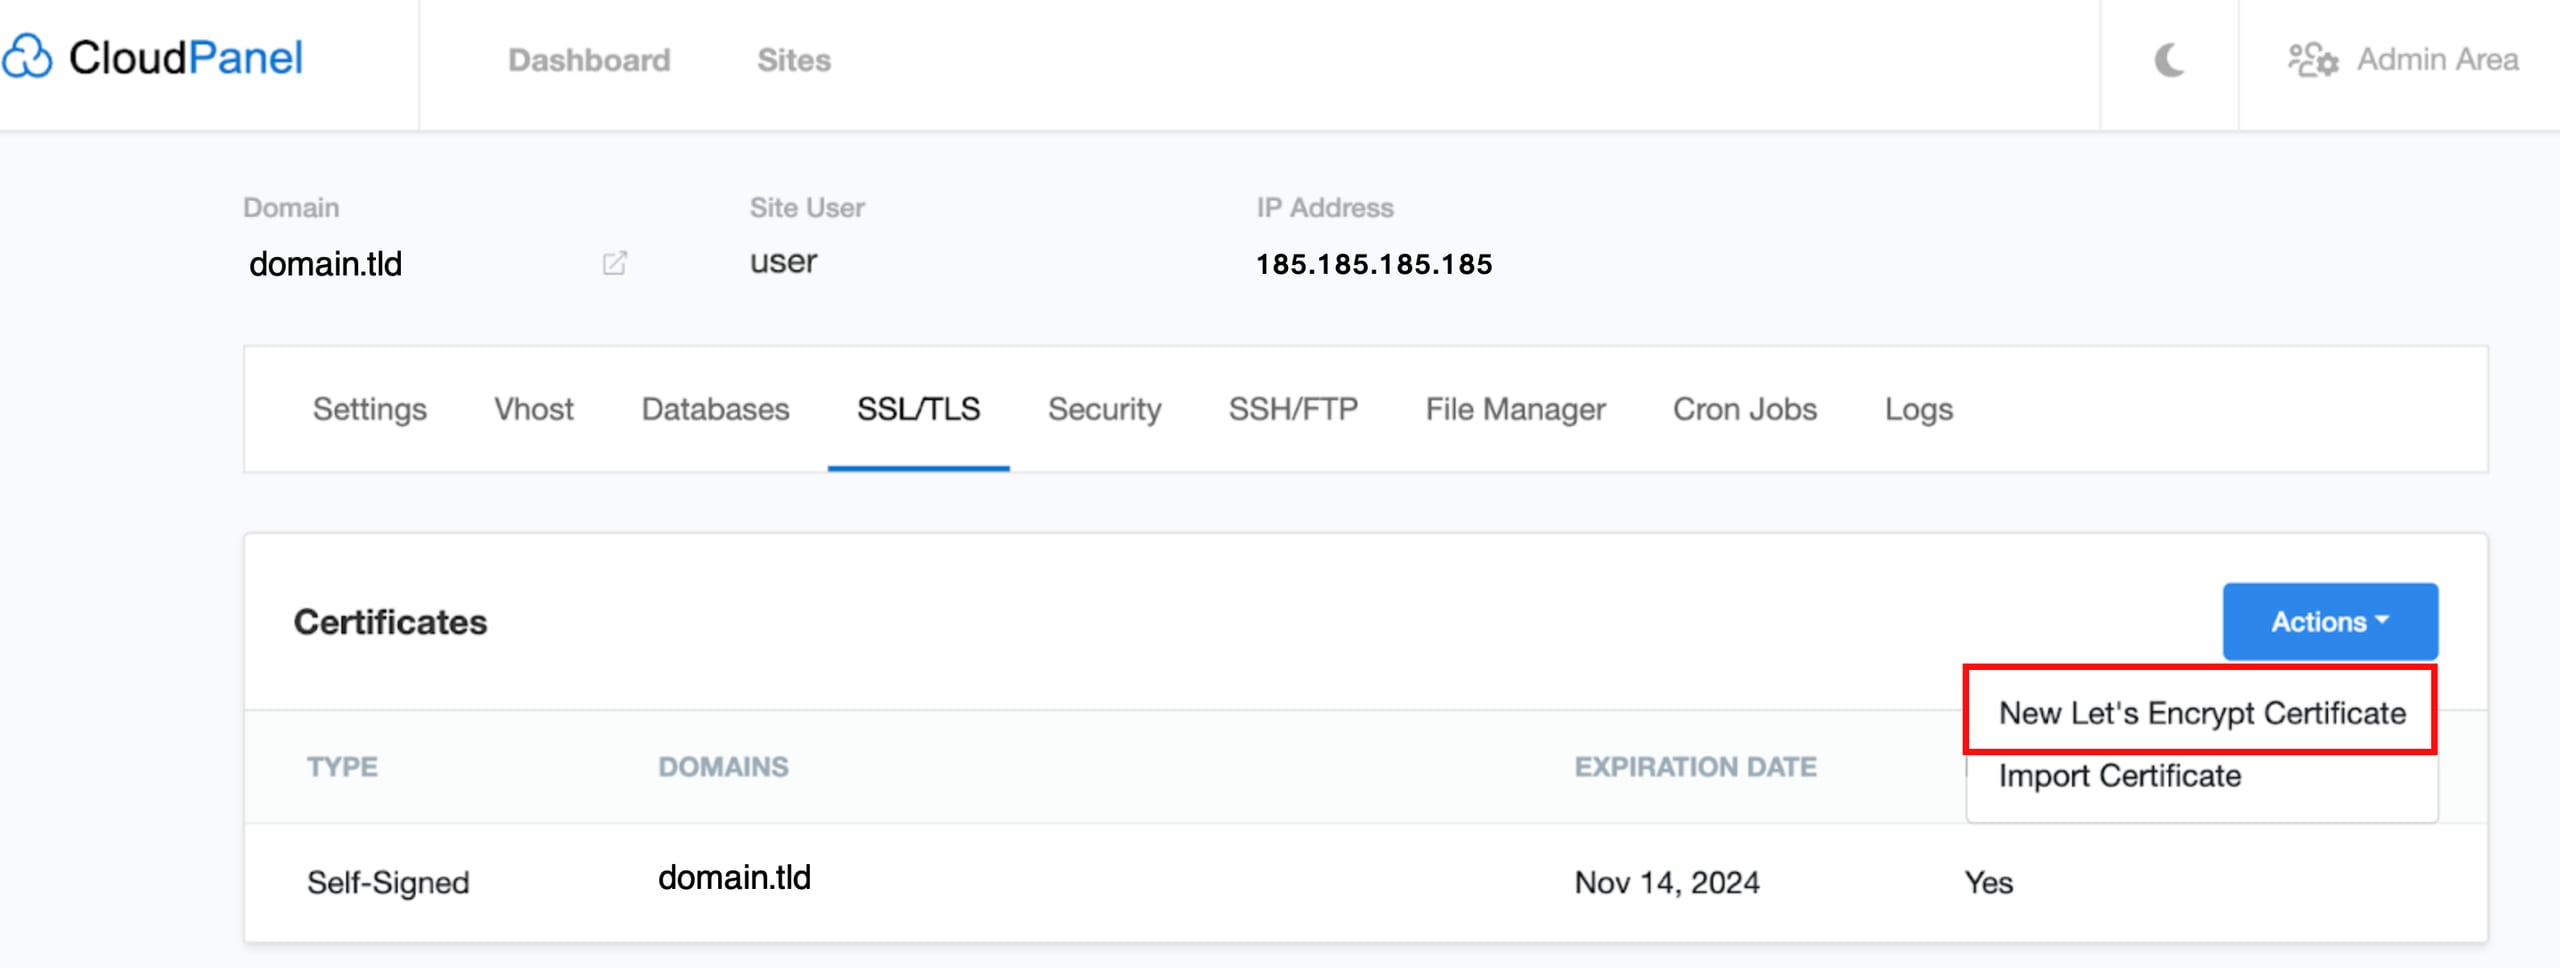
Within the website management section, go to the SSL/TLS tab, and from the Actions menu, select New Let’s Encrypt Certificate:
Step 4 — Configure certificate settings
Configure the certificate settings, whether to include www or not. Finally, click on Create and Install to initiate the Let’s Encrypt certificate request:
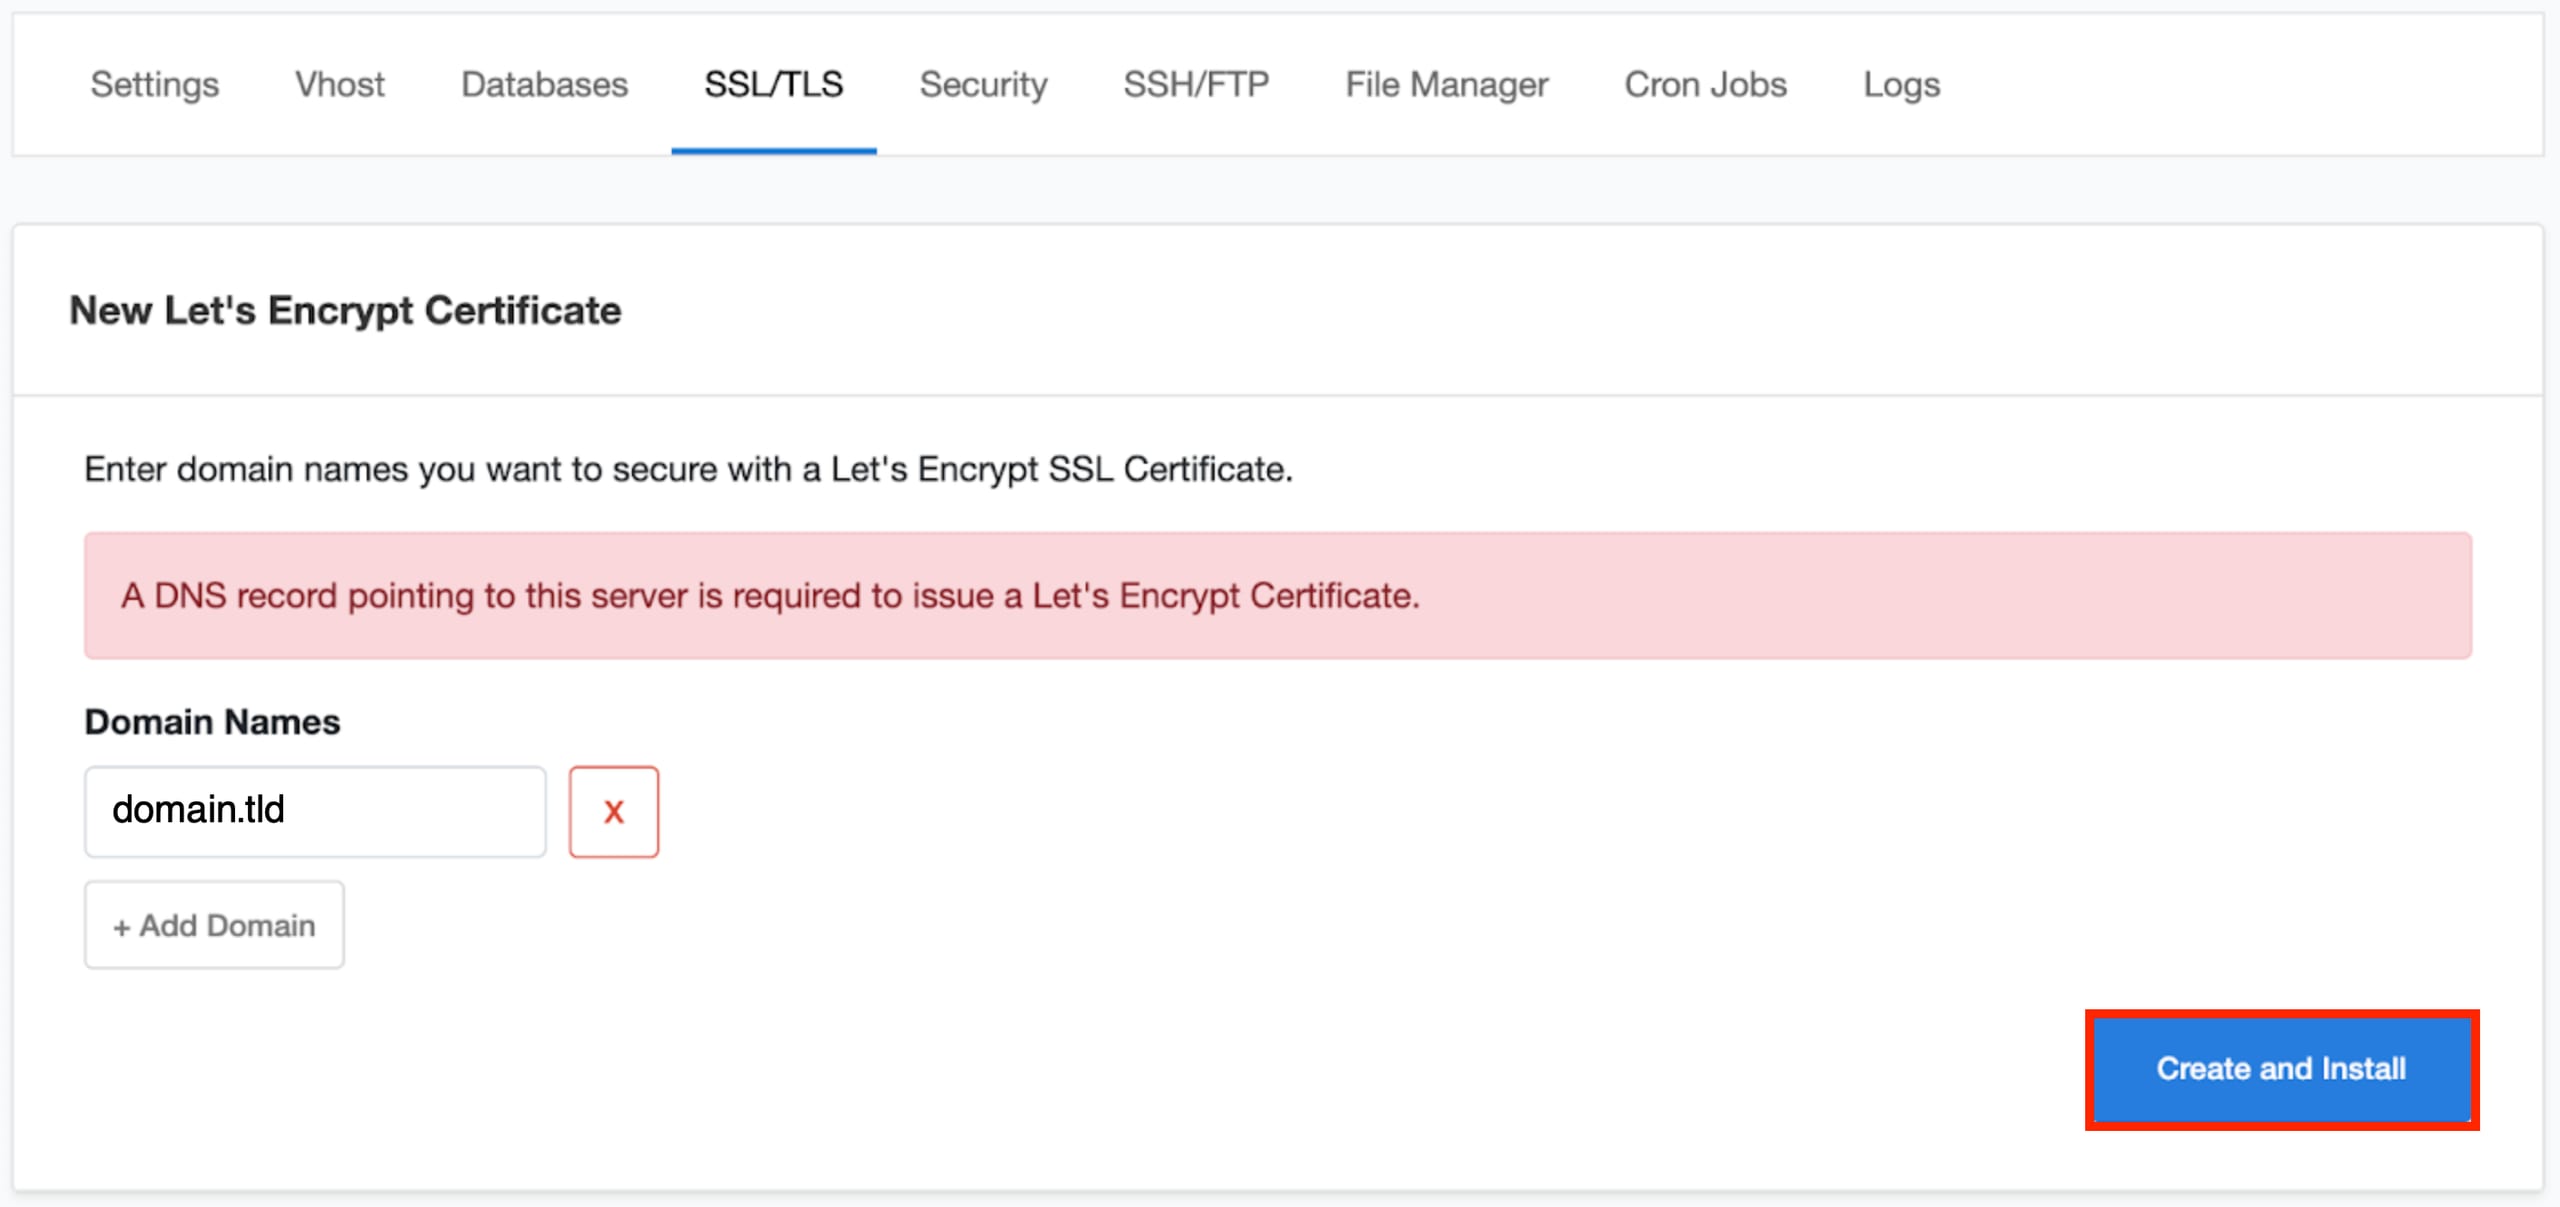
Once the process is complete, CloudPanel will display a success message indicating that the Let’s Encrypt SSL certificate has been installed for your domain.