If you use Hostinger AI Builder to run an online store, you can easily customize the checkout configurations. In this article you’ll learn how to:
- How to add legal pages as checkout policies to the checkout
- How to use custom options
- How to set store language
The checkout page itself cannot be edited, i.e., changing its structure, layout, or design is not yet supported 💡
Add legal pages as checkout policies to the checkout
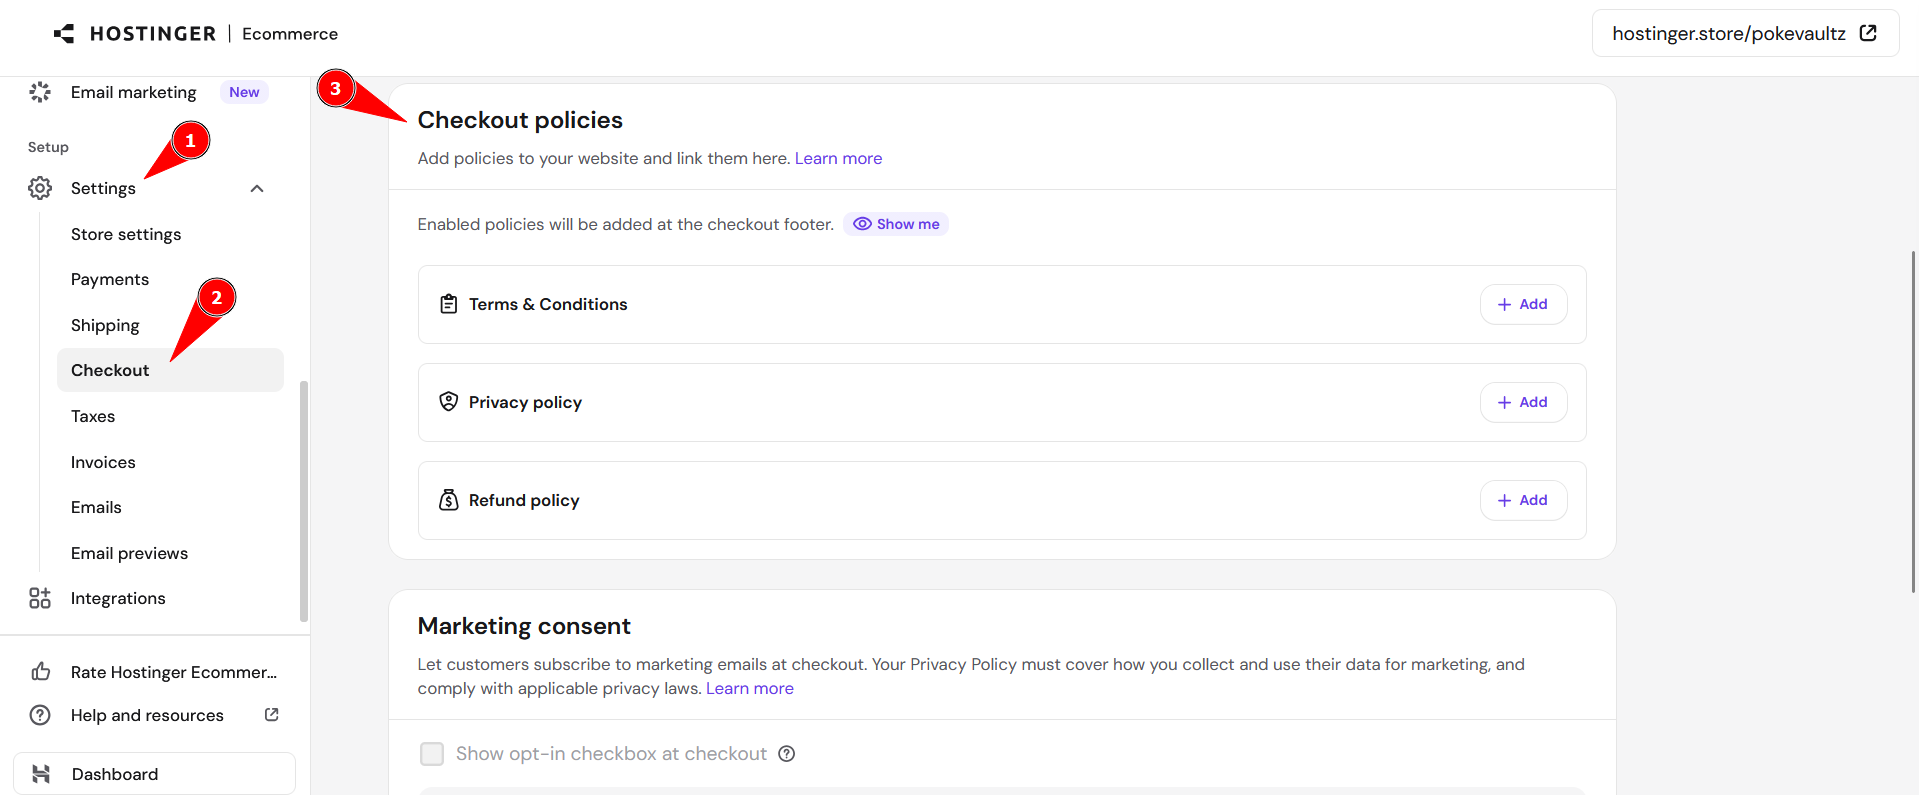
- Go to your Store, then click Settings in the side menu.
- Select Checkout.
- Go to section Checkout policies. In the section you can add Terms & Conditions, Privacy policy and Refunds policy.

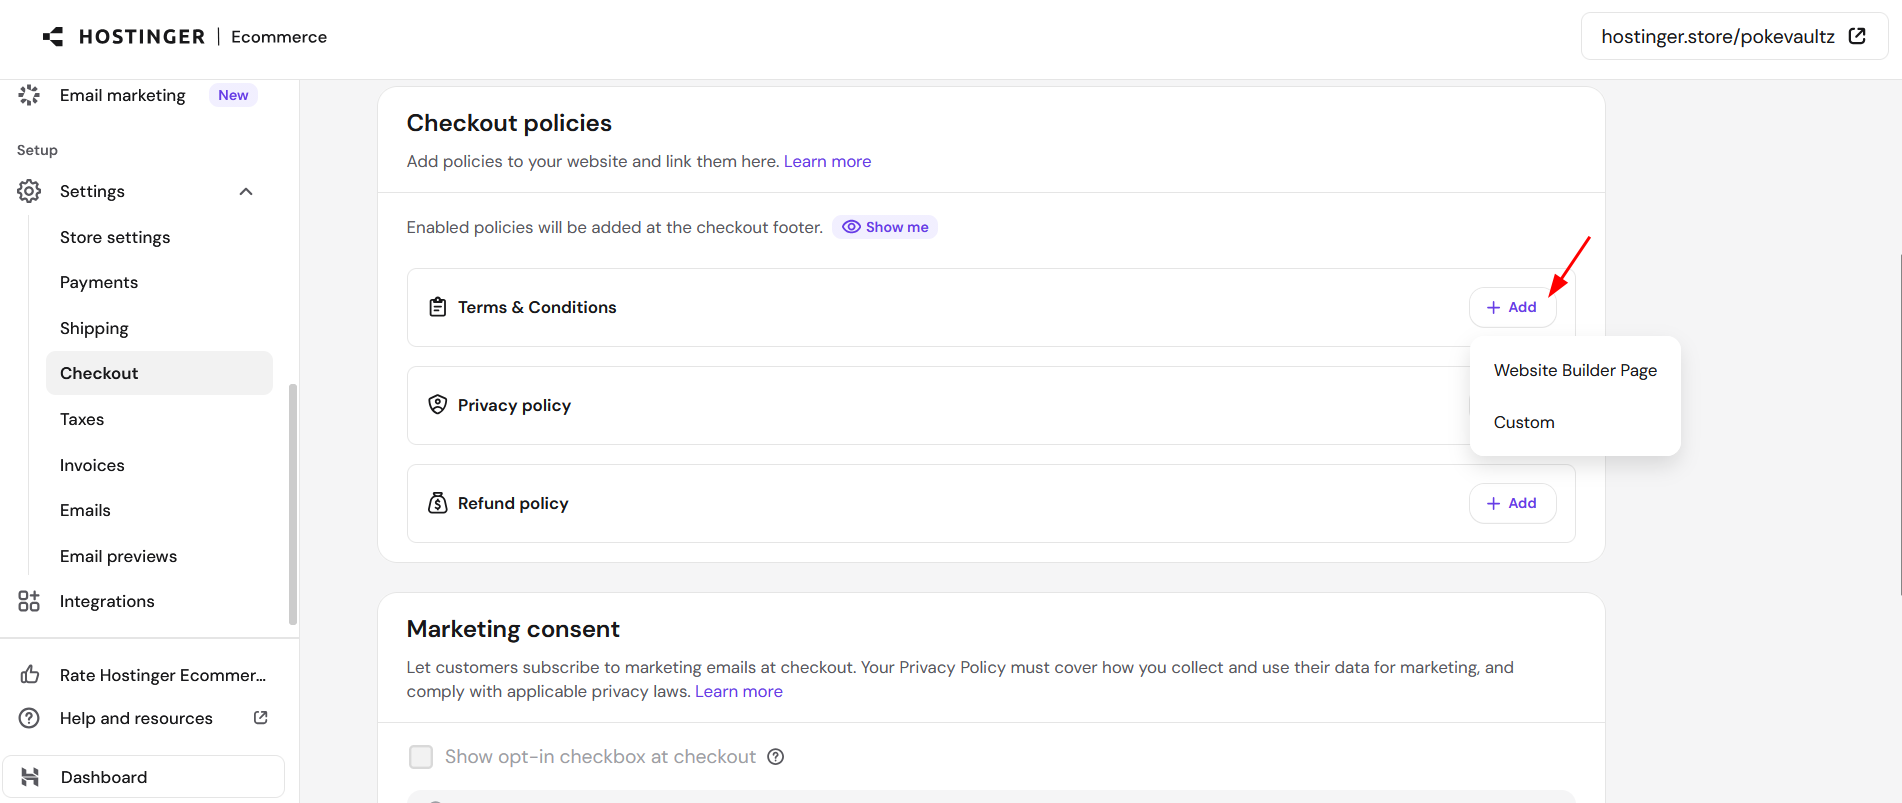
- To add specific policy select Add and choose from two options: Website Builder Page or add Custom link. This is an important step in order to ensure compliance with payment provider KYC requirements and build trust with your audience.

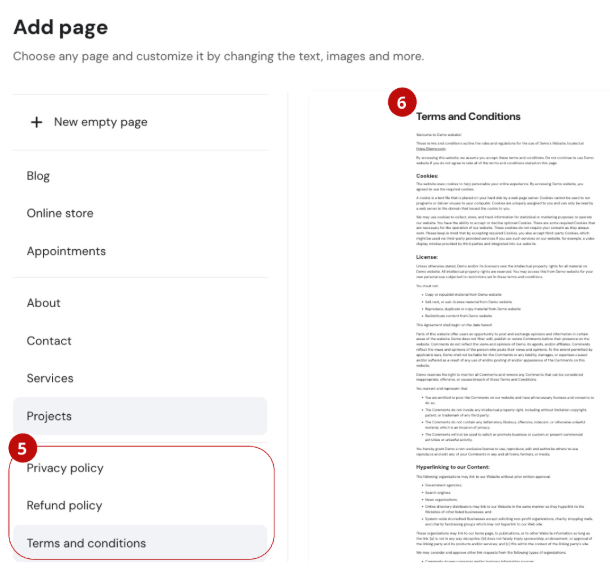
Website Builder Page can be used only for Hostinger AI Builder manual mode. - Use the Website Builder Page option to add necessary legal pages to both your website and your checkout page. Once this option is selected, the editor will open in a new tab, where you will be asked to select the Add page into your website. Select one of the legal pages (Privacy policy, Refund Policy or Terms & Conditions).
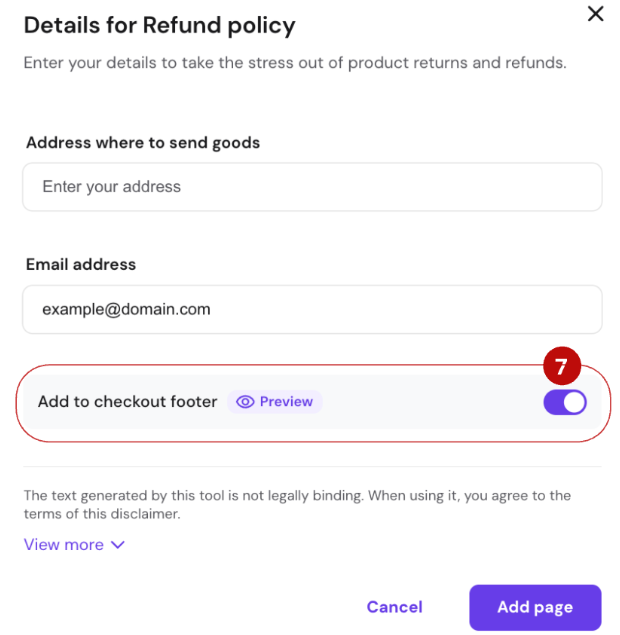
- Select the form.

- Fill all of the required fields and make sure to enable Add to checkout footer selection. Press Add page.

- Back in your Store Manager, a newly created link will appear automatically.

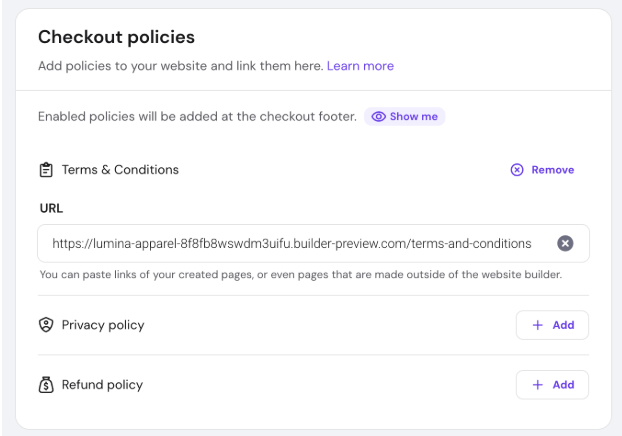
Repeat the same process for all the policies. You can also select Custom option and copy paste links yourself.
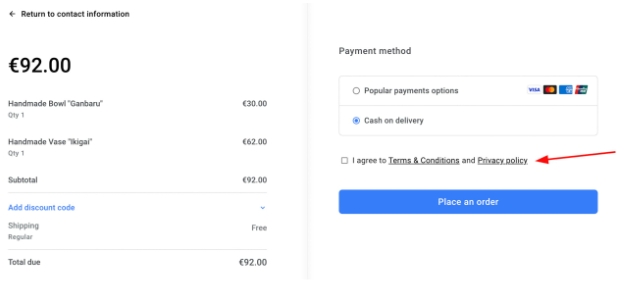
This way, your clients will be asked to agree with the policies before proceeding to payment in the checkout:
Learn more: How to Create Legal Pages for manual mode
Custom options
In the section Custom options, you can enable additional fields for collecting additional details from your clients:
-
Require phone number at checkout: choose whether a client is required to insert the phone number when making a purchase
-
Add a custom field to the checkout: collect more information from your clients; you can also make this field required
Checkout language
In the section Checkout language, specify the preferred language for your store: it will automatically reflect in the shopping bag, checkout, and invoices.
NOTES
-
You can enable or disable the shopping bag in the website’s header settings for manual mode
-
After making any changes, save them and update your website