The WordPress debugging mode helps you identify, track, and understand errors occurring on your website. This guide explains how to enable error debugging and configure error logs using the Hostinger File Manager.
Before you start
- This guide applies to web, cloud, and agency hosting.
- For WordPress websites on agency hosting, you must first enable
wp-config.phpediting.- Go to Hostinger dashboard → Websites.
- Click Dashboard next to the website.
- On the sidebar, go to Files → File Manager.
- Locate the Editing permission option an, if locked, click on the toggle to unlock it.
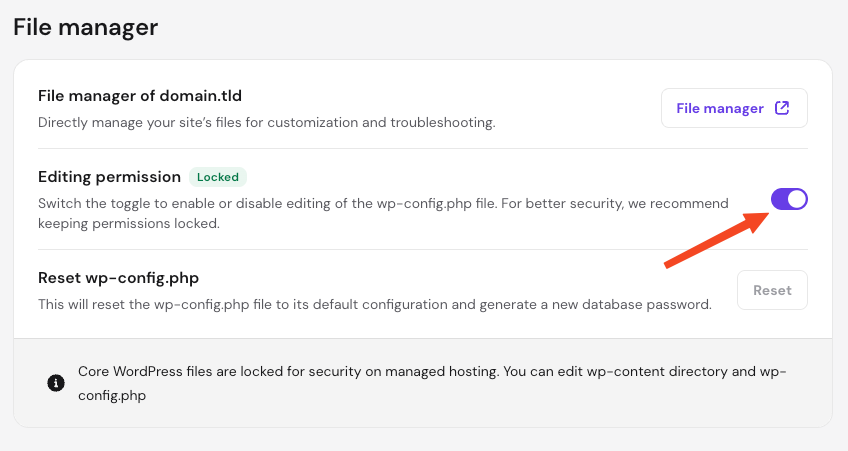
- It is recommended to lock it again after making the changes.
Step 1 – Access the wp-config.php file
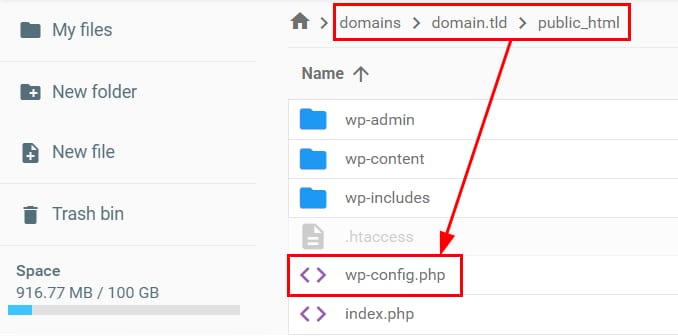
- Open the file manager for your website.
- Navigate to the
public_htmldirectory of your domain. - Locate the
wp-config.phpfile within the folder structure.

Step 2 – Enable WP_DEBUG
- Right-click the wp-config.php file and select Edit.
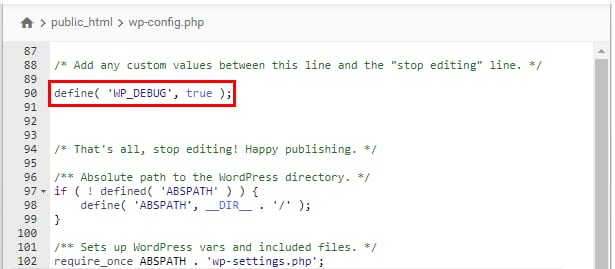
- Search for the line containing WP_DEBUG:
define( 'WP_DEBUG', false );
- Change the value from false to true:
define( 'WP_DEBUG', true );

- If this line does not exist in the file, add that code block directly above the line that reads
/* That's all, stop editing! Happy publishing. */
- Save the changes to the file.
Log website errors privately
To keep track of historical error data without displaying technical error messages publicly to website visitors, you can enable error logging and disable the error display.
- Open the
wp-config.phpfile for editing. - Add the following lines directly below the line that enables WP_DEBUG:
define( 'WP_DEBUG_LOG', __DIR__ . '/wp-content/debug.txt' );
define( 'WP_DEBUG_DISPLAY', false );
And save the changes.
The website configuration will now record all background errors silently without disrupting the visitor experience. The generated error log file is saved as debug.txt inside the wp-content directory, so you can access and download it directly from File Manager.
Additional resources
- WordPress debug: a comprehensive guide
- How to fix 500 Internal Server Error at Hostinger
- How to find the website’s configuration file at Hostinger