If you have a hosting plan, you can easily create redirects from Hostinger dashboard. In case you have purchased a domain name only, and your domain is pointing to Hostinger nameservers, you can set up a redirect without a hosting plan by following the steps below.
- Log in to Hostinger dashboard, navigate to Domains on the sidebar, and click Manage next to the domain you want to redirect. Then, go to DNS / Nameservers and open the Redirects tab:
 If the domain you wish to redirect is currently connected to Hostinger AI Builder, the Redirects option will not be shown. You will need to redirect the domain via Cloudflare.
 - In the Redirect from field, the selected domain displayed automatically. Enter the full destination URL in the Redirect to field, where you want visitors to be sent, including
https://(for example,https://new-domain.tld). - Under Redirect type, select Permanent (301) for a permanent redirect, then click Create redirect.
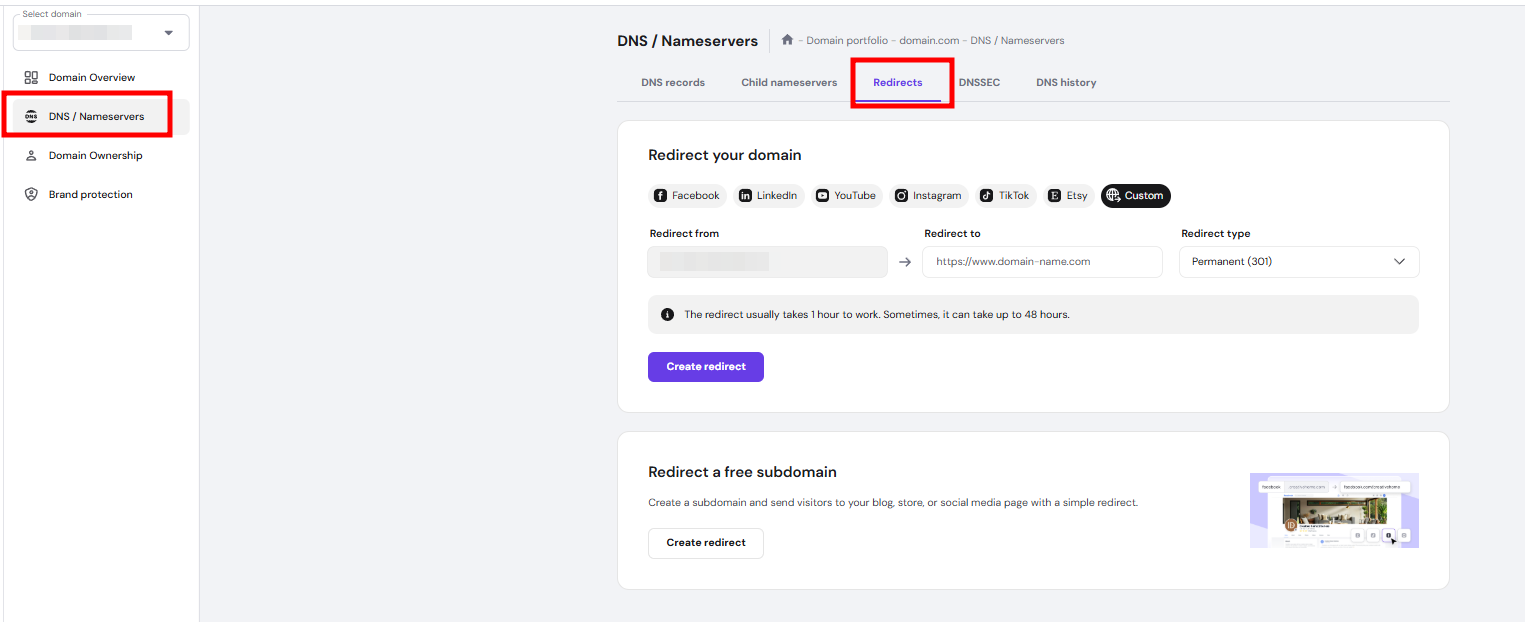
For convenience, you can also use the quick redirect buttons for popular platforms like Facebook, LinkedIn, YouTube, Instagram, TikTok, Etsy, or enter a custom URL.
What type of redirect to choose?
The main difference between the two types of redirection lies in their purpose and how search engines handle them:
|
Type |
SEO |
Use case |
|
301 — Permanent |
Search engines will transfer the SEO value from the old page to the new one |
A permanent change in the website name or due to a requirement from your hosting provider |
|
302 — Temporary |
Search engines do not transfer the SEO value to the new page |
When a website is undergoing maintenance or for testing a new page |
NOTES
- The redirect usually takes 1 hour to work. Sometimes, it can take up to 48 hours to fully propagate. Before testing, clear your local cache to ensure you’re getting the latest version of your website.
- You can also redirect a free subdomain to your blog, store, or social media page using the same method.