A symlink or symbolic link works as a shortcut to an existing directory or file on your File Manager. They can be useful for easier access to files in different locations inside your plan.
Before you start
- Symlink functionality is disabled by default on Web and Cloud hosting plans. To enable it, follow how to enable disabled PHP functions first.
- Agency plans do not support symlinks.
- On VPS, symlink functionality is enabled by default.
Create a symlink at Hostinger
If you wish to create a symlink, follow these steps:
1. Access your plan via SSH connection. You can use PuTTY, PenguiNet or any other SSH terminal
2. Type in the command: ln -s original_file.php symlink_file.php
Make sure to replace original_file.php with the full path of the file you want to create the shortcut for, and symlink_file.php with the name of the symlink file:
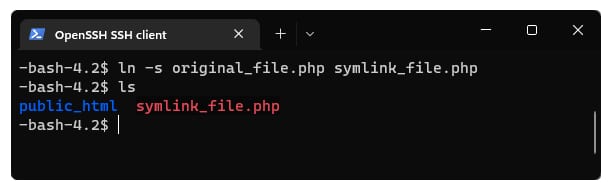
Once created, you can verify it on the terminal using the ls command.
3. That’s it! Your symlink is ready to use as a shortcut in your File Manager, on the location you created it:
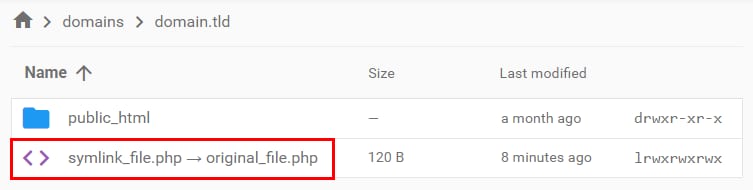
Double-clicking on it will lead you to the destination path 😊
NOTE
-
You can find all you need to know about symlinks in this tutorial: How to Create Linux Symlinks
-
For VPS users, you can follow the same steps to create symlinks, with VPS plans having symlink functionality enabled by default