What is WordPress Gutenberg? understanding the block editor
Mar 10, 2026
/
Jordana A.
/
13 min Read
If you’re new to WordPress, start by familiarizing yourself with Gutenberg, its block editor, to manage the platform more effectively. Introduced as a replacement for the classic editor, it has become a core part of the content management system’s website-building experience.
WordPress Gutenberg uses a block-based design system, making it much more user-friendly for all skill levels. Understanding its functions and design capabilities can help you create your ideal website without having to code.
Whether you’re building a personal blog or a multi-page website, this guide will help you get the most out of the block editor.
What is WordPress Gutenberg?
Gutenberg is the WordPress default editor that replaced the classic editor. It lets you create and design content easily using blocks for various site elements, such as text, images, and videos. Its drag-and-drop interface makes it easy to use, giving you more flexibility to design your website just as you want.
In the WordPress community, Gutenberg isn’t just a content editor ‒ it’s part of a larger ongoing project to transform the whole website editing experience. The WordPress core team has outlined a roadmap to achieve this:
- Easier editing. Introduced in WordPress 5.0, the Gutenberg block editor offers a more intuitive approach to website building.
- Customization. WordPress 5.9 added full-site editing, block patterns, a block directory, and block-based themes based on the Gutenberg interface.
- Collaboration. Future updates aim to simplify co-authoring and make it more user-friendly.
- Multilingual. The team is working to support multilingual websites directly within the core software.
How Gutenberg editor works
The Gutenberg WordPress block editor makes adding and editing different elements on your posts and pages easy by using individual content blocks. Each block works as a standalone piece with customizable settings.
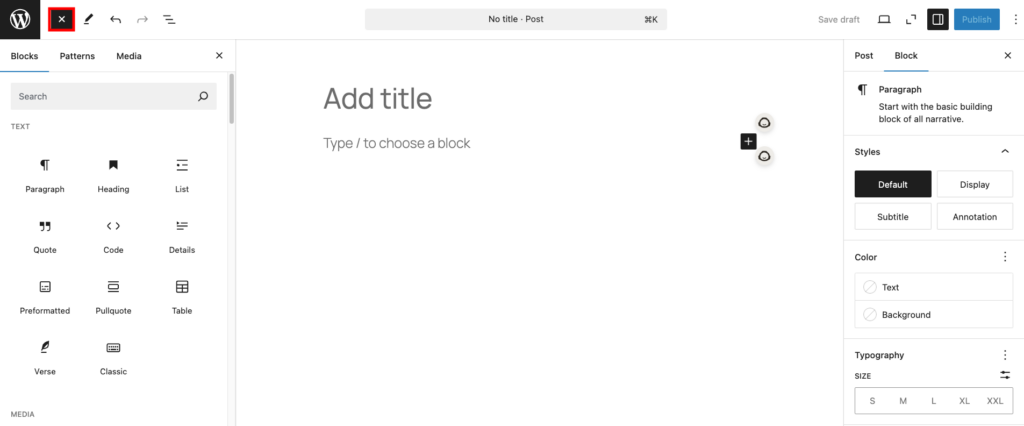
Getting started with the block editor is simple. Go to your WordPress dashboard, then head to Pages or Posts → Add New to open the Gutenberg interface.
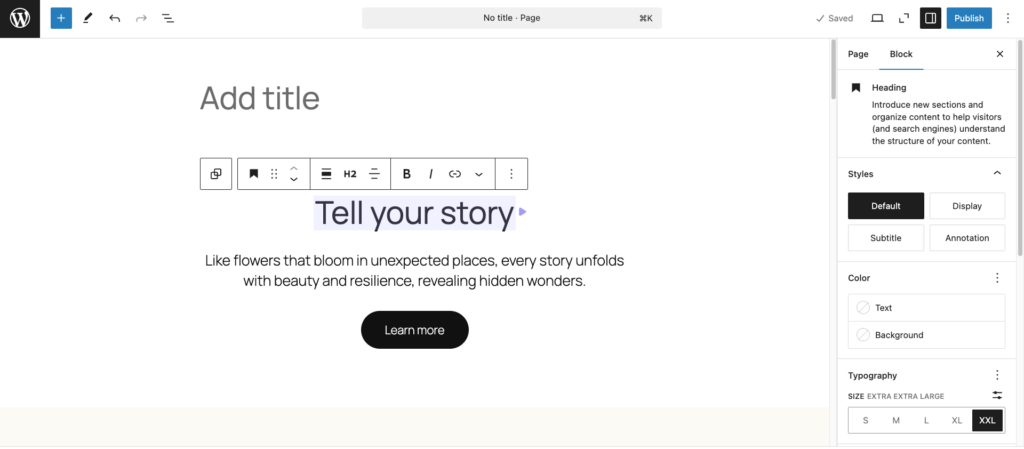
To add a block, click the + icon at the top left to see all available options organized by type. Drag and drop a block into the editor and place it wherever you like.
You can customize each block using the toolbar at the top of the element or the settings panel on the right.
For faster design, Gutenberg offers block patterns ‒ pre-made combinations of blocks, like columns with images and buttons.
If you’re tech-savvy, you can even create your own WordPress blocks or block patterns and share them with others.
Gutenberg editor vs classic editor
To better understand the block editor, let’s compare it with its predecessor and see the upgrades it brings.
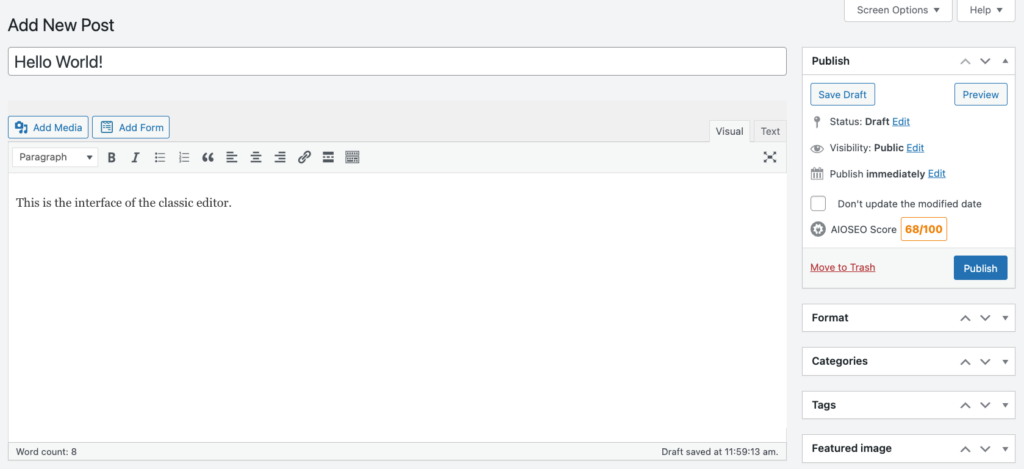
The WordPress classic editor, powered by the TinyMCE What You See Is What You Get (WYSIWYG) HTML editor, provides a straightforward, familiar interface for creating and editing posts and pages. It mimics traditional text editors like Microsoft Word, offering bold, italics, and lists for quick styling.
The visual editor allows users to upload media through the built-in image uploader. Switching to the text editor lets you add custom HTML code to posts and pages.
While the classic editor is reliable and easy to use, it lacks design flexibility. Creating complex layouts or advanced designs often requires extra plugins or custom HTML. Adding images and videos felt clunky. Also, you can’t see real-time previews of your live content.
Enter the Gutenberg block editor to address these limitations.
Instead of relying on a single text box, Gutenberg uses individual blocks for different elements, including media. This approach makes page design more visual and intuitive.
The drag-and-drop feature removes the need for shortcodes and extra plugins, letting you create custom layouts and see results in real time. You can also customize block patterns and their layouts to fit your needs.
With full-site editing, you can now design headers, footers, and other site elements in posts and pages. Plus, Gutenberg is developer-friendly, enabling tech-savvy users to create custom blocks and reusable templates.
Here’s a recap of the differences between the Gutenberg editor and the classic editor:
| Gutenberg editor | Classic editor | |
| Editor interface | Responsive and intuitive with self-explanatory menu settings. | Simple text interface, similar to an online document processor like Google Docs. |
| Content creation | Uses blocks with built-in content and customization features. | Offers a blank canvas for writing posts and pages. |
| Ease of use | Uses drag-and-drop blocks. Coding is optional. | Works like Google Docs but is easier with basic HTML skills. |
| Features | Offers drag-and-drop blocks, real-time previews, and easy customization for any skill level. | Provides a simple text box with basic formatting tools. |
| Pros | Offers flexible design, drag-and-drop blocks, real-time previews, and reusable templates. | Simple, familiar interface with easy formatting and minimal learning curve. |
| Cons | Takes a bit of practice to get used to. | Lacks design flexibility, visual layout tools, and modern customization features. |
The Gutenberg block editor comes pre-installed in WordPress 5.0 and newer. If you’re using an older version, you can still access it by installing the Gutenberg plugin. However, we recommend updating the latest WordPress version to optimize security.
You can remove the hassle of manual updates by switching to Hostinger. Hostinger’s managed WordPress plans include Smart WordPress Auto Updates, keeping your site secure and updated once activated. As every WordPress update usually has improvements for Gutenberg, enabling smart updates will help you save time.

How to use the WordPress Gutenberg block editor
Let’s explore essential WordPress features and steps to use Gutenberg for your website.
How to add a new block
The first step to using the block editor is to add a new block. There are several ways to do it.
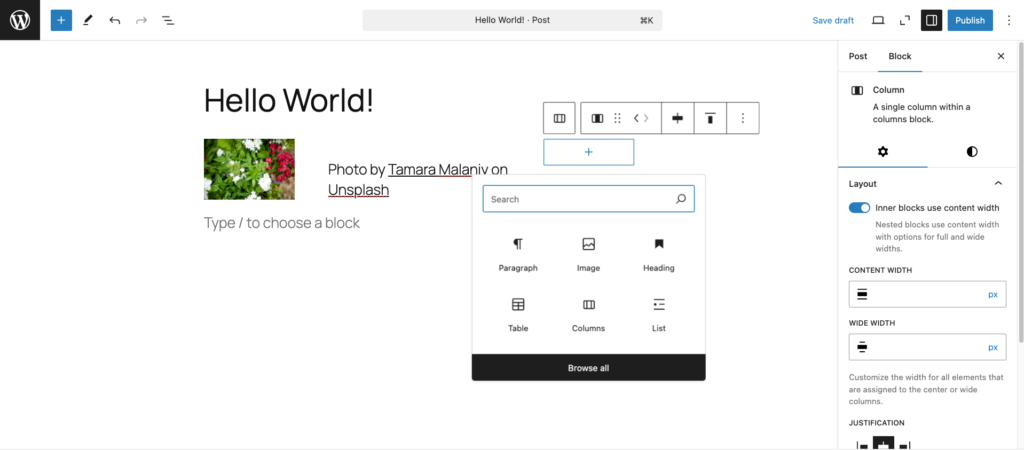
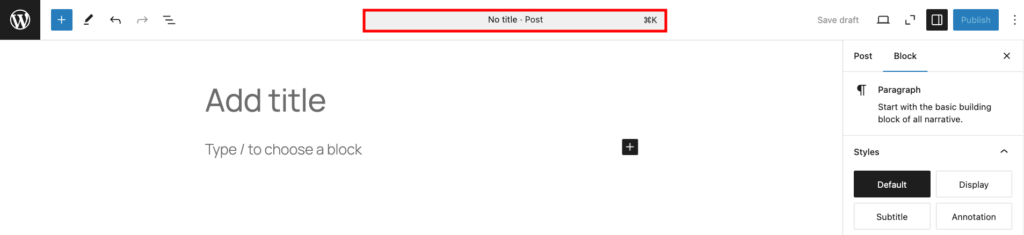
When you open the Gutenberg editor, you’ll notice a title block is already in place. To add another block, just move your cursor below it and click the black + icon to pick from the available options. If you don’t see the block you need, click Browse all to view more.
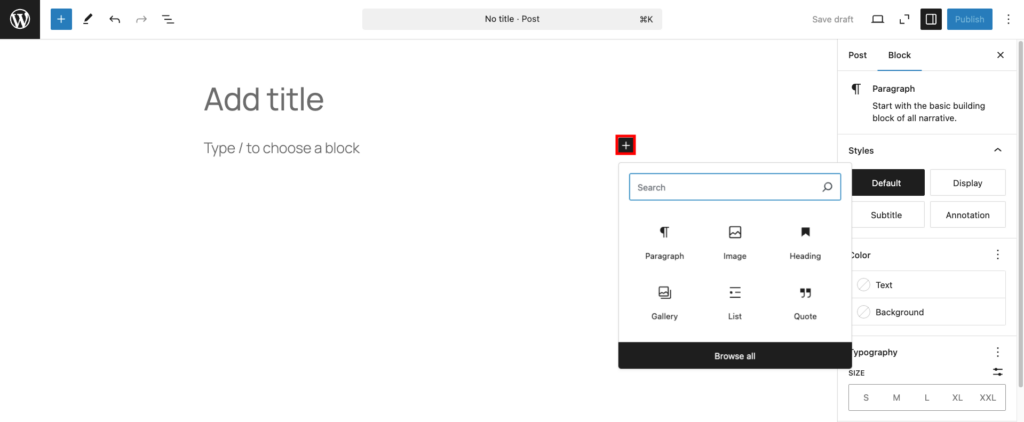
Alternatively, use the toggle block inserter in the top left corner, marked by a blue + button. From there, you can click a block to place it where your cursor is or drag it into position between existing blocks in the editor.
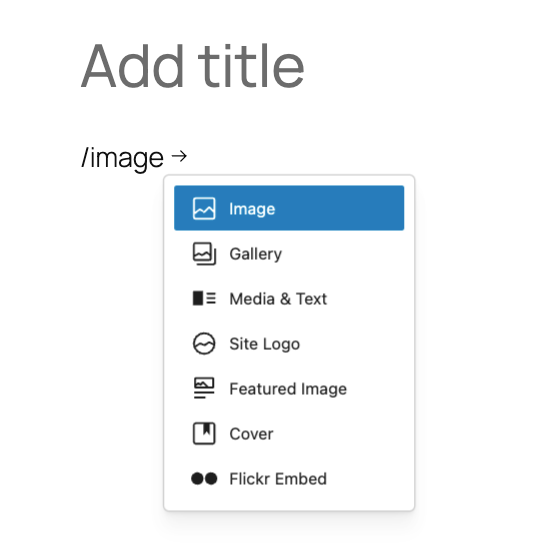
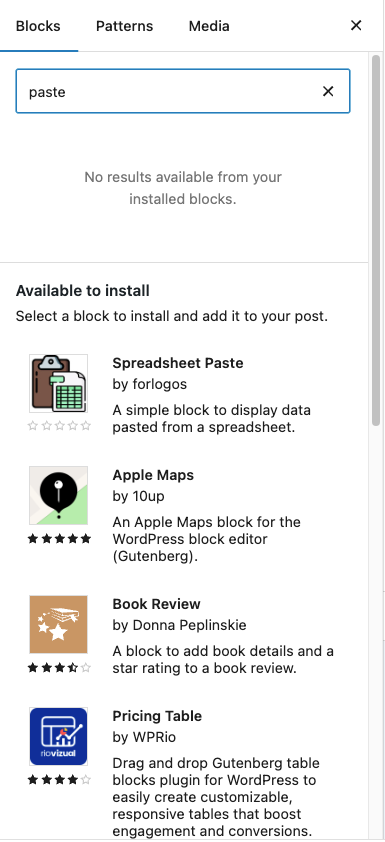
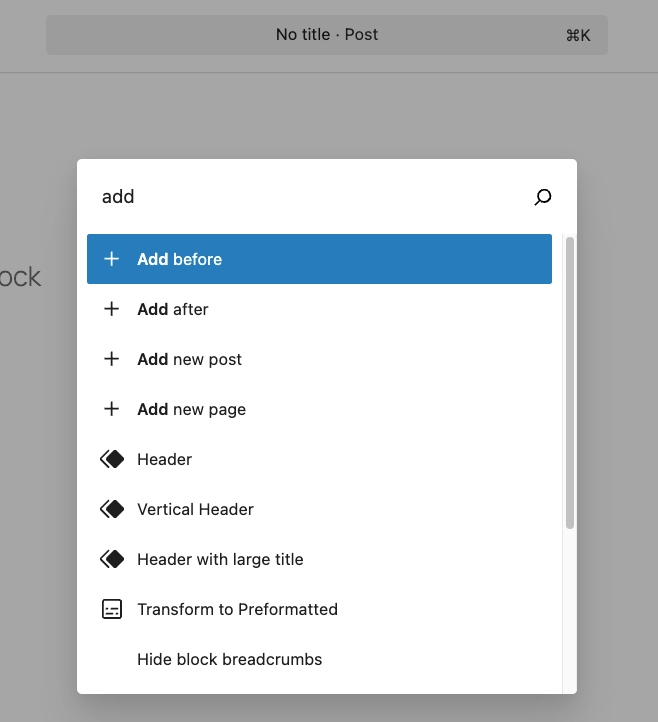
Another handy method is typing a slash (/) followed by the block’s name. Once it pops up, hit Enter to add it to your page or post.
There are six types of blocks to choose from ‒ text, media, design, widgets, theme, and embeds. If the one you need isn’t available, the inserter will suggest options from the Gutenberg block directory, which is part of the WordPress plugin repository.
How to customize blocks
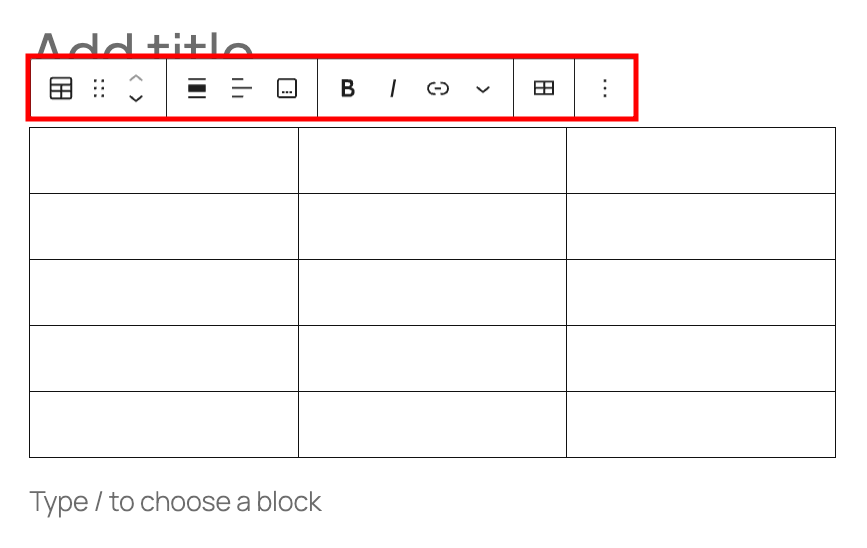
Customizing Gutenberg blocks in WordPress is easy. Just click on a block in the editor, and its toolbar will appear at the top.
The toolbar changes based on the block you’ve selected. For example, if you’re working with a table block, you’ll see options to adjust text alignment or add rows and columns.
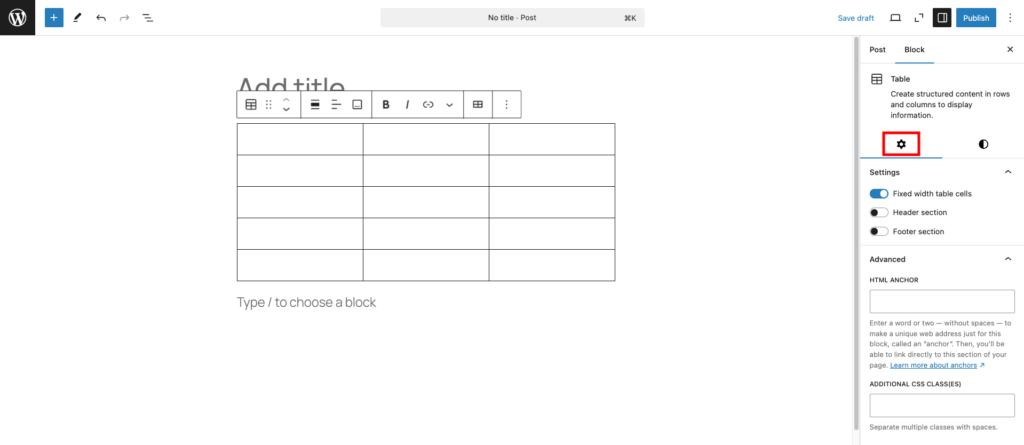
You can also access more settings by clicking the gear icon in the top-right corner of the editor. This opens a panel on the right sidebar where you can tweak styles, adjust dimensions, and change typography. For advanced users, you can add custom HTML or CSS to make any changes you want.
How to arrange blocks
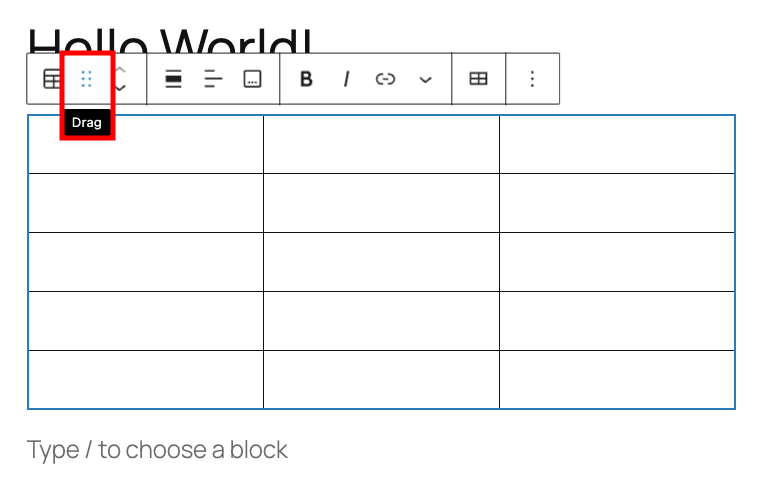
One of the biggest advantages of switching to Gutenberg is the ease of arranging elements. To move a block, simply click on it, select the six-dot icon on the toolbar, and drag it to where you want it.
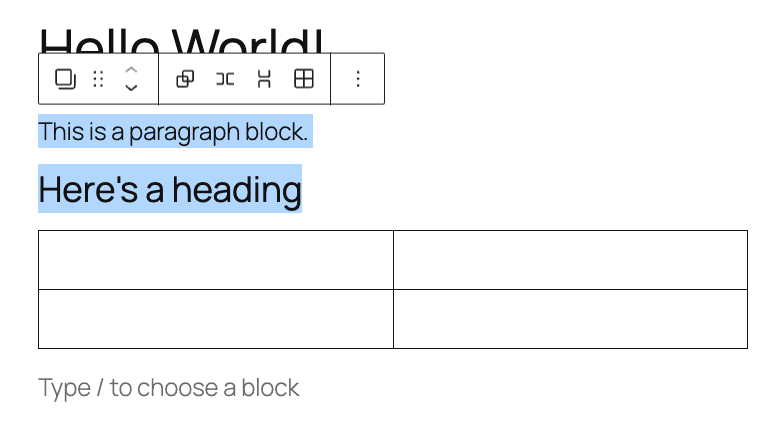
You can also move multiple blocks at once. Hold down the Shift key, click the first block, and then select the others you want to include. Once grouped temporarily, use the six-dot icon to drag them all together.
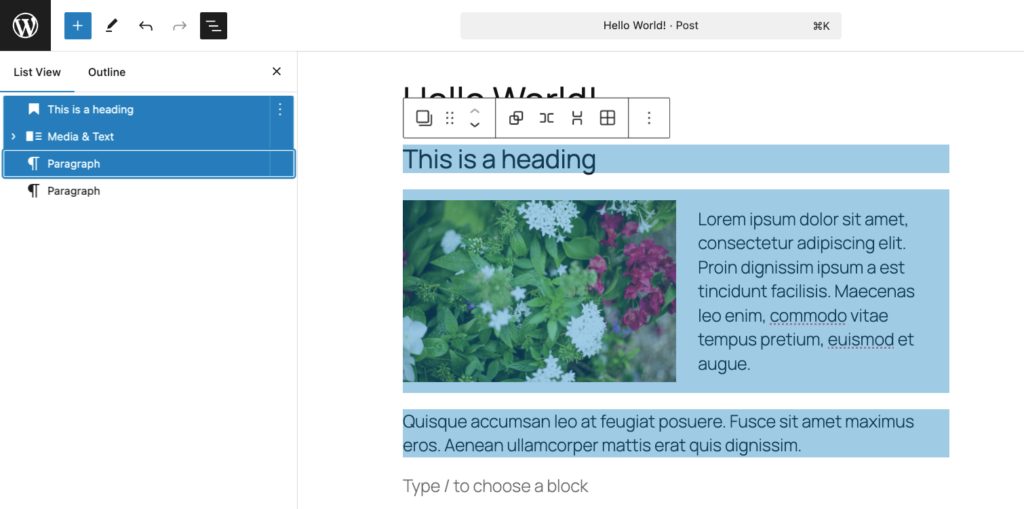
How to group multiple blocks
Say you’re creating a Services section on a homepage, where each item has an image, a headline, and a description, all neatly aligned. Grouping blocks is perfect for this because it lets you manage the whole section as one unit.
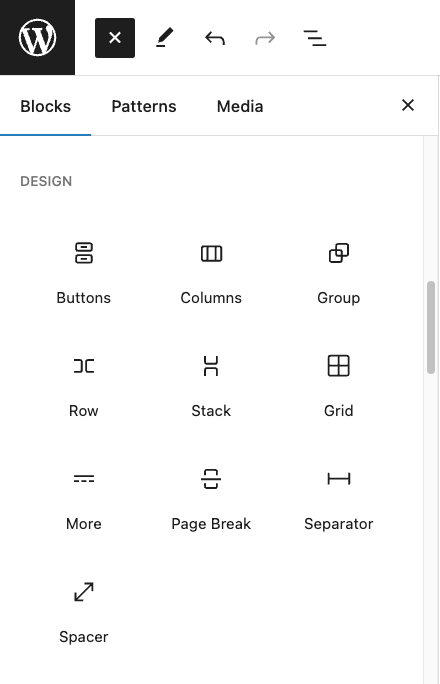
You can group blocks using Group, Columns, Row, or Stack blocks from the Design section of the block inserter. These design blocks create nested blocks ‒ blocks placed inside a parent block ‒ giving your layout a clear structure.
For example, a column block can act as a parent, holding child blocks like text and images, which appear indented under it in the editor.
Here’s how to use the Columns block:
- Open the block inserter → Design → Columns.
- Choose a pre-designed layout or create a custom one.
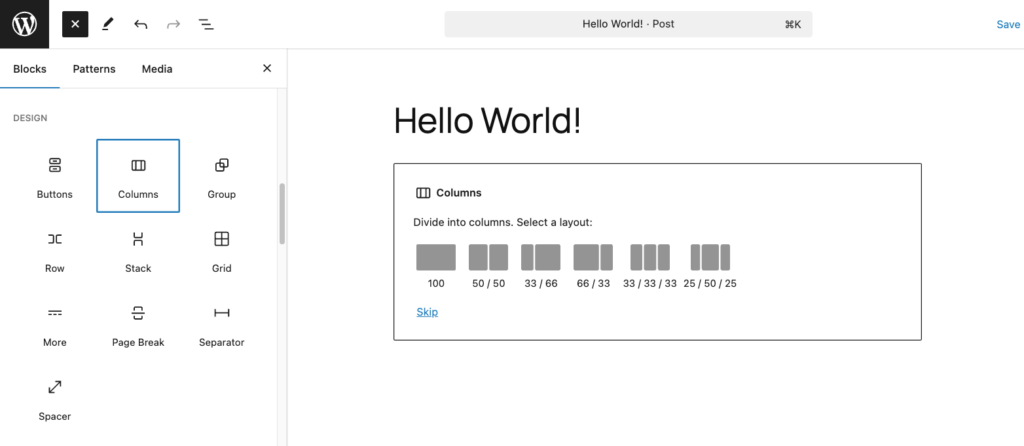
- Add blocks inside each column by clicking the + sign.
- Use the toolbar or sidebar settings to adjust the layout and alignment.
In the sidebar, you’ll find options like Inner blocks use content width. Turn it on to fit the inner blocks within the parent block’s width, creating a cohesive design.
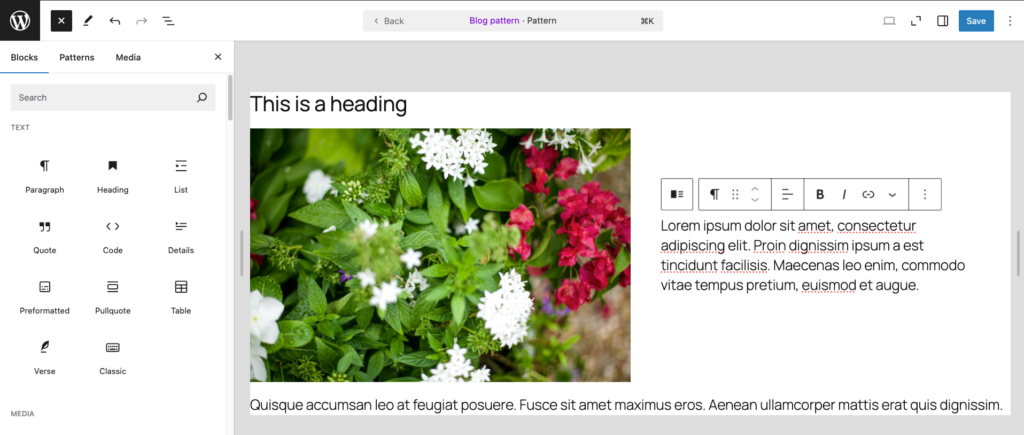
How to add headings and text
You can introduce text to posts or pages with paragraph and heading blocks.
To add a paragraph, start typing directly into the Gutenberg editor. Alternatively, use the block inserter and select Paragraph.
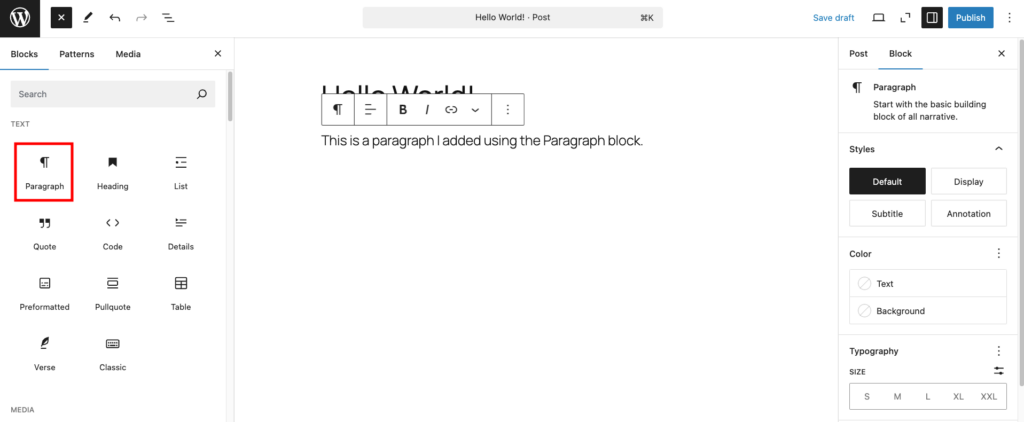
This block has a toolbar for basic options like aligning text, bolding, italics, and adding links. You can even include extras like footnotes, highlights, inline images, or subscripts and superscripts. The sidebar settings let you customize text color, typography, and dimensions for a polished look.
Heading blocks help organize your content, making it easier for readers and search engines to follow the flow. To add one, use any of the block-adding methods and select Heading. From there, pick the heading level (H1 to H6) in the toolbar.
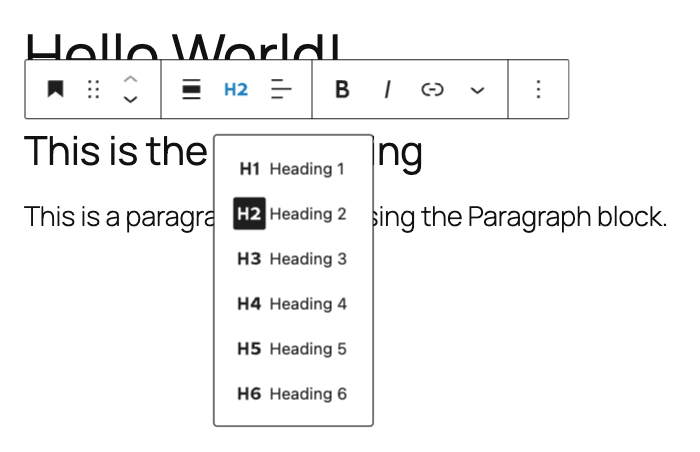
Like the paragraph block, the heading block lets you adjust alignment, width, and other attributes using the toolbar or sidebar settings.
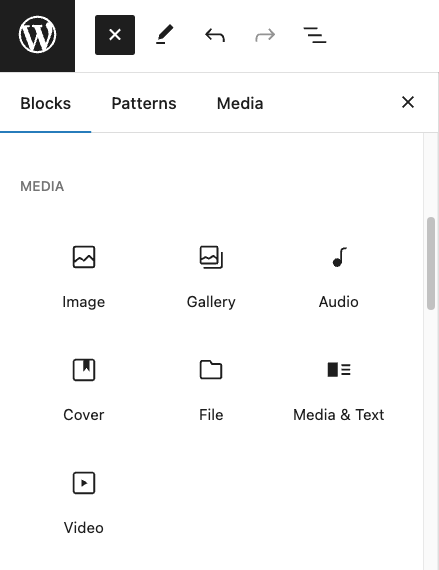
How to add images and media
The Gutenberg editor makes it easy to add different types of media to your posts and pages, like images, audio, videos, and files. It also offers some dynamic blocks, including:
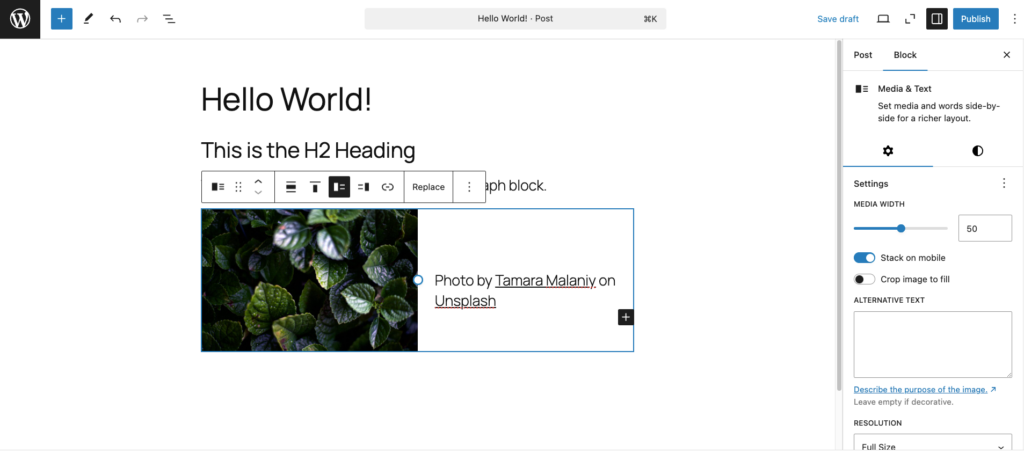
- Media & Text. Combines media and text side by side for better storytelling.
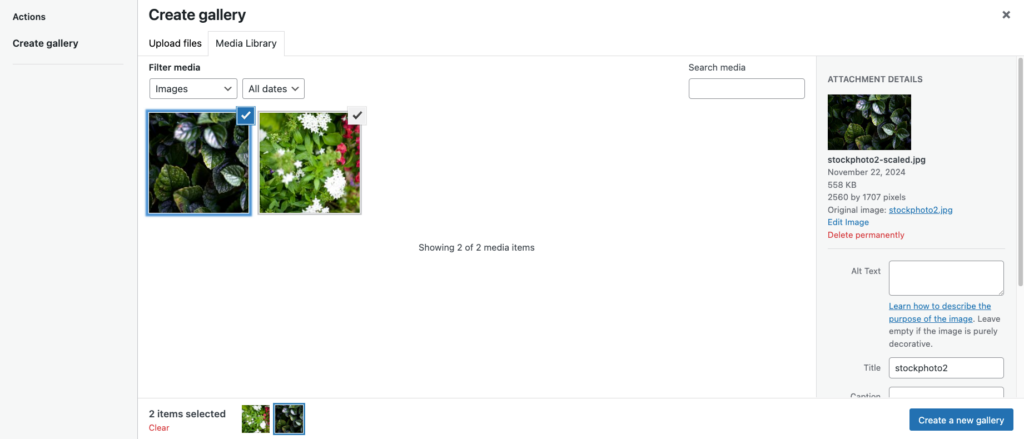
- Image Gallery. Displays multiple images in one area, great for portfolios and photography sites.
- Cover. Adds text overlays to images or videos, ideal for eye-catching headers or highlights.
To use these blocks, pick one from the block library and upload your media or select files from the Media Library. Or, add URLs to add files like audio or images. For image and gallery blocks, you can drag and drop multiple files at once to save time.
Each block has its own settings. For example, the Image block lets you tweak corners, borders, and radius, while the Media & Text block offers alignment, mobile stacking, color, and typography options.
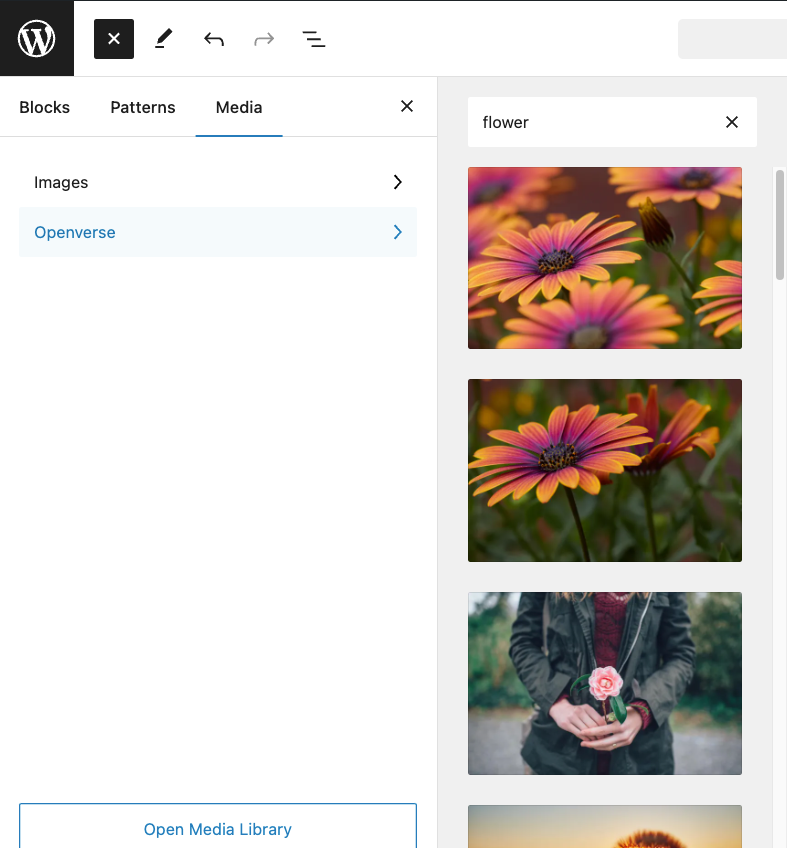
Need more visuals? Head to the block inserter and click Media → Openverse to explore the platform’s collection of openly licensed images.
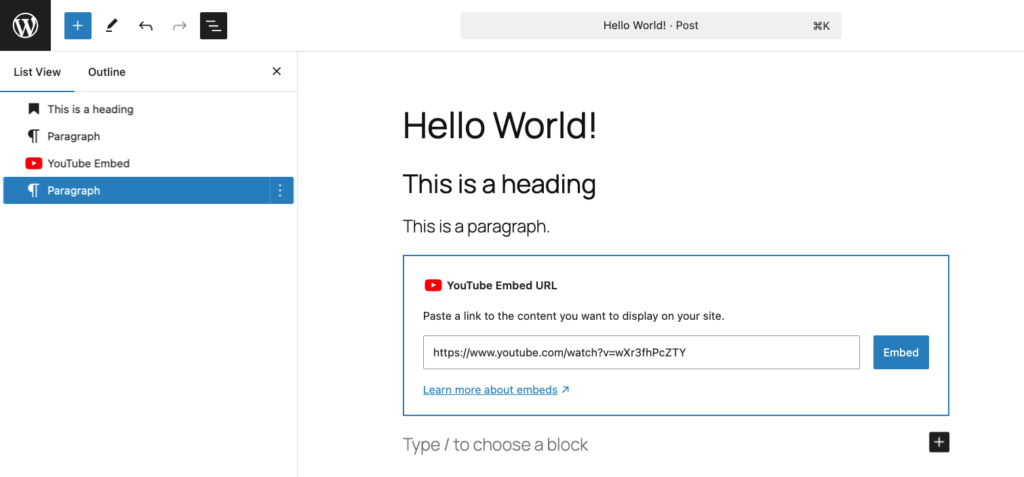
How to embed media
By default, the WordPress block editor supports various media types from different services.
Here are some examples of dedicated blocks for embedding content:
- Videos from YouTube, TikTok, Vimeo, Dailymotion, and TED.
- Images from Instagram, Flickr, Imgur, and Pinterest.
- Posts from Facebook, X, Bluesky, and Reddit.
- Audio files from Spotify, SoundCloud, and Mixcloud.
- Documents from Scribd and Issuu.
- Polls and surveys from Crowdsignal.
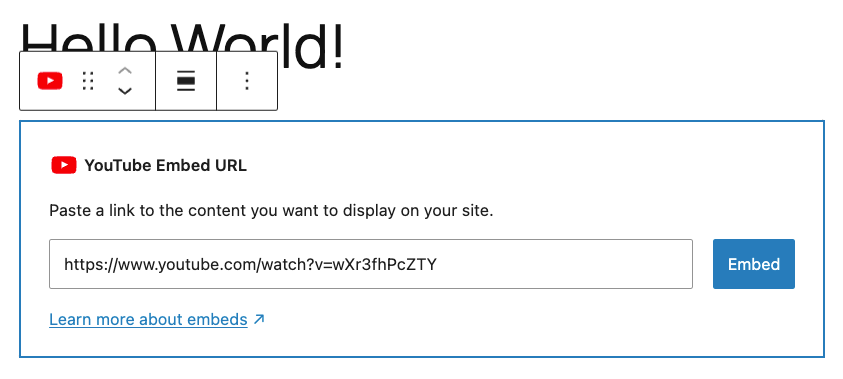
Here’s how to embed media in the Gutenberg editor:
- Open the block inserter and scroll down to the Embeds section.
- Choose your media source.
- Paste the media URL and select Embed.
- The page or post will now display the embedded content.
How to create patterns
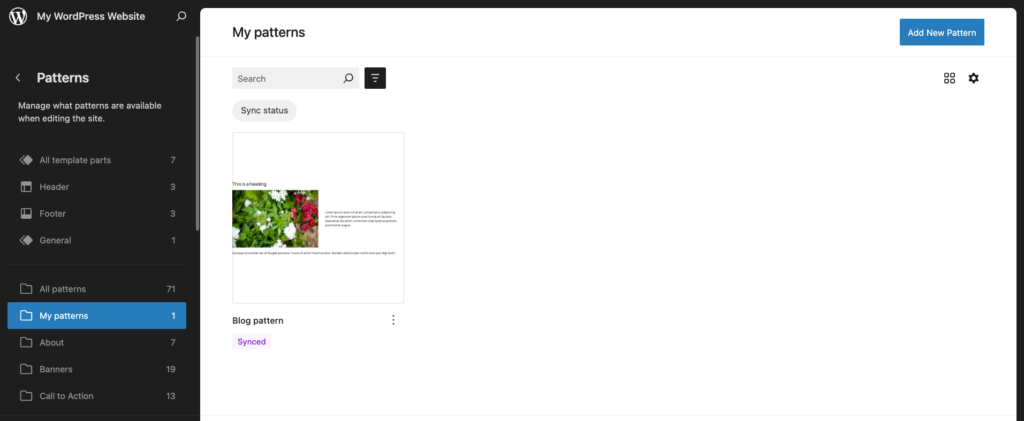
Patterns, formerly called reusable blocks, are handy content snippets you can use across your site to save time and keep a consistent design throughout your pages and posts.
There are two types of patterns:
- Synced patterns. These are reusable content blocks connected across your site. Any changes you make to a synced pattern will automatically update everywhere it’s used ‒ great for consistent elements like banners, call-to-action sections, or headers.
- Unsynced patterns. These patterns act as standalone copies. When you insert an unsynced pattern into a post or page, it won’t affect other instances. This is useful when you want to reuse a design but customize the content for specific pages.
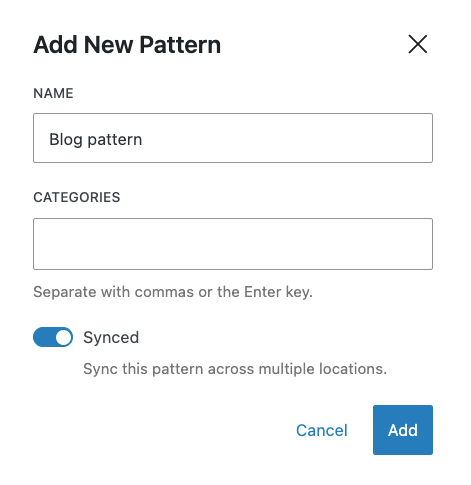
Here’s how to create one:
- Click Document Overview → List View. Hold down the Shift key and select the sections you want to save as a pattern.
- Click the Options button on the toolbar and choose Create pattern.
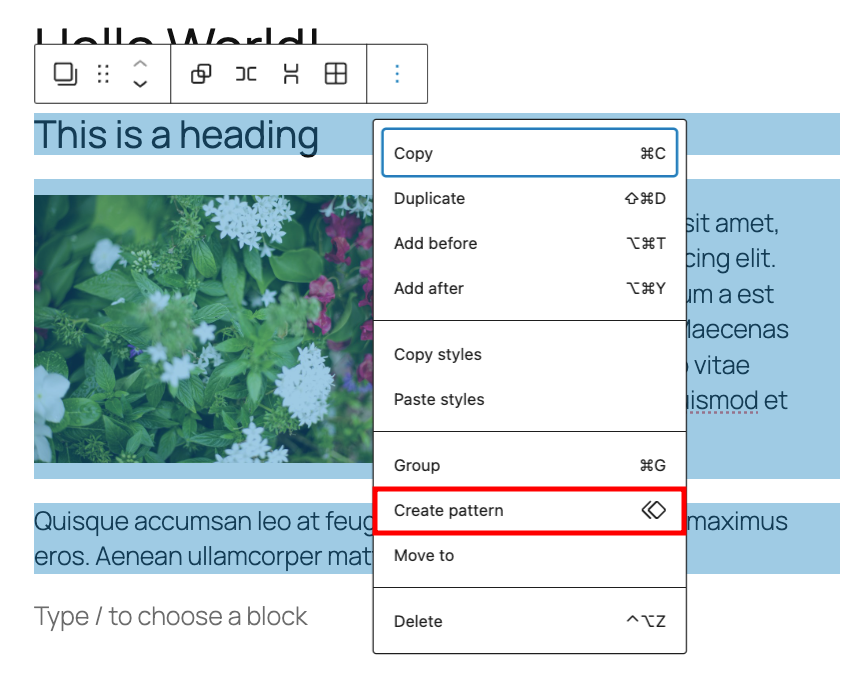
- Name your pattern and decide if you want it to be synced or unsynced, then click Create.
To use the pattern, open the block inserter and head to Patterns → My patterns. You can also type a slash (/) followed by the block name directly into the editor.

Editing an existing pattern is also straightforward. Just click on the pattern and hit Edit original. Make the changes and click Save.
To manage all the existing patterns, click the Options button on the top right corner of the editor and choose Manage patterns. This will take you to the Site Editor, where you can edit or bulk-manage default and custom patterns.
Want to use a pattern on a page or post without affecting others? Open the three-dot menu on the block’s toolbar and select Detach pattern. This makes the block independent, so changes won’t sync across the site.
Check out our guide on WordPress block patterns for tips on using and customizing them.
How to use Gutenberg keyboard shortcuts
Gutenberg keyboard shortcuts are a great way to speed up your workflow and focus on creating content. These handy key combos let you perform tasks in the WordPress block editor without needing to click through menus or buttons.
Here’s a table of some of the most useful shortcuts. You can also find the full list by clicking the three-dot icon in the top-right corner of the editor and selecting Keyboard shortcuts.
If you’re on macOS, replace Ctrl with Command (⌘) and Alt with Option (⌥).
| Action | Keyboard shortcut |
| Display all keyboard shortcuts | Shift + Alt + H |
| Global shortcuts | |
| Open the Command Palette | Ctrl + K |
| Switch between visual and code editors | Ctrl + Shift + Alt + M |
| Turn on distraction-free mode | Ctrl + Shift + |
| Activate full-screen mode | Ctrl + Shift + Alt + F |
| Open the block list view | Shift + Alt + O |
| Show or hide the settings sidebar | Ctrl + Shift + , |
| Navigate to the next part of the editor | Ctrl + ` or Shift + Alt + N |
| Navigate to the previous part of the editor | Ctrl + Shift + ` or Shift + Alt + P |
| Navigate to the nearest toolbar | Alt + F10 |
| Save changes | Ctrl + S |
| Undo last changes | Ctrl + Z |
| Redo the previous undo | Ctrl + Shift + Z |
| Selection shortcuts | |
| Select all text when typing | Ctrl + A |
| Clear selection | Escape |
| Block shortcuts | |
| Duplicate the selected block | Ctrl + Shift + D |
| Delete the selected block | Shift + Alt + Z |
| Insert a new block before the selected block | Ctrl + Alt + T |
| Insert a new block after the selected block | Ctrl + Alt + Y |
| Delete selection | Delete or Backspace |
| Move the selected block up | Ctrl + Shift + Alt + T |
| Move the selected block down | Ctrl + Shift + Alt + Y |
| Change the block type after adding a new paragraph | / |
| Text formatting | |
| Make the highlighted text bold | Ctrl + B |
| Make the highlighted text italic | Ctrl + I |
| Turn the highlighted text into a link | Ctrl + K |
| Remove a link | Ctrl + Shift + K |
| Underline the highlighted text | Ctrl + U |
| Strikethrough the highlighted text | Shift + Alt + D |
| Turn the highlighted text into inline code | Shift + Alt + X |
| Convert the selected heading to a paragraph | Shift + Alt + 0 |
| Convert the selected paragraph or heading to a heading of level one to six | Shift + Alt + 1-6 |
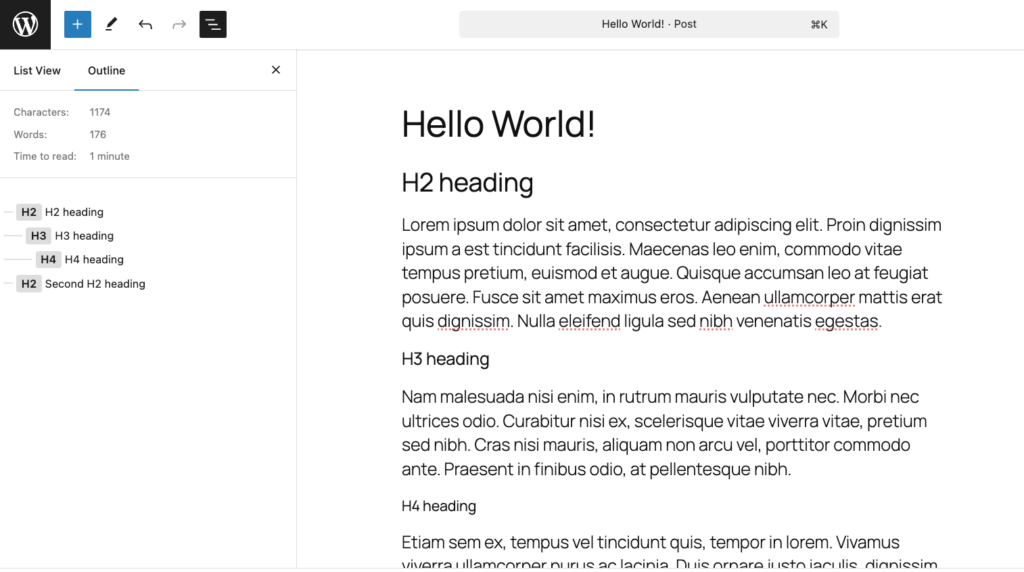
How to use the block list view
The block list view in the Gutenberg editor gives you a tree-like overview of all the blocks in your post or page. It’s especially useful for navigating long documents with many nested blocks.
You can open the block list view by clicking the Document Overview icon (three stacked lines) at the top left corner of the editor or using the shortcut Shift + Alt + O. From there, just click on any block in the list to jump straight to it in the editing area, no matter how deeply nested it is.
Next to the block list view is the outline, which gives you a quick look at your document’s structure, including heading titles and their hierarchy. It’s a great tool for making sure your content flows logically and uses headings correctly ‒ perfect for writers and content creators.
How to customize blocks with full-site editing
We’ve covered using the block editor for individual pages and posts. Gutenberg also has Site Editor which enables you to easily make changes to blocks across your entire site for a consistent look.
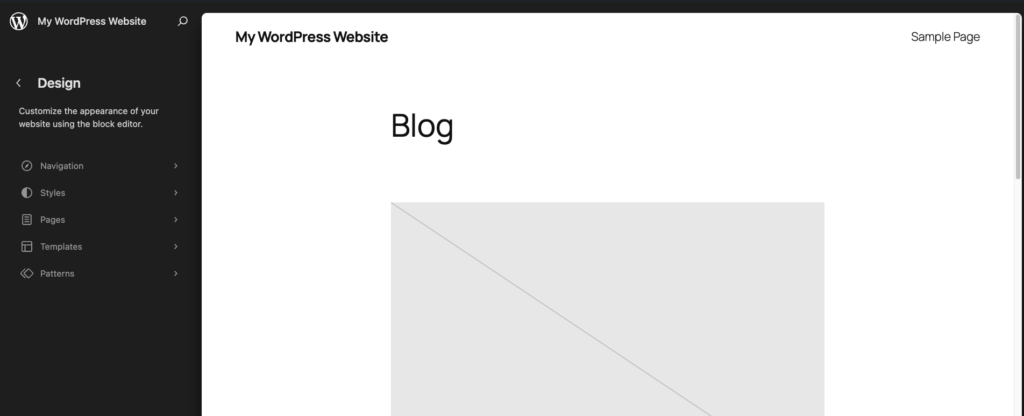
To access the Gutenberg site editor, go to Appearance → Editor from your WordPress dashboard. Once inside, you can customize various parts of your website:
- Navigation. Update menus with elements like custom links and site logos.
- Styles. Pick a style combination from your theme and adjust colors, typography, and layouts across your entire site.
- Pages. Edit page content directly within Site Editor ‒ no need to switch interfaces.
- Templates. Create layouts for specific pages, like your blog homepage or single posts. Some themes may offer additional layout options.
- Patterns. Manage synced patterns for consistent design elements across your site.
For a full-editing experience, you can preview the template in the editor while working on your page or post’s content. Open the Post tab in the right sidebar and select Template → Show template. This allows you to see how your content fits within the overall page layout.

Keep in mind that only users with a WordPress block theme can customize blocks in the full-site editor. If you want to use this feature, consider switching to a block theme, such as:
- Twenty Twenty-Four. A default WordPress theme with a clean and modern layout.
- Ona. Comes with child themes for various website niches.
- Neve FSE. The full-site editing version of a popular WordPress theme, suitable for all website types.
- Tove. Includes over 40 block patterns for quicker customization.
- Bricksy. Also comes with pre-built block patterns, plus WooCommerce support.
How to use the Command Palette
The Command Palette is a quick-access tool that lets you perform actions or navigate within the editor using a simple search bar, saving you the hassle of clicking through menus.
This feature is accessible in the Gutenberg block editor with the shortcut Ctrl + K (or Cmd + K on Mac) or by clicking the bar at the top of the interface.
When you click on it, you’ll see a search bar and a short list of common tasks like Duplicate, Delete, and Add after. Just type a letter or a keyword related to the task you’re looking for to see relevant options.
Here are some use cases that can speed up your workflow:
- Jump into a specific post or page just by typing the title.
- Add a new page or post.
- Exit fullscreen mode to show the WordPress admin sidebar.
- Enter distraction-free mode.
- Preview your work in a new tab.
How to disable the WordPress block editor
If you’re having trouble adjusting to the Gutenberg editor, WordPress lets you turn it off with a plugin or by editing the functions.php file.
Install the Classic Editor plugin to disable Gutenberg completely once activated. If you want more control, use the Disable Gutenberg plugin. It disables Gutenberg site-wide, but you can adjust the plugin’s settings so it only works for certain roles, post types, or templates.
Alternatively, add a code snippet to your functions.php file using the WordPress Theme File Editor, a File Manager, or File Transfer Protocol (FTP).
Here’s how to do it using Hostinger’s File Manager in the hPanel dashboard:
- Access File Manager in hPanel and navigate to public_html → wp-content → themes.
- Enter your active theme’s folder and double-click the functions.php file to open it.
- Add the following code before the last line:
add_filter('use_block_editor_for_post', '__return_false');- Save and close the file, then reload your WordPress site.
If editing code feels daunting, try the Code Snippets plugin instead:
- After installing and activating the plugin, go to Snippets → Add New on the dashboard.
- Name the snippet, then paste the code above into the Functions PHP tab. Choose the Only run in administration area option.
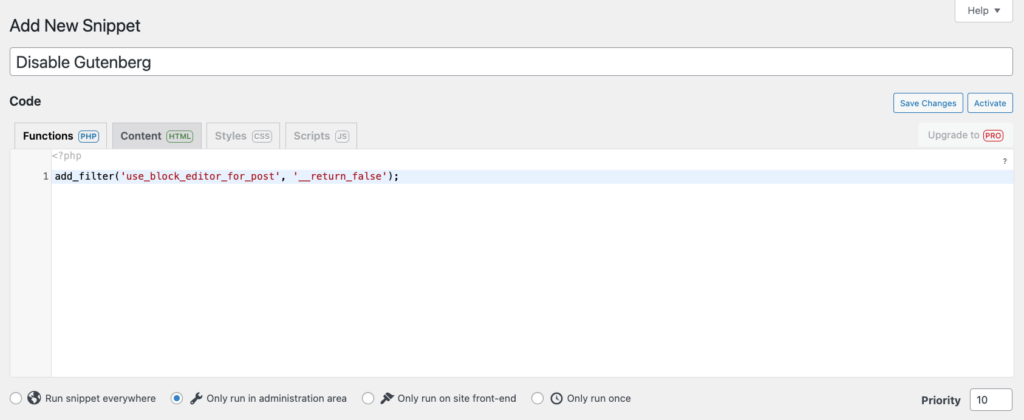
- Click Save Changes and Activate.
Keep in mind that disabling Gutenberg is a temporary solution since it’s the default editor for WordPress. As Gutenberg evolves with new features, transitioning away from the classic editor will help you take full advantage of what WordPress has to offer.
Want to elevate your WordPress experience?
Find the best WordPress plugins compatible with Gutenberg to enhance your website.
Conclusion
The Gutenberg block editor has improved how you can create and design websites on WordPress. With its flexible blocks for various site elements, you get a simple yet flexible way to build posts and pages as you want.
By addressing the limitations of the classic editor, Gutenberg’s drag-and-drop interface makes customization easy for users of all skill levels. Features like synced patterns guarantee consistent designs, while the expanded Site Editor allows you to customize themes directly without needing extra plugins.
We hope this guide has helped you understand how Gutenberg works and how it can enhance your WordPress experience. For more Gutenberg tips and tricks, check out our guide on creating a website with Gutenberg.
WordPress Gutenberg FAQ
Is Gutenberg free?
Yes. Gutenberg is built into WordPress core, so it’s free and comes pre-installed with WordPress 5.0 and newer.
Is Gutenberg better than Elementor?
It depends on your needs and preferences. Gutenberg offers simplicity and performance with a free, lightweight block editor for basic to moderate customization. Elementor is a paid solution that excels in advanced design, featuring a drag-and-drop interface with widgets and templates for precise layouts. In short, choose Gutenberg for speed and ease, or Elementor for creative flexibility and detailed design control, but keep in mind the subscription cost.
Is Gutenberg good for SEO?
Yes, Gutenberg is great for SEO. It creates clean, structured HTML that helps search engines understand your content. The block editor also makes it easy to optimize images and headings, which are key for good SEO. Plus, it works perfectly with popular SEO plugins like Yoast SEO.
What is the difference between blocks and widgets?
In WordPress, blocks are used to design posts and pages in the editor, while widgets add features to areas like sidebars and footers. With WordPress 5.8, the platform introduced the block-based widget editor, allowing users to manage widgets using blocks like the Gutenberg editor works for posts and pages.
All of the tutorial content on this website is subject to Hostinger's rigorous editorial standards and values.

Jordana is a Senior Content Writer with a background in Information Systems. She has over five years of experience in WordPress and is casually dabbling with PHP and MySQL. Her passion for writing and technology drives her to create tutorials for anyone wanting to build their online presence. Follow her on LinkedIn.


Comments
October 10 2018
Great post! It's good to know more reviews about the new Gutenberg WP Editor. WordPress landscape is always evolving but the time IS right for a real change of pace. With Gutenberg WordPress Editor, things are moving in the right direction.
September 12 2022
Hi there, as a complete beginner I have not found any information on how to remove/delete a block provided by a template I've chosen. I would appreciate some information on this please.
September 16 2022
Hey! You can check this resource to learn how to delete blocks from custom templates on Gutenberg Editor ?