How to Unpublish a WordPress Site and Individual Pages or Posts
Dec 22, 2025
/
Larassatti D.
/
7 min Read
As a WordPress user, there are times when you might want to permanently delete your WordPress website, specific pages, or posts. Other times, you might want to temporarily take them offline so you can make major changes away from prying eyes. Therefore, understanding how to unpublish a WordPress website is crucial for website owners.
Unpublishing a WordPress site involves more than simply taking it down. A strategic approach is required to ensure a smooth transition without affecting your search engine optimization (SEO) efforts, user experience, and data security.
In this article, we will walk you through the step-by-step process of how to unpublish a WordPress site. We will cover two methods to unpublish the entire site, as well as four ways to temporarily remove WordPress pages or posts. You’ll also get tips to minimize the SEO impact of unpublishing your self-hosted WordPress website.
Download all-in-one WordPress cheat sheet
How to Unpublish the Entire Website in WordPress
Whether you want to delete your WordPress website permanently or temporarily, we will go over a few different ways to do both.
How to Unpublish a WordPress Site through Permanent Deletion
With Hostinger, you can easily delete your self-hosted WordPress site from your hosting account dashboard.
Important! We highly recommend creating a WordPress backup before proceeding to the next steps. This way, you can keep a record of your website content. You will also have the option to bring the website back online if you wish and ensure a smooth WordPress reinstallation and migration process.
Here’s how to unpublish a WordPress site permanently from Hostinger’s hPanel:
- Log in to your account and navigate to the Websites menu.
- You’ll find a list of active websites on your hosting account. Find the site you want to delete, and click the three-dot menu next to it.
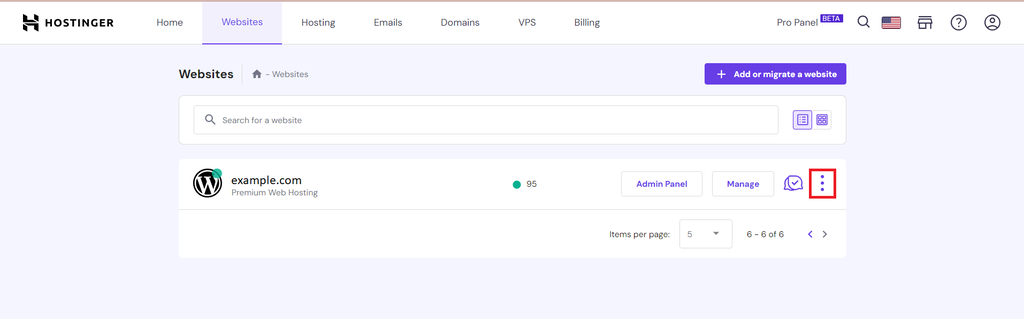
- Click Delete from the menu.
- You’ll see a confirmation pop-up. Check the confirmation approval box and hit the Delete button.
By completing all these steps, the entire site won’t be accessible anymore.
Alternatively, you can manually delete your website by removing all the website files. To access your website files, use an FTP client like FileZilla or simply use your hosting control panel’s built-in File Manager. We’ll demonstrate the steps using Hostinger’s File Manager:
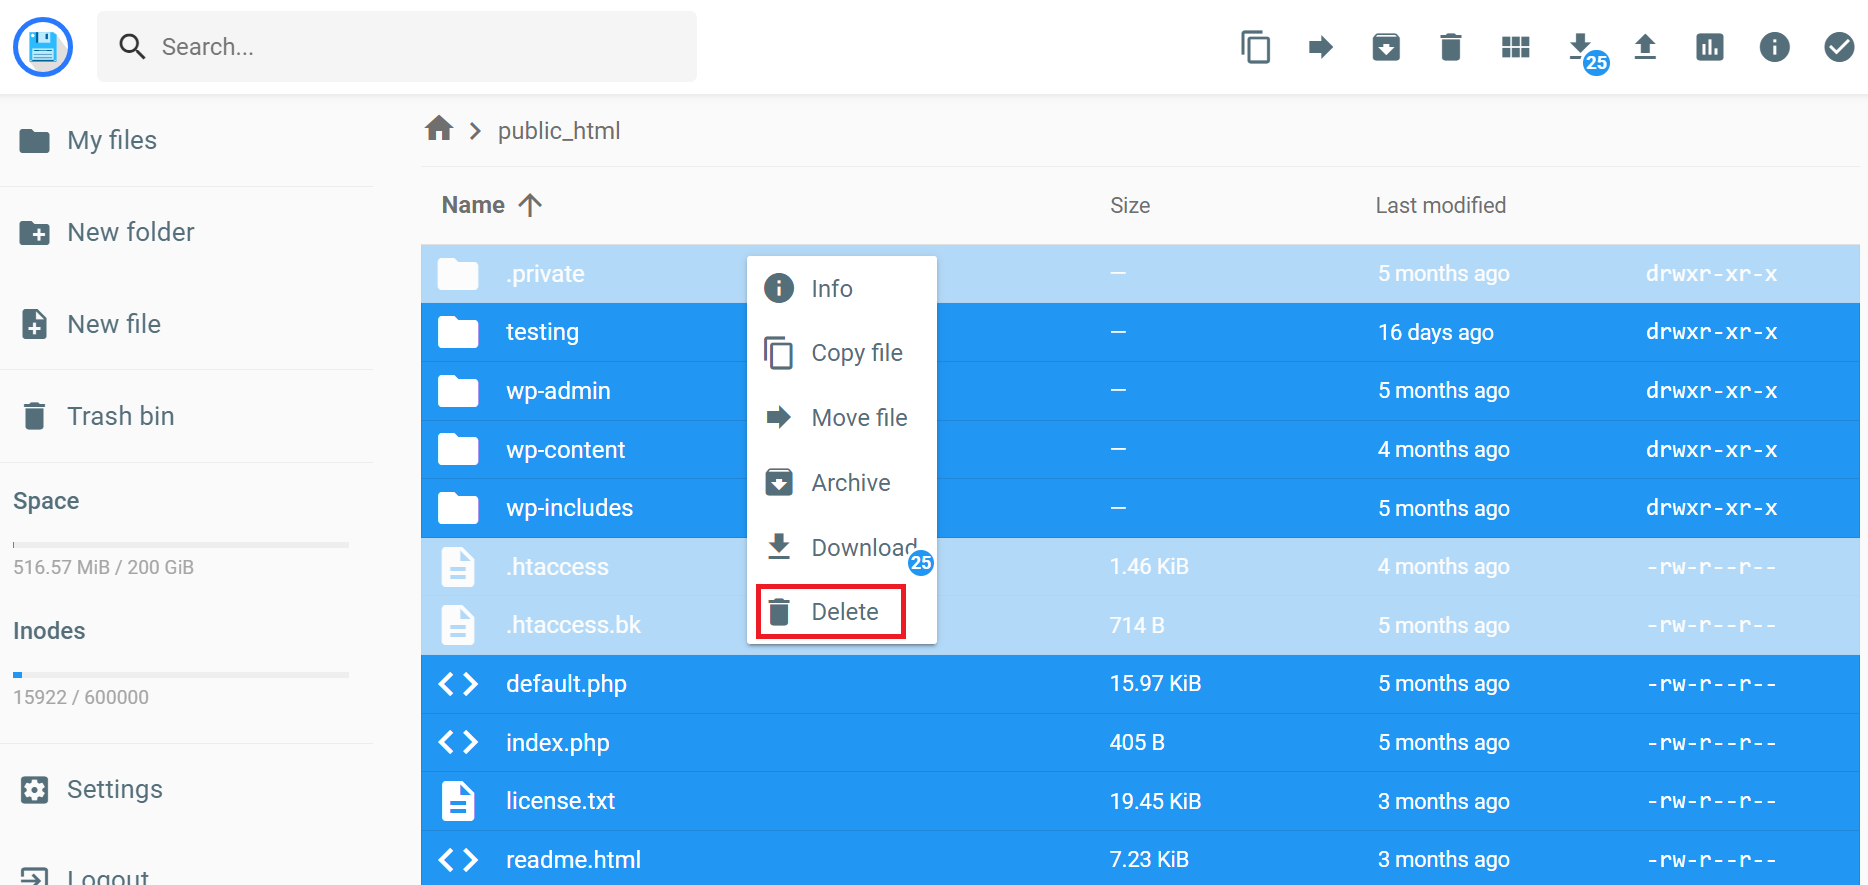
- Log in to your hosting account and find the File Manager.
- Locate the public_html folder.
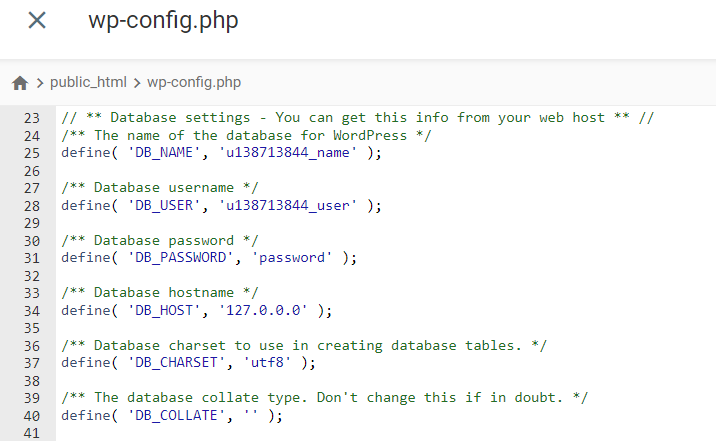
- In case you want to reinstall the website or change the domain name, you’ll need the site’s database information found in the wp-config.php file.
- Select all the files associated with your WordPress site installation. Simply press CTRL + A on Windows or cmd + A on macOS.
- Right-click anywhere on the page and choose Delete.
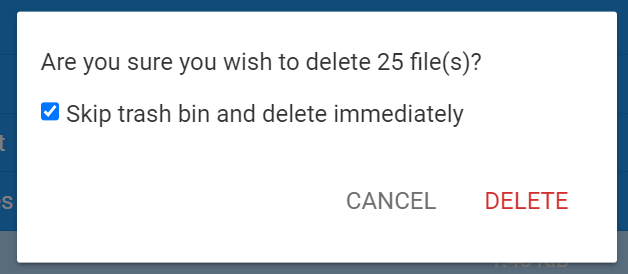
- A confirmation pop-up will appear. Checking the Skip trash bin and delete immediately option won’t allow you to restore the deleted files. Once you’re sure of your choice, hit Delete.
How to Unpublish a WordPress Site Temporarily using the Maintenance Mode
Activating the maintenance mode lets you unpublish a WordPress site temporarily. It’s especially useful when you’re applying major changes to your website and want to prevent visitors from seeing it. This way, users and search engines will revisit your site after the maintenance process is complete.
Pro Tip
If you’re a Hostinger user, you can easily activate maintenance mode from hPanel. Simply log in to your hosting account and navigate to WordPress overview → Core. Then, click the toggle button beside the Maintenance Mode option to activate it.

There are many plugins that allow you to put a WordPress site in maintenance mode. In this tutorial, we will show you how to unpublish a WordPress site temporarily using the SeedProd plugin:
- Navigate to Plugin → Add New Plugin from your WordPress dashboard.
- Search for the SeedProd plugin. Click Install Now, then Activate.
- Click Exit Setup when a setup wizard appears.
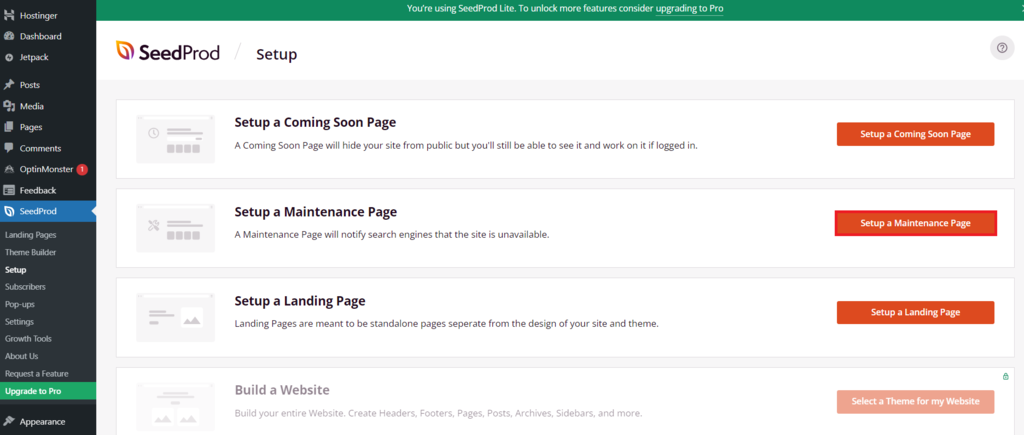
- Go to SeedProd → Setup and click Setup a Maintenance Page.
- Choose a provided page template from the library and customize it further using the drag-and-drop builder if you’d like. Hit Save once done.

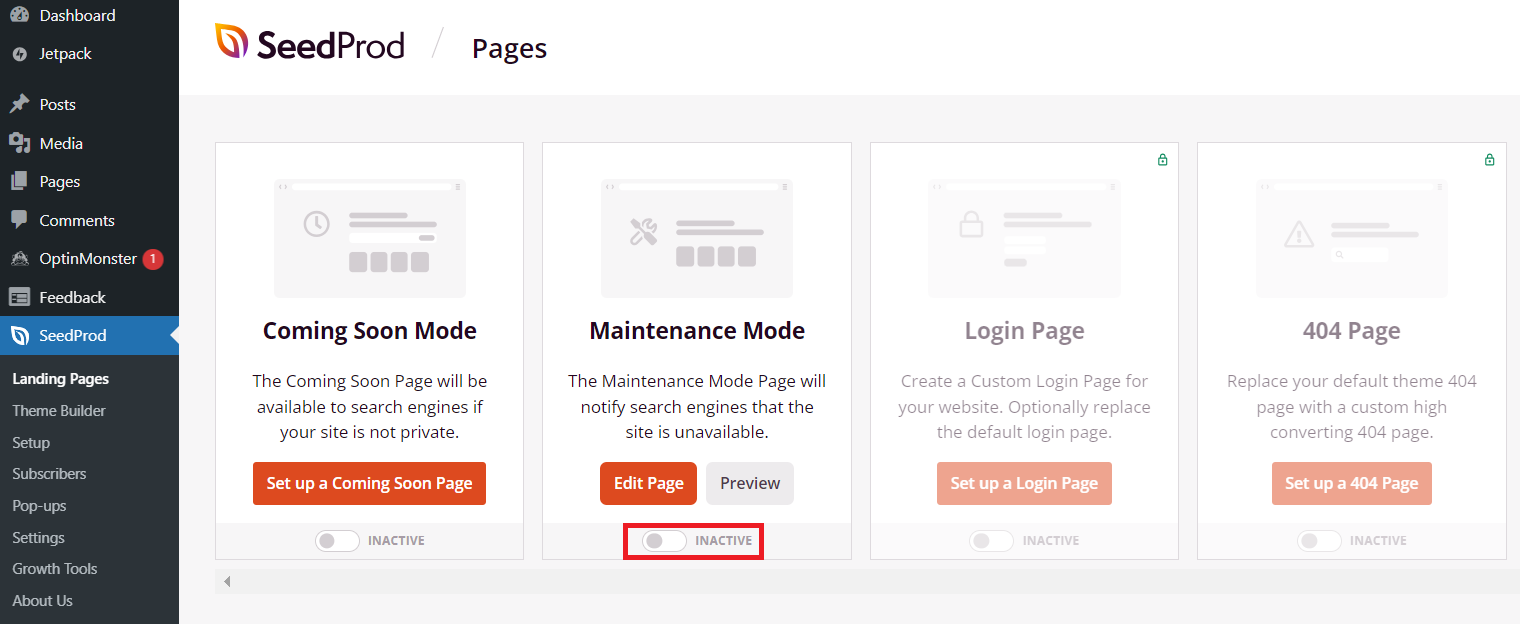
- Go back to the WordPress dashboard and navigate to SeedProd → Landing Pages.
- Click the Inactive toggle button under the Maintenance Mode section. Once it turns green, your entire site won’t be accessible to the public.
How to Unpublish WordPress Pages or Posts
Knowing how to unpublish individual pages or posts in WordPress is useful when you’re revising content, conducting site maintenance, or safeguarding information during a transition.
In this section, we’ll demonstrate four effective methods to unpublish specific pages or posts.
Method 1: Switch to Draft
You can temporarily unpublish a single WordPress page or post by changing its status to Draft. This lets you hide a post or page as you fix its errors or improve its content. Later, you can unhide it by simply republishing it. Here are the steps:
- Navigate to Pages → All Pages on the WordPress admin dashboard.
- Hover over the published page you want to put offline and choose Edit.
- In the WordPress block editor, hit the Switch to draft button on the side panel.
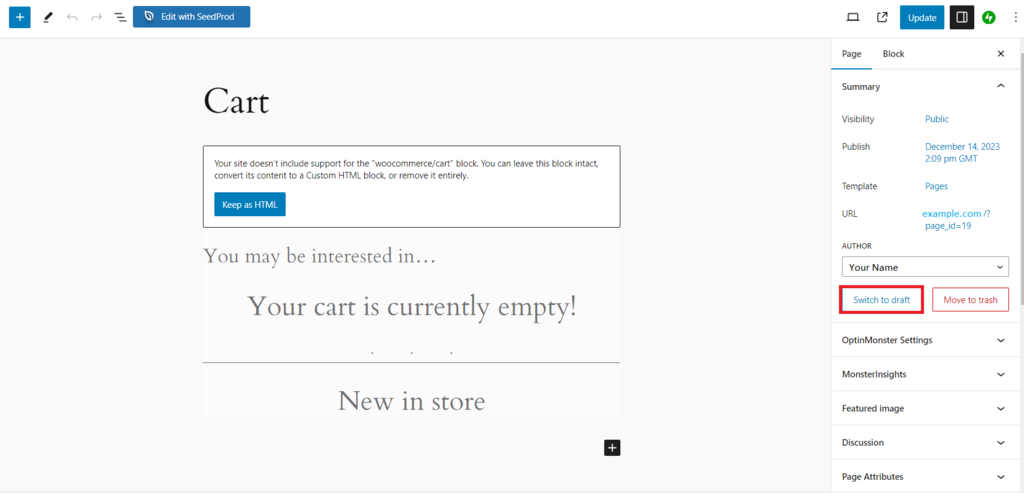
- When you see a confirmation pop-up to unpublish your WordPress page or post, choose OK.
Method 2: Use Bulk Actions for Multiple Pages or Posts
If you would like to hide multiple WordPress pages or posts quickly, use the bulk actions feature:
- From the WordPress dashboard, navigate to Pages or Posts depending on which type of content you want to unpublish.
- Check the boxes next to the posts or pages you want to unpublish.
- Find the Bulk actions drop-down menu and select Edit. Click the Apply button next to it.

- Expand the Status drop-down menu and select Draft.
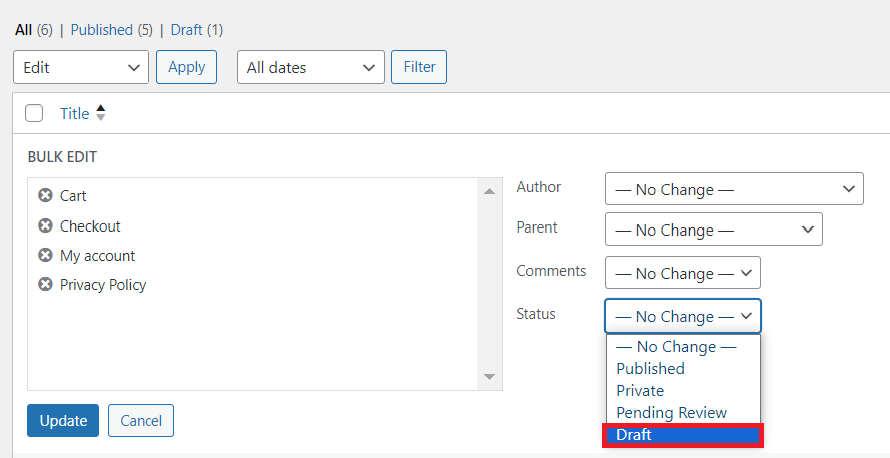
- Hit the Update button.
Pro Tip
To permanently remove multiple live pages or posts instead, choose Move to Trash from the Bulk actions drop-down menu. Then, go to the Trash and choose Delete permanently in the Bulk actions menu.
Method 3: Use the Private Mode
You can turn on the Private mode to unpublish a WordPress page or post. With this method, only website collaborators with specific user roles can view the post or page on the website.
Here’s how you can apply the Private status to a post or page:
- Open the live post or page you want to turn private with the block editor.
- In the Visibility section, select Private.
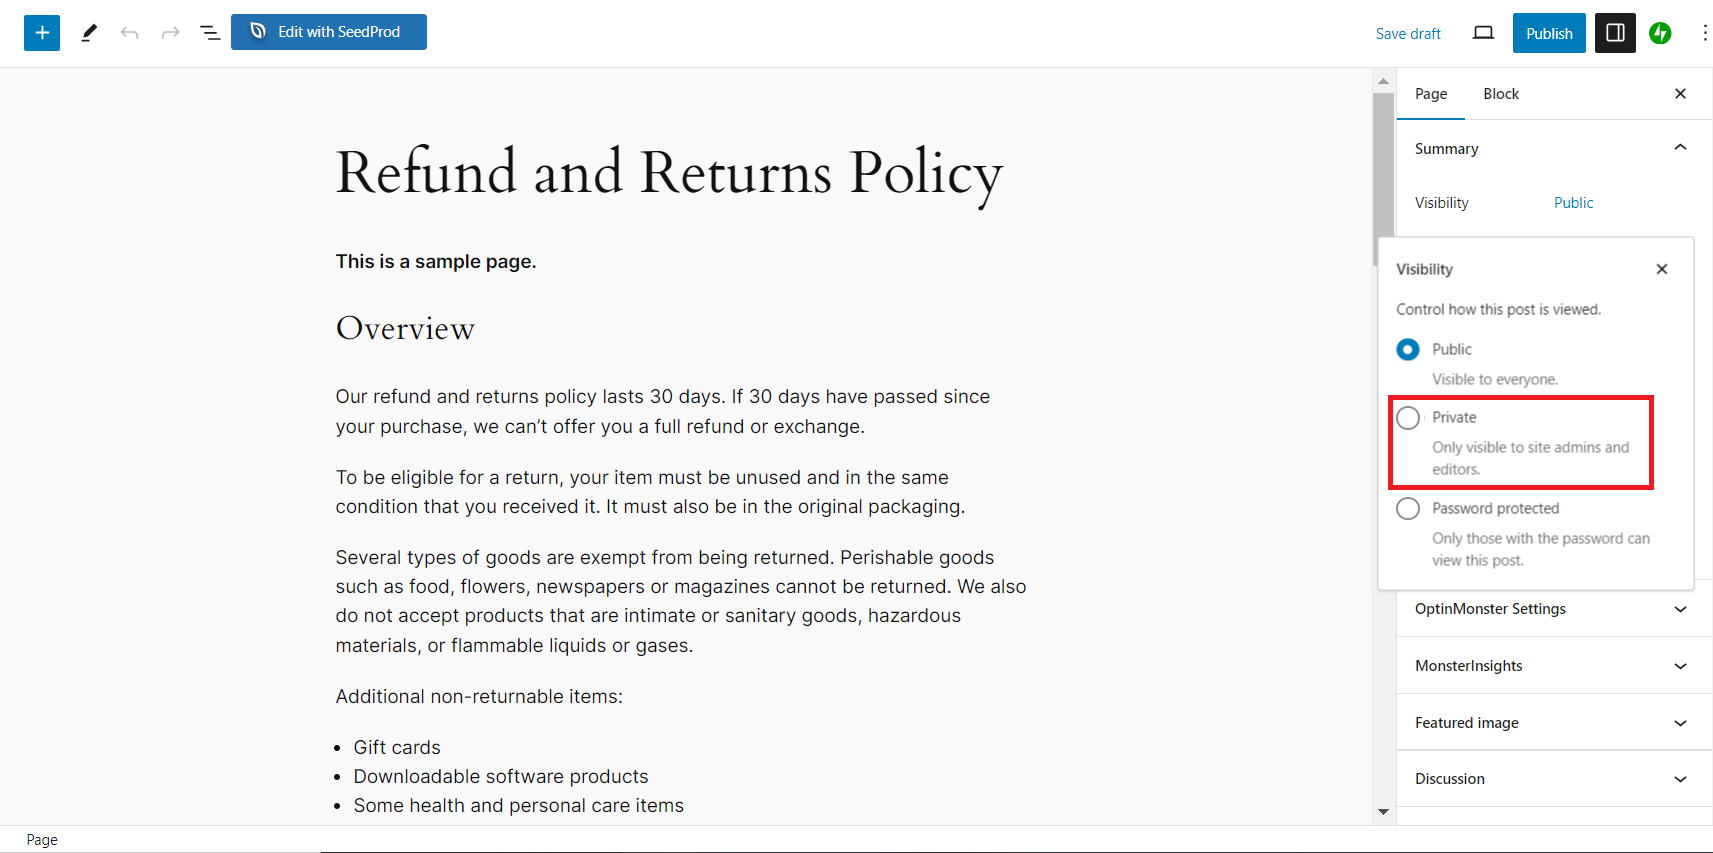
- Hit OK when the pop-up confirmation appears.
Once applied, the post or page will only be accessible to website admins and editors.
Method 4: Use Password Protection
Password protection prevents the public from seeing the post or page and minimizes internal security risks among your website’s collaborators or logged-in users. Only collaborators who know the password can access the post or page.
These are the steps to make your WordPress pages or posts password-protected:
- Open the page or post you want to password-protect in the WordPress block editor.
- Open the settings panel. In the Visibility section, choose the Password protected mode.
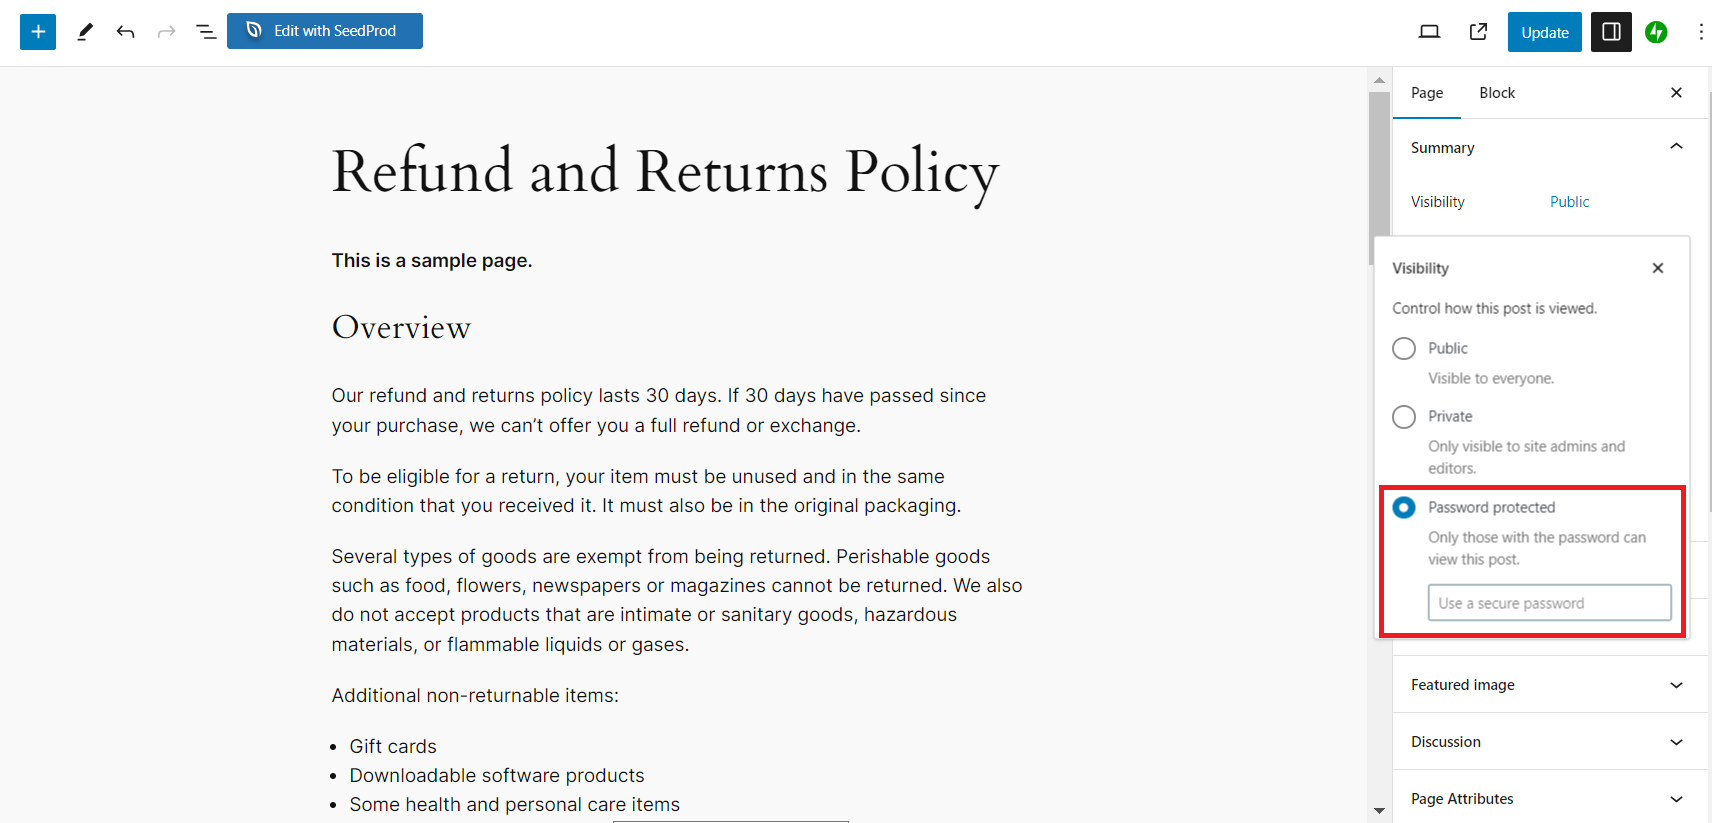
- Enter a strong password into the Use a secure password box.
- Hit the Update button to apply the change.
By completing these steps, visitors who want to access the WordPress page or post will be asked to enter the correct password.
Tips for Unpublishing Your WordPress Content
After exploring how to unpublish pages, posts, and an entire WordPress site, we’ll share with you several tips for navigating the process efficiently with minimal impact on your site’s SEO.
Consider Archiving Instead of Unpublishing
Archiving pages or posts allows you to keep them out of public view while still maintaining internal linking integrity and other SEO efforts. This is because archived pages can still be accessed via direct links if needed.
Meanwhile, if you unpublish your WordPress site, all the posts and pages will be removed from public view without preserving their associated elements. Changing a published post or page’s status to Draft also causes Google to remove it from its index, undermining your SEO efforts.
Therefore, unpublishing is more suitable for content that needs major changes. For example, outdated or irrelevant posts or pages that need to be rewritten and republished anyway.
You’ll need to install a third-party archives plugin like LH Archived Post Status to do this, as WordPress doesn’t provide this feature by default.
Repurpose Your Content
If content quality is the reason you want to unpublish your WordPress post or page, consider giving it a new life.
Repurposing content is a strategic approach to maximize the value of your existing website material. Research how competitor websites write about the same topic and try to improve upon them by making your content more unique and interesting.
For example, an old blog post can be revamped into a new article, transformed into an engaging infographic, or used as material for a video or email newsletter.
Alternatively, merge related content pieces into comprehensive guides or resource hubs. Update statistics, add new insights, and republish the content as a more extensive, polished piece.
As you repurpose the content, remember to optimize it for current search engine algorithms. Update keywords, meta descriptions, and headers for improved search engine visibility.
Assess the Impact on SEO and User Experience (UX)
Unpublishing certain pages or posts can have implications for SEO because it can lead to the creation of broken links. Moreover, search engine crawlers won’t be able to index the drafted post or page.
In terms of UX, a visitor might potentially see an Error 404 Page Not Found instead of the page or post they’re looking for.
If you must unpublish a WordPress page or post, creating WordPress 301 redirects can minimize negative impacts on your SEO and UX. Instead of getting an error page, visitors will be redirected to the new URL.
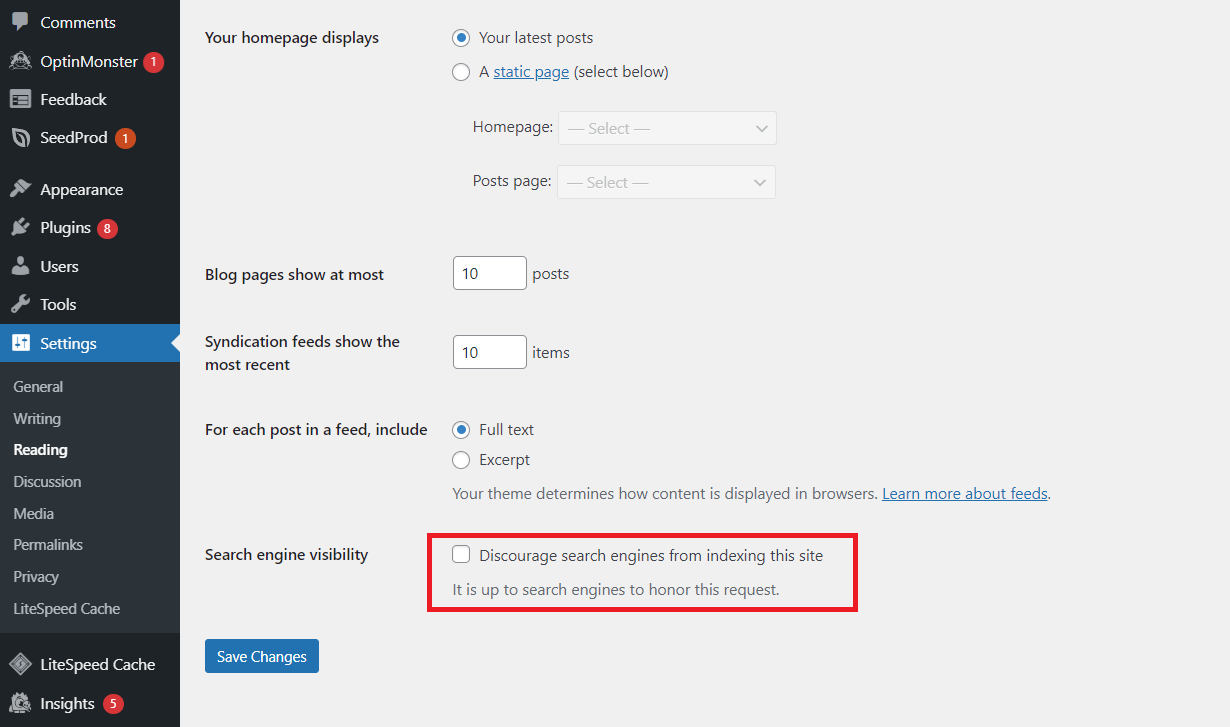
You can also prevent SEO robot crawlers from indexing your content entirely. This is ideal when you want to keep the page private from visitors and search engines.
Simply navigate to Settings → Reading from your WordPress dashboard. Then, find the Search engine visibility option and check the box beside Discourage search engines from indexing this site. Hit Save Changes.
Scheduled Unpublishing
Consider scheduling the time for unpublishing your WordPress page or post. This is particularly useful for time-sensitive content, such as promotional offers and event-related pages or posts.
The plugin PublishPress Future lets you automate and schedule changes to your posts, pages, and other content types.
After activating the plugin, you’ll see the PublishPress Future menu on the block editor’s settings panel. Check the Generate Future Action box to set an action to do with the post, along with the date and time to apply the change.
By clicking the Update or Publish button, the post status will change at the scheduled time.

Conclusion
In this guide, we’ve covered how to unpublish an entire WordPress site through permanent deletion and temporarily using maintenance mode.
You can also unpublish specific WordPress pages and posts by switching them to draft, using bulk actions, and activating password protection or the private mode.
Remember, unpublishing posts or pages can negatively impact SEO, so consider other alternatives like archiving to hide your content. If you must unpublish pages or posts, implement proper URL redirects to minimize SEO losses.
It’s also important to inform visitors before putting your WordPress website offline. Informing visitors from alternate channels can help reinforce transparency and maintain trust.
We hope this article helps you confidently navigate unpublishing on WordPress. Good luck!
How to Unpublish a WordPress Site FAQ
To learn more about how to unpublish a WordPress site, check out these answers to commonly asked questions about the topic.
What Happens When You Unpublish a WordPress Site?
Unpublishing a WordPress website will restrict access to the site and remove it from search results.
How Do I Hide My WordPress Site From the Public?
You can either permanently delete your WordPress website or temporarily hide it from the public by putting it in maintenance mode. Hostinger users can delete their website or put it in maintenance mode with just a few clicks using hPanel. Alternatively, access your website’s files and manually delete them or activate a plugin to put the website in maintenance mode.
When Should I Unpublish My WordPress Site?
You can unpublish your WordPress site permanently if you want it completely removed from the web. Meanwhile, temporarily unpublishing the website via maintenance mode should only be done when absolutely necessary. For example, when you want to implement major updates, security enhancements, or rebranding efforts away from prying eyes.
All of the tutorial content on this website is subject to Hostinger's rigorous editorial standards and values.

Larassatti Dharma is a content writer with 4+ years of experience in the web hosting industry. She has populated the internet with over 100 YouTube scripts and articles around web hosting, digital marketing, and email marketing. When she's not writing, Laras enjoys solo traveling around the globe or trying new recipes in her kitchen. Follow her on LinkedIn


