How to use XAMPP: A 3-step guide to setting up a local WordPress site
Apr 25, 2025
/
Will M.
/
7 min Read
Setting up a locally-hosted environment is a crucial step in any WordPress development project. Doing this enables you to safely test your site’s features and functionality, on a site that’s completely private.
In this article, we’ll explore how to use XAMPP to set up a local web server for developing and testing your WordPress site. This involves three steps:
- Install XAMPP.
- Run XAMPP and configure your environment.
- Download and run WordPress.
We’ll also discuss some best practices for experimenting with code and testing WordPress using XAMPP. Finally, we’ll cover how to use XAMPP with a WordPress multisite installation.
Download all-in-one WordPress cheat sheet
Why You Might Need a Local WordPress Site
A locally-hosted WordPress site is one that is only accessible by people on your network (that is, there are no live components). As such, this type of site can serve as a safe environment, in which new features and troubleshooting methods can be tested.
Local websites are perfect for performing the following types of tasks:
- Creating new themes and plugins: When using a local site, you don’t need to worry about any of the issues you might encounter when developing on a live WordPress site.
- Website staging: You can create a copy of a live website, which can then be used for testing purposes.
- Site debugging and troubleshooting: Working under the hood of your live site in order to resolve bugs or other issues may lead to bigger problems (and, potentially, costly downtime). By creating a local WordPress site, you can try out various solutions, and easily restore previous versions of your site should you make any mistakes.
For these reasons, creating a locally-hosted WordPress site is highly recommended for just about any development project. First, however, you’ll need a tool that will make the process of setting up a locally-hosted site quick and easy.
An Introduction to XAMPP
A few crucial ingredients are needed if you want to install WordPress locally. These consist of web server software (such as Apache), programming languages like Perl and PHP, and the database management software – MySQL. Installing each of these elements separately, however, is time-consuming and difficult.
XAMPP (an acronym for cross (x)-platform, Apache, MySQL, PHP, and Perl) enables you to install all these elements quickly and easily. You can then use XAMPP to set up the environment required to run WordPress on a local machine. There, you can test plugins, experiment with themes and coding, and carry out other development activities safely.
XAMPP is free and open-source software, backed-up by a sizable support community. It’s also extremely lightweight, and all the elements required to set up a local web server are contained within a single extractable file. What’s more, learning how to use XAMPP is relatively straightforward, as we’ll discuss in the following XAMPP tutorial.
How to Use XAMPP to Set Up a Local WordPress Site (In 3 Steps)
In the following steps, we’ll walk you through how to use XAMPP and install WordPress on it. For this tutorial, we will be covering the steps for the Mac version of the software. However, XAMPP can also be set up and run relatively easily on both Windows and Linux devices, using a similar process.
Step 1: Install XAMPP
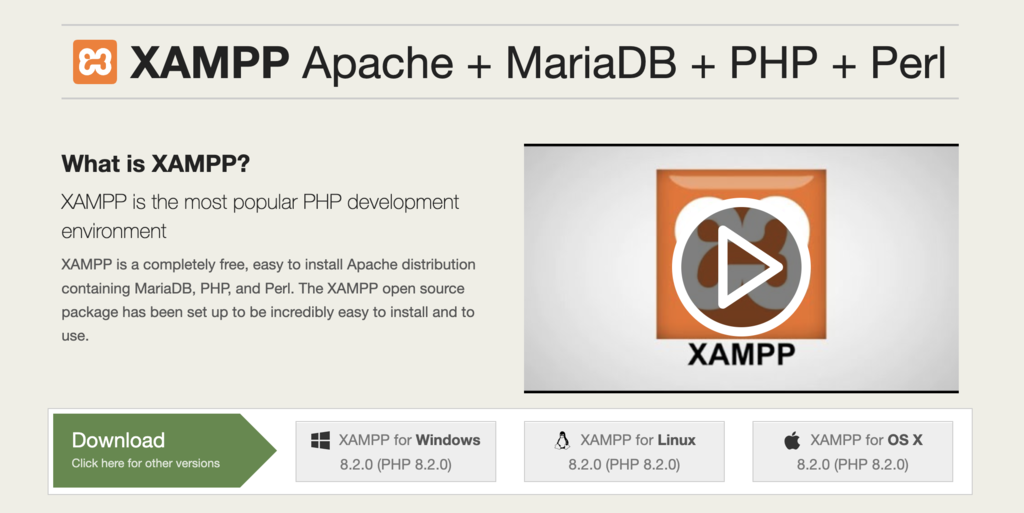
First of all, you’ll need to go to the Apache Friends website, and select the relevant download link on the homepage:
Next, drag XAMPP into your Applications folder:

Once the initial loading sequence is completed, XAMPP will be installed on your system. This part of the setup process doesn’t require much on your end.
It should be mentioned that if you are running XAMPP on Windows, and another program on your machine is using ports 80 or 443, you may encounter a port error. For example, the World Wide Web Publishing Service program commonly uses port 80 and may cause a conflict with XAMPP.
To resolve this, you’ll need to stop that service from running by doing the following things:
- Navigate to the Windows Start menu, and type in services.msc.
- In the Services window, locate World Wide Web Publishing Service.
- Right click on it, and select the Stop button.
- Restart XAMPP. The port error will be resolved if World Wide Web Publishing Service was the culprit.
If this doesn’t resolve the issue, it may be caused by your Windows firewall. To forcibly unlock your ports, you will need to set up a new firewall rule:
- Open up Windows Firewall and navigate to Advanced Settings.
- Go to Inbound > New Rule.
- Go to Port > TCP. You’ll have to type 80,443 in the field labelled Specific Ports, then click on Next.
- Select Allow the Connection, then click on Next again.
- Make sure all listed options are checked and continue to the next page.
- In the Name field, type in a memorable name (such as host1) and select Finish.
- You’ll now need to repeat steps 1 to 6, changing the name again (i.e. to host2) to clear the port.
- Restart your computer. Ports 80 and 443 should now be unblocked and open locally.
Once XAMPP is installed, you’ll be all set to start running XAMPP.
Step 2: Run XAMPP and Configure Your Environment
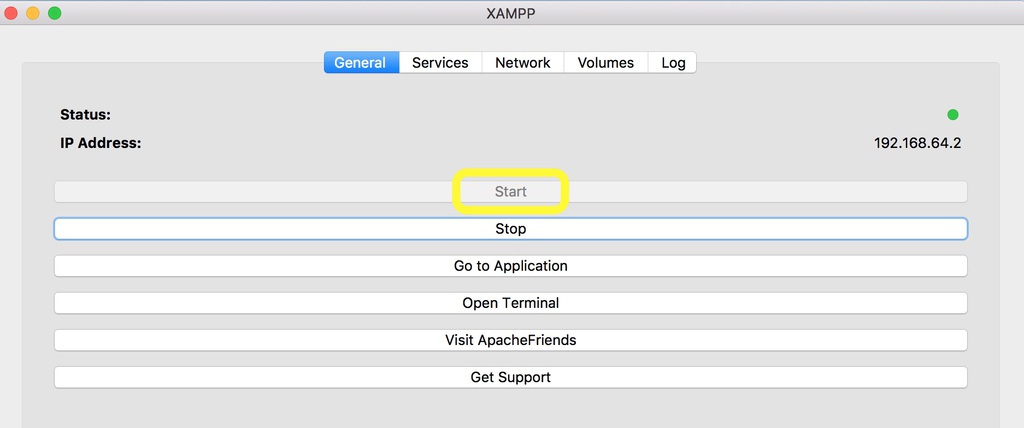
Now, open up the XAMPP application and hit the Start button. You should see a green light in the upper right-hand corner of the display:
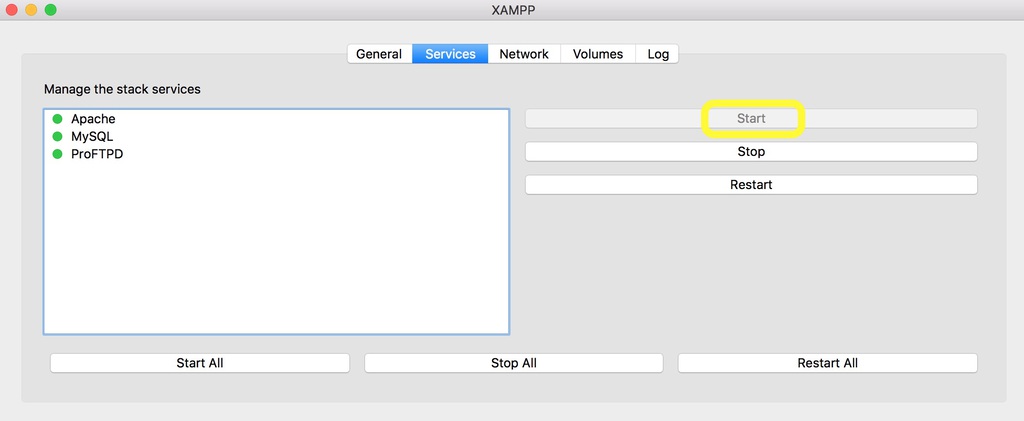
Next, navigate to the Services tab. You will need to ensure that the status of both the Apache and MySQL stack services are running (i.e. that they have a green light). This will ensure that your database management and server software elements are in place for your local environment. For now, you can ignore ProFTPD (which is a configurable File Transfer Protocol server).
If MySQL or Apache are not running (if they display a red light), simply select them and hit Start:
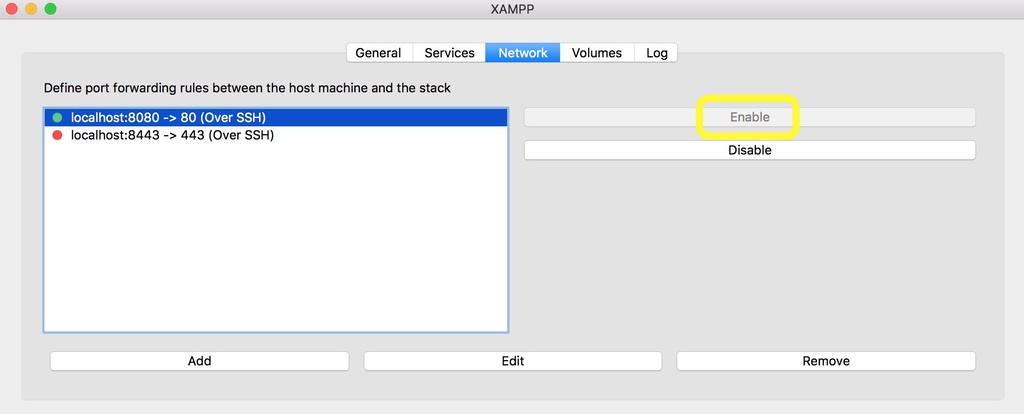
Then, switch over to the Network tab. Here, you can define the port forwarding rules between your host machine and your stack. Select the localhost option you wish to work on, and then hit the Enable button. In this example, we will be using localhost:8080:
You will now be able to access your localhost, and start using XAMPP as a server environment. To do this, open up your preferred web browser, and type in your localhost name (which in our case would be localhost:8080). This will bring up the XAMPP dashboard. Once there, select the phpMyAdmin button in the top right-hand corner of the page:

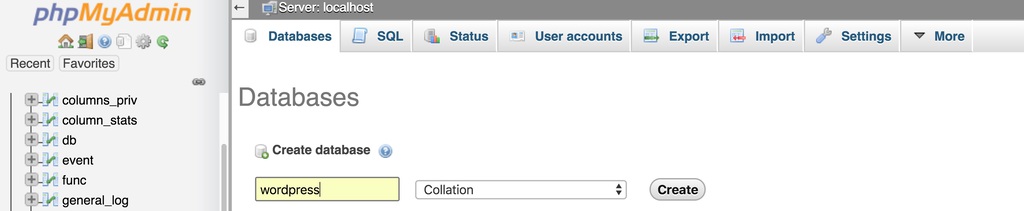
You’ll then need to create a database for your WordPress installation. To do this, select the Database tab, type in a name for your database (in our case, we’ll simply go with WordPress), ensure the next drop-down menu is set to Collation, and then hit Create:
After that, you’ll be ready to learn how to install WordPress on XAMPP.
Step 3: Download and Run WordPress
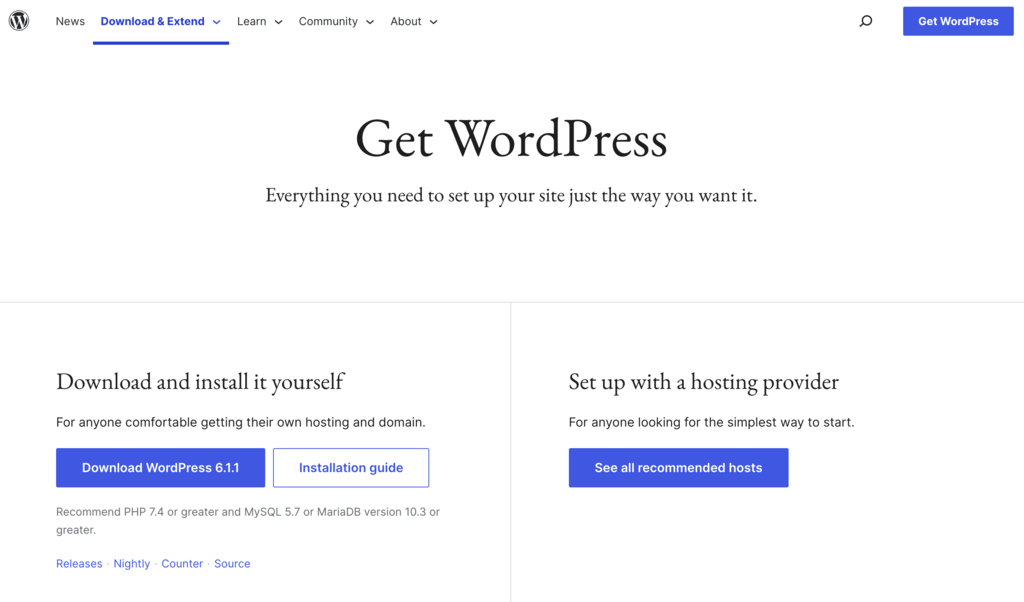
At this point, you’ll need to go to WordPress.org and download the latest version of WordPress:
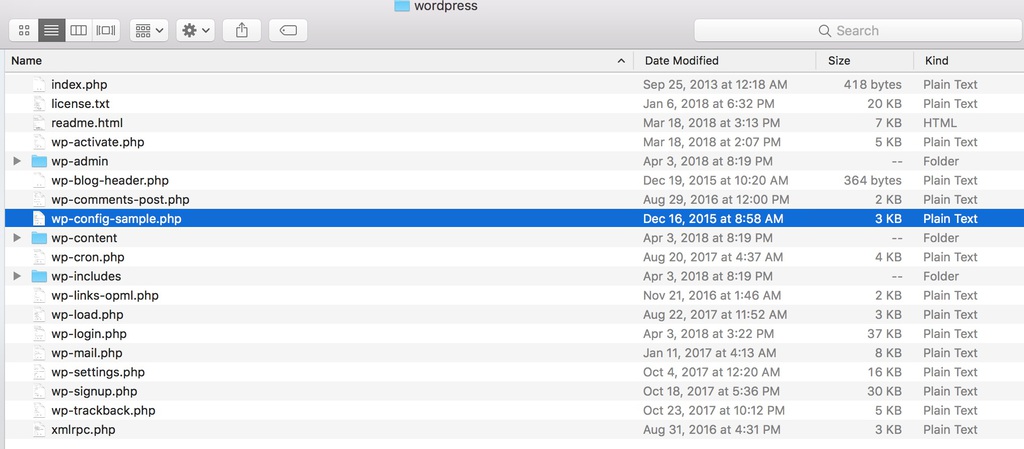
Open up the WordPress folder on your machine, and locate the wp-sample-config.php file:
Open this file in your preferred text editor (such as TextEdit). You’ll need to locate this line of text:
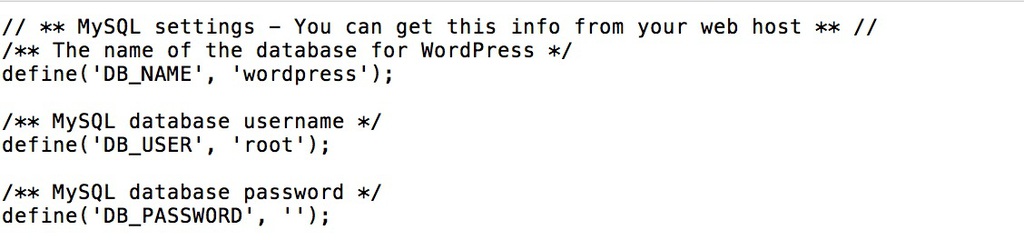
define('DB_NAME', 'database_name_here');Replace database_name_here with whatever you named your database in the last step. Then, look for these two lines:
define('DB_USER', 'username_here');
define('DB_PASSWORD', 'password_here');
You’ll need to replace username_here with root, and delete password_here entirely. The resulting text should look like this:
Once you’ve done that, save the file as wp-config.php. You’ll need to ensure that it is placed in the htdocs subfolder within the XAMPP folder. You’ll also need to paste your WordPress install folder into htdocs as well.
Finally, navigate to http://localhost/wp/ in your browser. Once there, follow the standard WordPress installation procedure. When that’s all done, you’ll have a locally-hosted WordPress site ready to go!
How to Set Up WordPress Multisite on XAMPP
Now that you know how to use XAMPP for a single WordPress installation, you may want to use it to create a multisite network. This enables you to create a network of websites that are all managed from a single WordPress installation. There are a lot of applications for a multisite installation. For instance, it presents a useful way to test how your newly-developed themes and/or plugins will function on a variety of sites.
To get started, you’ll need to open up your wp-config.php file in a text editor again. You’ll then need to add the following lines of code at the bottom, right above the line * That’s all, stop editing! Happy blogging. *:
define('WP_DEBUG', false);
define('WP_ALLOW_MULTISITE', true);
After you’ve ensured that Apache and MySQL are still running on XAMPP, log in to your localhost site. Then, navigate to Tools > Network Setup:
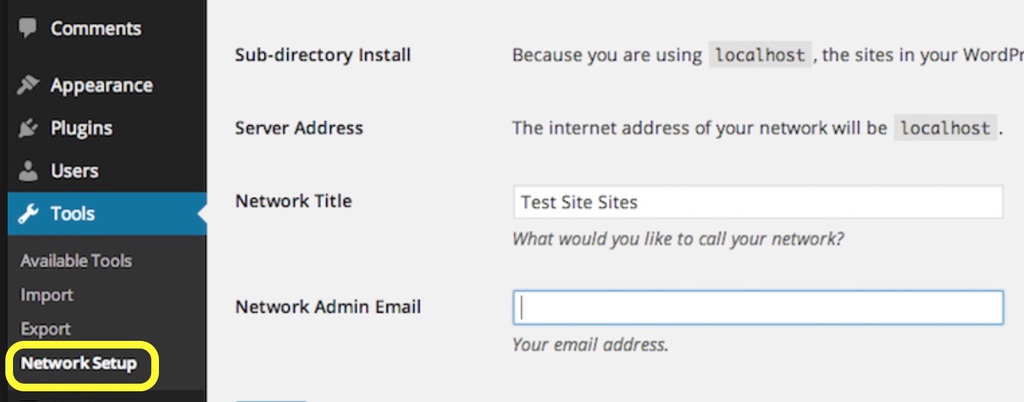
Once you’ve entered a network title, select Install. You will be prompted to edit your wp-config.php and .htaccess files.
Open up your wp-config.php file once more. You’ll need to add the following code beneath the lines you added previously:
define('MULTISITE', true);
define('SUBDOMAIN_INSTALL', false);
define('DOMAIN_CURRENT_SITE', 'localhost');
define('PATH_CURRENT_SITE', '/');
define('SITE_ID_CURRENT_SITE', 1);
define('BLOG_ID_CURRENT_SITE', 1);
Next, you’ll need to open up (or create) your .htaccess file in the same directory as your wp-config.php file. Then, replace all the existing lines in that file with the following snippet:
# BEGIN WordPress
RewriteEngine On
RewriteBase /
RewriteRule ^index\.php$ - [L]

# add a trailing slash to /wp-admin
RewriteRule ^([_0-9a-zA-Z-]+/)?wp-admin$ $1wp-admin/ [R=301,L]

RewriteCond %{REQUEST_FILENAME} -f [OR]
RewriteCond %{REQUEST_FILENAME} -d
RewriteRule ^ - [L]
RewriteRule ^([_0-9a-zA-Z-]+/)?(wp-(content|admin|includes).*) $2 [L]
RewriteRule ^([_0-9a-zA-Z-]+/)?(.*\.php)$ $2 [L]
RewriteRule . index.php [L]

# END WordPress
Save the file and close it. Now, you should be able to access individual sites in your dashboard when you log in to your local WordPress installation.
What to Do With Your Local WordPress Installation
Once you know how to use XAMPP and have a local WordPress site to experiment on, what you do next will largely depend on the kind of development project you’re embarking on. To get you started, WordPress.org offers a great beginner’s guide on how to test drive WordPress.
If you’re interested in theme development, you may want to see our guide on how to develop a WordPress theme, or check out such sites as Theme Shaper. Using your local environment, you can safely edit your files to experiment with new themes and their associated functionality.
If you want to learn how to use XAMPP and WordPress together to test your coding knowledge and gain more PHP experience, there are a number of helpful guides for that as well. Codecademy offers an excellent variety of tutorials that cover PHP and HTML fundamentals, plus much more.
While using your local WordPress installation for development, you’ll also want to have resources at hand for troubleshooting and honing your skills. Stack Exchange is a thriving online forum where you can pose questions to the WordPress development community, as well as gain invaluable insights. Finally, you’ll probably want to become a regular on the WordPress.org support forum.

Conclusion
As we have seen, XAMPP is a powerful and versatile solution for setting up a local web server. It presents a perfect way to create an environment for basic WordPress coding, experimenting with multisite settings, tweaking themes, and much more. Though it is not the only tool that you can use. A great alternative is setting up WordPress using Docker.
Do you have any questions about how to use XAMPP or your new local WordPress site? Let us know in the comments section below!
Learn Other Expert WordPress Techniques
What Is Xmlrpc.php
Everything You Need to Know About wp-config.php
How to Become a WordPress Developer
How to Perform a WordPress Search and Replace
What Are WordPress Hooks?
How to Add Custom CSS to WordPress
How to Speed Up a WordPress Website
All of the tutorial content on this website is subject to Hostinger's rigorous editorial standards and values.

Will Morris is a staff writer at WordCandy. When he's not writing about WordPress, he likes to gig his stand-up comedy routine on the local circuit.


