How to solve ERR_NAME_NOT_RESOLVED in 6 steps
Sep 18, 2025
/
Leonardus N. & Ariffud M.
/
7 min Read

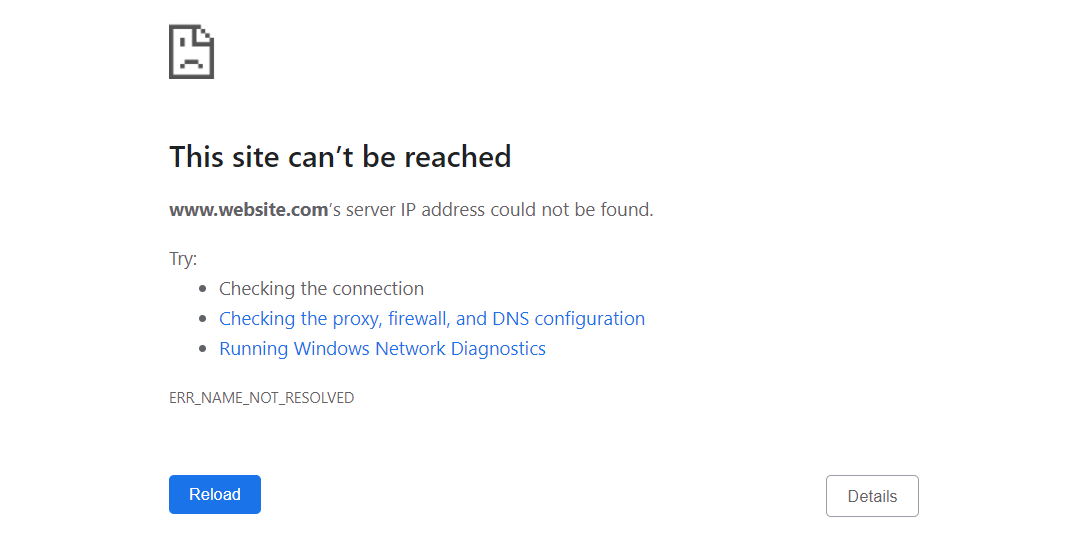
ERR_NAME_NOT_RESOLVED is a common domain name system (DNS) error that prevents your browser from accessing a website. It means your computer could not find the correct IP address corresponding to the domain name you entered.
To fix the error, follow these six proven solutions, ranging from DNS caching to DNSSEC settings:
- Clear the DNS cache. Remove outdated IP information from your operating system.
- Update browser settings. Clear your browser’s internal cache and check its settings.
- Change your internet connection. Rule out your router or local network as the problem.
- Reset your firewall and DNS servers. Fix blocks from security software and switch to public DNS.
- Edit the hosts file. Correct any manual IP address overrides on your computer.
- Disable DNSSEC. A final step for website owners to fix domain authentication issues.
The ERR_NAME_NOT_RESOLVED error is typically caused by one of the following issues:
- Outdated DNS cache on your device or in your browser.
- An unstable internet connection or a router problem.
- Firewall or antivirus software blocking the connection.
- Unreliable DNS servers from your internet provider.
- An incorrect configuration in your computer’s local hosts file.
- A domain-side DNSSEC issue, often after migrating a domain.
Learn how to fix ERR_NAME_NOT_RESOLVED with Hostinger Academy
If you prefer a visual guide, our Hostinger Academy video provides a complete walkthrough of the methods we’ll cover in this tutorial. You’ll get a step-by-step look at how to resolve the ERR_NAME_NOT_RESOLVED error in your browser.

How to fix ERR_NAME_NOT_RESOLVED
The ERR_NAME_NOT_RESOLVED error has several potential causes, from simple cache issues to incorrect network settings.
To solve it, start with the quickest fixes, like flushing your DNS cache, and then move on to more technical solutions, like modifying your hosts file or disabling DNSSEC.
Follow these steps to find the root cause and get back online:
1. Flush your device’s DNS cache
First, clear your device’s DNS cache. This action removes outdated IP address data that often causes the ERR_NAME_NOT_RESOLVED error, forcing your system to fetch the latest domain information.
A stale entry is a common source of this DNS cache error, especially if you recently migrated your domain to a new hosting provider.
The process for clearing the cache differs between Windows, macOS, and Linux. For detailed, step-by-step instructions, follow our tutorial on how to flush a DNS cache.
Once the DNS cache is clear, try visiting the website again. If the error persists, move on to the next likely source: your browser’s internal cache, which holds its own set of DNS records.
2. Clear your browser’s cache and settings
Web browsers like Google Chrome maintain their own browser DNS cache to improve load times, and this data must also be cleared regularly. Otherwise, it will use the outdated address, causing ERR_NAME_NOT_RESOLVED.
You’ll perform two actions in Chrome: clearing its host cache and disabling page preloading.
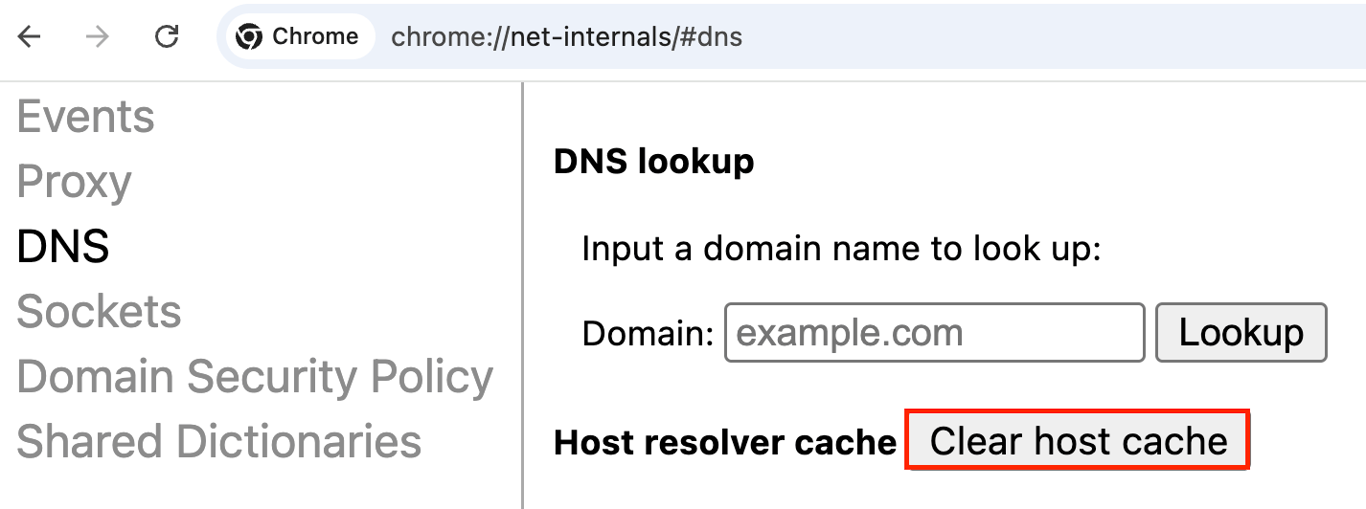
Clear the host cache
This forces Chrome to find the website’s new IP address instead of using an outdated, cached one.
- Type chrome://net-internals/#dns into your Chrome address bar and press Enter.
- Click the Clear host cache button. The action is immediate, and there is no confirmation message.
Disable page preloading
Chrome’s preload feature can sometimes cause this error by using old DNS information. Disabling it ensures every connection fetches fresh data.
- Navigate to Chrome’s Settings by clicking the three-dot menu in the top-right corner.
- Select Performance from the left-hand menu.
- Find the Preload pages option and switch the toggle to Off.

After completing both steps, restart Chrome and try to access the website again. If you still see the ERR_NAME_NOT_RESOLVED error, the issue is likely with your current network. Try connecting to the site using a different internet source.
3. Test using a different internet connection
If clearing the system and browser caches didn’t work, the problem might be a router DNS issue or a network configuration fault. Therefore, you must confirm if your internet connection is the source of the ERR_NAME_NOT_RESOLVED error.
The easiest way to test this is to switch to a different network.
- Connect your computer to a mobile hotspot.
- Try to visit the website that showed the error.
If the website loads correctly on the mobile hotspot, your primary internet connection is the problem. Restart your router to clear its cache and reset the connection.
- Unplug the power cord from your router.
- Wait at least 30 seconds for it to fully power down.
- Plug the power cord back in and wait for the internet connection light to become stable (usually solid green or blue).
A router restart solves most local network glitches. If you’re still stuck on your main connection, it’s a sign that the DNS servers assigned by your internet provider are failing. The solution is to stop using them and switch to a public alternative.
4. Reset your firewall and DNS servers
If other solutions fail, ERR_NAME_NOT_RESOLVED may stem from a misconfigured firewall or an unreliable DNS server from your internet service provider (ISP). Let’s address both.
Reset your firewall
Your firewall provides essential security, but can sometimes mistakenly block connections. Resetting it to its default settings can quickly resolve the ERR_NAME_NOT_RESOLVED error.
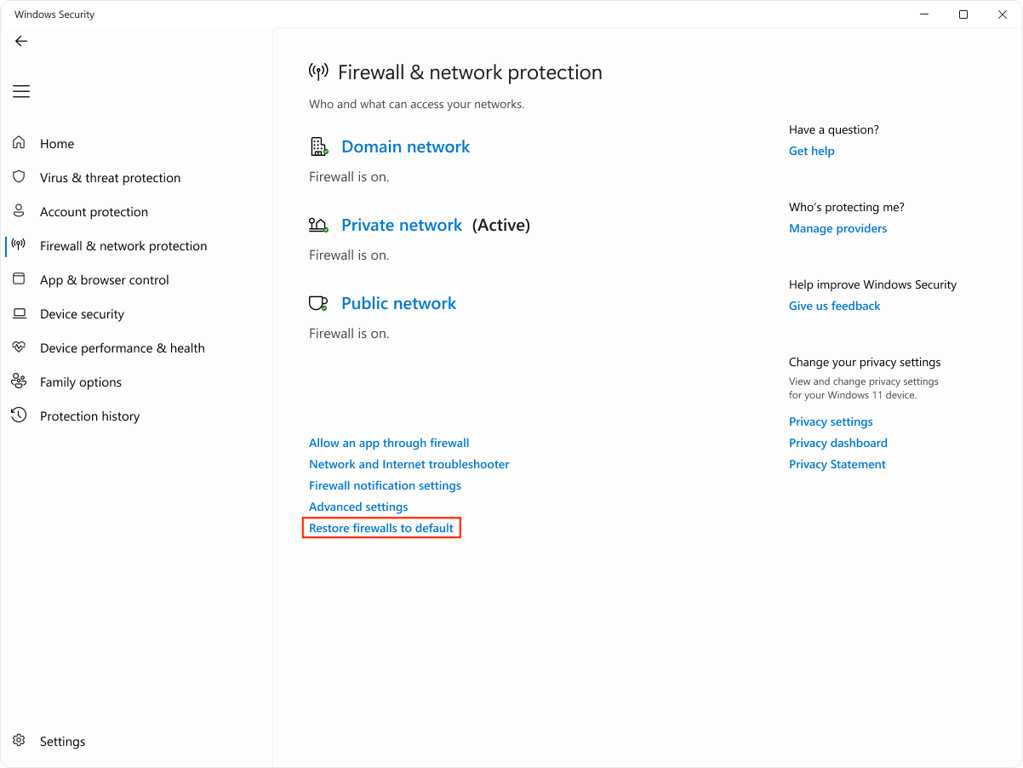
On Windows:
- Open the Start menu and search for Windows Security, then open it.
- In the left-hand menu, select Firewall & network protection.
- Click Restore firewalls to default and confirm your action.
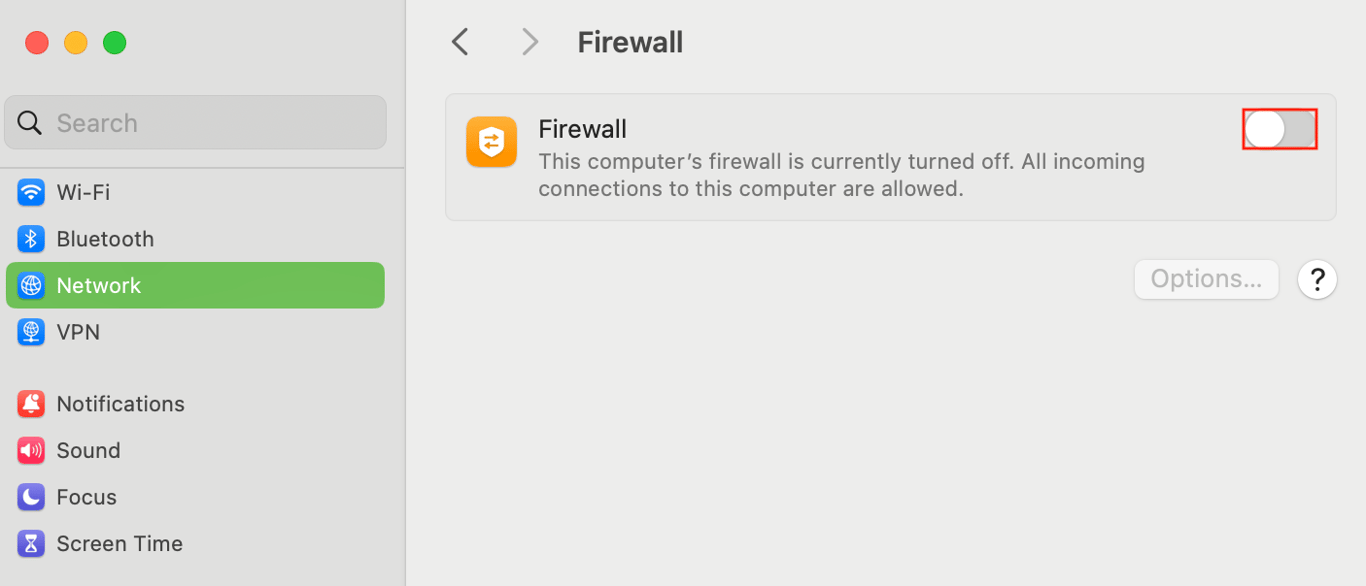
On macOS:
- Open System Settings and navigate to Network → Firewall.
- If the firewall is on, the options button will be clickable. Click it, and review the list of applications. If you see any rules blocking your browser or internet access, remove them using the minus (–) button.
- As a simpler alternative, you can turn the firewall off temporarily to see if it resolves the error. If the site loads, you have identified the firewall as the cause and need to adjust its rules.
Change your DNS server address
Your ISP’s default DNS servers can be slow or faulty. Switching to a free, public DNS provider like Google or Cloudflare is a reliable fix for many DNS-related issues, including this and DNS server not responding.
Here are some of the most popular public DNS servers:
| Provider | IPv4 address | IPv6 address |
| 8.8.8.8 and 8.8.4.4 | 2001:4860:4860::8888 and 2001:4860:4860::8844 | |
| Cloudflare | 1.1.1.1 and 1.0.0.1 | 2606:4700:4700::1111 and 2606:4700:4700::1001 |
On Windows:
- Navigate to Control Panel → Network and Internet → Network and Sharing Center.
- Click Change adapter settings on the left.
- Right-click your active network connection, like Wi-Fi or Ethernet, and select Properties.
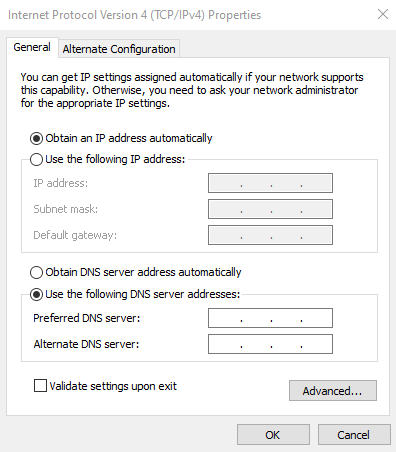
- Select Internet Protocol Version 4 (TCP/IPv4) and click Properties.
- Select Use the following DNS server addresses: and enter the addresses from the table above. Hit OK to save.
On macOS:
- Go to System Settings → Network.
- Select your active internet connection and click Details….
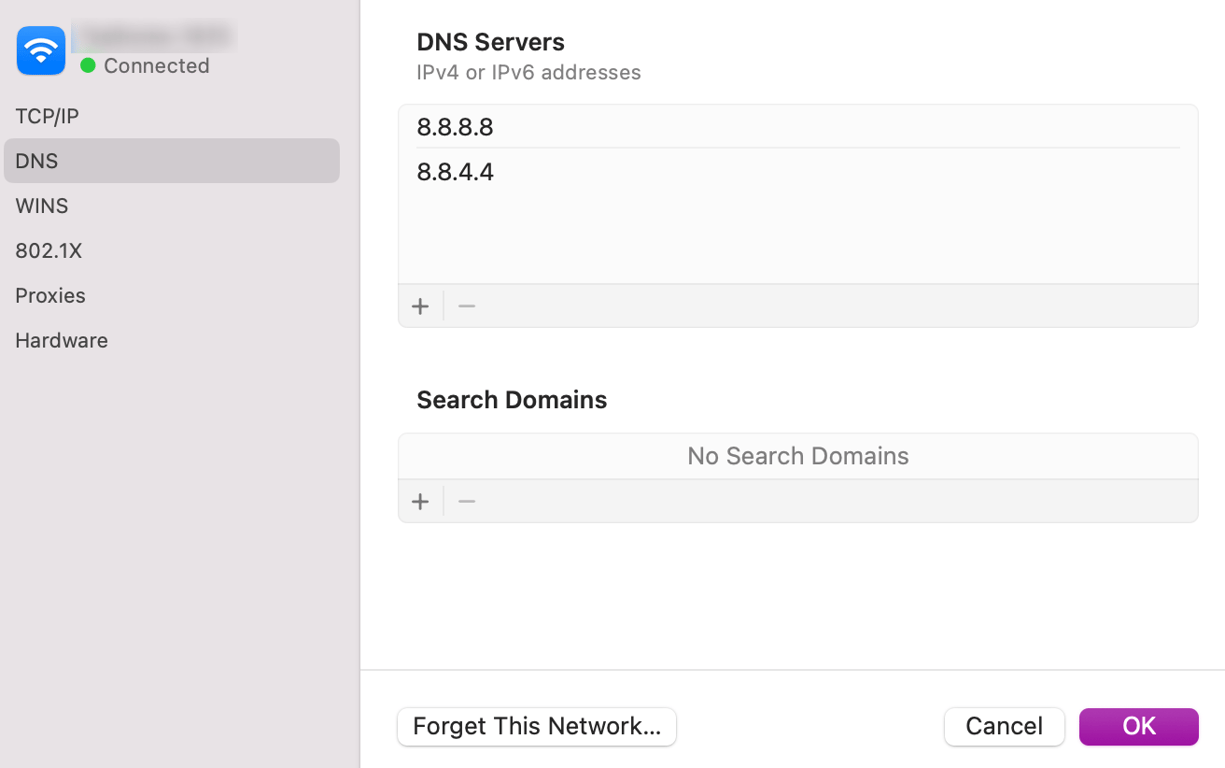
- In the new window, select the DNS tab.
- Click the plus (+) button under DNS Servers and add the new addresses.
- Hit OK to apply the changes.
You have now corrected caches, ruled out network hardware, and even switched DNS providers. If the error still persists, there’s one last place a faulty configuration can hide: your computer’s hosts file, which can override all other network settings.
5. Check and edit your hosts file
The hosts file is a local file that can be manually edited to map domain names to specific IP addresses.
Its rules override all settings from your DNS server, so an incorrect entry can create a faulty host file redirect, causing the ERR_NAME_NOT_RESOLVED error.
This process involves two parts: finding the website’s correct IP and then checking the hosts file for incorrect entries.
Find the website’s correct IP address
First, you need to know the website’s actual IP address. You can find this using the ping command.
- Open Command Prompt (Windows) or Terminal (macOS/Linux).
- Type the following command, replacing domain.tld with the website you’re trying to reach, and press Enter.
ping domain.tld
- Note the IP address that responds, for example, 104.26.10.230. This is the correct IP.
Check the file for errors
Next, you need to open the hosts file to check its contents. The location of this file and the commands required to edit it differ for each operating system. For detailed instructions, follow our full guide on how to edit a hosts file.
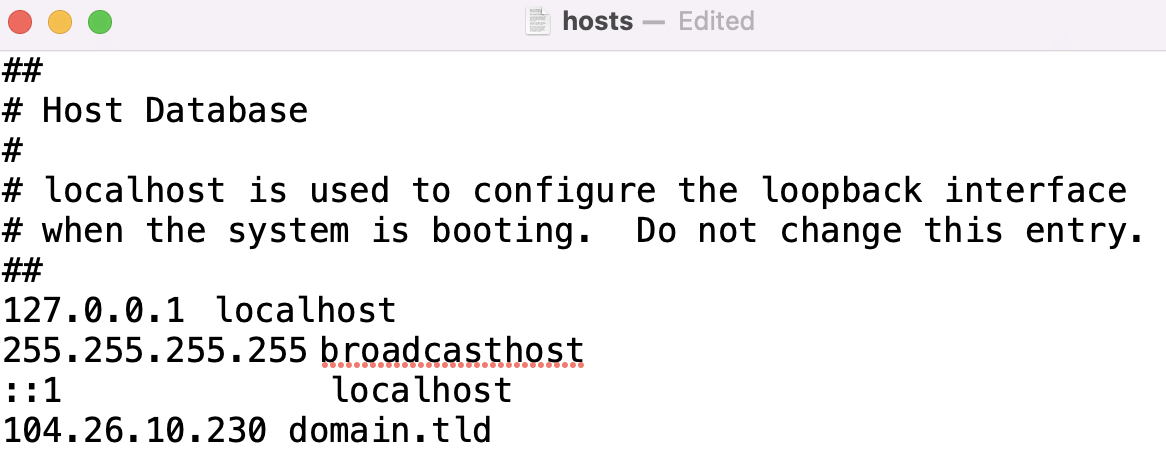
Once the file is open, look for any line containing the domain that’s giving you trouble.
- If you find an entry with the wrong IP, like 192.0.2.1 domain.tld, disable it by adding a # symbol to the beginning of the line (# 192.0.2.1 domain.tld) or delete the line entirely.
- If no entry for the domain exists, add a new line at the bottom with the correct IP you found earlier:
104.26.10.230 domain.tld
Save the file and exit the editor. Then, flush your DNS cache one last time for the changes to take effect.
Modifying the hosts file resolves client-side misconfigurations. If this step doesn’t fix the error and you own the website in question, the problem is likely not on your computer but with the domain’s own security settings.
The final step is to investigate its DNSSEC configuration.
6. Disable DNSSEC for your domain
Finally, if you are the website owner and the error is happening on your own domain, the cause is often a Domain Name System Security Extensions (DNSSEC) issue.
DNSSEC adds a critical layer of security by authenticating DNS records, but if misconfigured, it will prevent the domain from resolving correctly.
This problem is common after transferring a domain or changing nameservers, as the cryptographic signatures may no longer match. The most effective solution is to disable DNSSEC, which lets your domain become accessible again.
If your domain is with Hostinger, you can do this directly from hPanel.
- Navigate to Domains → Domain portfolio.
- Find the domain you want to configure and click Manage.
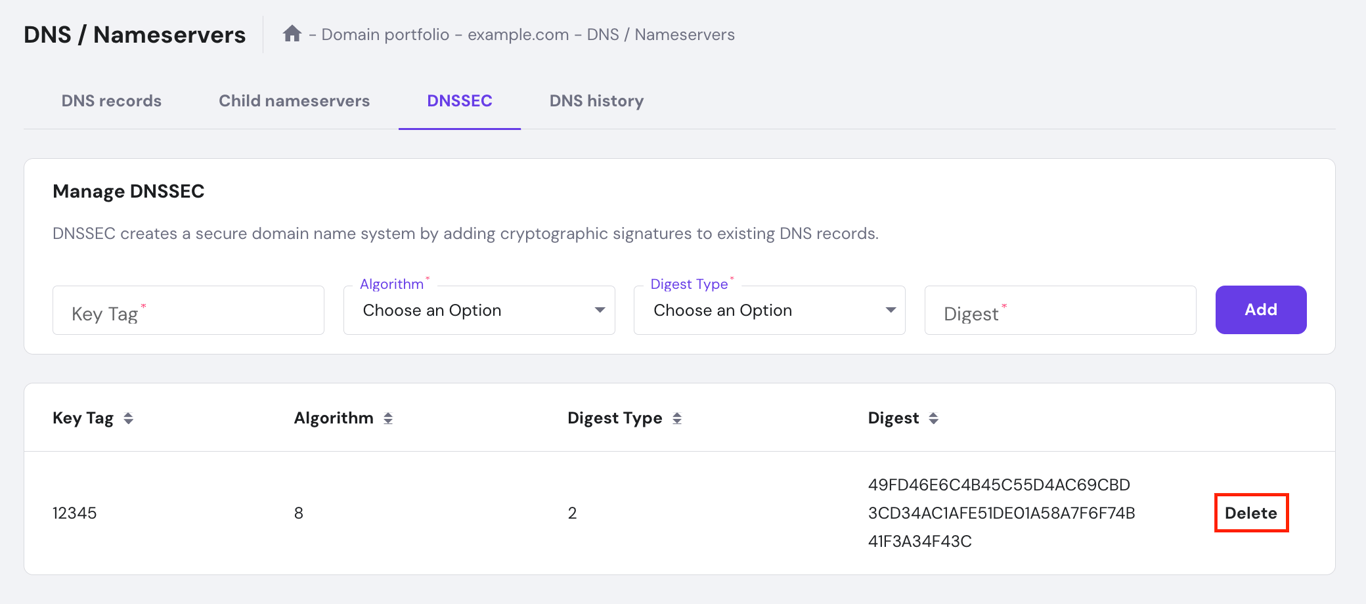
- On the left sidebar, select DNS / Nameservers.
- Select the DNSSEC tab. If there is an active DNSSEC record listed, click the Delete button next to it.
Disabling DNSSEC can take a few hours to take effect. While you are in this area of hPanel, you can manage all your domain’s records with Hostinger’s DNS Zone Editor.
Domain Name Checker
Instantly check domain name availability.
Key takeaways
The ERR_NAME_NOT_RESOLVED error is a common roadblock, but it’s almost always fixable. By systematically troubleshooting the issue, from your local computer’s cache to your domain’s server settings, you can identify the cause and get back online quickly.
Here is a recap of the six methods we covered:
- Flush your device’s DNS cache. This is the first step to clear outdated IP address records from your operating system.
- Clear your browser’s cache. This resolves issues caused by your browser’s internal cache, which is separate from the system’s.
- Test your internet connection. This helps confirm if the problem lies with your local network or router.
- Reset firewall and change DNS servers. This rules out blocks from security software and bypasses your ISP’s default DNS servers.
- Edit the hosts file. This fixes errors caused by incorrect manual IP address mappings on your computer.
- Disable DNSSEC. This is a final step for website owners to resolve domain-side authentication issues.
If you’ve worked through all these steps and the error persists, the problem may require a more technical solution. Consider these final checks:
- Test in Incognito mode. This is the fastest way to confirm if a browser extension is causing the conflict.
- Temporarily disable your VPN or antivirus. Security and privacy software can often interfere with DNS lookups.
- Reset your computer’s network stack. This powerful fix resolves deeper configuration issues within your operating system’s network settings.
If ERR_NAME_NOT_RESOLVED continues even after these advanced steps, do not hesitate to contact your hosting or domain provider’s support team for expert assistance.
All of the tutorial content on this website is subject to Hostinger's rigorous editorial standards and values.

Leo is a Content SEO Specialist and WordPress contributor. Armed with his experience as a WordPress Release Co-Lead and Documentation Team Representative, he loves sharing his knowledge to help people build successful websites. Follow him on LinkedIn.

Ariffud is a Technical Content Writer with an educational background in Informatics. He has extensive expertise in Linux and VPS, authoring over 200 articles on server management and web development. Follow him on LinkedIn.