How to change the font color on WordPress using 4 simple methods
Jun 24, 2025
/
Yoga K.
/
4 min Read

WordPress is a powerful and popular content management system (CMS) for building engaging, visually appealing websites without restrictions. It allows site owners to fully customize their websites, including changing typography settings.
For instance, you can add a custom font, modify the font size, and change the font color. There are multiple methods to tweak the font color in WordPress. They depend on many aspects, such as the WordPress theme and site editor.
Keep reading to learn more about how to change the font color in WordPress and the four easy ways to do it.
Change the Font Color Using the WordPress Editor
The easiest method to customize the font color is via the WordPress text editor. This section will cover how to change the default font colors in WordPress using the block and classic editor.
Using the WordPress Block Editor
The Gutenberg editor or WordPress block editor has been the default text editor since WordPress 5.0. With the Color settings, you can quickly change the font color in a post or page.
Follow the steps below to modify the text color in WordPress via the block editor:
- Log in to your WordPress dashboard and open the post or page you want to customize.
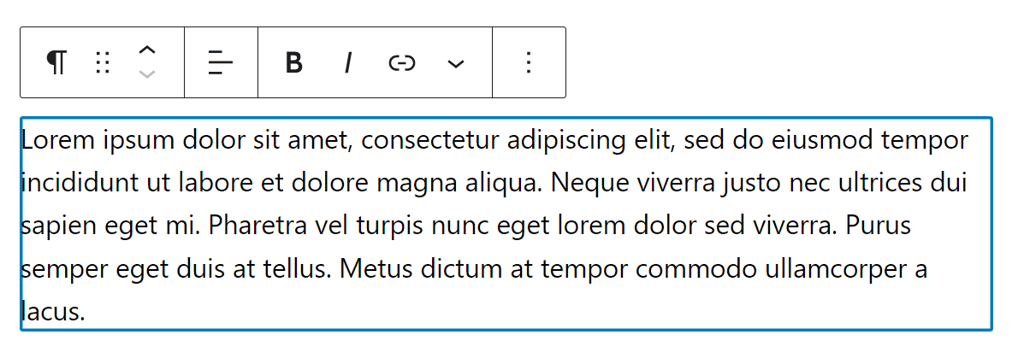
- Select the Paragraph or Heading block you want to customize. For example, we will use the Paragraph block.
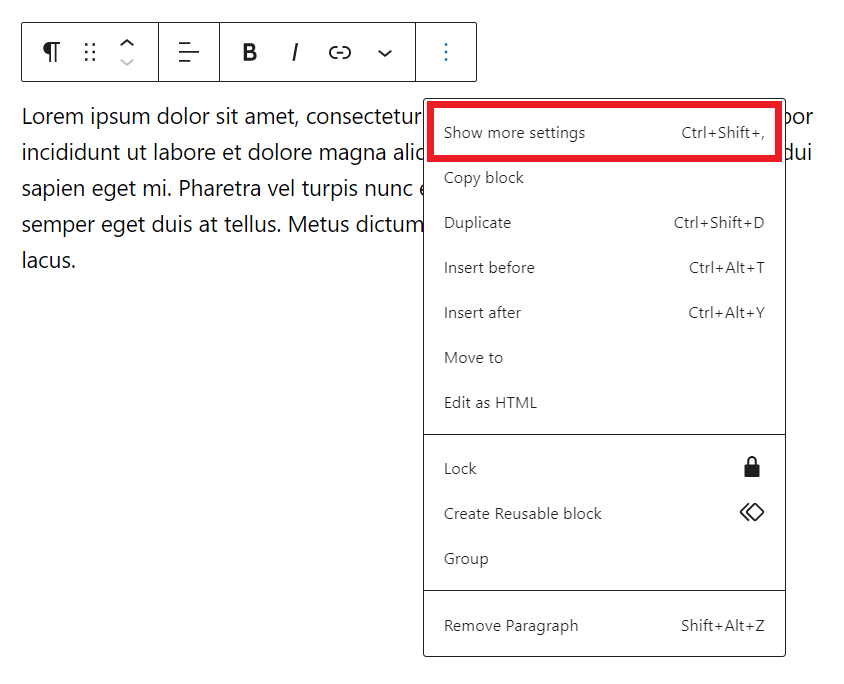
- Click the three vertical dots icon on the block toolbar and select Show more settings. Alternatively, select Settings in the screen’s top-right corner.
- Navigate to the Color settings section and click the Text button. Pick a suitable color from the default color selector.
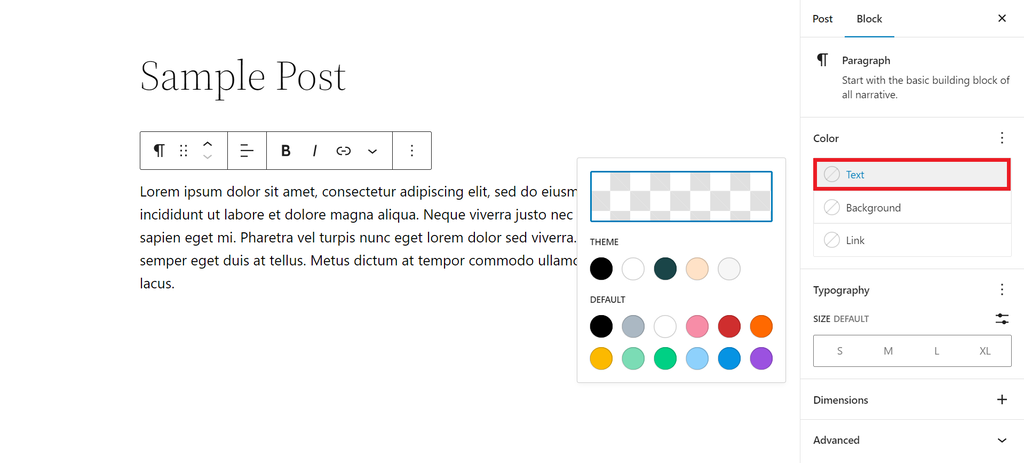
Alternatively, use the custom font color selector or enter the RGB, HSL, or Hex code to add a preferred custom color.

- Click Publish or Save draft to apply the changes.
Using the WordPress Classic Editor
To enable the Classic Editor, you must first install and activate the plugin. Then, set it as the default editor via Settings → Writing → Default editor for all users. Ensure the classic editor is selected.
Note that the classic text editor only lets you change the WordPress text color. Meanwhile, with the block editor, you can customize the text, background, and link colors.
Follow these steps to change the font color via the classic editor:
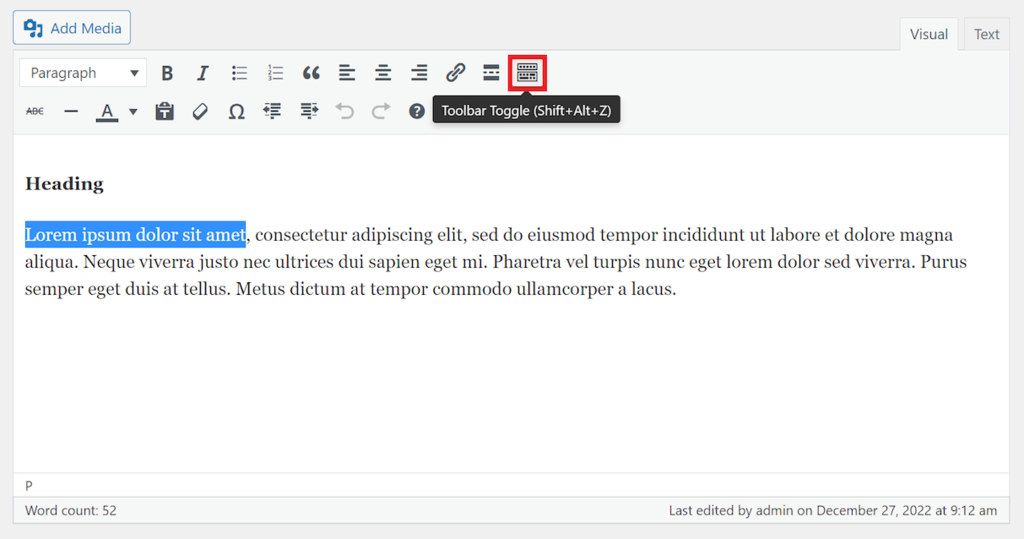
- Open an existing post or create a new one from the WordPress admin dashboard.
- In the visual editor, highlight the text you want to customize.
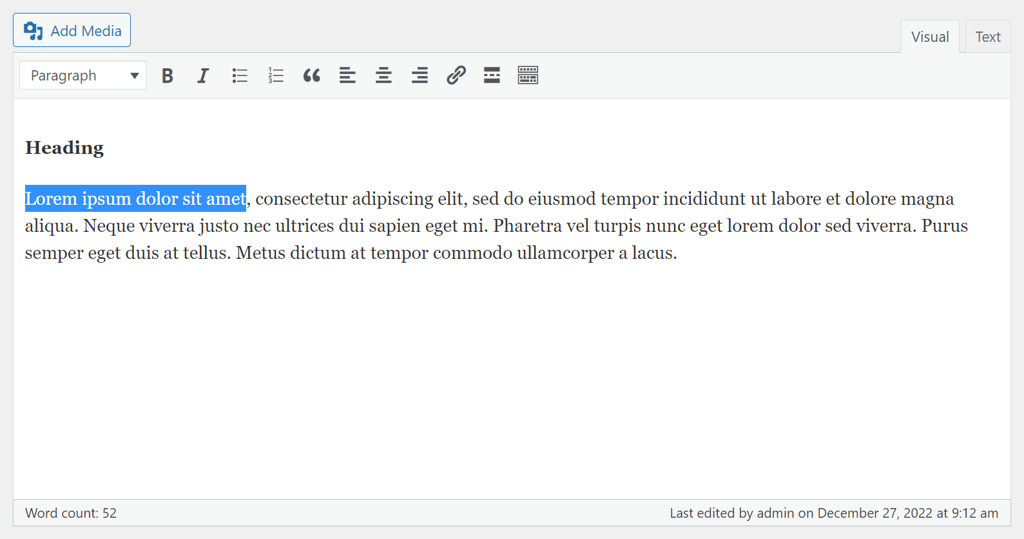
- Click the Toolbar Toggle button to show the text formatting options.
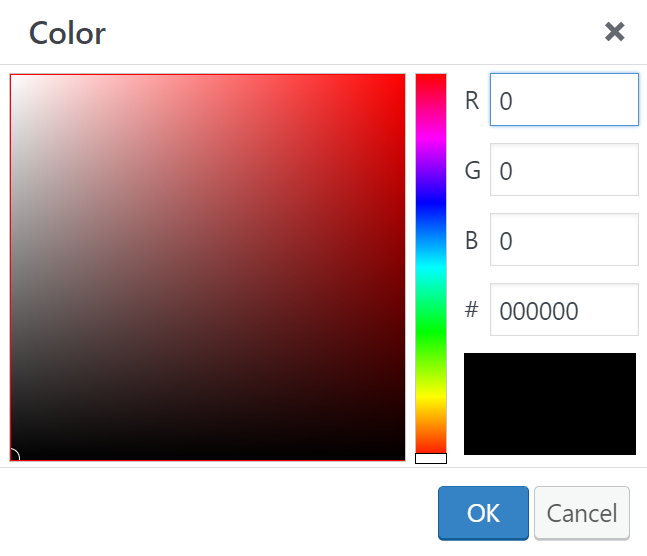
- Select the Text color button and choose from the color palette.
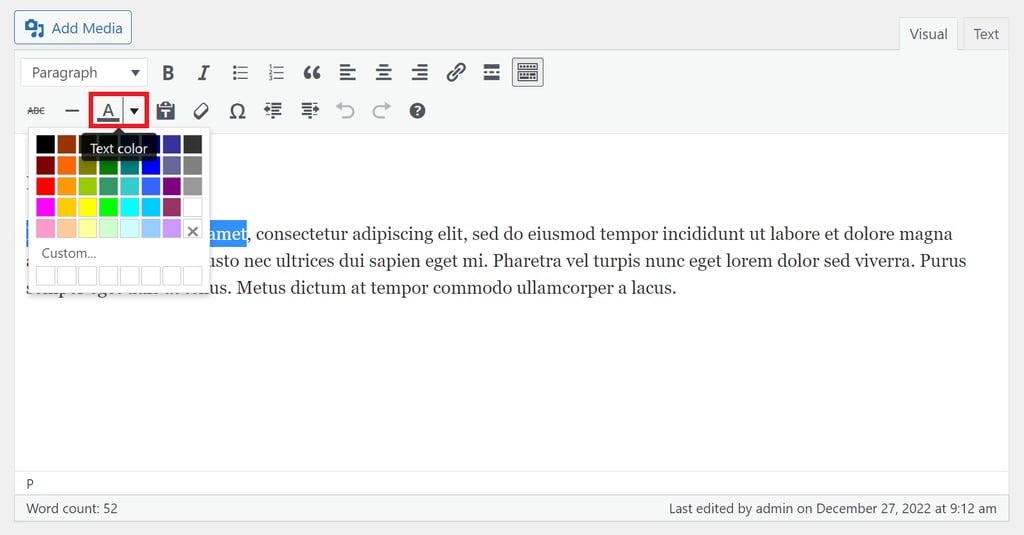
Alternatively, add a custom color by clicking the Custom… button. Use the color picker or enter your preferred RGB or Hex color code.
- Apply the changes by clicking Publish or Save draft.
Change the Font Color With the WordPress Theme Customizer
You can modify entire site font colors using the WordPress theme customizer. This method is especially useful for changing the overall look of your WordPress site.
Here are the steps to customize the font color in WordPress using the Theme Customizer. Many WordPress themes support the feature, but we will use Twenty Fifteen as an example:
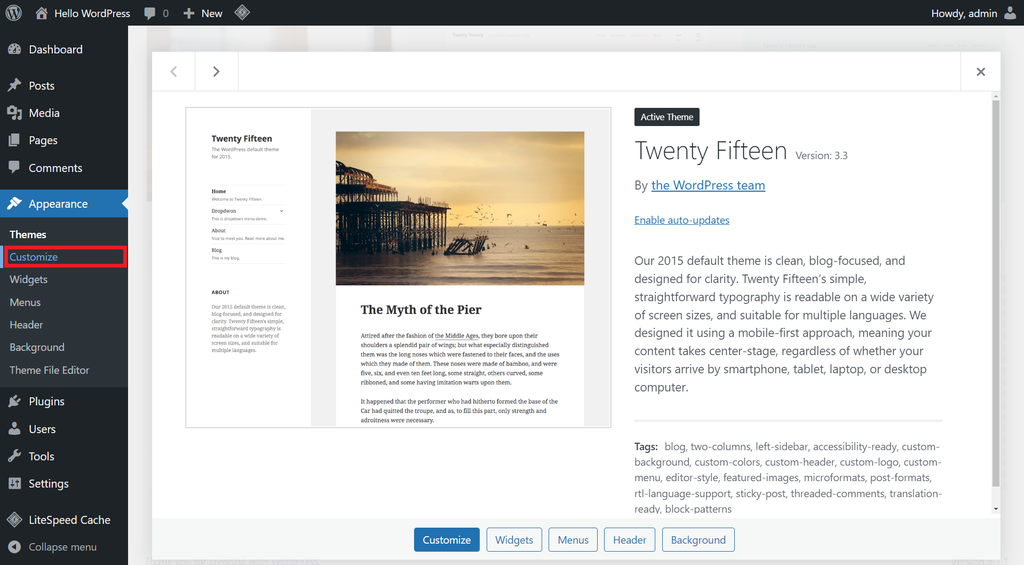
- From the WordPress dashboard, go to Appearance → Customize.
- Select the Colors tab.

- Go to the Header and Sidebar Text Color section and click Select Color. Pick a color from the color selector or customize it using the color picker tool.
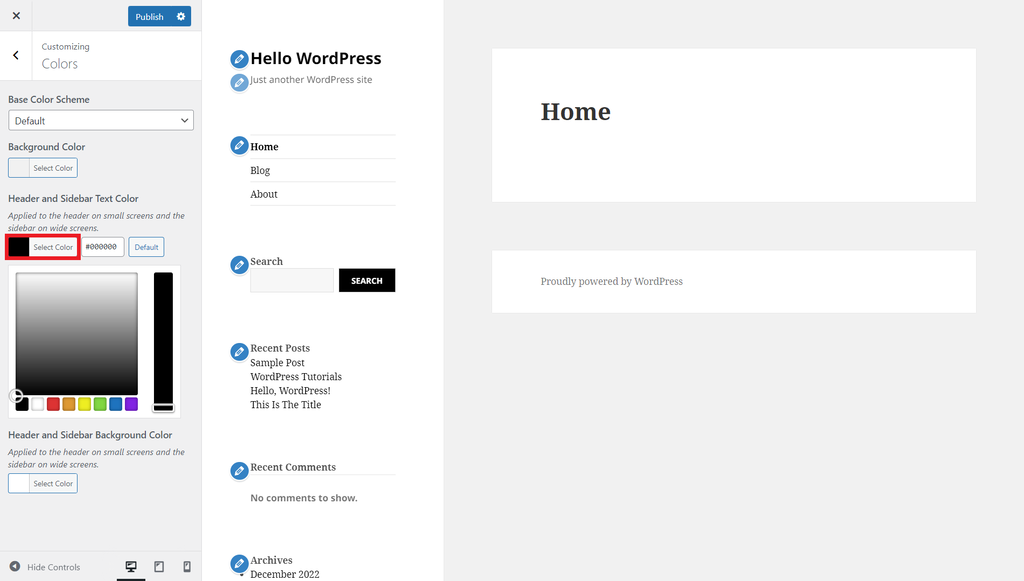
- Click Publish to save the changes.
Change the Font Color in WordPress Using CSS Code
WordPress has an advanced feature called Additional CSS for customizing font size, colors, and family using custom CSS code. Compared to the Theme Customizer, this feature offers more options to style specific elements.
Follow these steps to use Additional CSS to modify font colors on the heading and paragraph elements:
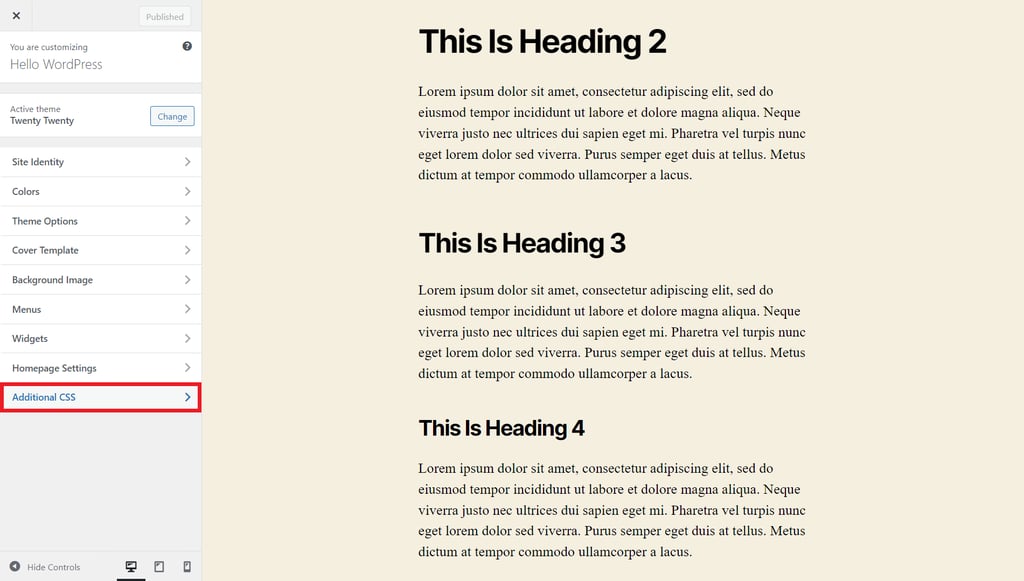
- Make sure your current theme supports the Theme Customizer. For example, we will use the Twenty Twenty-Two theme.
- Open a WordPress blog post via the site front-end.
- Open Customize from the top toolbar.

- Select Additional CSS from the sidebar.
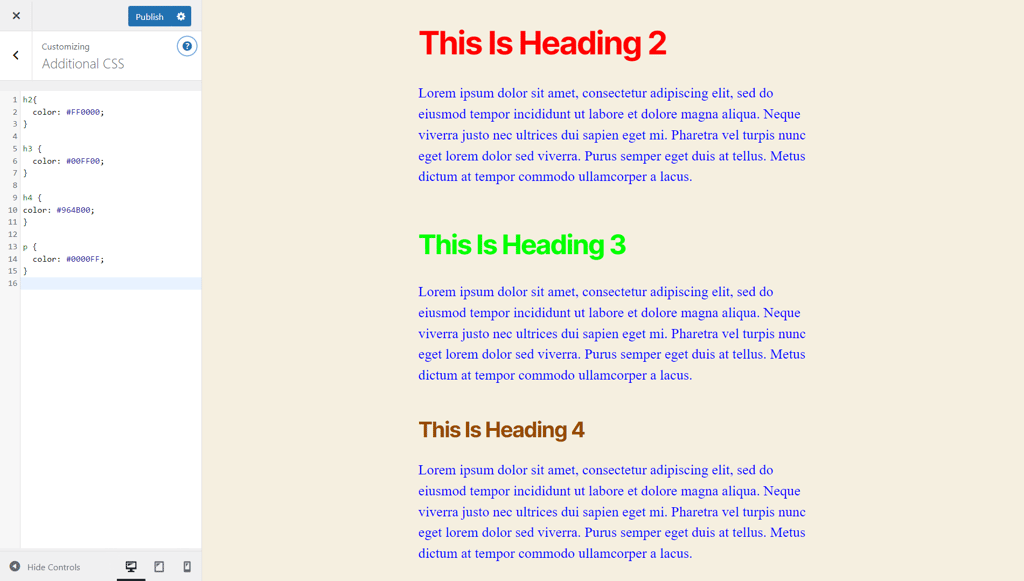
- In the Additional CSS editing area, enter the following code to change the heading color:
h2{
	color: #FF0000;
}

h3 {
	color: #00FF00;
}

h4 {
color: #964B00;
}
Enter the CSS code below the previous one to change the paragraph text colors:
p {
	color: #0000FF;
}
Feel free to change each placeholder Hex code to your preferred color. The result will look like the following:
- Click Publish to save the changes.

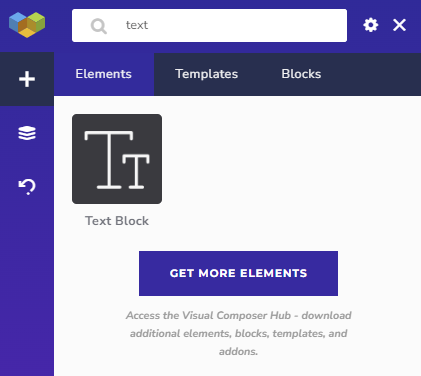
Change the Font Color in WordPress With a Page Builder
Another simple way to modify the font color in WordPress is using a page builder. In this tutorial, we will use Visual Composer, one of the best WordPress page builders.
Follow the steps below to modify the font color in WordPress via Visual Composer:
- Install and activate the Visual Composer plugin. Once activated, you will be redirected to the setup wizard page, where you must complete the configuration.
- Create a new post by clicking on the Add New with Visual Composer button or select Edit with Visual Composer under an existing one. For this tutorial, we’re going to create a new post.

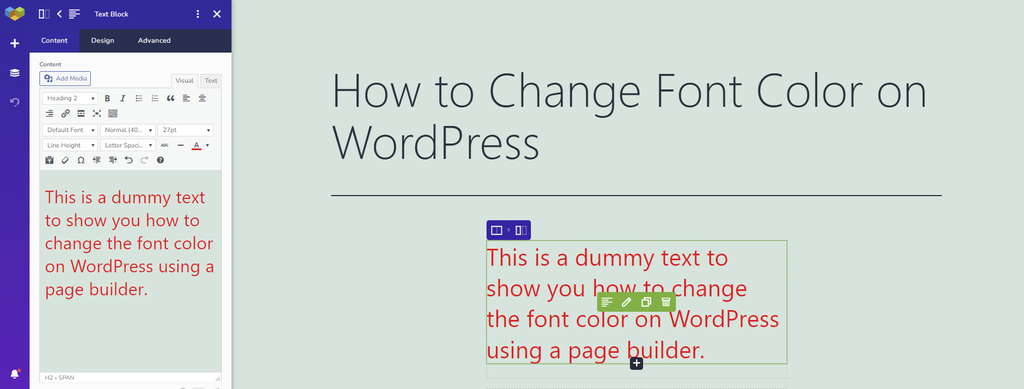
- Insert a text block into the layout and populate it with your desired text.
- Hover over the text and select Edit Text Block. Doing so opens the Content tab on the left panel of the screen.
- Highlight the text and click on the Text color button. Choose one from the font color selector.

- The change made will appear in the editor’s interface.
- Select the checkmark symbol in the bottom left corner of the page to save or publish the post.
Conclusion
WordPress lets you freely customize your website. You can pick a theme and modify the visual style of any element, including the WordPress font color. When changing text colors, ensure that it remains readable.
We have learned four ways to change the font color in WordPress via two WordPress text editors, the WordPress Theme Customizer, custom CSS code, and a page builder. Since the steps are simple, any WordPress website owner can easily implement them.
Hopefully, this article has helped you learn about font color customization in WordPress. Feel free to ask if you have any questions by commenting below. Good luck on your online journey!
All of the tutorial content on this website is subject to Hostinger's rigorous editorial standards and values.

Information Technology and web development are Yoga's passions. He loves nothing more than sharing his experience with readers, and helping them to understand the world of IT. In his spare time, Yoga likes to make music and learn to code. He is always looking for new challenges, and enjoys pushing himself to learn new things.


