What is DNS: A comprehensive guide to how it works
May 04, 2026
/
Hasna A. & Simon L.
/
9 min Read
The Domain Name System (DNS) associates website names with their numerical Internet Protocol (IP) addresses that a web browser needs to locate the server a website is on. This means you can type hostinger.com instead of having to memorize strings of numbers like 172.217.14.142.
But DNS does more than make the internet user-friendly. It keeps websites running fast by directing traffic to the closest servers, can help block access to malicious sites, and ensures that requests always reach the right destination.
Here’s why this matters: when DNS isn’t working properly, websites won’t load, emails won’t send, and apps stop connecting. Understanding how it works can help you fix connection problems faster and make smarter decisions about your internet security.
Let’s see how this happens.

How does DNS work?
DNS works by translating domain names into IP addresses through a multi-step process called DNS lookup, which happens in milliseconds when you visit a website.
When you enter hostinger.com into your browser’s address bar, you’re submitting a DNS request. Your computer then checks whether it already has the IP address for that domain stored locally in a DNS record, which is simply an IP address that matches the fully-qualified domain name.
Your computer searches its hosts file and cache for this information. The hosts file is a plain text file that maps hostnames to IP addresses in your operating system, while the cache is temporary data stored by your hardware or software components.
Matching IP addresses are commonly found in your browser cache or your internet service provider’s (ISP’s) cache, which speeds up the process since your computer doesn’t need to search elsewhere.
However, if no matching IP address is found in your hosts file and cache, the DNS resolution process continues with additional steps to find the correct address.
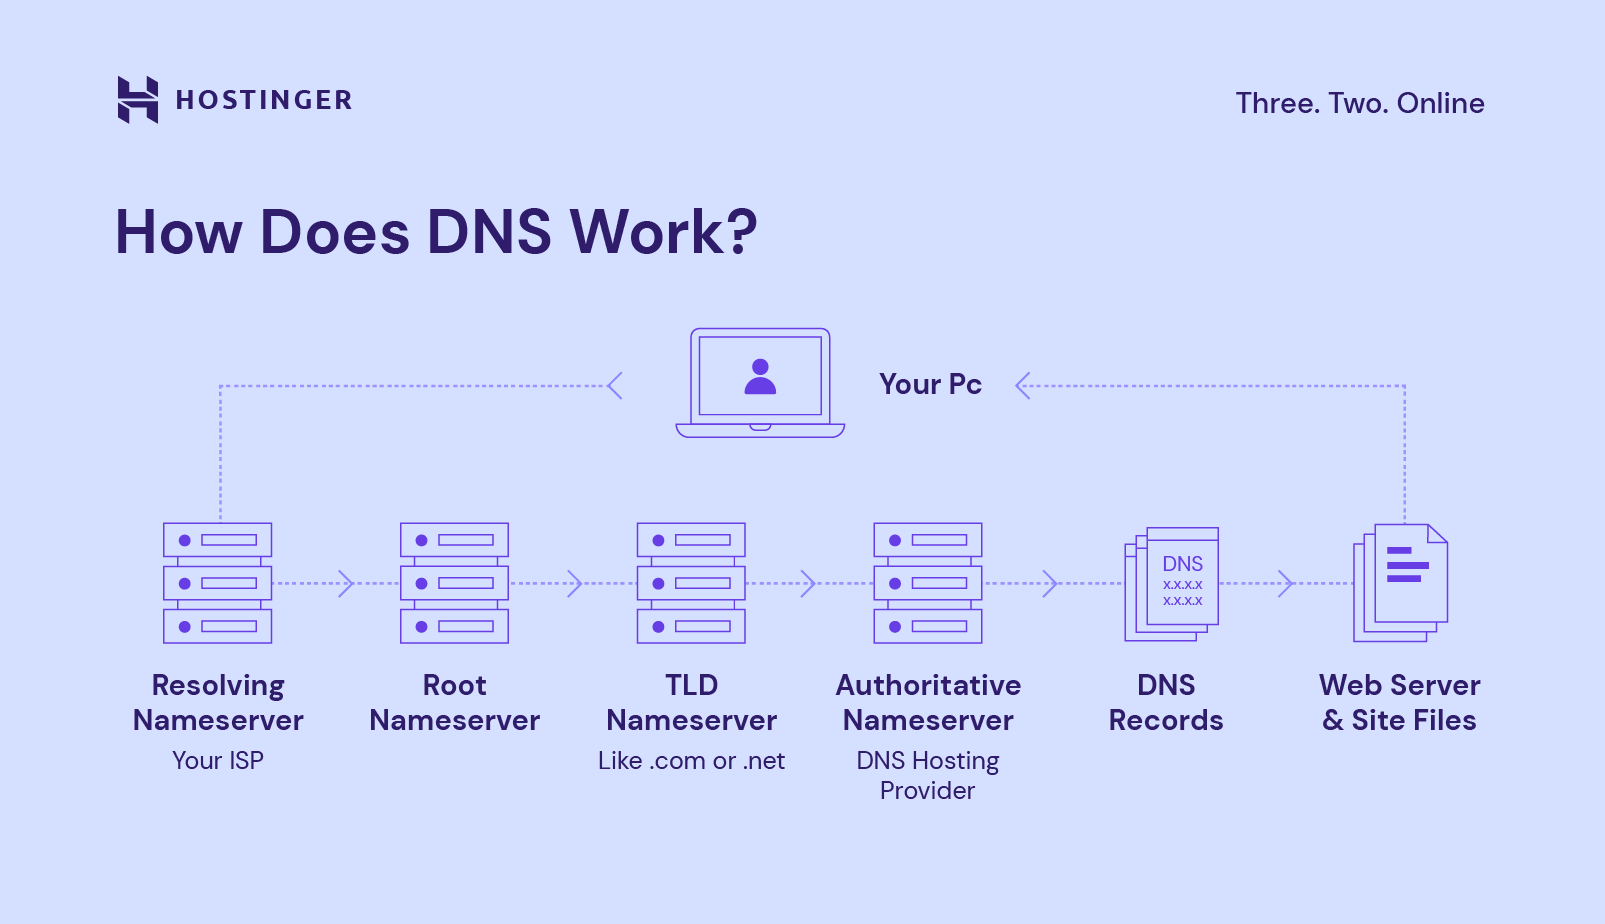
What DNS servers are involved in loading a website?
If your computer can’t find a matching IP address in your hosts file or cache, it will submit your DNS query to a network of four DNS servers:
- DNS resolver (recursive resolver): Acts as the middleman between your computer and other DNS servers. It first checks its own cache for the IP address and, if found, returns it immediately. If not, it forwards your request to the root nameserver.
- Root nameserver: Sits at the top of the DNS hierarchy and acts like a directory. It doesn’t store the IP address you need but identifies the top-level domain and directs the resolver to the correct TLD nameserver.
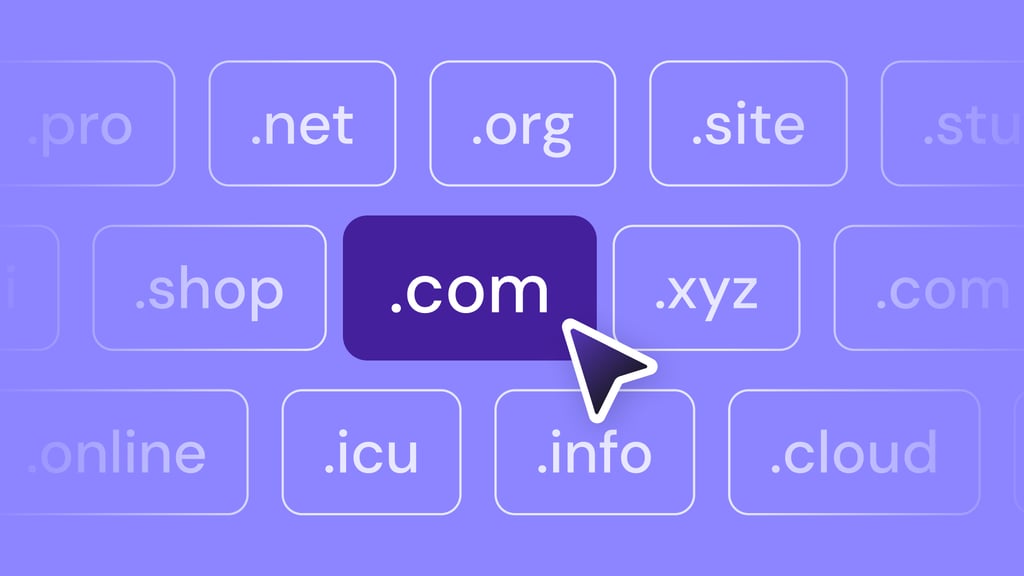
- TLD nameserver: Manages all domain names within a specific top-level domain, such as .com, .org, .net, and .online. For hostinger.com, it would direct the resolver to the specific authoritative nameserver that holds Hostinger’s records.
- Authoritative nameserver: The final stop that stores all information for the specific domain, including its IP address. It sends the IP address back to the resolver, which then returns it to your computer so you can visit the website.
Finally, the resolver performs DNS caching by storing the IP address as temporary data, so future visits to the same site happen instantly without going through all these steps again.
What are the main differences between recursive and authoritative DNS servers?
The main difference is that recursive DNS servers act as middlemen that search for answers on your behalf, while authoritative DNS servers are the final sources that actually store and provide the official DNS records for specific domains.
Recursive DNS server
- Acts as an intermediary between your computer and other DNS servers.
- Doesn’t store domain records but searches through the DNS hierarchy (root → TLD → authoritative servers) to find answers.
- Caches responses to speed up future queries for the same domains.
Authoritative DNS server
- Stores the official DNS records for specific domains and provides definitive answers about those domains.
- Contains the actual IP addresses, mail server information, and other DNS data.
- Doesn’t need to query other servers as it has the authoritative information.
When you visit a website, the recursive server does the legwork of finding the right authoritative server.
Most internet users interact with recursive DNS servers (often provided by their ISP or services like Google DNS), while website owners manage authoritative DNS servers for their domains.
What are domain nameservers?
Domain nameservers are specialized servers that store all DNS records for a domain name and respond to queries about where that domain should direct visitors.
When someone visits your domain, the nameserver responds with the necessary information to connect them to your website’s hosting server.
Nameserver addresses look similar to domain names. Most hosting providers give you two or more nameserver addresses. For example, here is what Hostinger’s nameservers might look like:
exampleone.dns-parking.com
exampletwo.dns-parking.com
When launching a new site, nameserver addresses that look like the examples above would be provided to enable you to point your domain name to Hostinger.
If you bought your domain and hosting from the same provider, this happens automatically. But if you purchased your domain from one company and hosting from another, you’ll need to update your domain’s nameservers manually. You can check your current nameservers using DNS checkup tools, RDAP lookup, or Hostinger’s WHOIS.
Here’s a typical example: if you host your website with Hostinger but bought your domain from a different provider, you’d need to change your domain’s nameservers to Hostinger’s. This connects your domain name to your website.
Ready to register your own domain?
Check out our guides for more tips on how to buy a domain name and what to do after you bought a domain name. It includes a step-by-step process for registering a domain and answers other related questions.
How to change the nameservers?
You can only change nameservers where your domain is registered. For example, if you bought your domain from Hostinger, you can change the nameservers in hPanel. If you purchased it from Cloudflare Registrar, you can change it in your Cloudflare account.
Domain names purchased from Hostinger automatically use Hostinger’s nameservers. If you buy a domain from Hostinger along with hosting, you don’t need to change anything.
Here’s how to change nameservers from your domain registrar account. We’ll use Hostinger as an example, but the process is similar with most domain providers:
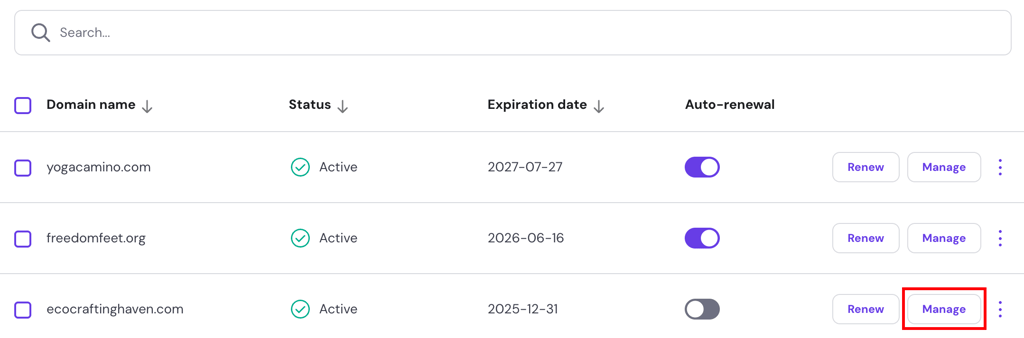
- Log in to hPanel, navigate to Domains, and click Manage on the domain name you want to edit.
- In the left panel, select DNS / Nameservers.

- Click Change Nameservers, and choose Use Hostinger nameservers to point your domain to Hostinger hosting, or select Change nameservers to enter custom nameserver addresses from another provider.
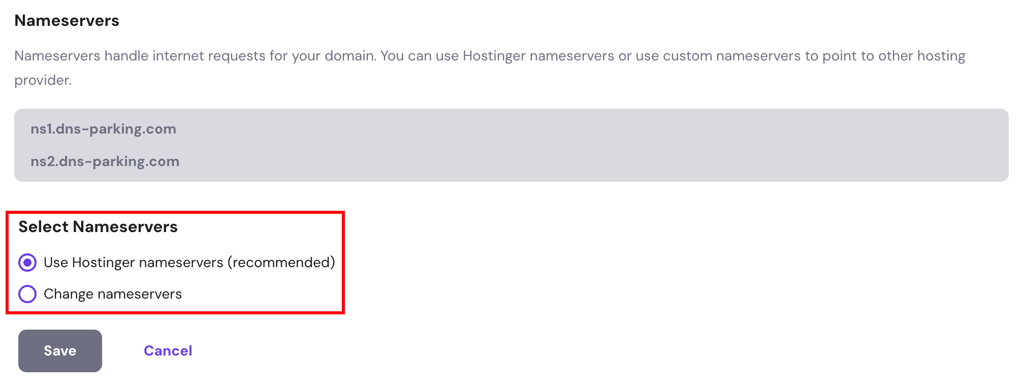
- Save your changes.
Once your nameservers point to your hosting provider, you can manage your DNS settings from your hosting control panel. For example, if your Cloudflare Registrar domain now points to Hostinger, you’ll control all DNS settings through Hostinger instead of Cloudflare.

What is a DNS zone, and how do I make changes to it for my domain?
A DNS zone is a portion of the DNS namespace that’s divided up for administrative control by a person or organization. Each DNS zone contains at least one DNS record.
When you use your web host’s nameservers for your domain, you can make changes to the DNS zone using their provided tools. You might want to modify a DNS zone for various reasons, such as pointing your domain to a different server address.
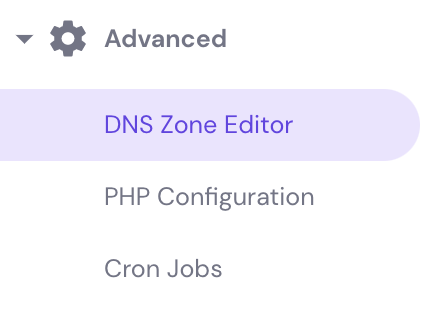
You can easily modify DNS zone records using a DNS Zone Editor. If you use Hostinger, access the editor by logging into hPanel, then go to Advanced → DNS Zone Editor in the sidebar.
On the DNS Zone Editor page, you’ll see a form to add new DNS records. You can add five main types of DNS records here.
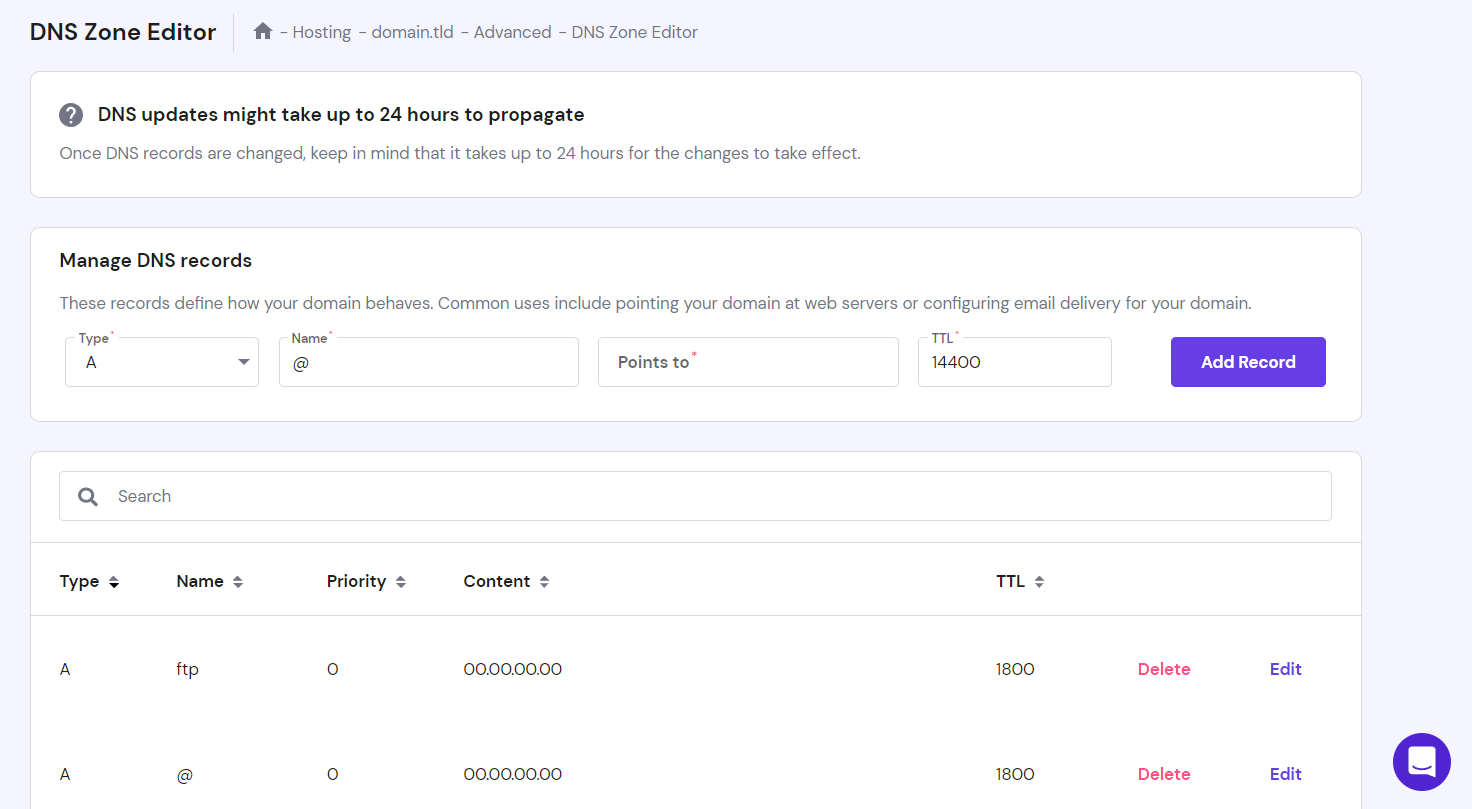
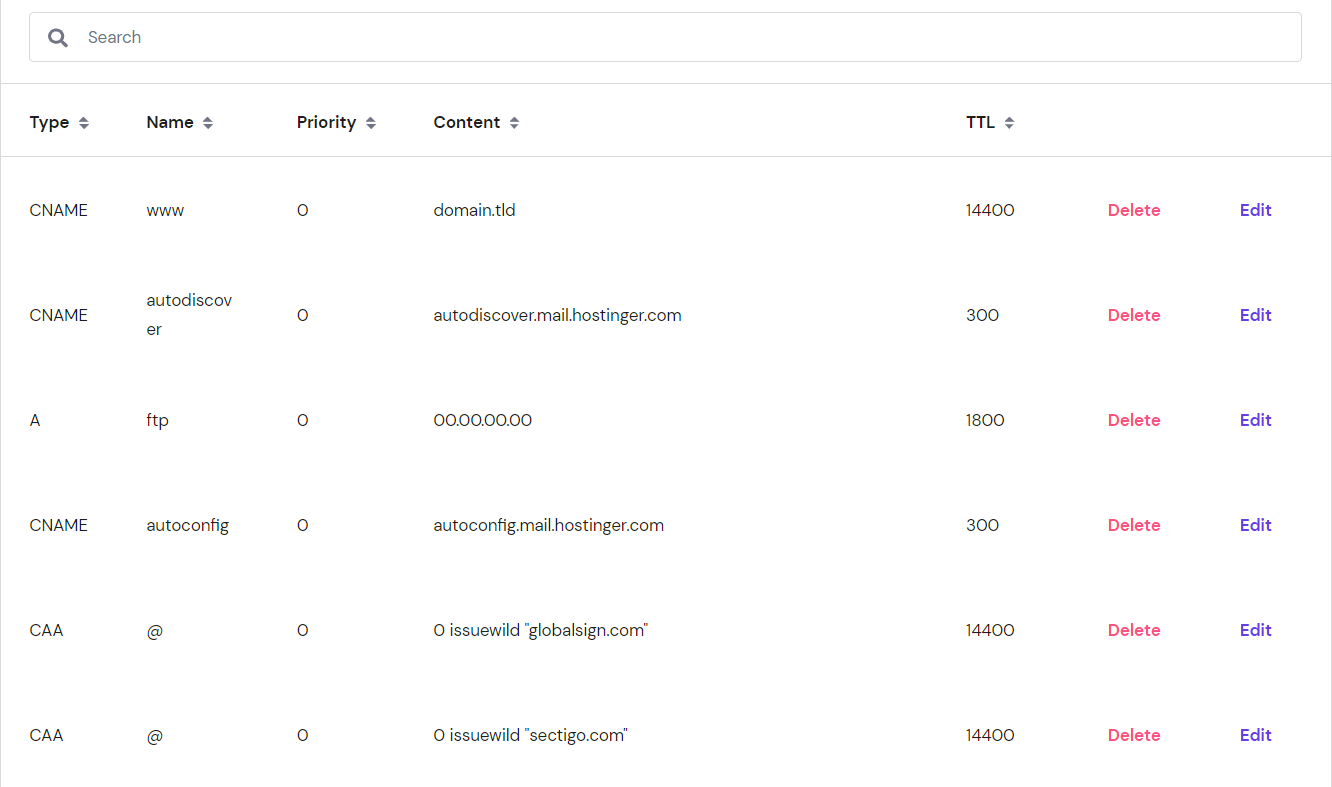
Below the form is a table showing your existing records. Use the search bar to find specific DNS records, then click Delete or Edit to modify them.
Before configuring your DNS settings, it’s important to understand the different types of DNS records and how they work.
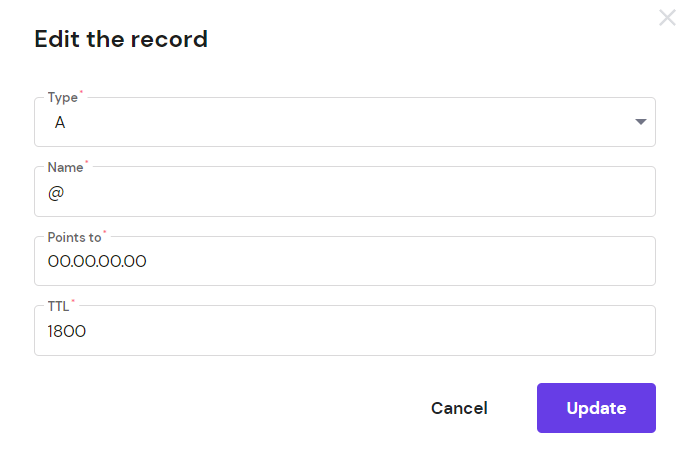
A record
An A record (or DNS host record) points a hostname or domain to an IPv4 address. For example, it converts hostinger.com to 104.19.184.120. An AAAA record works the same way but uses IPv6 addresses instead.
While each hostname typically has one primary A record, you can add multiple A records for load balancing or backup purposes. By default, you’ll find two A records in hPanel: one for your main domain (@) and one for FTP. Both usually point to the same IP address.

To modify your A records and point your domain to a different IP address, click Edit and update these fields:
- Type: Change to AAAA only if your new IP address is IPv6.
- Name: The @ symbol represents your root domain (like yourdomain.com). For subdomains like sub.yourdomain.com, enter just the subdomain part.
- Points to: Enter the new IP address here.
- TTL: Short for “time-to-live,” this tells DNS resolvers how long to cache the query. The default is usually 14400 (4 hours).
CNAME records
A CNAME record (or “canonical name” record) creates an alias that points one domain to another domain name. When users visit the alias domain, DNS resolves it through the target domain to reach the same destination.
This saves time for domain administrators because you don’t need multiple A records pointing different domain names to the same IP address.
For example, if you want alias1.yourdomain.com and alias2.yourdomain.com to both go to main.yourdomain.com, you’d create a CNAME record for each alias.
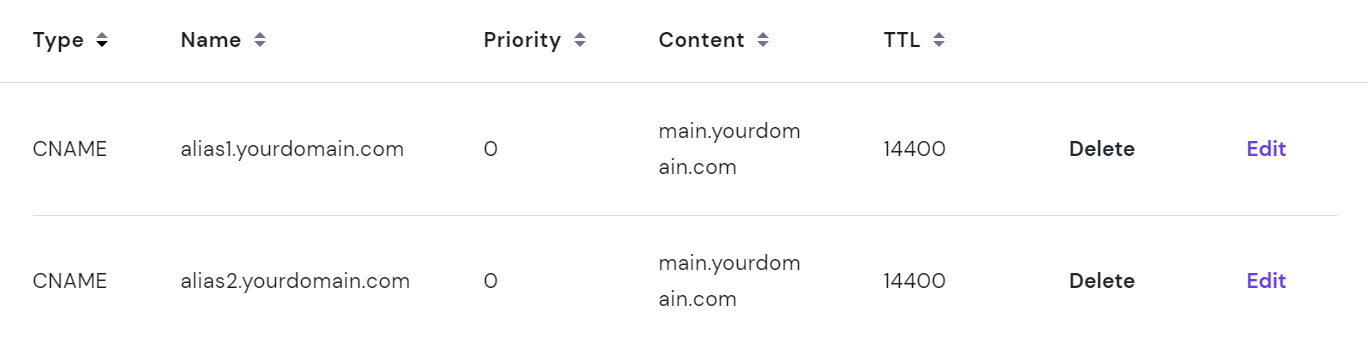
To add a new CNAME record, fill in these fields:
- Name: Enter the alias domain or subdomain name.
- Target: Enter the domain that the alias should point to.

MX records
An MX record (mail exchanger) tells email providers which mail server handles incoming emails for your domain. For example, with an MX record for yourdomain.com, you can receive emails at addresses like name@yourdomain.com.
Hostinger provides two default MX records:
mx1.hostinger.com
mx2.hostinger.com
If you want to use a third-party email service like Google Workspace, you’ll need to replace these default MX records with Google’s mail servers.
When adding or modifying MX records, fill in these fields:
- Mail server: The address of your mail server. For Google Workspace, it looks like ASPMX.L.GOOGLE.COM.
- Priority: If you have multiple mail servers, this determines which one gets used first. Lower numbers have higher priority.

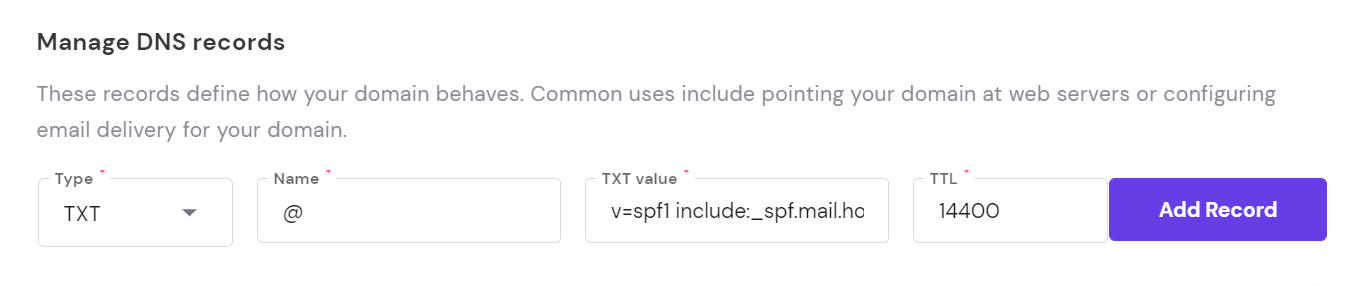
TXT records
A TXT record lets you add readable text information about your domain for both humans and machines. While it doesn’t directly change how your DNS works, it provides important information to other services about your domain. You can have multiple TXT records in your DNS zone.
One common use for TXT records is creating Sender Policy Framework (SPF) records. These specify which servers are authorized to send emails on behalf of your domain. Hostinger automatically creates an SPF record for you.

Adding or modifying TXT records works like other record types. Simply fill in the TXT value field with the information you want to include.
Hostinger’s default SPF record looks like this:
v=spf1 include:_spf.mail.hostinger.com ~all.
SRV Records
An SRV record connects a hostname to a specific service and includes more detailed information than other DNS records, like port numbers. This helps applications find the right settings for particular services on your domain.
Hostinger doesn’t include SRV records by default, but you can add them if needed. For example, you might add an SRV record for an XMPP instant messaging service.
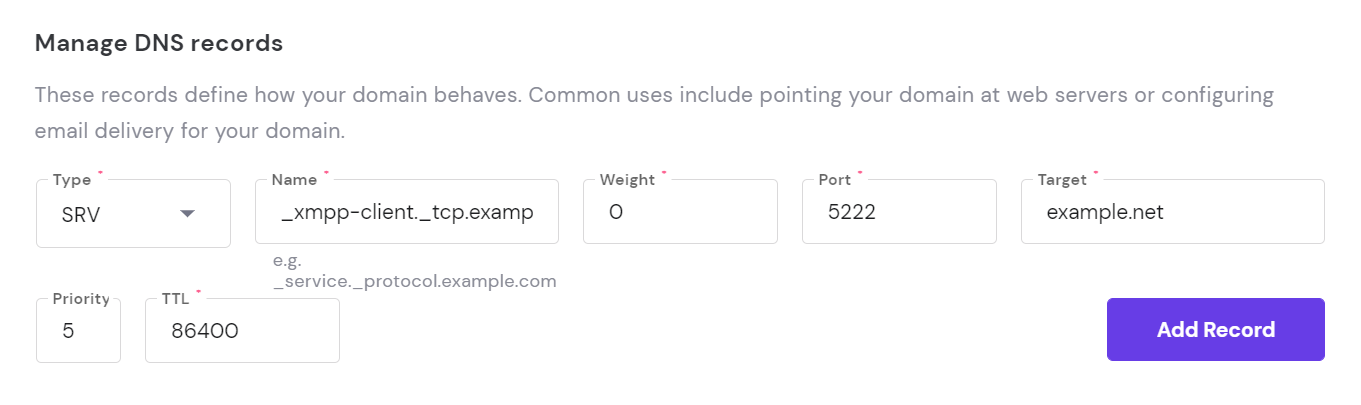
When creating SRV records, fill in these fields:
- Name: The service name in _service._protocol.example.com format. For XMPP, something like _xmpp-client._tcp.example.net.
- Weight: If multiple SRV records have the same priority, this determines which gets used first. Lower numbers have higher priority.
- Port: The port number assigned to the service, which helps computers route the right type of traffic.
- Target: The address of the server that handles this service.
DNS propagation
Each time you modify or add a new DNS record, there’s a period where the changes spread across DNS servers worldwide. This is called the DNS propagation period.
Besides adding or modifying DNS records, changing your domain’s nameservers or adding new subdomains will also trigger DNS propagation.
DNS propagation can take anywhere from a few minutes to 24 hours to complete fully. During this time, some visitors might see your old content while others see the new version, but your site typically remains accessible.
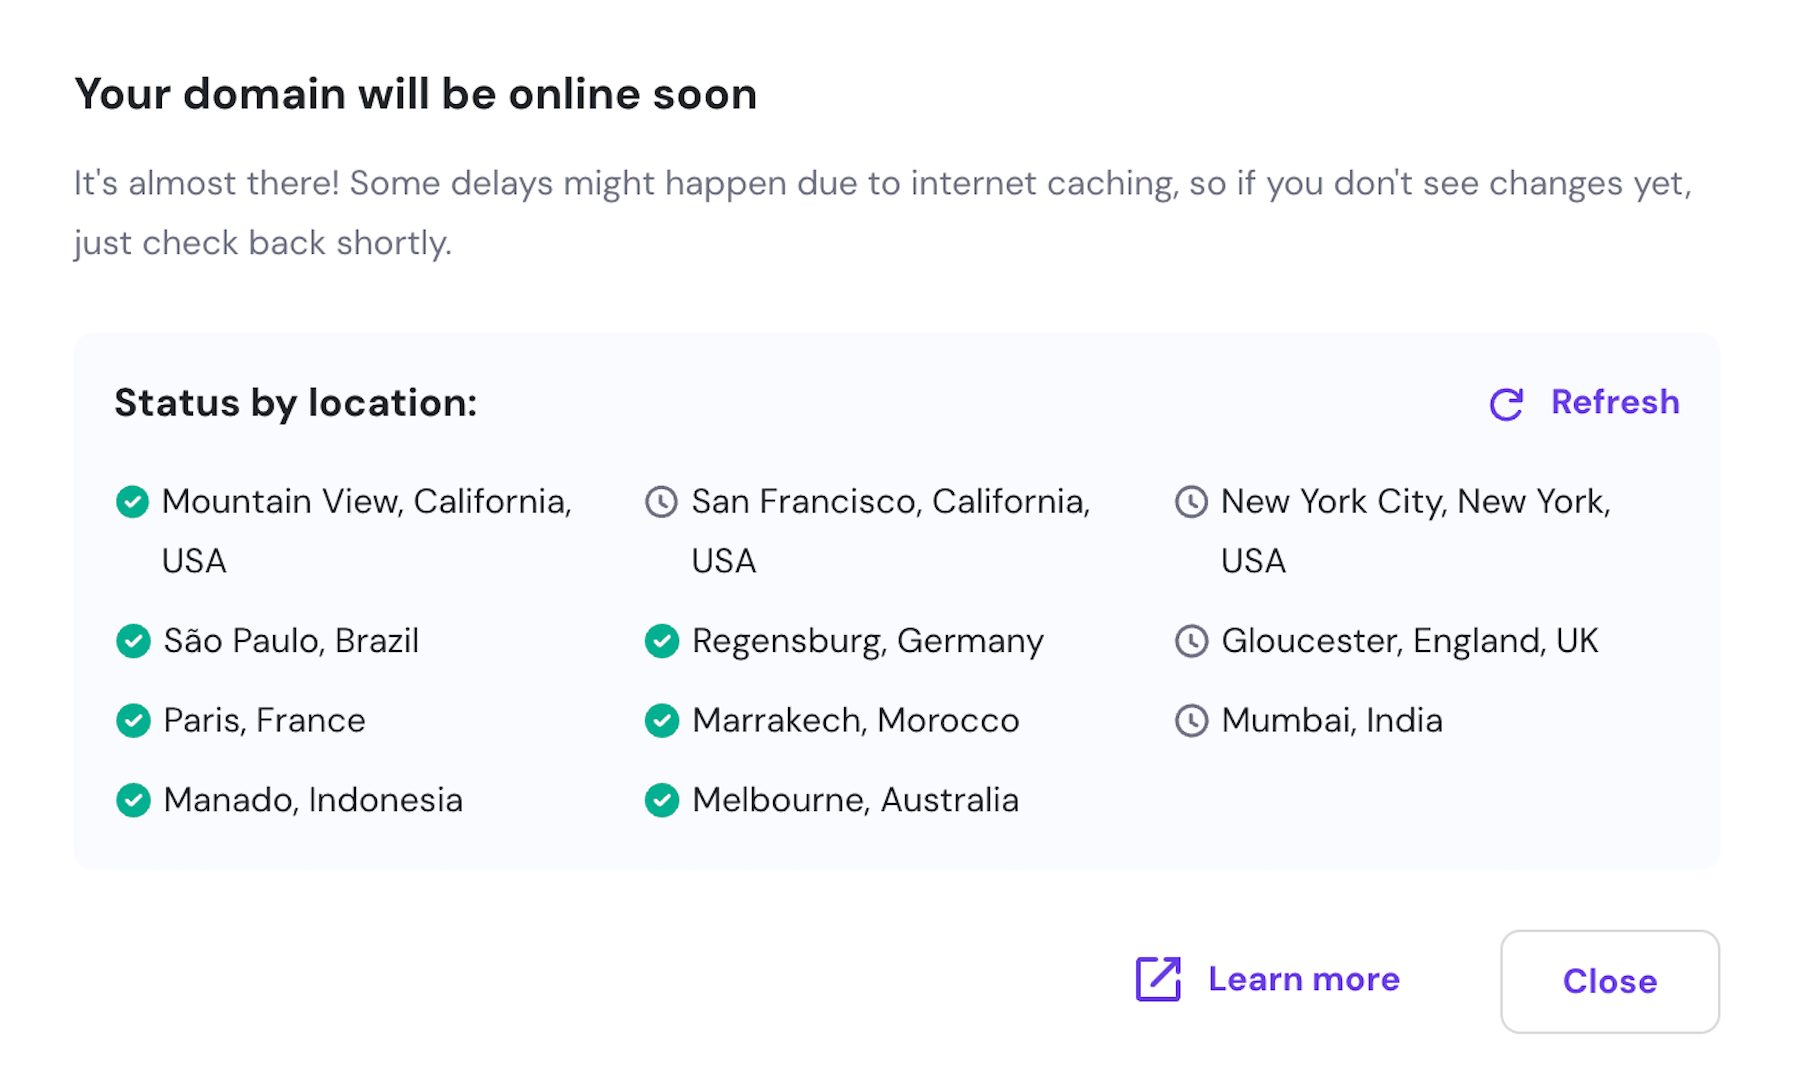
For domains using Hostinger nameservers, you can check the propagation status directly in hPanel.
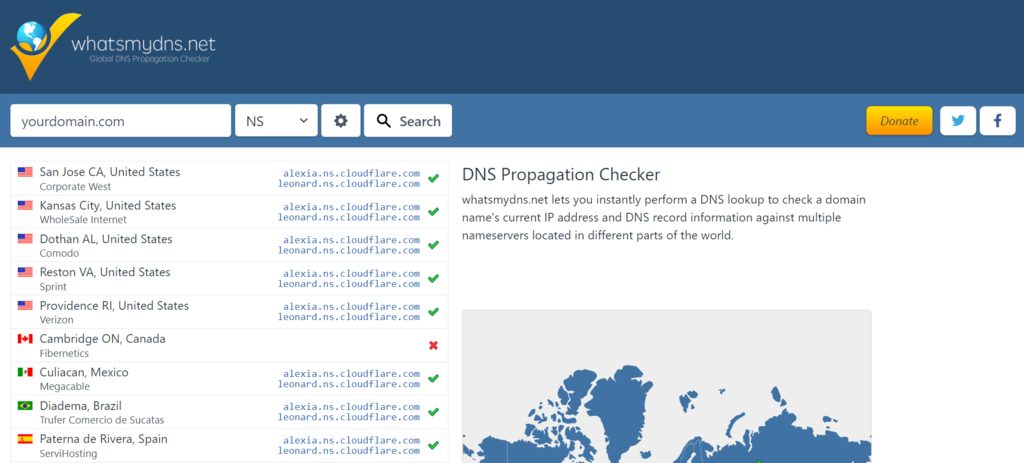
You can also check DNS propagation progress in real-time by entering your domain into a DNS checker tool like WhatsMyDNS.
These tools show you how your DNS changes are spreading across different locations worldwide, so you can see which areas have updated and which are still showing the old information..
DNSSEC
Domain Name Security Extensions (DNSSEC) is a security technology available through many free and premium DNS services. It works by adding cryptographic signatures to DNS records, which helps verify that the DNS responses you receive are authentic and haven’t been tampered with by attackers.
DNSSEC availability varies by domain registrar and hosting provider. For example, Hostinger supports DNSSEC for some domains, but not all registrars or hosting providers offer this feature.
If you’re interested in enabling DNSSEC, contact your hosting provider or domain registrar to check if it’s available for your specific domain.
Why should you care about DNS?
DNS directly affects your website’s performance and overall online presence, and when it breaks, your business can go offline.
Beyond just getting visitors to your site, DNS records like SPF, DKIM, and DMARC also secure your email system by blocking unauthorized senders from impersonating your domain and damaging your reputation.
However, DNS can also face issues. Server outages, corrupted cache files, and configuration errors can all prevent users from reaching your site. If you’re experiencing connectivity problems, learn how to fix a DNS server that is not responding to get back online quickly.
With this DNS foundation, you’re equipped to troubleshoot connection issues, secure your email delivery, and manage your domain’s technical settings with confidence.
How do I check my DNS?
Open your command prompt app, type ipconfig /displaydns, and press Enter to see your cached DNS records. This command shows you all the DNS information temporarily stored on your computer, including recently resolved domain names and their corresponding IP addresses.
You can also use the command prompt to clear out old or corrupted DNS data that might be causing connection problems. If you’re experiencing issues with websites not loading properly, learn how to flush DNS to refresh your local DNS cache and potentially resolve connectivity issues.
All of the tutorial content on this website is subject to Hostinger's rigorous editorial standards and values.

Hasna is passionate about tech, culture, and the written word. She hopes to create content that helps people succeed on the web. When not writing, rearranging, or polishing sentences, she enjoys live music and overanalyzing movies.

Simon is a dynamic Content Writer who loves helping people transform their creative ideas into thriving businesses. With extensive marketing experience, he constantly strives to connect the right message with the right audience. In his spare time, Simon enjoys long runs, nurturing his chilli plants, and hiking through forests. Follow him on LinkedIn.