Understanding Magento Progressive Web Apps and Building a Storefront
Apr 23, 2025
/
Ariffud M.
/
9 min Read
Magento progressive web application (PWA) is an advanced technology that transforms Magento storefronts into high-performing, app-like experiences. It combines the best of web and mobile apps, offering faster loading times, offline capabilities, and improved user engagement.
In this article, we’ll guide you through the benefits, prerequisites, and steps to implement Magento PWA. By the end, you’ll understand how to enhance your Magento storefront with PWA to provide seamless, responsive, and engaging shopping experiences.
Download website launch checklist
Benefits of Magento PWA
Implementing a Magento PWA offers numerous advantages for your eCommerce store. Here are the key benefits:
- Improved performance. Progressive web applications load faster and provide smoother interactions, resulting in better user experiences. This performance optimization keeps mobile users engaged and reduces bounce rates.
- Enhanced mobile experience. Designed with a mobile-first approach, PWAs deliver app-like features on websites, making mobile commerce activities more accessible and enjoyable.
- Offline capabilities. PWAs can work offline or with poor internet connections by caching essential resources. This ensures uninterrupted shopping experiences for users regardless of their connectivity.
- Push notifications. PWAs engage users effectively with push notifications, driving higher retention and returning customers. These notifications can inform users about promotions, chats from sellers, and order updates.
- Cost-effective development. PWAs reduce the need for separate mobile app development, saving time and resources. Using PWA development tools allows for efficient creation and maintenance.
- SEO advantages. Unlike native apps, PWAs are indexable by search engines, improving your Magento store’s SEO and visibility. This leads to better search engine rankings and increased organic traffic.
Prerequisites for Using Magento PWA
Before implementing a Magento PWA, it’s essential to meet particular prerequisites to ensure a smooth and effective setup.
Technical Requirements
To get started with Magento PWA, you need to install Magento on a server. For those who want flexibility and complete control, we recommend setting up the Magento Open Source version on a Linux virtual private server (VPS).
Hostinger’s VPS is an excellent choice for hosting Magento PWAs. It offers a pre-configured template for a quick and easy installation process, ensuring that your Magento and its necessary components are ready for your PWA development.

Development Environment
A robust development environment is crucial for a smooth development process. Make sure you have the following tools and configurations set up:
- Node.js. A required module to build the project. Ensure your Node.js version is >=14.
- Yarn. A package and project manager for your progressive web app. Make sure to install Yarn version >=1.12.0.
If you haven’t installed Node.js and Yarn or are unsure which version is installed, don’t worry. The subsequent section will provide more details.
Knowledge Requirements
A solid understanding of web development fundamentals is essential for working with Magento PWA. Here are the key areas you should be familiar with:
- Magento. Familiarity with Magento’s architecture and its backend operations is crucial for integrating PWA features effectively. We recommend checking our Magento tutorial article for detailed guidance on setting up and managing your store.
- Headless architecture. Understanding how headless architecture works will help you grasp how the PWA interacts with the Magento backend without relying on the traditional front-end framework.
- React. Magento PWA typically uses React to build user interfaces. Understanding how to use React components, state management, and custom hooks will enhance your storefront.
Getting Started with Magento PWA
There are several ways to implement PWA on Magento. In this tutorial, we use Magento PWA Studio and the Venia storefront application.
1. Set Up the Environment
Before setting up Magento PWA on a VPS, you need to prepare your environment first. Here are the steps:
- Log in to your server using SSH. Run this command and replace username and your_server_ip with your actual details:
ssh username@your_server_ip
- Update and upgrade the server to ensure you have the latest packages and security updates:
sudo apt update

sudo apt upgrade -y
- Verify if Node.js and Yarn are already installed on your VPS and check their versions with these commands:
node -v

yarn -v
- If outdated versions of Node.js and Yarn are installed, remove them by executing:
sudo apt remove nodejs npm -y

npm uninstall --global yarn
- Install the latest version of Node.js using APT and NodeSource PPA:
curl -fsSL https://deb.nodesource.com/setup_lts.x | bash -

apt-get install nodejs -y
- Install Yarn with npm:
npm install --global yarn
2. Install Magento PWA Studio
After preparing your server environment, it’s time to install Magento 2 PWA Studio. Follow these steps to do so:
- Start by creating a new PWA Studio project with Yarn. This will set up the project structure and necessary files for your PWA.
yarn create @magento/pwa
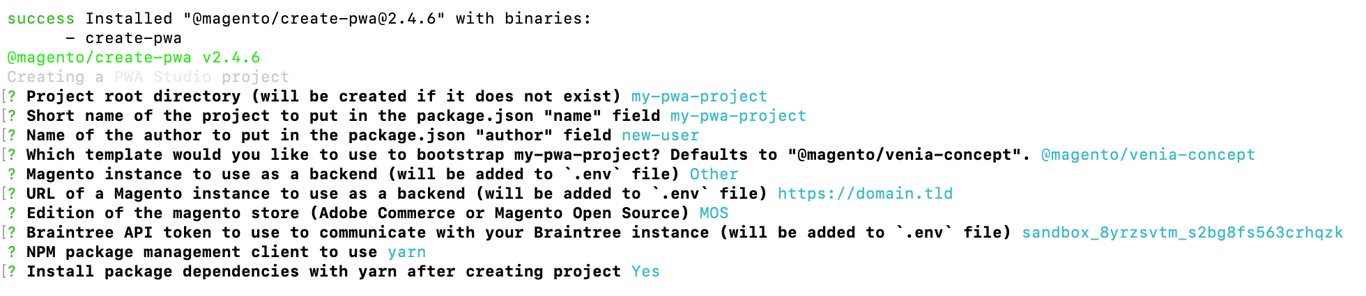
- Wait for Yarn to prepare the setup. You’ll be prompted to answer the following questions:
- Project root directory. Create a new folder to store your project files.
- Short name of the project. Enter a name for your project.
- Name of the author. Specify the author’s name.
- Which template would you like to use. Write @magento/venia-concept to use the Venia storefront.
- Magento instance to use as a backend. Select Other among all options.
- URL of a Magento instance. Enter your Magento backend’s URL.
- Edition of the Magento store. Pick MOS (Magento Open Source).
- Braintree API token. Type your Braintree sandbox token. Press Enter if you don’t have one.
- NPM package management client. Choose Yarn.
- Install package dependencies. Type Yes.
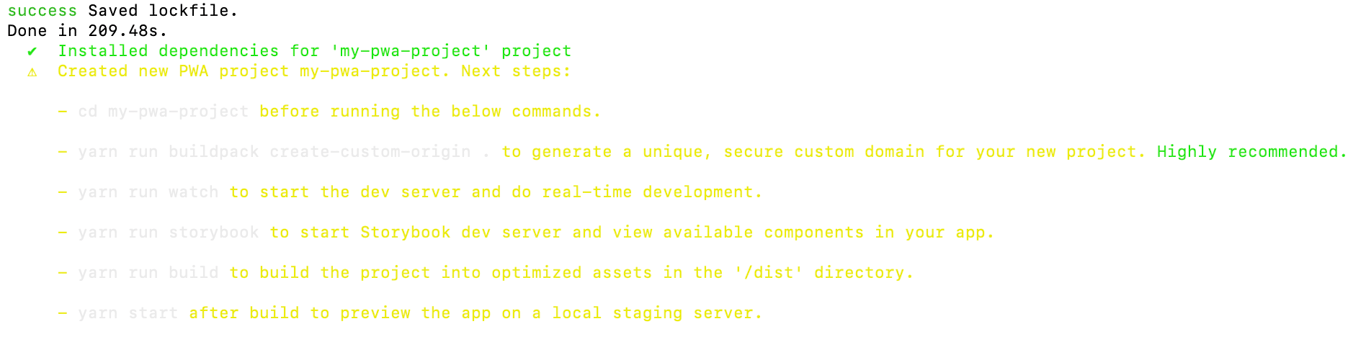
- Once done, you should see the following output indicating that the installation is successful:
3. Start the Development Server
Now that you have PWA Studio installed, you can start the development server. Here are the instructions:
- Navigate to the directory where your new PWA project is located. Replace your_project_name with your actual project directory:
cd your_project_name
- Optionally, generate a unique custom domain and SSL certificate for your local development environment:
yarn buildpack create-custom-origin ./
- If you encounter any errors while executing the above command, run this one beforehand:
export NODE_OPTIONS=--openssl-legacy-provider
- Use the command below to start the Magento PWA development server. This will enable real-time development and hot-reloading of your changes:
yarn run watch
- The server will compile your storefront project and start a local development server, indicated by the following output:
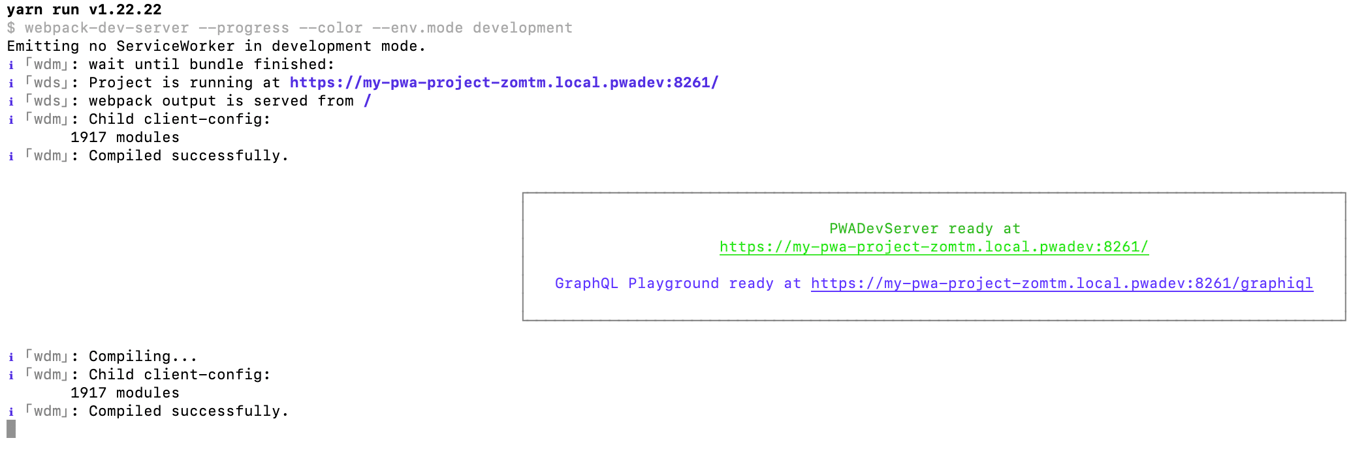
- Open your web browser and access the generated URL or your Magento’s domain if you set one up. You should see the Venia storefront running like below:
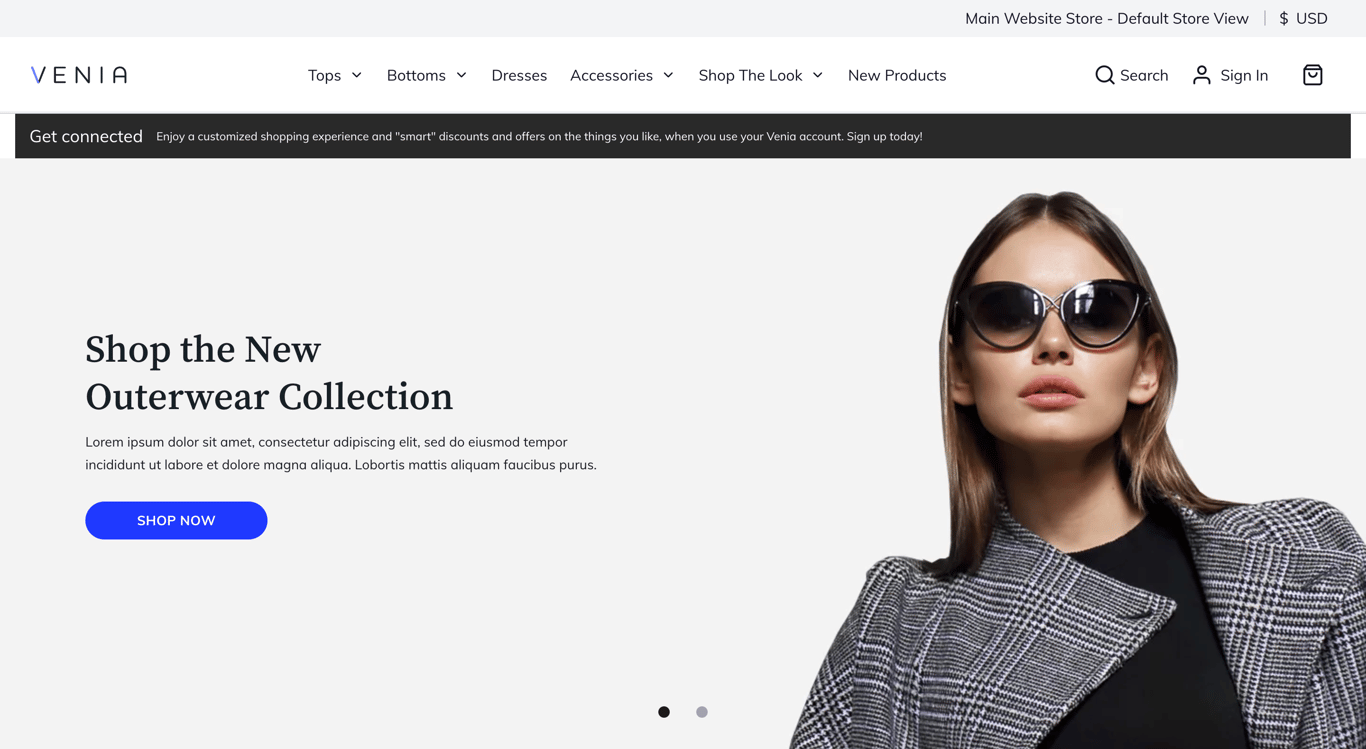
- To stop the development server and exit from the status screen, press Ctrl + C.
4. Customize PWA Theme
Customizing your PWA theme is a crucial step to ensure it reflects your brand and meets your specific needs. To begin customizing the default Venia theme, follow these basic steps:
- Navigate to the src directory within your project folder. Here, you will find the main files responsible for the theme’s structure and styles.
cd your-project-name/src
- As an example, let’s customize the footer component. Start by creating the components directory:
mkdir -p src/components
- Copy the footer component from node_modules to your new directory:
cp node_modules/@magento/venia-ui/lib/components/Footer/footer.js src/components/Footer
- Open the footer.js file and make your changes:
nano src/components/Footer/footer.js
- Here’s an example modification for the footer content:
// src/components/Footer/footer.js

import React from 'react';

import { Link } from 'react-router-dom';

import { mergeClasses } from '@magento/venia-ui/lib/classify';

import defaultClasses from './footer.css';

const Footer = props => {

const classes = mergeClasses(defaultClasses, props.classes);

return (

<footer className={classes.root}>

<div className={classes.content}>

<div className={classes.links}>

<Link to="/about-us">About Us</Link>

<Link to="/contact">Contact</Link>

<Link to="/privacy-policy">Privacy Policy</Link>

</div>

<div className={classes.copyright}>

© {new Date().getFullYear()} Your Company Name. All rights reserved.

</div>

</div>

</footer>

);

};

export default Footer;
- Customize the styles by modifying the CSS or Sass files. For the footer, run nano src/components/Footer/footer.css and add these modifications:
/* src/components/Footer/footer.css */

.root {

background-color: #333;

color: #fff;

padding: 20px;

text-align: center;

}

.links a {

color: #fff;

margin: 0 10px;

text-decoration: none;

}

.links a:hover {

text-decoration: underline;

}
- Export the footer component in src/components/Footer/index.js by adding the following content:
export { default } from "./footer";Styling and Branding Tips
Here are some tips on how to effectively customize styles and use branding elements to improve your Magento PWA storefront:
- Add branding elements. Incorporate your logo, brand colors, and typography throughout the theme by updating the style files and importing your brand assets.
- Custom CSS and Sass. Use custom CSS or Sass to define your styles. This allows you to maintain a clean separation between the default theme and your customizations. Create new stylesheets or modify existing ones as needed.
- Optimize for mobile devices. Make sure that your customizations are responsive on mobile phones. Test your changes across different screen sizes and devices to verify their performance for mobile users.
Suggested Reading
For inspiration, see how top brands like Byredo, Omega Watches, and Christian Louboutin customize their Magento websites.
5. Implement Custom Features
Adding custom features to your Magento PWA site can enhance the user experience and provide additional functionality tailored to your specific needs. Here’s how to create and integrate new React components in your PWA:
- Create a directory for your new component:
mkdir -p src/components/NewComponent
- Create a new JavaScript component file:
nano src/components/NewComponent/NewComponent.js
- Write the code for the newly created component. For example, create a simple banner:
// src/components/NewComponent/NewComponent.js

import React from 'react';

import { mergeClasses } from '@magento/venia-ui/lib/classify';

import defaultClasses from './NewComponent.css';

const NewComponent = props => {

const classes = mergeClasses(defaultClasses, props.classes);

return (

<div className={classes.banner}>

<h1>Welcome to Our Store</h1>

<p>Enjoy a seamless shopping experience.</p>

</div>

);

};

export default NewComponent;
- Create a CSS file to style the component:
nano src/components/NewComponent/NewComponent.css
- Here’s how you can modify the component’s appearance:
/* src/components/NewComponent/NewComponent.css */

.banner {

background-color: #f5f5f5;

padding: 20px;

text-align: center;

}

.banner h1 {

font-size: 2em;

margin: 0;

}

.banner p {

font-size: 1.2em;

margin: 0;

}
- Import and integrate your new component into the desired page or layout. For example, add it to src/components/HomePage/HomePage.js:
// src/components/HomePage/HomePage.js

import React from 'react';

import NewComponent from '../NewComponent/NewComponent';

const HomePage = () => {

return (

<div>

<NewComponent />

{/* Other homepage components */}

</div>

);

};

export default HomePage;
Custom Feature Examples
Here are some examples of custom features to enhance customer experience:
- Custom React hooks. Create custom hooks to manage complex state logic and side effects, improving code reusability and readability.
- Visual components. To make the interface more interactive and engaging, add visual components like carousels, modals, and sliders.
- Web app manifest. Customize the web app manifest to provide a native app-like experience when users add your PWA to their home screen.
6. Integrate Extensions and Third-Party Services
Using extensions, APIs, and third-party services can enhance your Magento store’s functionality. However, after implementing PWA, you need to verify that both existing and new services are working correctly.
Compatibility Check
Here’s how to ensure existing extensions, third-party services, or APIs are compatible with your PWA setup:
- Review the documentation. Check the documentation of the extensions or services for any specific instructions or compatibility notes related to Progressive Web Apps.
- Test in a staging environment. Try out the extensions and services in a staging environment to ensure they work seamlessly with your PWA.
- Consult community resources. Use community forums and resources to gather insights and solutions from other developers who have integrated similar services.
Integration Steps
Follow this guide to integrate popular extensions, services, and APIs into your Magento PWA:
- Use Composer to install the desired extension or service:
composer require vendor/extension
- Follow the service’s documentation to configure it correctly. This might involve setting up API keys, adjusting settings, or enabling features in the Magento admin panel.
- Update your PWA components to use the new extension or service. For example, if integrating a payment gateway, you might need to modify the checkout component:
// Example modification to integrate a payment gateway in the checkout component

import PaymentGateway from 'vendor/payment-gateway';

const Checkout = () => {

return (

<div>

{/* Other checkout components */}

<PaymentGateway />

</div>

);

};

export default Checkout;
- Verify that all functionalities provided by the extension or service are operational and that there are no conflicts with existing features.
Suggested Reading
Not all extensions are free; some are paid and add to the total Magento cost. Check the detailed breakdown in our article.
7. Test and Deploy the PWA Project
After customizing the storefront’s appearance and implementing custom features, it’s wise to test functionality and performance before deploying the project in a production environment.
Testing Process
Here are some recommended testing practices for your Magento PWA:
- Performance testing. Use tools like Lighthouse to test the performance of your PWA and identify areas for improvement.
- Cross-browser testing. Verify that your PWA works correctly across different browsers and devices.
- User acceptance testing (UAT). Conduct UAT to ensure the PWA meets user requirements and provides a seamless experience.
Debugging Practices
Before deploying your Magento PWA, follow these debugging practices:
- Check console logs. Review console logs for errors or warnings and resolve any issues.
- Use debugging tools. Utilize browser developer tools to inspect and debug your code.
- Run linting tools. Use linting tools like ESLint to identify and fix code quality issues.
- Monitor network requests. Make sure all network requests are functioning correctly and efficiently.
Deployment Guide
If there are no errors in the development mode, you can start deploying your Magento PWA to a production environment:
- Run this command to create an optimized production build of your PWA:
yarn run build
- Here’s the expected output:
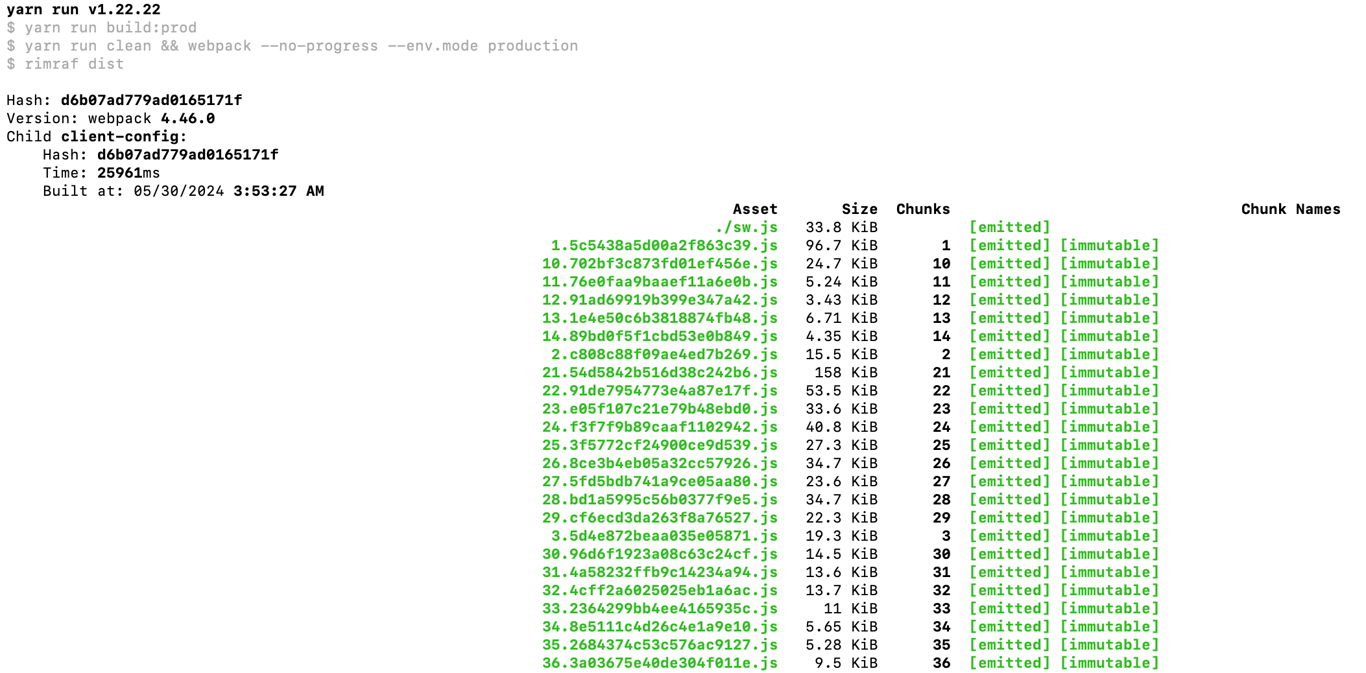
- It’s advisable to preview the app one more time on a local staging server by executing the following:
yarn start
- Set up your web server to serve the PWA. Here’s an example configuration for Apache:
<VirtualHost *:80>

ServerName your-domain.com  # Replace with your actual domain name

DocumentRoot /path/to/your/build  # Replace with the actual path to your build directory

<Directory /path/to/your/build>  # Replace with the actual path to your build directory

Options Indexes FollowSymLinks

AllowOverride None

Require all granted

</Directory>

ErrorDocument 404 /index.html

<IfModule mod_rewrite.c>

RewriteEngine On

RewriteCond %{REQUEST_FILENAME} !-f

RewriteRule ^ index.html [QSA,L]

</IfModule>

</VirtualHost>
- After deployment, regularly monitor your PWA’s performance and functionality. Use monitoring tools to track any issues and maintain optimal performance.
Conclusion
Implementing the progressive web app technology for Magento stores offers numerous advantages, such as improved performance, seamless integration with native applications, and increased mobile conversions.
In this guide, you’ve learned how to deploy a Magento PWA project, customize it, and implement additional features, ensuring a responsive and engaging experience for your customers.
By combining PWA solutions with Magento, you can unleash this platform’s full potential and ensure your online store stays ahead in the eCommerce competition. If you have any questions, ideas, or want to share your experience using PWA on Magento, don’t hesitate to comment below!
Magento PWA FAQ
This section answers the most common questions about PWA integration with a Magento store.
Why Should I Consider Implementing Magento PWA?
Implementing Magento PWA enhances your store with faster load times, offline browsing, and push notifications. It provides a mobile-first experience, improves user engagement and satisfaction, and helps increase conversion rates on mobile phones and other devices.
Are There Any Specific Requirements for Implementing Magento PWA?
Yes, you need a Magento 2 installation, a hosting service that supports Magento PWA storefront development, Node.js, and Yarn. It’s also recommended that you become familiar with React and PWA Studio tools to create and optimize the storefront project.
Can I Use Existing Extensions and Themes with Magento PWA?
Yes, but compatibility varies. Many extensions need updates for PWA. Meanwhile, custom Magento themes must be redeveloped using PWA Studio and the Venia storefront app. Always check with the extension or theme developer for PWA support and guidelines.
All of the tutorial content on this website is subject to Hostinger's rigorous editorial standards and values.

Ariffud is a Technical Content Writer with an educational background in Informatics. He has extensive expertise in Linux and VPS, authoring over 200 articles on server management and web development. Follow him on LinkedIn.