How to install composer for Linux, Mac, and Windows + best practices
Aug 21, 2025
/
Ignas R.
/
6 min Read
Composer is a dependency manager made for the PHP programming language. It allows users to easily manage and integrate external dependencies and libraries for PHP software development.
This makes the software development process much more streamlined and efficient. With already pre-set dependencies and libraries, users no longer need to start their projects from scratch.
In this tutorial, we will guide you through installing Composer on shared hosting accounts, Linux, or macOS systems. Additionally, we’ll provide instructions on downloading, installing, and utilizing Composer packages.
Installing Composer
This section will show you how to install Composer on shared or cloud hosting accounts and such operating systems as Linux, macOS, and Windows.
Important! Composer comes pre-installed on Hostinger’s Premium and Business hosting plans as well as on cloud hosting plans. If you are already using our services, skip the following part. However, if you feel your version of Composer is outdated and the latest version is needed, you may proceed with the local installation process.
1. Installing Composer on Shared Hosting, Linux, or macOS
The commands to install Composer on a shared hosting account, Linux (PC or server-based system), and macOS are the same.
Pro Tip
Hostinger provides its users with two Composer versions. If you need Composer version 1.10, use the composer command.
Otherwise if you need a newer 2.0 version or you are using PHP 8.0+, use the composer2 command.
Follow these steps to install Composer on your system:
- Connect to your hosting account using an SSH connection. Note that this is only applicable for shared and cloud hosting only. Otherwise, open a terminal window on Linux or macOS.
- Download Composer from the official website using the following command:
php -r "copy('https://getcomposer.org/installer', 'composer-setup.php');"If you are using macOS or Linux, ensure that you have PHP installed beforehand.
- Verify the installer’s signature (SHA-384) to ensure that the installer file is not corrupt:
php -r "if (hash_file('sha384', 'composer-setup.php') === '55ce33d7678c5a611085589f1f3ddf8b3c52d662cd01d4ba75c0ee0459970c2200a51f492d557530c71c15d8dba01eae') { echo 'Installer verified'; } else { echo 'Installer corrupt'; unlink('composer-setup.php'); } echo PHP_EOL;"The installer’s signature is the long string of characters as shown in the example command above (’55ce33d…’). It changes every time a new version of Composer comes out. Therefore, fetch the latest SHA-384 command from the Composer download page.
- Once you are done, you may install Composer either locally or globally. Local installation means the dependency manager will be stored in your current directory, and you must specify the path before executing corresponding commands.
Meanwhile, the global installation allows you to run Composer from anywhere on your system by storing it in the /usr/local/bin directory. However, the global installation method won’t work on shared and cloud hosting.
Local Installation
php composer-setup.php
Global Installation
php composer-setup.php --install-dir=/usr/local/bin --filename=composer
You should get the following result:
All settings correct for using Composer
Downloading…

Composer (version 2.4.2) successfully installed to: /usr/local/bin/composer
Use it: php /usr/local/bin/composer
- Once the installation process is complete, remove the installer:
php -r "unlink('composer-setup.php');"- Finally, test the Composer installation:
composer
The command line will return the following output:
   ______
  / ____/___ ____ ___ ____ ____ ________ _____
 / / / __ / __ `__ / __ / __ / ___/ _ / ___/
/ /___/ /_/ / / / / / / /_/ / /_/ (__ ) __/ /
____/____/_/ /_/ /_/ .___/____/____/___/_/
                  /_/
Composer version 2.4.2 2022-09-14 16:11:15
Important! If you installed Composer locally, you need to use php composer.phar command within the same directory where it was installed in order to use Composer.
2. Installing Composer on Windows
Getting started with Composer on a Windows machine is a bit different. No command-line instructions are necessary to download and install the software.
Simply follow these steps:
- Install PHP on your computer. We recommend using XAMPP, as the process is straightforward, and you can complete it within a few minutes.
- Once XAMPP is installed, download the latest version of Composer.
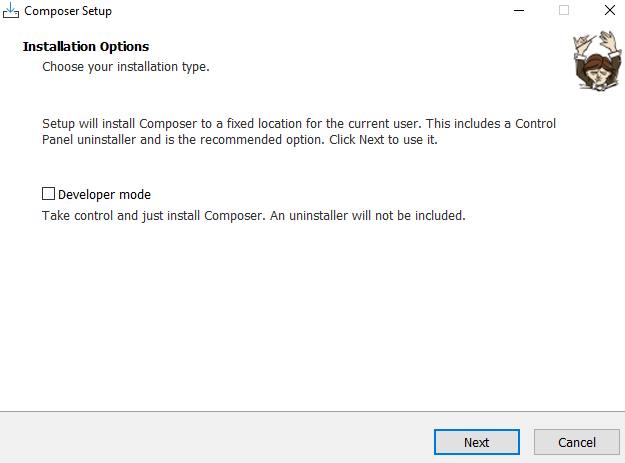
- Run Composer setup wizard. When it asks you to activate the developer mode, ignore it and continue with the installer.
- A window will pop up and ask you to locate the PHP command-line. The default location is
C:/xampp/php/php.exe.Once the location is selected, click Next. - You will be prompted with the Proxy Settings window. Leave the box unchecked and skip this part by hitting Next. Then, on the last window, click Install.
- After completing the installation, open the Command Prompt. Press the CTRL + R shortcut, and type in cmd. Click OK.
- Use the following command and press Enter:
composer
Command-line will return the following result:
   ______
  / ____/___ ____ ___ ____ ____ ________ _____
 / / / __ / __ `__ / __ / __ / ___/ _ / ___/
/ /___/ /_/ / / / / / / /_/ / /_/ (__ ) __/ /
____/____/_/ /_/ /_/ .___/____/____/___/_/
                  /_/
Composer version 2.4.2 2022-09-14 16:11:15
You now have Composer installed on your Windows system. Open the Command Prompt and run it from any place.
Generating and Understanding composer.json
Now, the exciting part – using Composer in your PHP project. To achieve this, you need to generate a composer.json file. This file contains packages (dependencies) that should be downloaded.
Furthermore, composer.json also checks for version compatibility for your project. If you use an older package, composer.json will let you know that one may avoid future issues.
If you are deploying a Laravel project or other PHP frameworks, this file helps simplify dependency management as you don’t have to update the software package individually.
You have the option to create and update composer.json yourself. However, the best practice is to let Composer do this for you. Thus we don’t recommend creating the file manually.
Let’s demonstrate the practicality of composer.json by creating a sample project.
Our project is a simple PHP timer, allowing developers to determine how much time a code takes to execute. This is highly useful for debugging and optimization purposes.
Follow these steps for more information:
- Create a new directory for the project. Since our project is a timer, we will name the folder phptimer. To do this, execute the following command:
mkdir phptimer
- Now, enter the newly created directory:
cd phptimer
- Find a package or library for the project. The best place to achieve this is Packagist, where you will find tons of libraries to help your project development. For this tutorial, we need a timer package:
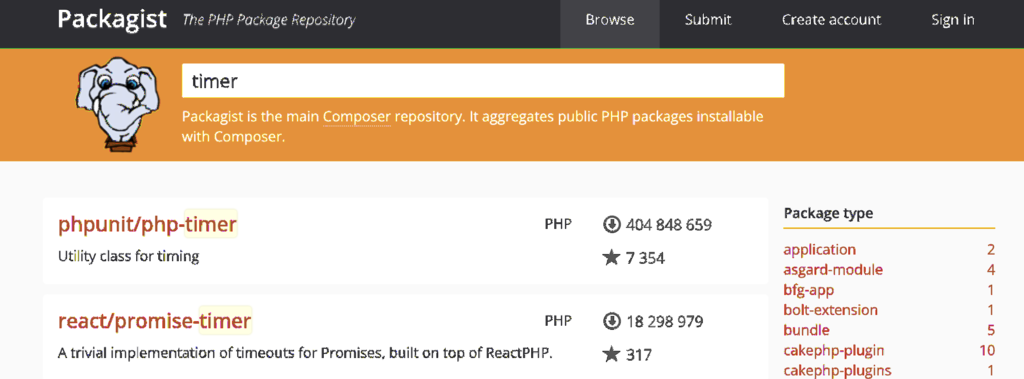
As you can see, several timer packages are available, and each has a name and a short description. For our example, we will pick phpunit/php-timer as it has the most downloads and GitHub Stars.
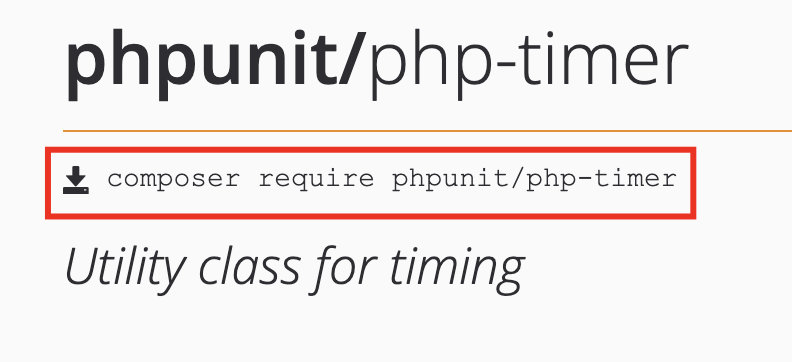
- At the top of the page, you will see which command you need to use in the terminal to download and install the package:
composer require phpunit/php-timer
The output of the terminal will show the version of phpunit/php-timer:
Using version ^5.0 for phpunit/php-timer
In our case, the package update range is >=5.0.3 <6.0.0, as version 6.0.0 will break the backward compatibility. For detailed information about versioning in Composer, visit the official documentation page.
After executing the previous command, your project directory will have two new files (composer.json and composer.lock) and a folder named vendor. This is a specific directory where Composer stores all your packages and dependencies.
Using Autoload Script
Your project is almost ready. The only thing left is loading the dependency into your PHP script. Fortunately, Composer’s autoload file helps you to complete this process faster.
To use autoloading, write the following line before you declare or instantiate new variables in your script:
require __DIR__ . '/vendor/autoload.php'
We’ll give you an example to help you understand this concept better. Let’s say we want to test our phptimer project. Open the nano text editor to create a script named demo.php:
nano demo.php
Paste the following to the file:
<?php
require __DIR__ . '/vendor/autoload.php';

use SebastianBergmann\Timer\Timer;

$newtimer = new Timer;

$newtimer->start();

foreach (\range(0, 100000) as $i) {
    // ...
}

$scriptduration = $newtimer->stop();

var_dump($scriptduration->asSeconds());
Now, run the following script:
php demo.php
Finally, the terminal will display an output similar to the following:
float(0.002729457)
Updating Your Project Dependencies
You have to know how to update your packages, and this can be done in one of two ways:
- Universal update – to check and install updates for all of your packages or dependencies at once, use the following command:
composer update
- Package-specific update – execute this command to check for updates for one or more specific packages:
composer update vendor/package vendor2/package2
Remember to replace the vendor/package value with the name of the package you want to update.
Composer will also update the composer.json and composer.lock files by running the update command to match the current state of your project dependencies.

Conclusion
Composer helps developers manage the dependencies and libraries of their PHP projects. It allows developers to integrate and manage open-source packages from a single place easily.
This article taught you how to install and use Composer effectively. To summarize, let’s review all the steps once again:
- Install Composer on a shared hosting account, Linux, macOS, or Windows systems.
- Generate the composer.json file.
- Use an autoload script to load dependencies into the PHP file.
- Update your project dependencies.
We hope that you found this tutorial helpful. If you have questions or further insights, please leave them in the comments section.
All of the tutorial content on this website is subject to Hostinger's rigorous editorial standards and values.

Ignas takes great satisfaction in helping people tackle even the most complex technical issues. His current goal is to write easy-to-follow articles so that these issues will not happen at all. During his free time, Ignas likes to play video games and fix up things around his house.