How to fix “The Link You Followed Has Expired” Error in WordPress (3 methods)
Apr 27, 2025
/
Leonardus N.
/
4 min Read
Download all-in-one WordPress cheat sheet
Error messages may appear in WordPress from time to time, whether it’s a database connection error or a critical error.
One common WordPress error message is The link you followed has expired. Unfortunately, this error message doesn’t tell you the cause, and the link only takes you back to the previous page.
This article will explain why the The link you followed has expired error message occurs and three ways to fix it.
What Causes “The Link You Followed Has Expired” Error?
The The link you followed has expired error often shows up after you upload a theme or plugin that exceeds the file size upload limit. Hosting providers usually have upload size and execution time limits in their PHP settings to improve server performance.

This limitation can hinder you when uploading certain files, themes, or plugins. You can see the current upload limit on your WordPress admin panel via Media → Add New.
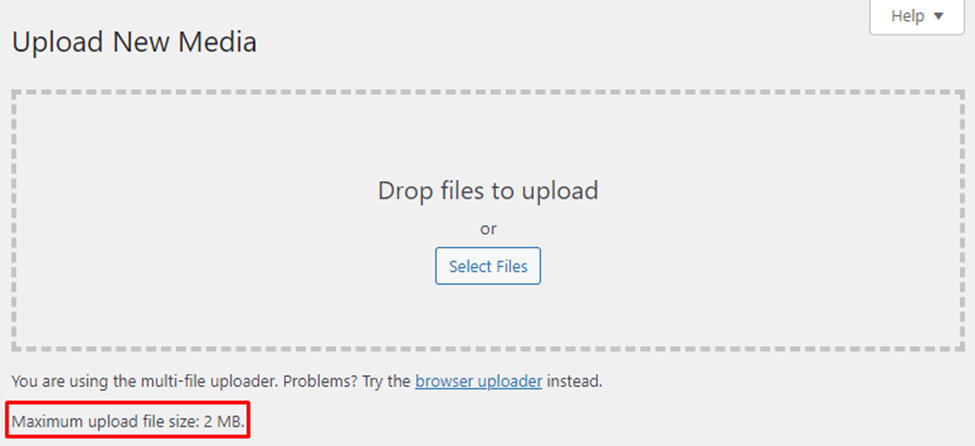
Note that The link you followed has expired is not the only error message you may get when uploading large files that exceed the size limit. For example, if you try to upload a media file, you may get the image.jpg exceeds the maximum upload size for this site error banner.
3 Ways to Fix “The Link You Followed Has Expired” Error
Fixing the The link you followed has expired error message requires increasing the maximum file upload size. Let’s see three ways to do it.
1. Increase Limits in the functions.php File
The first method to fix The link you followed has expired is by modifying the functions.php file. This may be the easiest method, as you can edit theme files directly from the WordPress admin area. Follow these steps to do so:
- Navigate to Appearance → Theme File Editor. For block theme users, go to Tools → Theme File Editor.
- You’ll see a list of theme files in the right sidebar. Select the functions.php file.
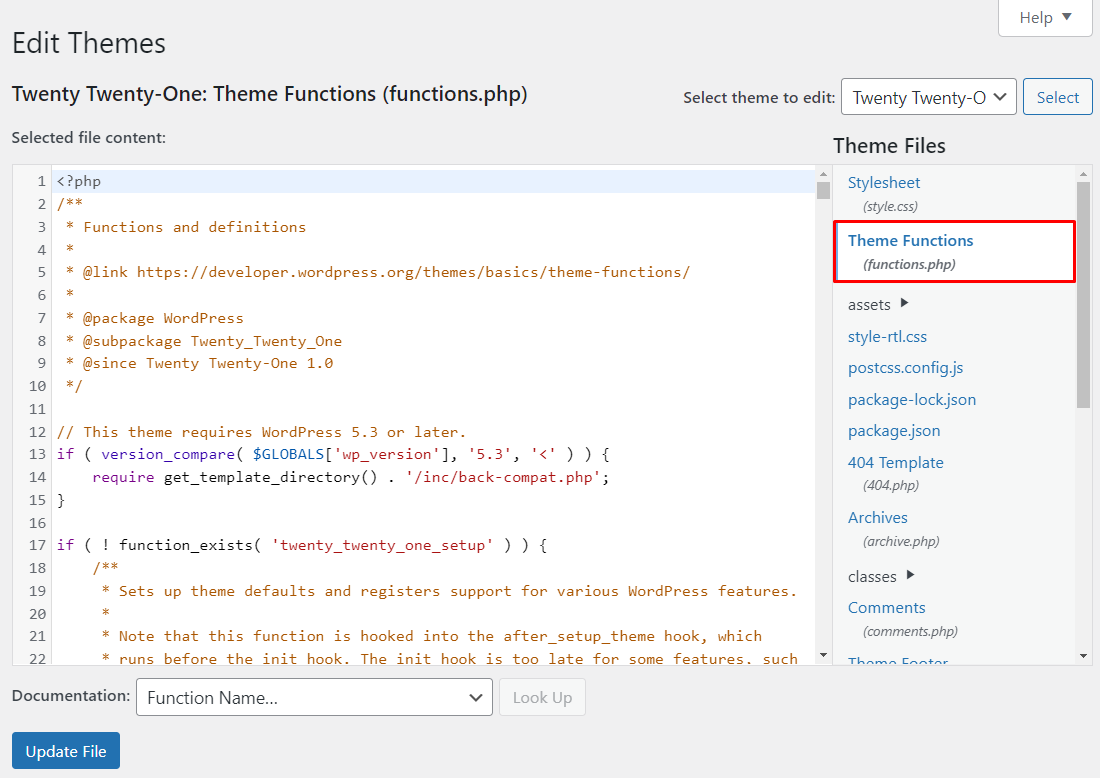
- Add the following code snippet. Adjust the value of php_value upload_max_filesize as you like.
@ini_set( 'upload_max_size' , '120M' );
@ini_set( 'post_max_size', '120M');
@ini_set( 'max_execution_time', '300' );
- Scroll down to the bottom and click the Update File button.
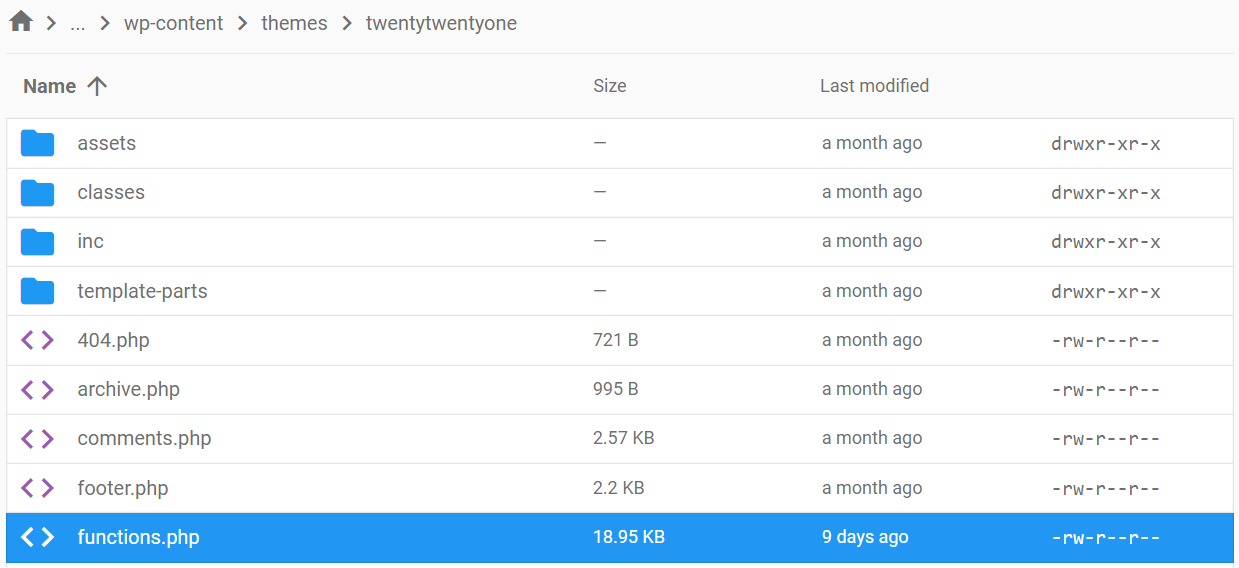
You can also access the functions.php file using an FTP client or the web hosting file manager. Go to /public_html/wp-content/themes path and open the folder of your currently active theme. Then, open and edit the functions.php file.
Note that this modification only applies to the active theme. If you switch to another WordPress theme, the configurations will revert to the default upload limits.
Important! Any update to the theme will delete modifications made to functions.php. To edit theme files while keeping it up-to-date, consider creating a child theme.
2. Increase Limits Using the .htaccess File
The next method is editing the .htaccess file – a hidden file in your website’s root directory that allows you to include additional configuration. Follow these steps to increase the file upload size limit through the .htaccess file.
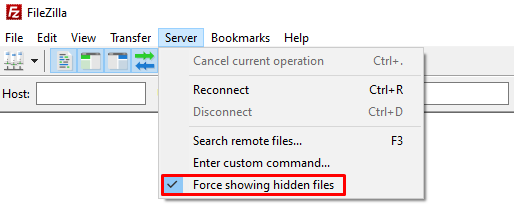
- Access your site’s public_html directory via an FTP client or the web hosting file manager. If you use an FTP client like FileZilla, show hidden files by enabling the Server → Force showing hidden files option.
- Find and open the .htaccess file.
- Add the following code snippet:
php_value upload_max_filesize 128M
php_value post_max_size 128M
php_value max_execution_time 300
php_value max_input_time 300
- Adjust the value of php_value upload_max_filesize as you like. For example, if you want to set a 128 MB limit, the line should be php_value upload_max_filesize 128M. It should look like this:

- Save the file and go back to your WordPress dashboard to verify the new upload limit.
3. Increase Limits in the php.ini File
The last option is to define the maximum file size in the php.ini file. It is the WordPress PHP configuration file that’s located in the site’s root folder. It allows you to increase PHP memory limit and resources.
Unfortunately, most shared hosting plans don’t have this file in the public_html folder. In some cases, it’s available, but the hosting provider doesn’t let you edit the file. To alleviate this, create a new php.ini file using a plain text editor and upload it to your hosting account.
In the following steps, we will use Hostinger’s hPanel as an example. However, the steps should be similar for other hosting control panels.
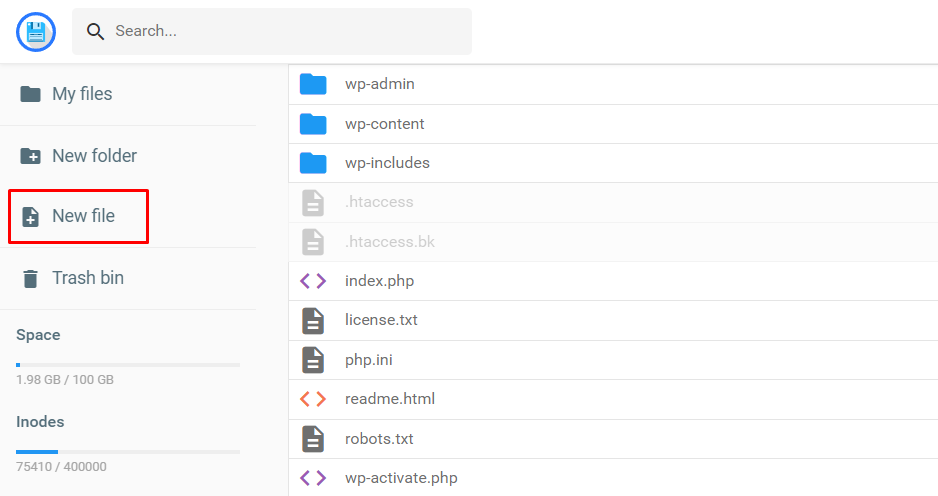
- Log in to hPanel and select File manager.

- Open the public_html folder and click New file in the left sidebar.
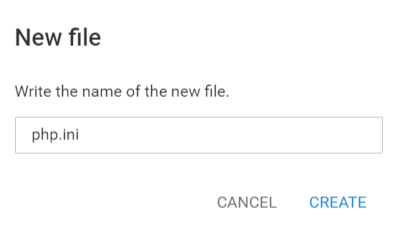
- A pop-up will appear to name the new file. Type php.ini and click Create.
- The text editor will open. Copy and paste the following code snippet:
upload_max_filesize = 128M
post_max_size = 128M
max_execution_time = 300
- Click the Save button at the top-right corner.
Pro Tip
Make sure your WordPress site is running the latest PHP version to prevent compatibility issues. Check out our guide on changing the PHP version.

Conclusion
The The link you followed has expired WordPress error message is usually triggered by uploading a theme or plugin that exceeds the maximum file size limit. It is one of several errors that are caused by the file size upload limit.
These limits are usually set by WordPress hosting companies. Fortunately, you can easily override or change the configuration using one of the following methods:
- Add additional code to the theme’s functions.php file. This is the easiest method, as the file is accessible via the WordPress admin area. However, you’ll lose the configuration if you switch themes.
- Configure the limits via the .htaccess file. This method is suitable if you want to keep WordPress files unchanged.
- Create a php.ini file in the root directory. This method lets you include an additional PHP configuration that increases the file size limit.
If you are unsure about modifying these files, create backups first. So if anything goes wrong when you debug WordPress, use the backup files to revert to the website’s previous configuration.
All of the tutorial content on this website is subject to Hostinger's rigorous editorial standards and values.

Leo is a Content SEO Specialist and WordPress contributor. Armed with his experience as a WordPress Release Co-Lead and Documentation Team Representative, he loves sharing his knowledge to help people build successful websites. Follow him on LinkedIn.


