How to set up and manage a WordPress cron job
Dec 22, 2025
/
Jordana A.
/
5 min Read
Cron is a UNIX utility that allows users to run scheduled tasks on a web server. WordPress has its own cron system called WP-Cron that simulates the UNIX cron system to automate update checkups, scheduled post publishing, and other repetitive tasks.
If you’re a WordPress user, knowing how to schedule WP cron events will make your administrative tasks easier.
This article will cover setting up and managing the WordPress cron system with a plugin and WP-CLI. You will also learn the advantages and disadvantages of using WordPress cron and how it differs from UNIX’s cron job.
Download all-in-one WordPress cheat sheet
What Is a WordPress Cron Job?
WordPress cron job is a system that simulates the UNIX cron system to automate task scheduling at custom time intervals. It allows WordPress users to perform time-based tasks on page load, such as publishing schedule posts and checking for updates.
What Are the Benefits and Negatives of Using WordPress Cron
The WP-Cron system is easy to set up because, unlike the UNIX cron job, it doesn’t require knowledge of UNIX commands. Various WordPress cron job plugins come with features that simplify the setup and management process, making the system accessible even for beginners.
By allowing you to schedule repetitive tasks at a custom time interval, you can save time and focus on other essential tasks. Additionally, this system ensures you don’t lose any data if the scheduled tasks fail to run on time — a feat that the UNIX cron job cannot do.
Unfortunately, WP-Cron only runs when a user visits your website. Low-traffic WordPress sites will skip some jobs if no one triggers a page load, causing a pending cache buildup and harming the site’s load time and performance.
Driving traffic to your site won’t solve this issue. In fact, high-traffic sites that use cron jobs are prone to race conditions and long-running processes. Race conditions happen when multiple visits occur at the same time, triggering WP-Cron to execute the same task simultaneously. This builds up a queue of jobs, resulting in slow performance.
How to Manage WordPress Cron Jobs With a Plugin
The easiest way to set up and manage WordPress cron jobs involves using a cron job plugin. In this tutorial, we will use WP Crontrol as it’s free and has all the necessary features. Feel free to use other plugins that suit your preferences.
1. Install the WP Crontrol Plugin
First, install and activate the WordPress plugin for managing cron jobs by following these steps:
- Navigate to Plugins → Add New from your WordPress admin dashboard.
- Use the filter feature to find WP Crontrol and click Install Now.
- Once the installation is complete, select Activate.
To see all the cron jobs that are running on your WordPress site, go to Tools → Cron Events from your dashboard.
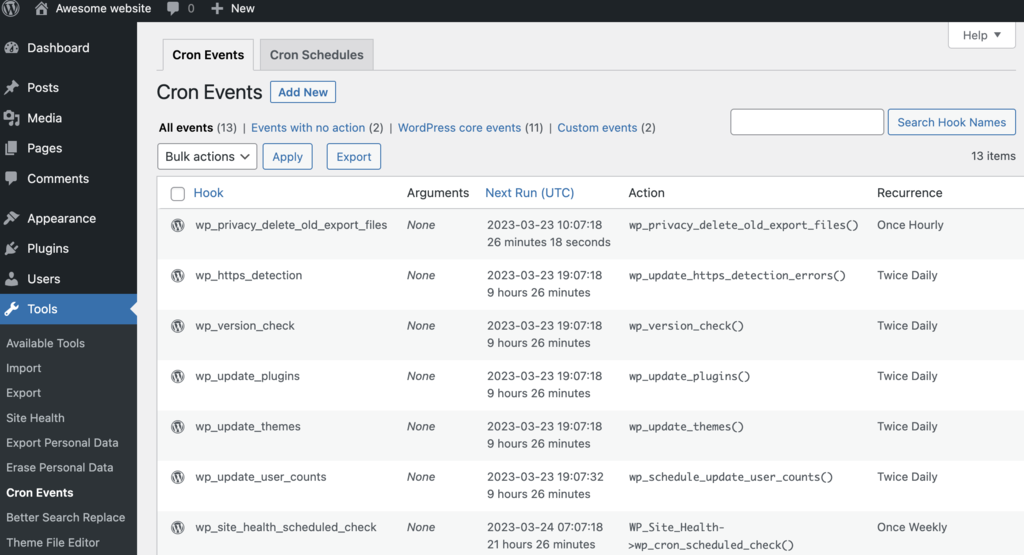
Important! Don’t delete any default WordPress cron jobs (they have the wp prefix). Doing so will disrupt the site’s core functionality.
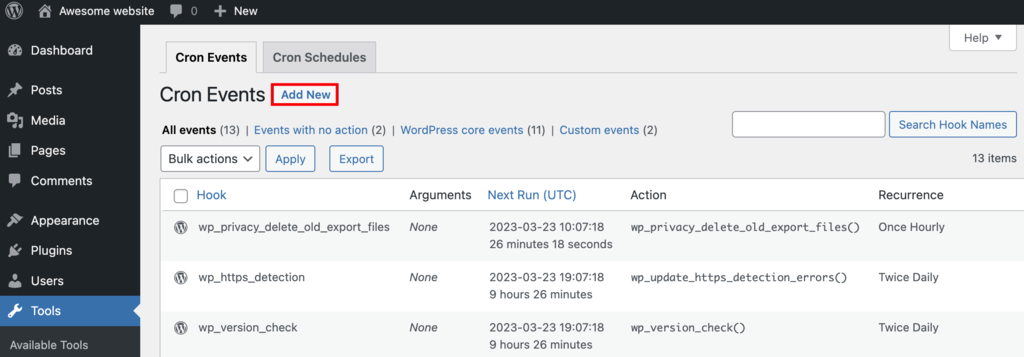
2. Add a New Cron Event
Now that you can control WordPress cron jobs, you can start managing them. Here’s how to add a new cron event:
- Access the Cron Events sub-menu and click Add New at the top of the page.
- Choose the Standard cron event option and create a WordPress hook for the new cron event. Make sure the hook name follows the standard PHP naming convention. Schedule the run time and the recurrence. Feel free to leave the Arguments textbox empty.
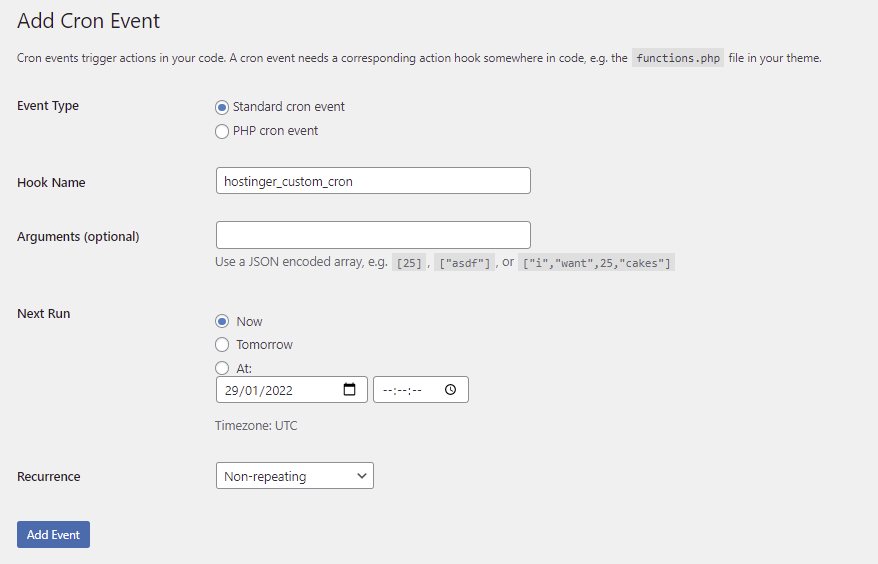
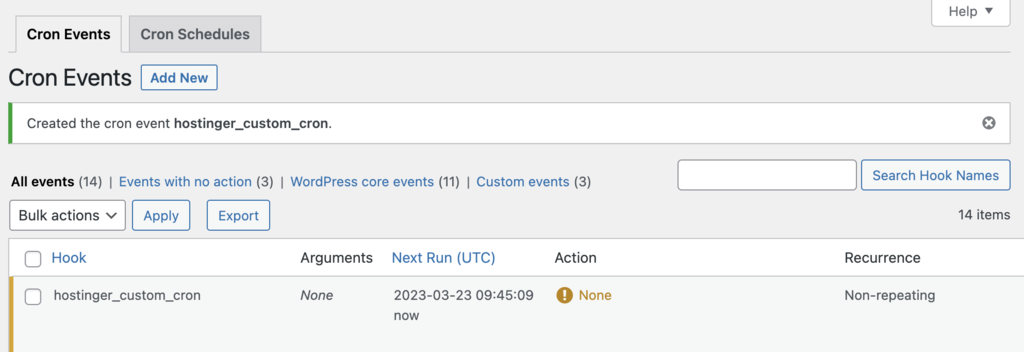
- Click Add Event. The new cron event will appear in the Cron Events list if the process was successful.
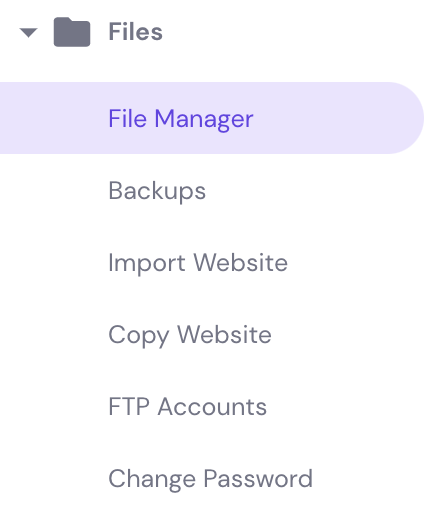
- Now that you have a hook, the next step is to add it along with the action that runs when the cron event is triggered. Access your hPanel dashboard and open File Manager under the Files section.
- Locate your theme’s functions.php file inside the root directory. Double-click the file to open it and add the following code snippet:
add_action( 'hostinger_custom_cron', 'hostinger_custom_cron_func' );
function hostinger_custom_cron_func() {
  wp_mail( 'you@example.com', 'Automatic email', 'Automatic scheduled email from WordPress to test cron');
}
This example uses the wp_mail() function which prompts WordPress to send an email when the cron event runs. Don’t forget to change the placeholder with an actual email address.
- Save the changes made and load your website. If you receive the test email, the cron event is operating correctly.

3. Set Cron Scheduling
The plugin provides four standard time intervals to choose from, but it still allows users to create custom intervals. Follow these steps to add a new cron schedule:
- Navigate to Settings → Cron Schedules from your WordPress dashboard.
- Fill in the fields under the Add Cron Schedule section. Here, we will set the interval to 600 seconds (10 minutes). Use the PHP naming convention to create the interval name.
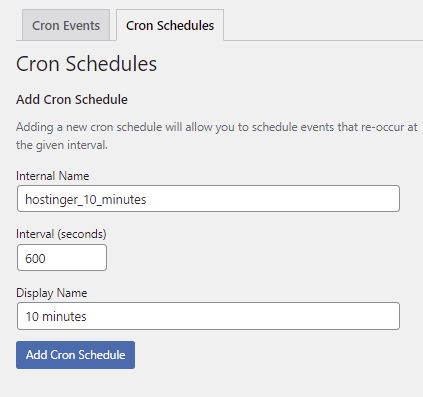
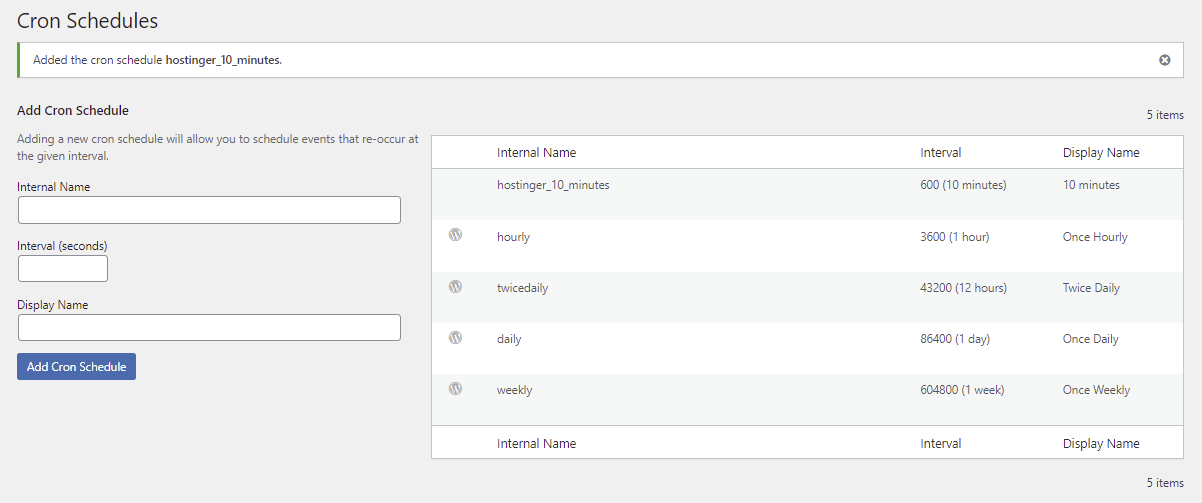
- Click Add Cron Schedule. The new time interval should appear in the list.
4. Edit an Existing Cron Event
Now that we have a custom interval, let’s use it with the custom cron. Here’s how to modify an existing cron event:
- Go back to Tools → Cron Events and locate the cron event we created earlier. Click Edit below it.
- Open the Recurrence dropdown menu and pick 10 minutes.
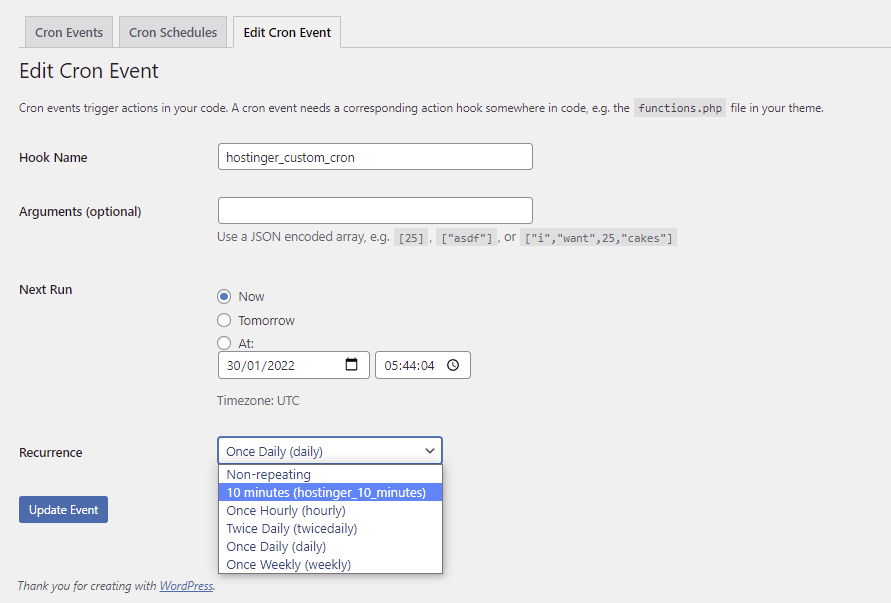
- Click Update Event.
How to Set Up WordPress Cron Jobs with WP-CLI
Another way to set up WordPress cron jobs involves using WP-CLI. This tool lets you manage the site via a command-line interface.
Hostinger’s Managed WordPress Hosting plans come with WP-CLI pre-installed. Therefore, you’ll only need to connect to your hosting account using Putty SSH.

To access the existing cron events, enter this command in the terminal:
wp cron event list
The following command will display the other commands you can use with WP-CLI:
wp help
How to Create a Real Cron Job
WordPress creates and stores the WP-Cron script inside the wp-cron.php file. While it allows your WordPress website to have cron jobs running regardless of the OS, this file isn’t immune to attacks and may conflict with caching plugins. The use of real cron jobs can eliminate the constant file execution.
Before setting up real cron jobs, you’ll need to disable the default WordPress cron. To disable WP_CRON, add this code snippet to the wp-config.php file above the “/* That’s all, stop editing! Happy blogging. */” line:
define( 'DISABLE_WP_CRON', true );
The next step is to set up a real cron job to schedule WordPress core tasks. The process may vary depending on your hosting provider or service. If you’re a Hostinger user, follow this tutorial:
- Access your hPanel dashboard and navigate to Cron Jobs under the Advanced section.
- Add this code snippet to the Command to run textbox:
wget -O /dev/null -o /dev/null https://yoursite.com/wp-cron.php?doing_wp_cron
Don’t forget to change the placeholder with your website’s actual URL.
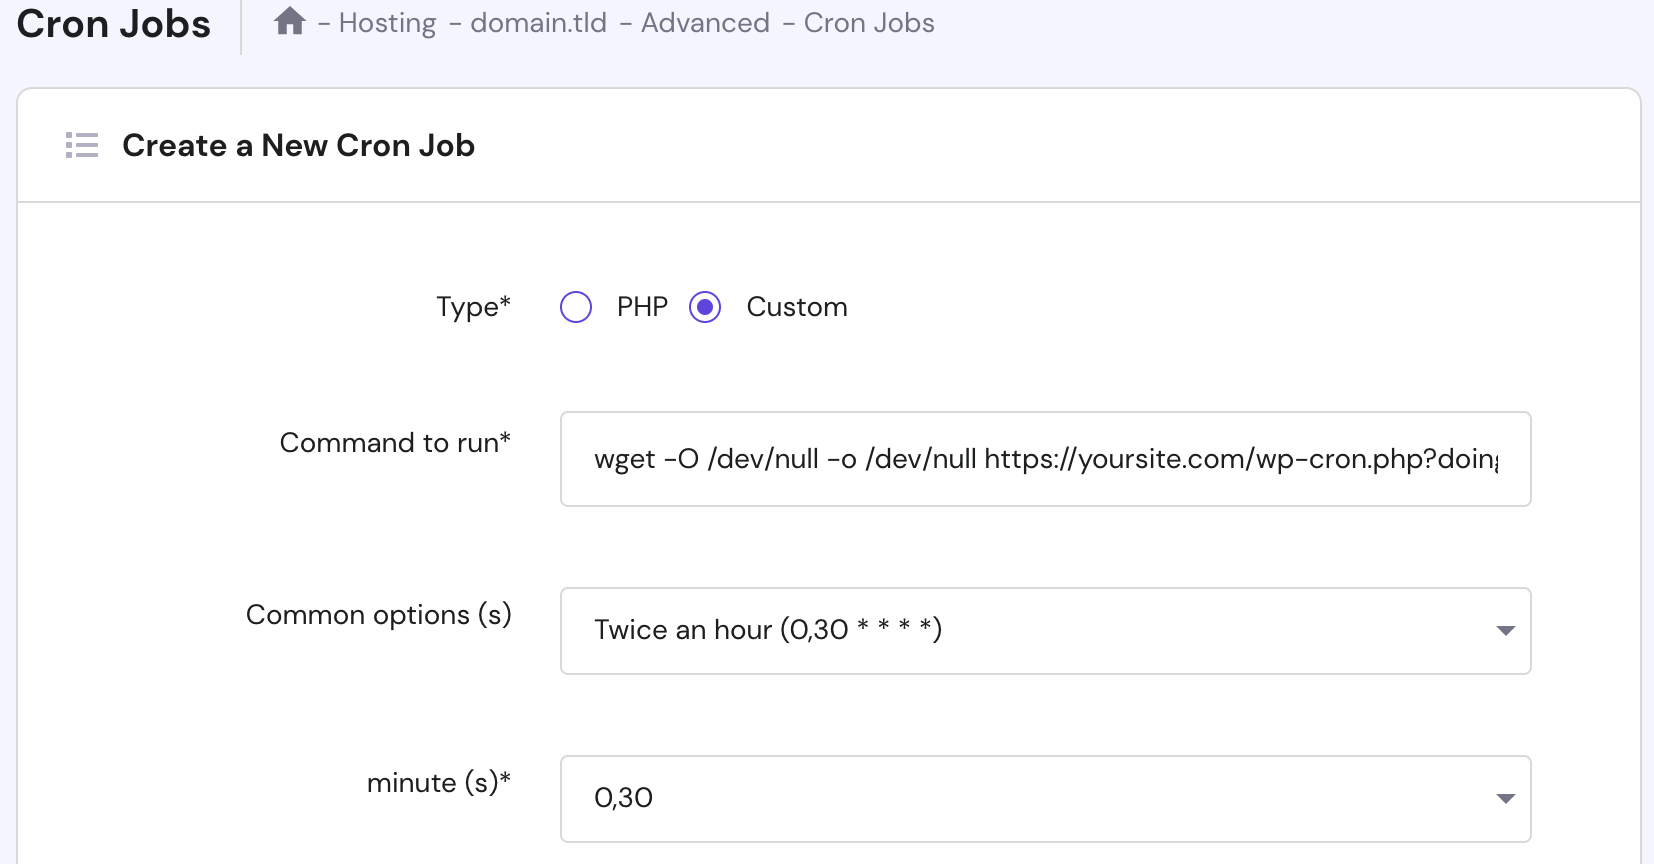
- hPanel provides the most common interval options to choose from. We recommend starting with twice an hour.
- Click Save to store the new cron job settings.
Conclusion
The WordPress cron job makes it convenient to schedule tasks at custom time intervals. While WP-Cron has some disadvantages, knowing how to use this utility will allow you to perform administrative tasks more efficiently.
We hope this article has helped you understand the functionality of the WordPress cron job and how to set it up using a plugin and WP-CLI. Good luck.
If you’re looking to optimize your WordPress site’s performance even further, we recommend using high-quality WordPress hosting.
Learn Other Expert WordPress Techniques
How to Create WordPress Custom Widgets
How to Become a WordPress Developer
Guide to WordPress Page Template
How to Create a WordPress Custom Post Type
WordPress Template Hierarchy Guide
How to Set Up a WordPress Cron Job FAQ
What Is the Difference Between WP-Cron and Cron?
WP-Cron is a web-based system that simulates the UNIX cron system. WP-Cron events are triggered on page load whereas the real cron runs every minute.
Should I Use the Real Cron or WP-Cron?
WP-Cron works perfectly for its purpose, which is to run WordPress core tasks. However, using it for executing additional tasks can harm your site’s load speed. For this reason, we recommend using real cron jobs for better performance.
How Do I Stop a Cron Job in WordPress?
If you have unused cron jobs, the easiest solution would be to delete them. Alternatively, modify the time interval as needed.
Run this command to delete cron jobs that use a specific hook. This method is ideal for removing obsolete cron jobs.$ wp cron event delete hook_name
Where Can I Find Cron Jobs in WordPress?
Cron jobs in WordPress can be found in the wp-config.php file or by using a plugin such as WP Crontrol or Advanced Cron Manager.
How Do I Run a Cron Job in WordPress?
To run a cron job in WordPress, you can use the wp_schedule_event() function in your theme’s functions.php file or use a plugin such as WP Crontrol or Advanced Cron Manager to set up and manage cron jobs.
All of the tutorial content on this website is subject to Hostinger's rigorous editorial standards and values.

Jordana is a Senior Content Writer with a background in Information Systems. She has over five years of experience in WordPress and is casually dabbling with PHP and MySQL. Her passion for writing and technology drives her to create tutorials for anyone wanting to build their online presence. Follow her on LinkedIn.


