How to create a WordPress custom post type: what it is and its customization
Aug 28, 2025
/
Aris S.
/
12 min Read

WordPress has multiple post types to help you organize your website’s content. You can easily create a chronological blog or display static pages with them.
However, the built-in post types may not be sufficient for large websites with diverse content. In that case, you need to create your own post type.
This article will explain how to create a custom post type in WordPress. You will also learn how to customize it to expand its functionality.
Download all-in-one WordPress cheat sheet
What Is WordPress Custom Post Type?
WordPress custom post type is an additional content category users create to organize their website content. It is useful if your WordPress website has diverse content that doesn’t belong to WordPress’s default post types.
While you can assign categories to organize your content, your posts will appear in one list when grouped into the same post type. This makes tracking your posts more difficult.
By default, WordPress has seven post types:
- Posts – category for regular posts. Typical content of this type includes a blog post.
- Pages – displays static content that is not listed by date.
- Attachments – all the website media, including images, videos, or PDF files.
- Revisions – saved versions of all post types.
- Navigation Menus – list of links your website visitors can use to find specific information.
- Custom CSS – type that you can modify to customize your WordPress theme.
- Changesets – the track of changes made in the customizer.
WordPress custom post types allow you to choose a particular section for your content. You can quickly group content without choosing categories and easily track posts in different sections.
Custom post types in WordPress also offer several customization options. This allows you to expand their functionality beyond the default posts.
For instance, you can move the custom post type menu, change the edit screen’s appearance, and enable features like featured images or excerpts.
Elements of a WordPress Custom Post Type
Before creating custom post types, you must understand the terms array and element. They are essential parts of your custom post type’s code.
An array is a data structure that stores key and value pairs known as elements. In this case, it reserves the properties of the custom post type.
To create a custom WordPress post type, there are three arrays containing different elements – $args, $labels, and $supports. The associative array $args is short for arguments, which include various key-value pairs, including:
- description – a short and descriptive summary of the post type. You can only display it in the post type’s template.
- public – changes WordPress custom post types’ visibility to authors and visitors. Choose TRUE to make it appear in the WordPress Dashboard and visitors’ custom query.
- menu_position – defines the new post type’s location in the WordPress admin menu. Refer to the WordPress codex page for its value and positions.
- has_archive – defines the custom post type archives, URL structure, and slug name based on parameter 1 of register_post_types().
- show_in_admin_bar – alters the post type’s visibility in the upper admin bar under the +New section.
- show_in_nav_menus – changes whether you can add posts of this type to navigation menus created via the Appearance → Menus.
- query_var – sets whether site visitors can enter a post’s type and title as a query in the URL to view it.
In addition to the elements, $args holds the $labels and $supports array containing different key-value pairs. We recommend creating a separate $labels variable to keep all the key and value pairs to make the code cleaner and easier to understand
The $label array defines the custom post type’s text and holds the following keys:
- name – the general plural name for the post type
- singular_name – the name for a single post of the custom type
- add_new – replaces the ‘Add New’ text
- add_new_item – changes the ‘Add New Post’ text
- edit_item – adjusts the ‘Edit Post’ text
- featured_image – modifies ‘Featured Image’ in the post editor
- set_featured_image – replaces ‘Set Featured Image’
- menu_name – alters the text of the top-level link. The default text for the link is the name key
Meanwhile, the $supports array contains elements that define the custom post type’s features. The TRUE value enables the following features:
- title
- editor
- author
- thumbnail
- excerpt
- trackbacks
- custom-fields
- comments
- revisions
- page-attributes
- post-formats
How to Create a WordPress Custom Post Type
There are three different ways to add custom post types in WordPress, and each has its pros and cons:
- Using a normal plugin – most simple, but the custom post type will be deleted if you uninstall or deactivate the plugin.
- Editing the theme’s functions.php file – doesn’t require an additional tool, but this method doesn’t preserve the data after the theme update.
- Creating a site-specific plugin – preserves the data and is highly customizable but requires technical skills.
In this article, we will use the third method. Before proceeding, we recommend you read our tutorial about how to create a WordPress plugin to learn more about the custom code.
To create custom post types, use the register_post_type() function. This takes two parameters – the custom post type name and the $args array.
The plugin’s code should also contain custom functions that call register_post_type(). Remember to hook these functions to the init action hook to allow the custom post type to register properly.
To avoid conflict with other plugins, your custom function should have a prefix like ht_.
Here is a code example for a Custom Article post type plugin:
<?php
/*
Plugin Name: Custom Post Types
Description: Add post types for custom articles
Author: Hostinger Dev
*/
// Hook ht_custom_post_custom_article() to the init action hook
add_action( 'init', 'ht_custom_post_custom_article' );
// The custom function to register a custom article post type
function ht_custom_post_custom_article() {
    // Set the labels. This variable is used in the $args array
    $labels = array(
        'name'               => __( 'Custom Articles' ),
        'singular_name'      => __( 'Custom Article' ),
        'add_new'            => __( 'Add New Custom Article' ),
        'add_new_item'       => __( 'Add New Custom Article' ),
        'edit_item'          => __( 'Edit Custom Article' ),
        'new_item'           => __( 'New Custom Article' ),
        'all_items'          => __( 'All Custom Articles' ),
        'view_item'          => __( 'View Custom Article' ),
        'search_items'       => __( 'Search Custom Article' ),
        'featured_image'     => 'Poster',
        'set_featured_image' => 'Add Poster'
    );
// The arguments for our post type, to be entered as parameter 2 of register_post_type()
    $args = array(
        'labels'            => $labels,
        'description'       => 'Holds our custom article post specific data',
        'public'            => true,
        'menu_position'     => 5,
        'supports'          => array( 'title', 'editor', 'thumbnail', 'excerpt', 'comments', 'custom-fields' ),
        'has_archive'       => true,
        'show_in_admin_bar' => true,
        'show_in_nav_menus' => true,
        'query_var'         => true,
    );
    // Call the actual WordPress function
    // Parameter 1 is a name for the post type
    // Parameter 2 is the $args array
    register_post_type('article', $args);
}
Note that the code may vary depending on the custom post type. Once you finish writing the code, follow these steps to turn it into a plugin:
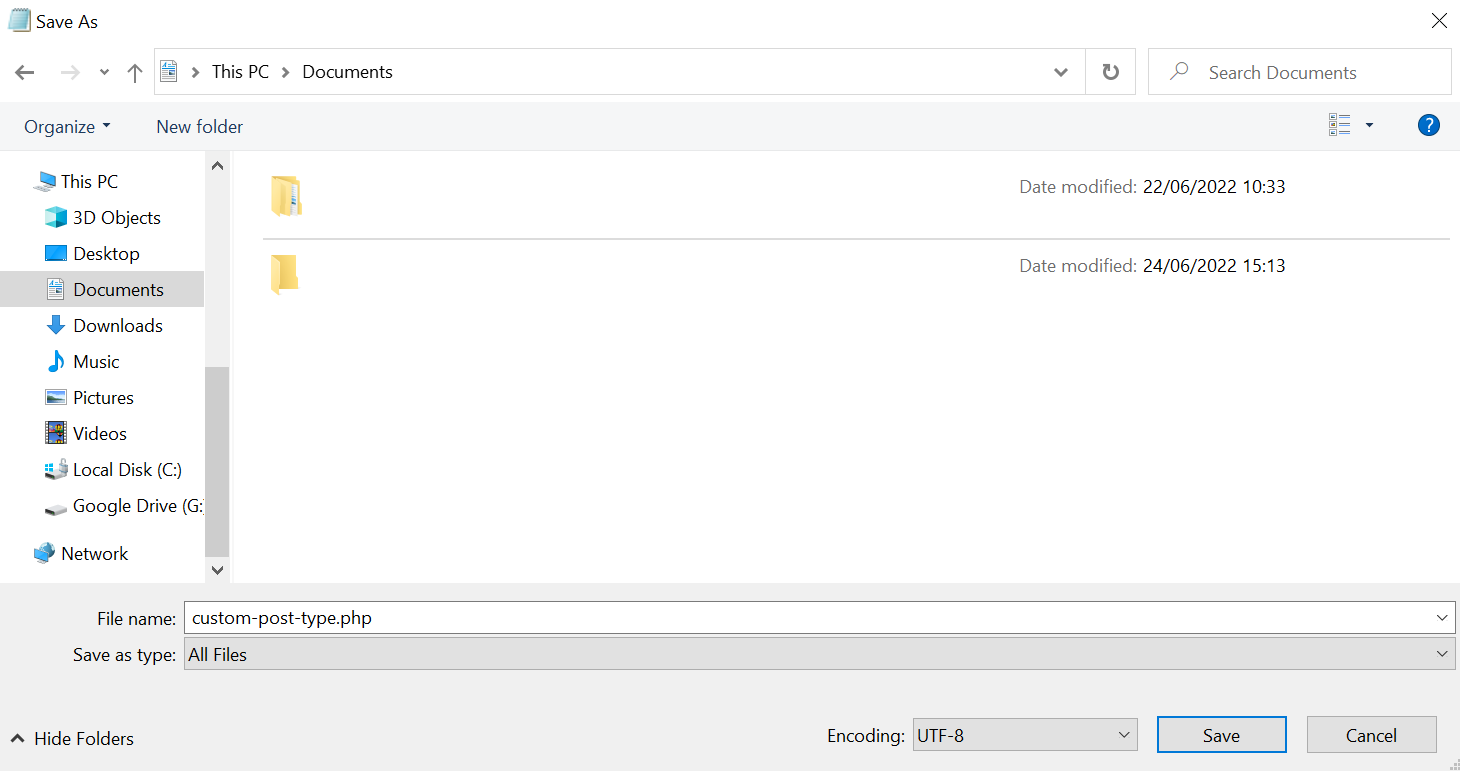
- Copy and paste the code into a text editor. For example, we will use Windows Notepad.
- Save the file. Name the file custom-post-type.php and select All Files from the Save as type dropdown menu.
- Click Save.
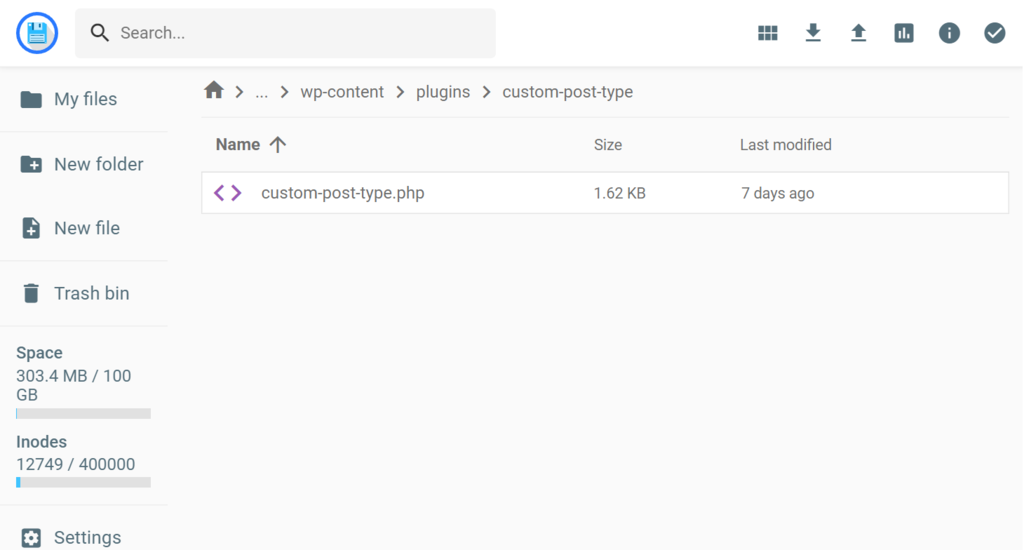
- Open your FTP client or hosting account’s file manager. For Hostinger users, go to your hPanel → Hosting → Manage → Files → File Manager.
- Inside the File Manager, navigate to public_html → wp-content → plugins.
- Create a new folder and name it custom-post-type.
- Paste the file into the folder.
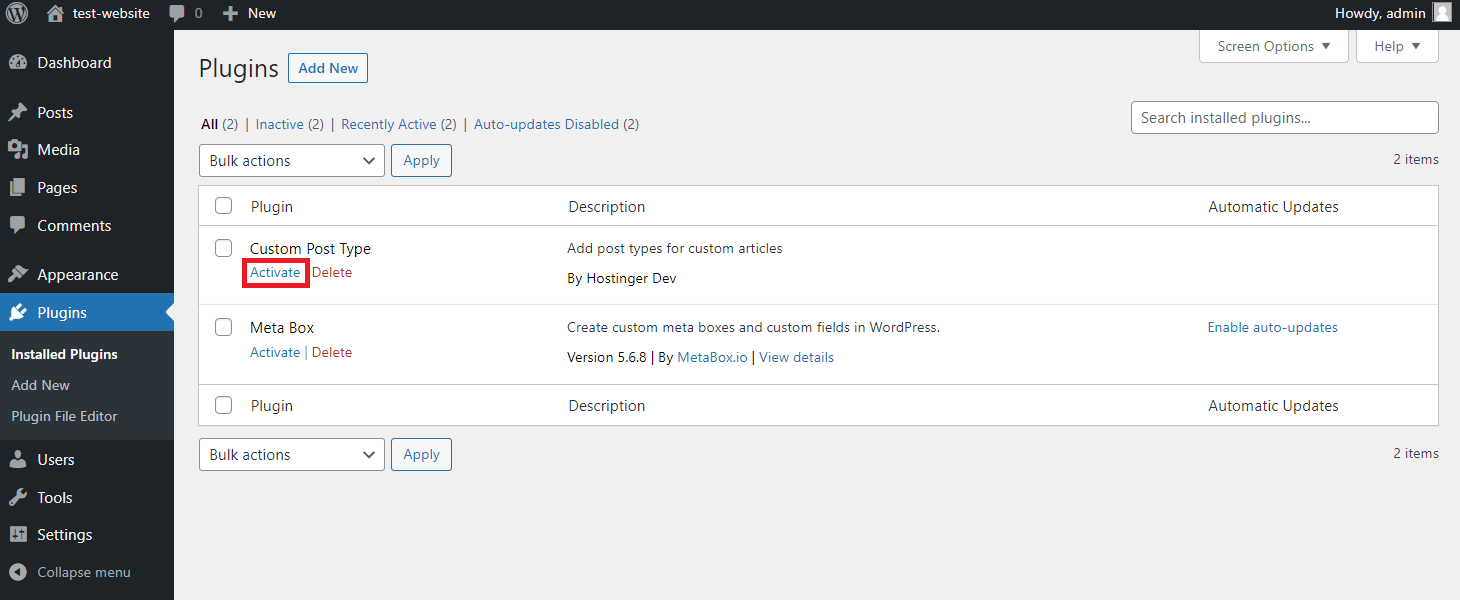
- Log in to your WordPress dashboard. Go to Plugins → Installed Plugins.
- Find the Custom Post Type plugin and click Activate.
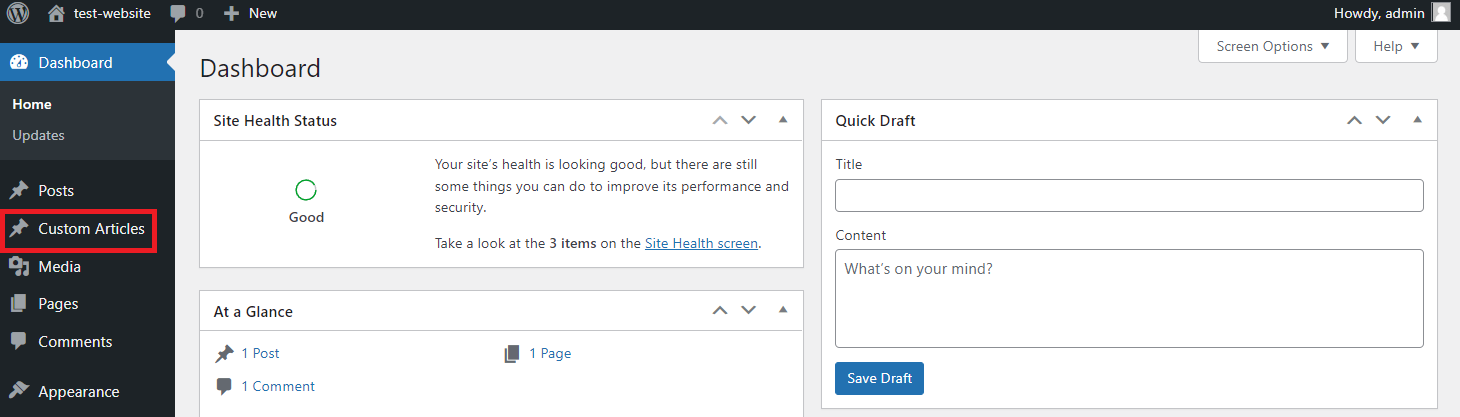
- Refresh the page. You should see the Custom Article post type on your WordPress admin menu.
You may create an unlimited number of custom post types. However, too many custom post types can slow the REST API discovery and complicate the admin bar.
How to Customize New Post Type
You may need to customize your new post type to differentiate it from other content. Before customizing, you should create template files in your active theme’s directory.
You need two template files for customization – single-{post_type}.php and archive-{post_type}.php. These are templates for an individual post entry and the custom type’s archive page, respectively.
WordPress will use the default single.php and archive.php if you don’t create these templates. Since all posts and archives refer to those two files, customizing them will change the entire site.
The best way to create template files is to duplicate your theme’s existing single.php and archive.php files. This method keeps your site’s theme structure and sets up the required template tag, simplifying the customization process.
Here are the steps to do so:
- Access your FTP client or hosting account’s file manager.
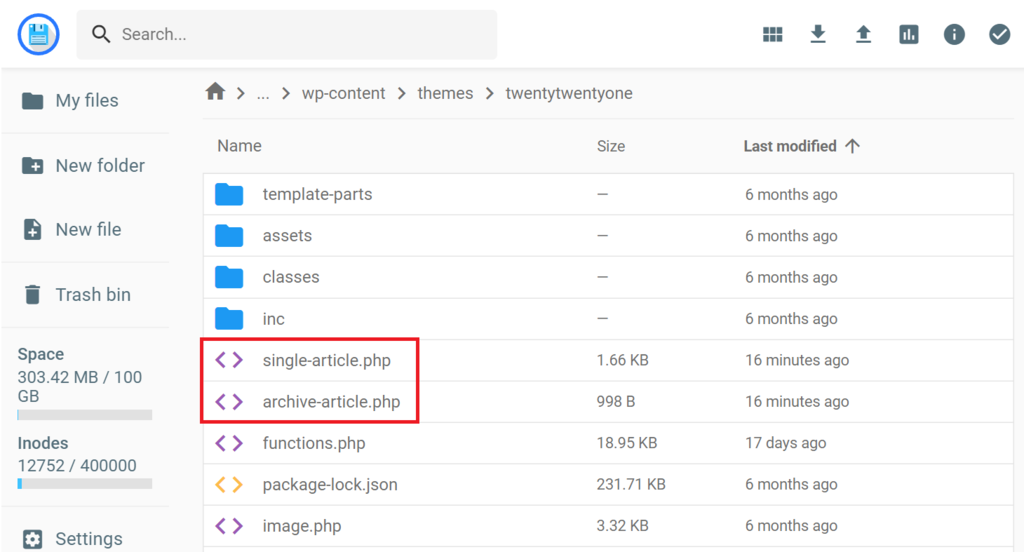
- Locate your currently active theme folder. In our case, it is in /public_html/wp-content/themes/twentytwentyone.
- Copy the single.php and archive.php files and paste them outside that folder.

- Rename them based on parameter 1 of your register_post_type(). Since our parameter 1 is article, the names are single-article.php and archive-article.php.
- Move the files back to the twentytwentyone folder.
- Repeat the second and third steps for other custom post type templates.
Important! Themes with the same structure for posts and pages won’t have single.php and archive.php files. Such themes only use the singular.php file.
To customize the template files, download and edit them using a text editor. If you use Hostinger’s web hosting service, edit them directly in the file manager.
Once you save the files, the changes should apply only to the custom type’s archive page and individual entry.
Adding a Meta Box to a Custom Post Type
The meta box is an editing screen window allowing users to add post metadata. It is useful for adding or modifying posts’ information, such as author details, publishing controls, and custom slug.
While WordPress comes with default meta boxes, you may need a specific one for your custom post type. For example, the Movies custom post type may require the Genre meta box.
Using a meta box helps you add metadata to your content more quickly. Instead of entering the value individually, you can click data from the meta box to input it.
To create a custom meta box, edit your theme’s functions.php or site-specific plugin’s code. In this tutorial, we will add the new meta box’s custom code to the plugin’s file.
Since the code varies depending on the meta box content and placement, refer to WordPress codex for more information. For this tutorial, we will explain how to build a custom Author meta box:
- Locate the custom-post-type.php file in your hosting file manager or FTP client.
- Double-click the file to open the editor screen. Alternatively, download and open the file in a text or code editor.
- Create an empty custom meta box by entering the following code:
// Add meta box
add_action("add_meta_boxes", "add_author_meta_box");

function add_author_meta_box()
{
    add_meta_box(
    "author_meta_box", // Meta box ID
    "Author Details", // Meta box title
    "author_meta_box_callback", // Meta box callback function
    "article", // The custom post type parameter 1
    "side", // Meta box location in the edit screen
    "high" // Meta box priority
);
}
function author_meta_box_callback()
{
	wp_nonce_field(‘author-nonce’, ‘meta-box-nonce’);
global $post;
placeholder
}- Add the meta box’s content by replacing the placeholder value. For this tutorial, we will add the author name and ID fields using the following code.
// Add meta box content
 ?>
	<th><label for="athor_name_field">Author Name</label><th>
	<td><input
type="text"
id="author_name"
class="regular-text"
name=“Author_Name”
value=“”
/>
    <td>
    <th><label for="author_id_field">Author ID</label><th>
	<td><input
type="text"
id="author_id"
class="regular-text"
name=“Author_ID”
Value=””
/>
    <td>
<?php - At the bottom of the code, add the following snippet to save the entered values:
// Save meta box data
add_action ( 'save_post', 'author_save_postdata');
function author_save_postdata( $post_id ) {

// If this is an autosave, our form has not been submitted
if ( defined( 'DOING_AUTOSAVE' ) && DOING_AUTOSAVE )
return $post_id;

	// Retrieve post id
	If (‘article’ !== get_post_type() ) {
		return $post_id
}
 	// Check the user's permissions
   	if ( 'page' == $_POST['post_type'] ) {

if ( ! current_user_can( 'edit_page', $post_id ) )
return $post_id;

} else {

if ( ! current_user_can( 'edit_post', $post_id ) )
return $post_id;
}

/* OK, it is safe to save the data now. */

// Sanitize user input.

$mydata = sanitize_text_field( $_POST['Author_Name'] );

$mydata = sanitize_text_field( $_POST['Author_ID'] );


// Update the meta field in the database.

update_post_meta( $post_id, 'Author_Name', $_POST['Author_Name'] );

update_post_meta( $post_id, 'Author_ID', $_POST['Author_ID'] );
}- In the file manager’s code editor, click the disk icon on the top right to save the change. If you edit the code locally, save and re-upload the updated file.
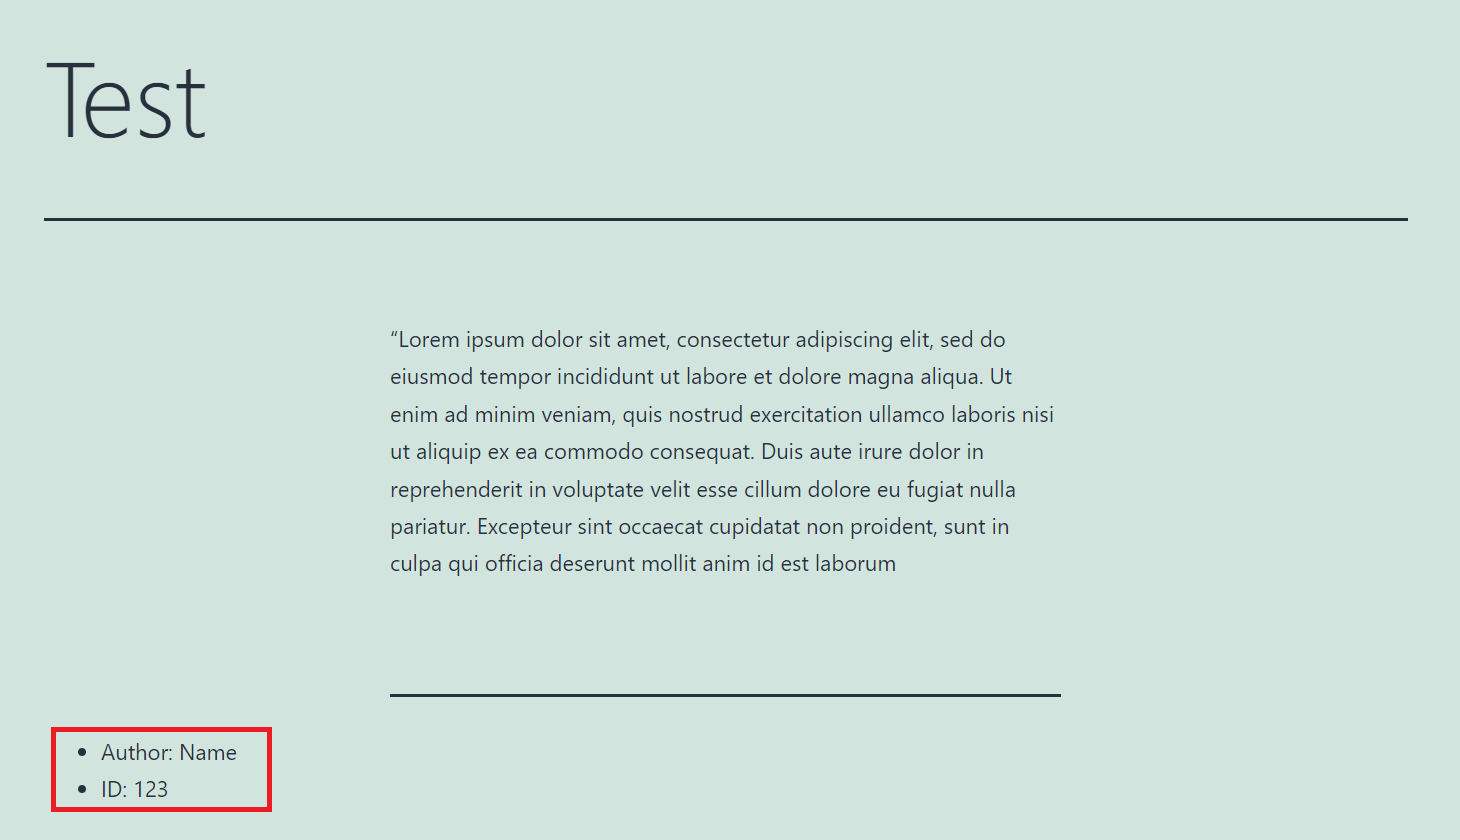
The new meta box should appear if you open your custom post type’s edit screen.

To ensure the meta box works properly, enter texts into the designated field and update the post. The entered value should appear in the custom fields.
If you need to become more familiar with PHP, use the Meta Box plugin to automatically generate the code. Since it only generates the meta boxes’ content code, you must write the add_metabox () function yourself.
After you download and install the plugin, follow these steps:
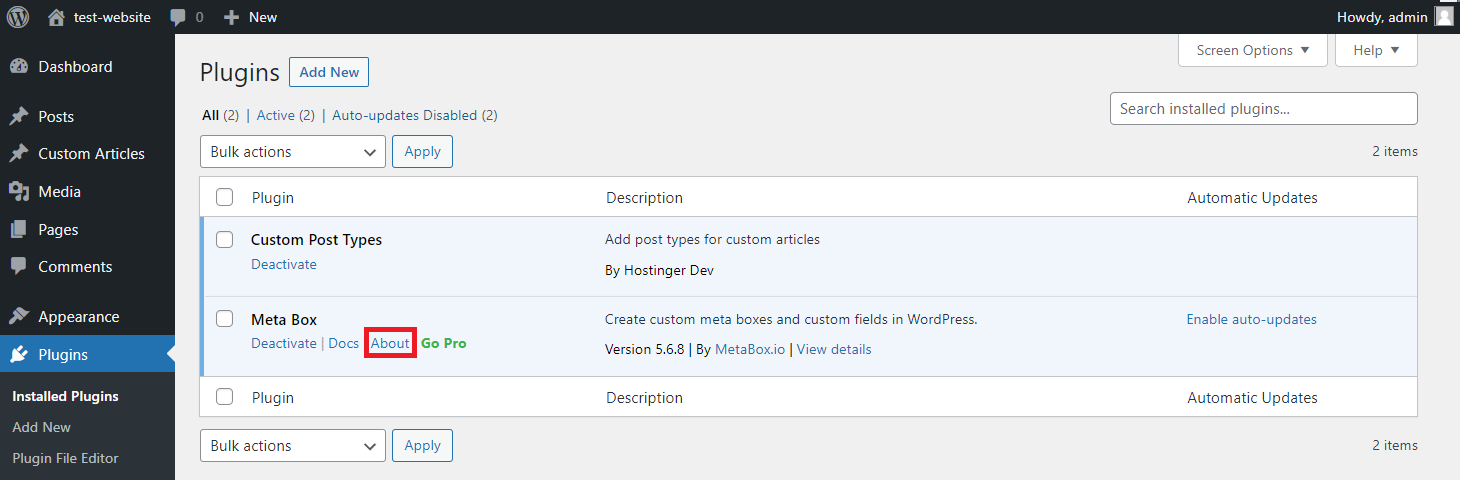
- On the WordPress sidebar, go to Plugins → Installed Plugins.
- Find the Meta Box plugin and click About → Go to Online Generator.
- Create a custom meta box.
- Click Generate Code → Copy.
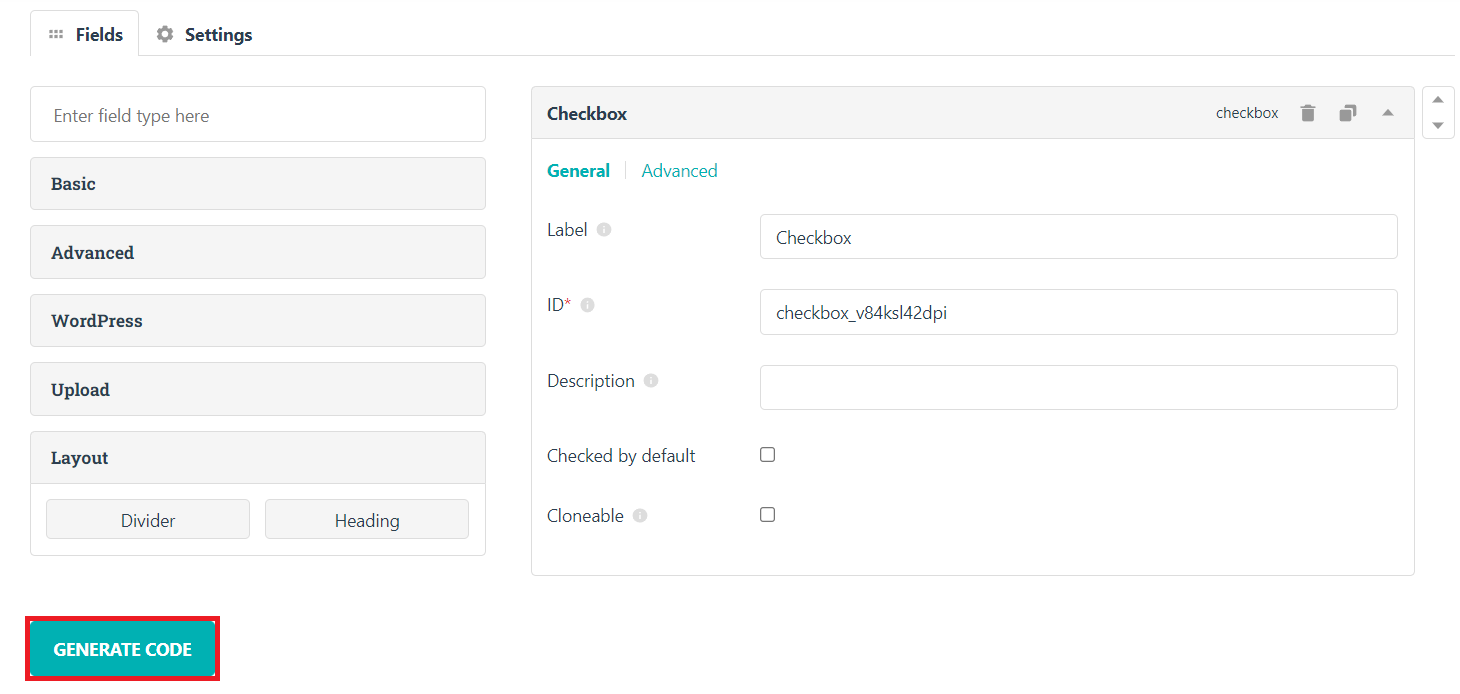
- Paste the code to your functions.php or custom-post-type.php file.
Pro Tip
Use a plugin to add PHP code in WordPress posts or pages directly via the admin dashboard. You don’t have to create template files or use a separate text editor, improving workflow and minimizing errors.
How to Display Custom Post Types on the Front Page
WordPress custom post types are not displayed on the front page by default. To enable them, write a new function that calls the set method of WordPress’ WP_Query object.
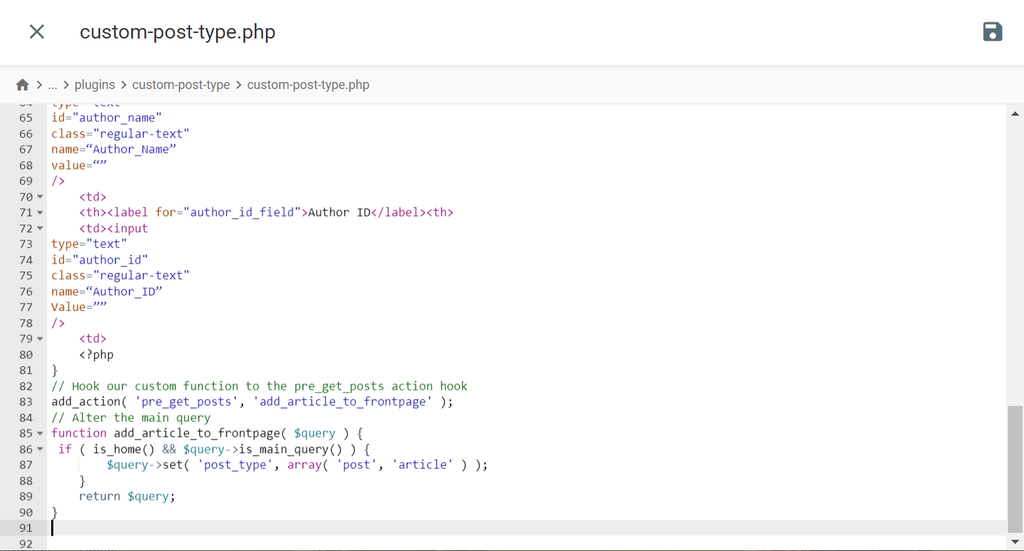
Here’s an example:
// Pin our custom function to the pre_get_posts action hook
add_action( 'pre_get_posts', 'add_article_to_frontpage' );
// Alter the main query
function add_article_to_frontpage( $query ) {
 if ( is_home() && $query->is_main_query() ) {
        $query->set( 'post_type', array( 'post', 'article' ) );
    }
    return $query;
}
In this function, $query->set() takes two parameters – the modified property and an array defining its value. In our case, the modified property is post_type, while the arrays’ values are post and article.
The array includes ‘post’ to show the default post type on the front of your website. Removing it will display only the custom posts.
The second parameter is ‘article’, which displays regular and all custom article posts on the front page.
To enable the code, paste it to your theme’s functions.php or custom plugin’s file. We will show you how to paste it into the plugin:
- Access your WordPress site files and go to your custom plugin’s folder. Ours is in the /public_html/wp-content/plugins/custom-post-type.
- Open the .php file. Then, copy and paste the code at the bottom.
- Click the disk icon on the top right to save your changes.
The default and custom post types should be available on the front of your WordPress website.
How to Add and Display WordPress Custom Field
After creating a new custom post type, you may need to add a custom field to give your content more details.
For this task, you can use WordPress’s built-in custom field or a plugin. Since every method has its pros and cons, we’ll explain both to help you decide which suits you better.
Using WordPress Default Custom Field
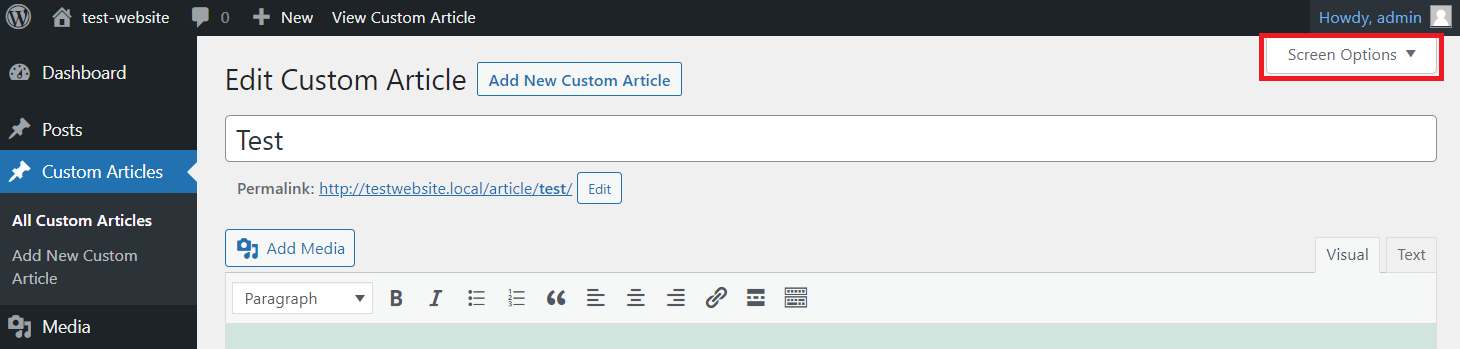
WordPress provides us with a built-in tool to add a custom field. Since it is hidden by default, activate it by going to the Post Editor → Screen Option.
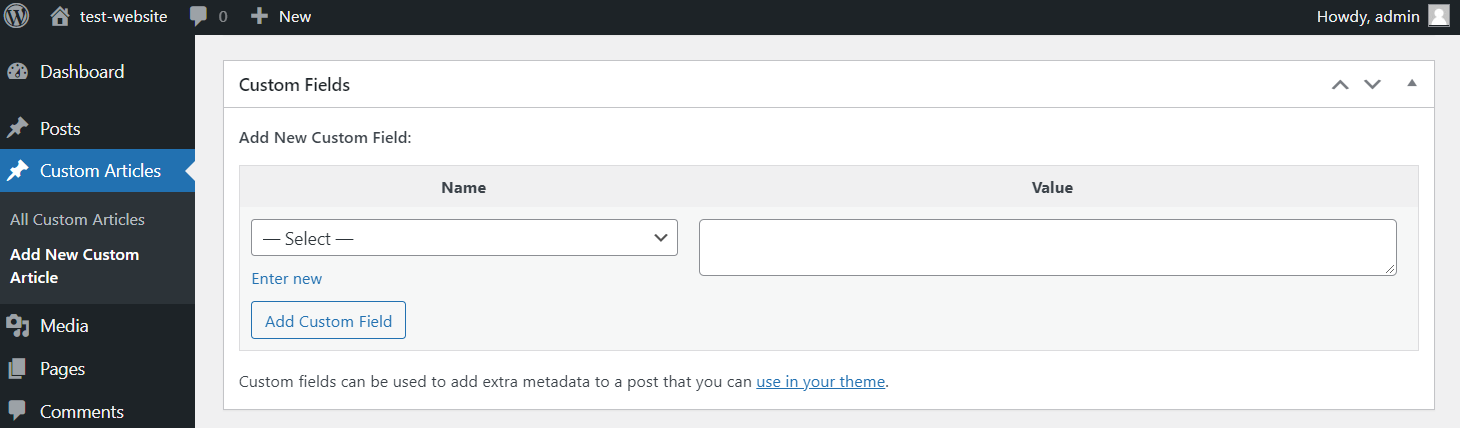
Once activated, you will see the custom field section at the bottom of the WordPress edit screen. Enter the name and value, and click the Add Custom Field button.
However, custom fields won’t display on your page’s front end by default. To enable them, insert the_meta() or echo get_post_meta() function into your active theme’s file.
Use the_meta() to display all custom fields on a post. To display a specific custom field, use the echo get_post_meta( $post->ID, ‘key’, TRUE). Replace the key value with your custom field name.
Since there are two post types, you can edit single.php or single-article.php. It depends on where you want to display the custom field.
Suppose you want to add an Author custom field for the custom article-type posts. In that case, enter one of the function codes in the single-article.php file. Here are the steps:
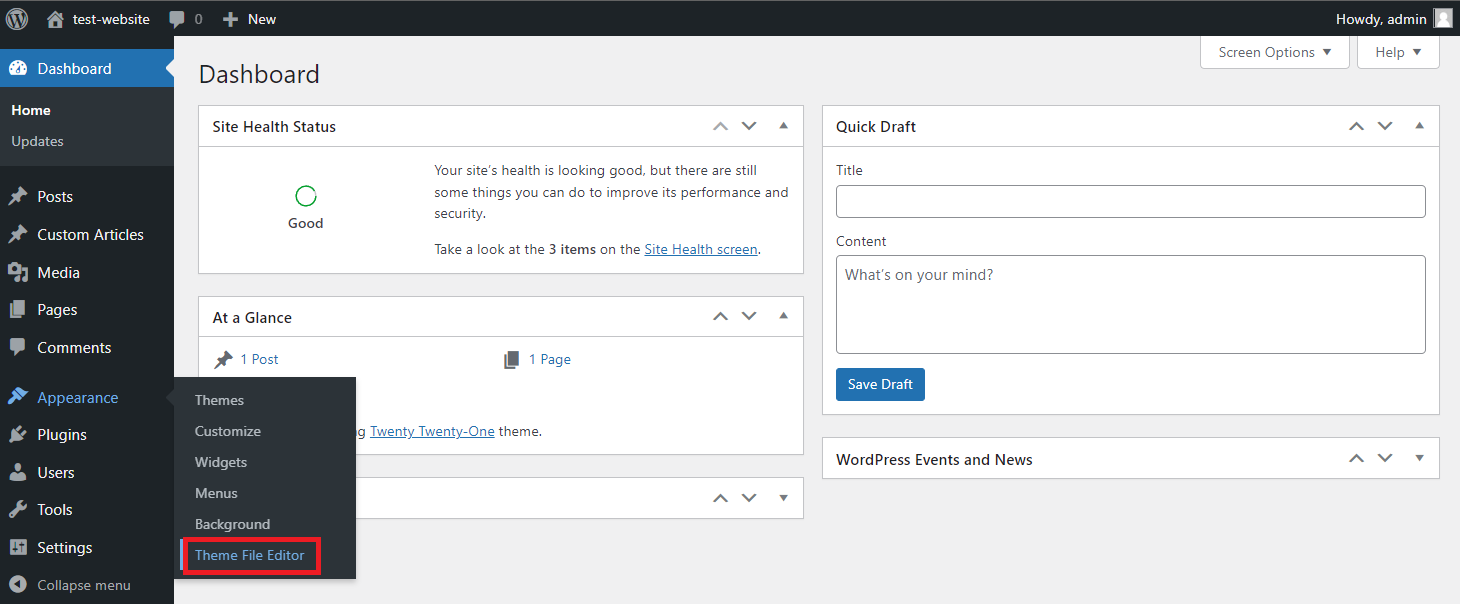
- From your WordPress Dashboard, head to Appearance → Theme Editor.
- From the Theme FIles menu on the right side of your screen, select singe-article.php.
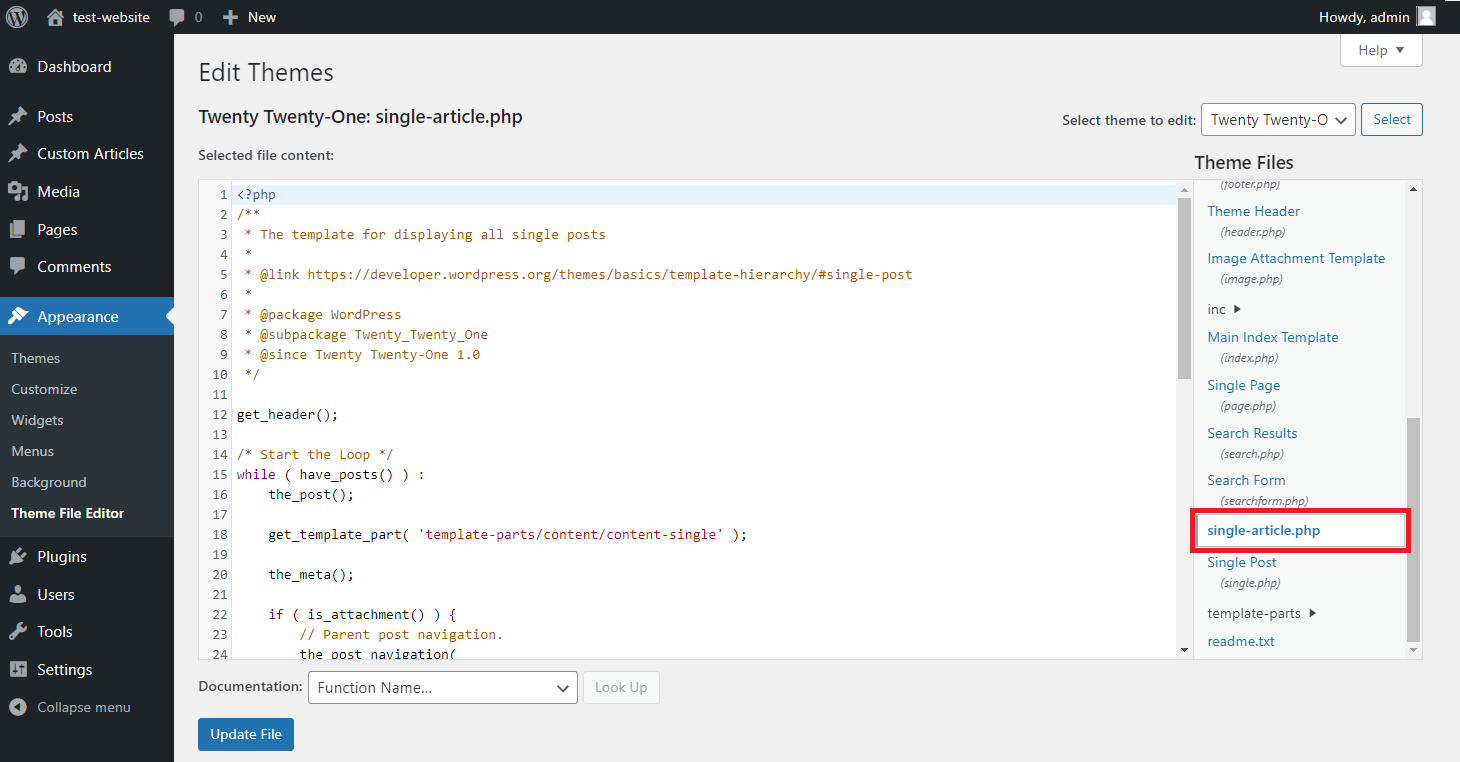
- Locate the WordPress’ The Loop and find this line:
get_template_part( 'template-parts/post/content', get_post_format() );
- Paste one of the function codes under the line.
- Click Update File.
Your WordPress website will now show the Author custom field below the post.
Limiting Custom Fields to a Specific Post Type via a Plugin
Unfortunately, you can’t use WordPress’s built-in tool to add a custom field for a specific post type. This default tool automatically adds a new custom field for all post types.
Instead, use the Advanced Custom Fields plugin. It limits certain custom fields, making them selectable only on a chosen post type.
Important! After this plugin is enabled, you will no longer see the default WordPress custom field on your post editor.
After you activate the plugin, follow these steps to create and enable a custom field for a specific post type:
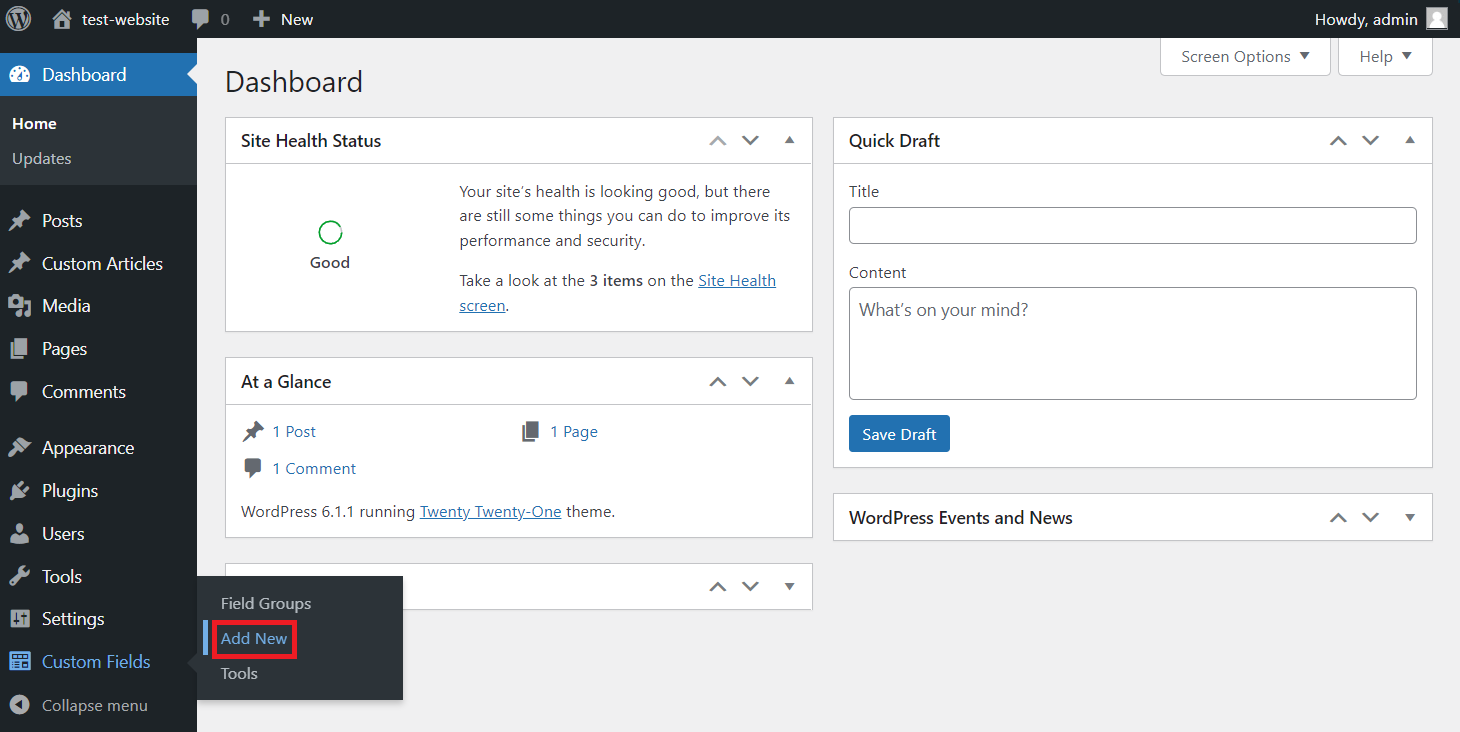
- Go to your WordPress sidebar, click Custom Fields → Add New.
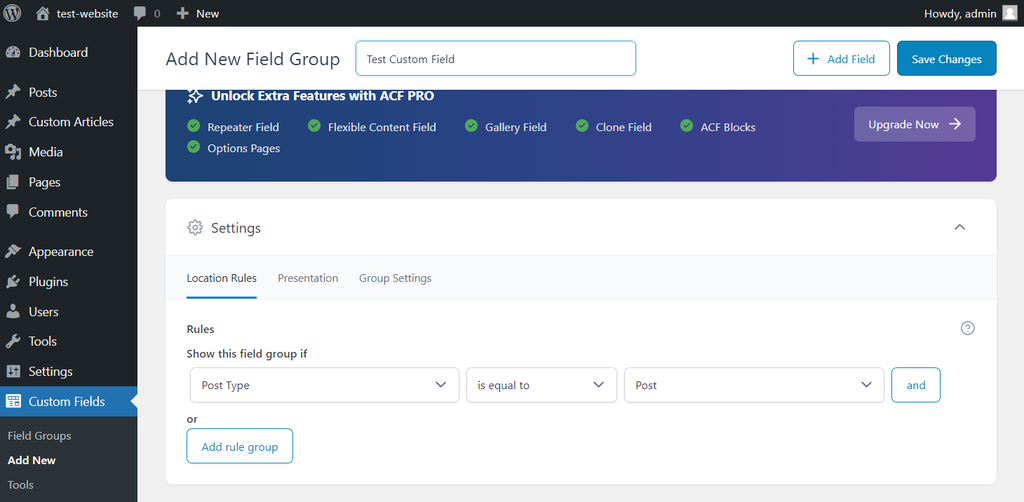
- Enter the New Field Group name.
- Fill in the following details for your new custom field:
- Field Label – the name of your custom field that will be displayed on the edit page.
- Field Name – the ID of your custom field that will be used to display on your theme.
- Field Type – choose between text, checkbox, URL, etc., based on your needs.
- Once you’re done, hit Close Field.
- Scroll down to the Settings section and select the Location Rules tab.
- Fill the Show this field if columns to define the custom field’s visibility condition. For example, to make it selectable on a Custom Article post type, choose Post Type → is equal to → Custom Article.
- Click the Save Changes button.
Since you create this field via a plugin, you must use its functions to display the custom field. The steps to insert the function are similar to adding a default custom field, but enter the_post( ‘key’ ); function instead.

Conclusion
Custom post type in WordPress allows users to organize their website content into different categories. However, the default post types may not be enough for a large website with diverse content.
In that case, you can create a custom post type in WordPress by building site-specific plugins. Here’s the recap of the steps:
- Write the plugin code in a text editor and save it as .php.
- Create a custom post type folder in your site’s plugins directory.
- Paste the file into the new folder.
- Go to your WordPress admin dashboard → Plugins → Installed Plugins
- Find the custom post type plugin and click Activate.
Your custom post type also has plenty of customization options. For instance, you can customize the editing screen, add meta boxes, edit the post type’s visibility, and enable WordPress’s built-in features.
This vast customizability lets you create a post type that specifically caters to your content. It helps you organize your WordPress website faster and more efficiently.
Learn Other Expert WordPress Techniques
How to Add Custom CSS to WordPress
All About WordPress Salts
How to Create WordPress Custom Widgets
WordPress Hooks Guide
How to Create a Custom Post Template in WordPress
How to Use XAMPP to Set Up a Local WordPress Site
How to Add PHP Code to WordPress
How to Duplicate Pages in WordPress
How to Display Custom Field Metadata Using WordPress get_post_meta Function
WordPress Custom Post Type FAQ
This section will answer three of the most common questions regarding WordPress’s custom post type. However, if you have further questions, leave them in the comment action below.
What’s the Difference Between a Post and a Custom Post Type?
In WordPress, a post may refer to a single piece of content. It may also refer to a post type, similar to pages, attachments, revisions, and others.
Meanwhile, a custom post type is a content category that users make themselves.
What Can You Change in the WordPress Custom Post Type?
You can change its location in the admin area, searchability, and additional features like excerpts, post formats, and trackbacks.
Moreover, WordPress also allows you to modify the edit post screen and add custom fields to include more information in your content. For instance, you can display the post’s author or reading time.
Is It Possible to Get a Custom Post Type ID?
Yes. To see a WordPress post ID, hover over the content’s title and see the UR at the bottom left corner. It is the number between the “post=” and “&” parameters.You can also get a custom post type unique ID by its title using the get_page_by_title () command. Alternatively, retrieve it using slug the get_page_by_path () command.
All of the tutorial content on this website is subject to Hostinger's rigorous editorial standards and values.

Aris is a Content Writer specializing in Linux and WordPress development. He has a passion for networking, front-end web development, and server administration. By combining his IT and writing experience, Aris creates content that helps people easily understand complex technical topics to start their online journey. Follow him on LinkedIn.


