How to install Minecraft mods on a dedicated server, Windows, and macOS
Apr 23, 2025
/
Ariffud M.
/
5 min Read

If you’re tired of playing the vanilla version of Minecraft and want to try something new, consider installing custom mods. They can transform your gameplay, such as by automating farming with Industrial Craft, exploring new dimensions with Twilight Forest, or improving building efficiency with WorldEdit.
Mods bring endless possibilities to your Minecraft world, turning it into something unique – sometimes strange, but always entertaining. In this guide, we’ll show you how to install mods on a dedicated server, Windows, and macOS.
Adding mods on your local machine (Windows or macOS) is perfect for solo or small-scale gameplay, while using a dedicated server offers more flexibility, customization, and the opportunity to build a thriving Minecraft community.
Prerequisites for installing Minecraft mods
Before installing Minecraft mods, install a mod loader like Fabric or Forge. Mod loaders are important for loading, running, and managing the mods you install.
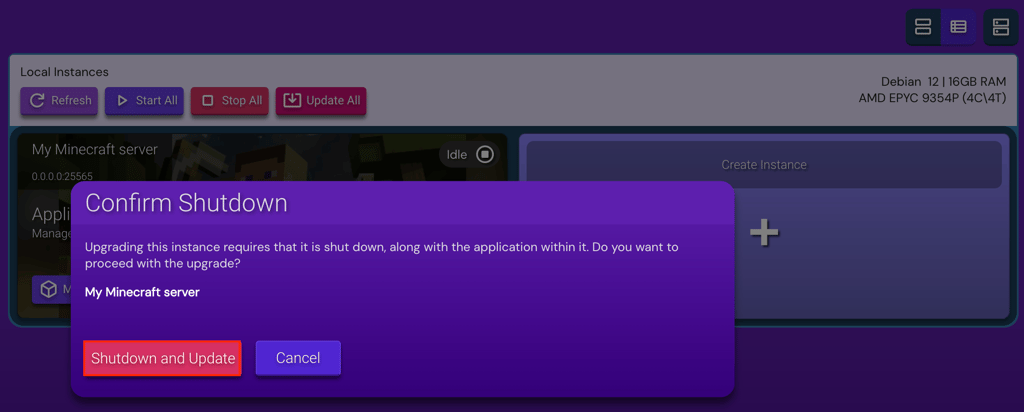
Next, update Minecraft to the latest version available to ensure compatibility with your chosen mods. If you’ve set up a Minecraft server on Hostinger Game Panel, you can update it by accessing your Game Panel profile and going to Update Instance → Shutdown and Update.
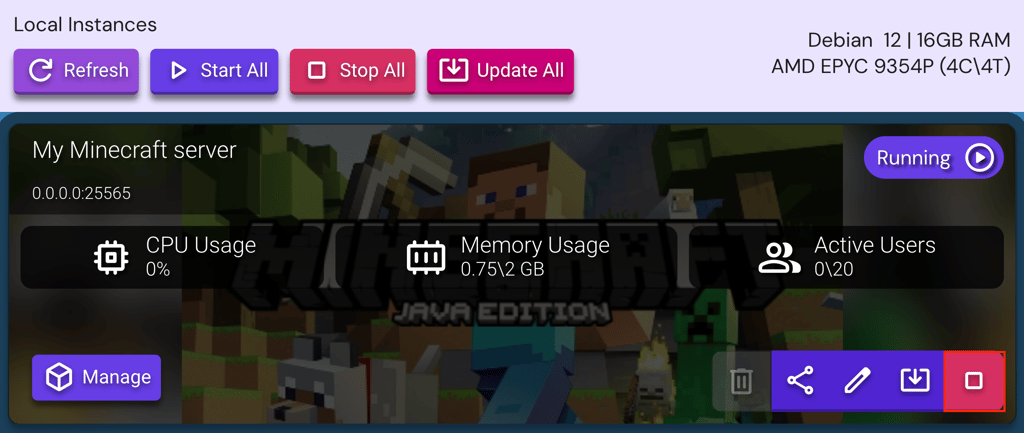
You must also power off your Minecraft server to avoid issues during the mod installation process. In Game Panel, you can do this by clicking the Stop Instance button.
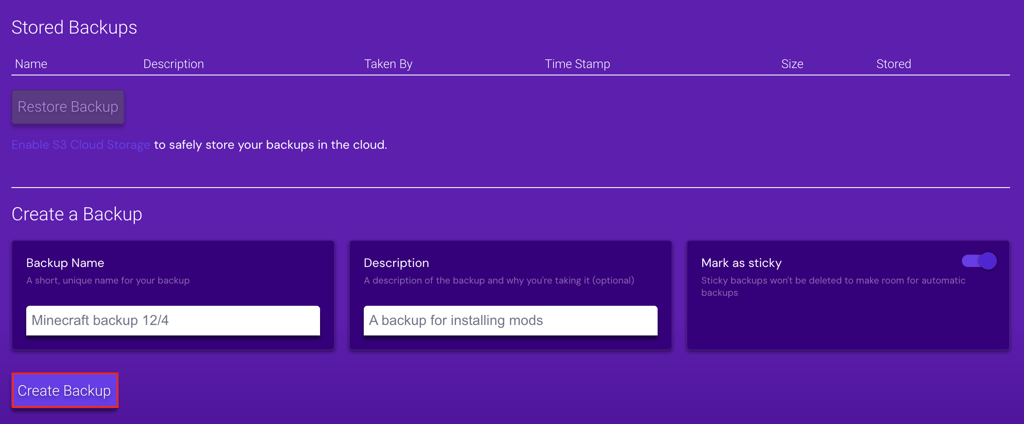
While it’s not mandatory, we suggest backing up your game files to prevent losing your progress. Go to Manage → Backups in Game Panel. Fill in the necessary details, and mark the backup as sticky so it won’t be automatically deleted. After that, hit Create Backup.
Suggested reading
Read our in-depth comparison between Fabric and Forge to decide which mod loader fits your gameplay style best. In short, Forge is ideal for complex modpacks and larger mod libraries, while Fabric works better for lightweight mods and faster updates.

How to install Minecraft mods on a dedicated game server
If you use Hostinger’s Minecraft hosting service, adding individual mods and modpacks to your server is easy with Game Panel.
Important!
Make sure you and your players have the same mods or modpack version installed on your Minecraft client as on the server. If there’s a mismatch, such as missing mods or a different modpack version, players won’t be able to join your server or experience the game the same way.
Installing mods on Minecraft using Game Panel
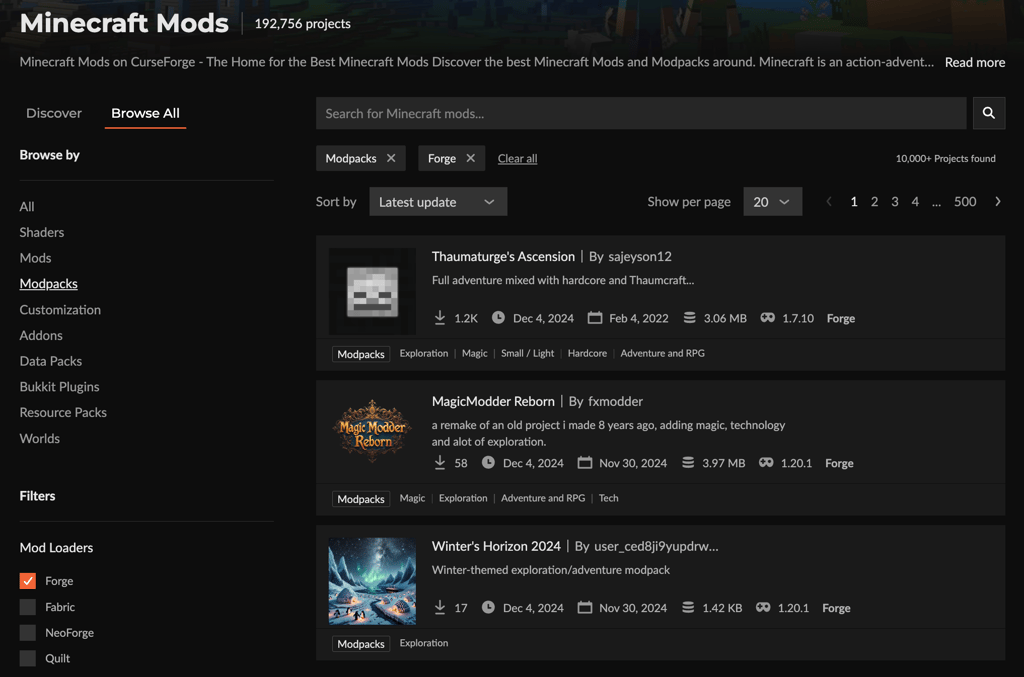
First, download your mods from trusted sources like CurseForge, 9Minecraft, and Modrinth. Use their filter features to refine results based on the mod loader, Minecraft version, environment, and categories.

Remember to check the mod’s installation requirements, as some may need an additional API to be installed beforehand. If you need help with choosing a mod, check out our recommended Minecraft mods.
Once you’ve downloaded the desired mod, log in to Game Panel, then navigate to Manage → File Manager. Right-click anywhere in the directory listing and select Create Directory.
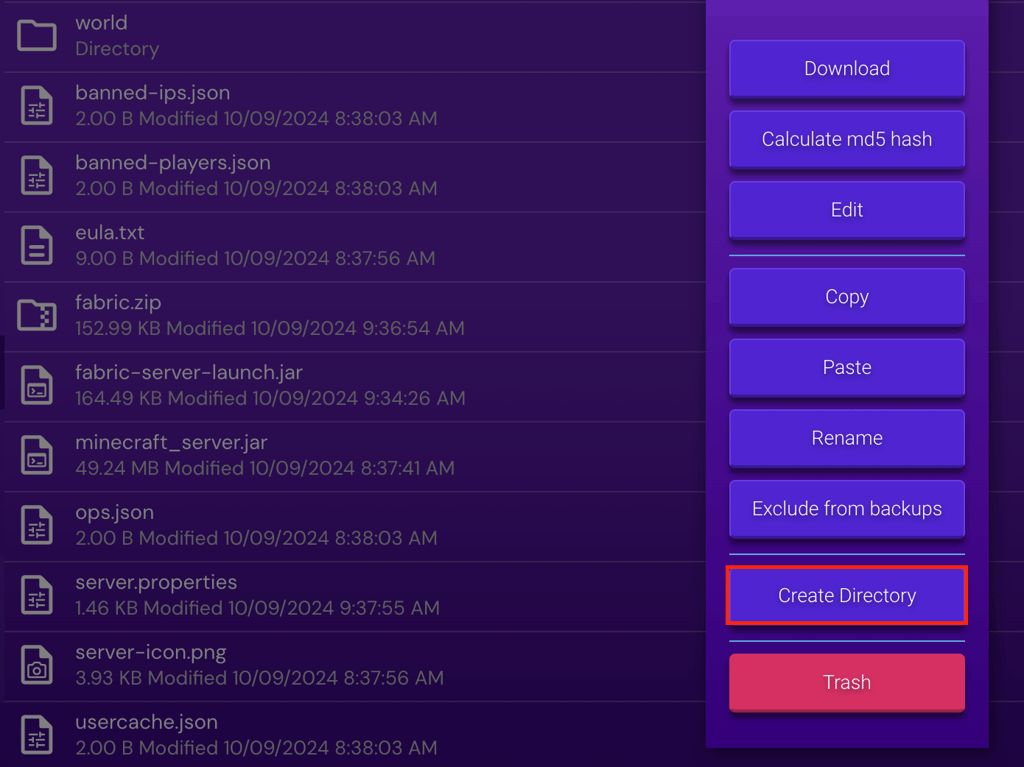
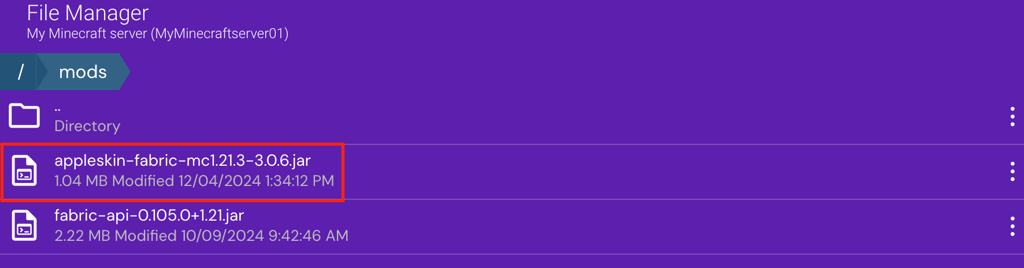
Name the new directory mods, and upload the file with a JAR extension into this folder by dragging and dropping it.
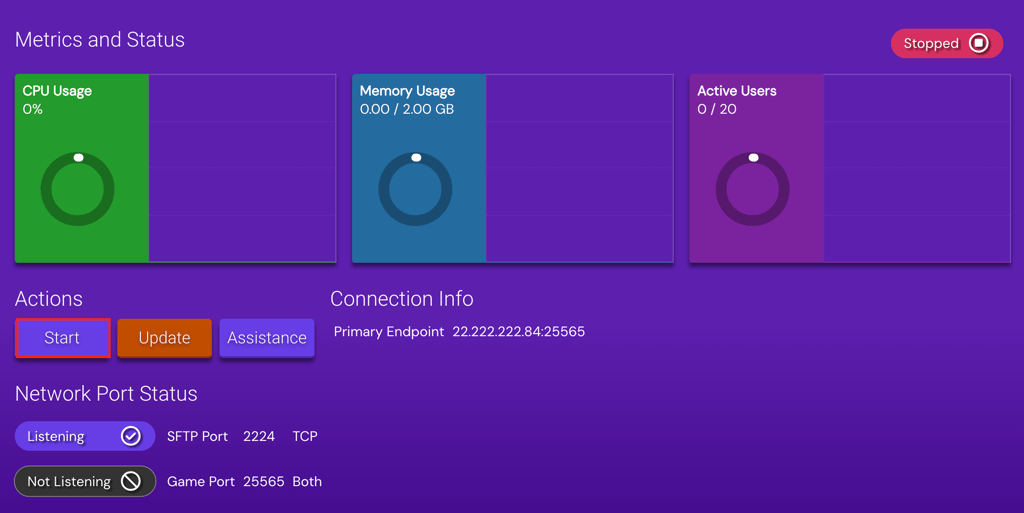
Once the mod is uploaded, go to Status → Start to relaunch your Minecraft server.
That’s it! Now, open your Minecraft client, connect to your server, and check if the mod is running correctly.
Pro tip
Install mods one by one and test each afterward instead of installing several mods at once. That way, you can verify they all work as intended and quickly pinpoint if one causes an issue.
Installing modpacks on Minecraft
Modpacks are pre-configured collections of mods that work together to enhance your Minecraft gameplay quickly. They save you the time and effort of manually installing each mod.
To install a modpack on Hostinger Game Panel, start by selecting a modpack from websites like CurseForge, Feed The Beast, and Technic. Make sure the modpack is compatible with your current mod loader, such as Forge.
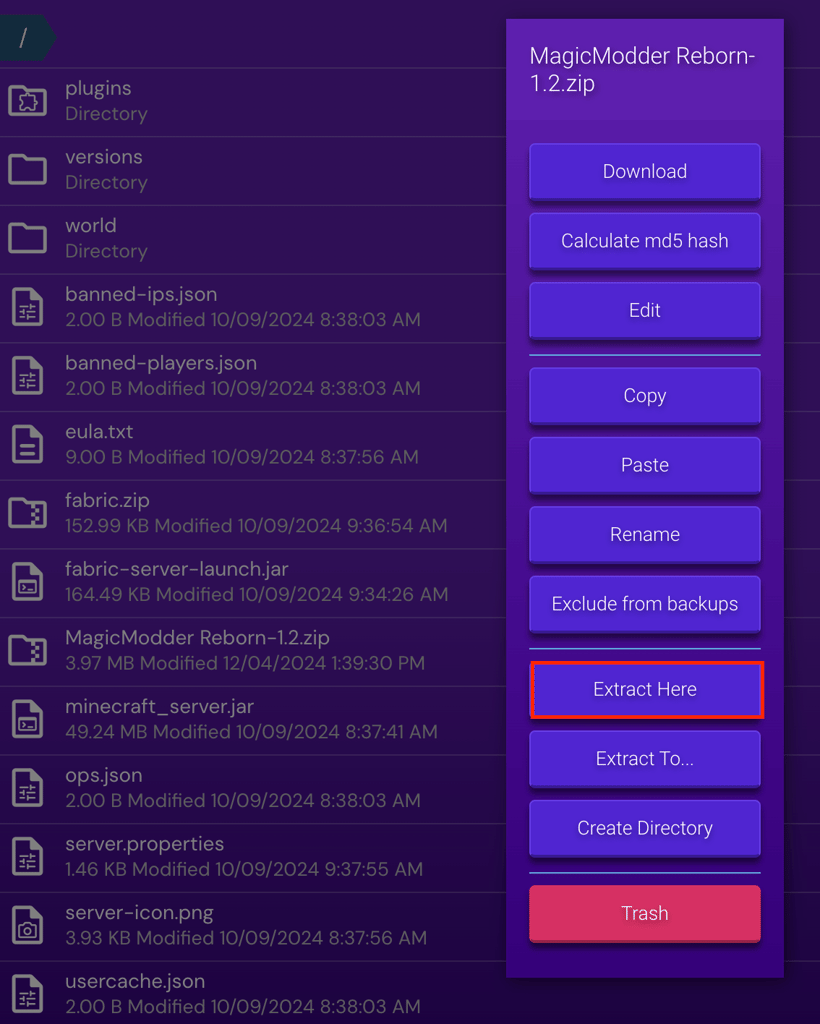
After that, download the modpack ZIP file to your local computer. Then, access your Game Panel → Manage → File Manager. Unlike individual mods, you’ll upload the modpack to your Minecraft server’s root directory instead of the mods folder.
Once the file is uploaded, right-click it and select Extract Here. After extracting, start your Minecraft server as usual to load the modpack.
When to choose individual mods vs modpacks
Choose individual mods if you want:
- Specific features or mechanics that are not available in a modpack.
- Customizing your gameplay with a mix of different mods.
- More control over your mod setup.
On the other hand, modpacks are a better option when you’re looking for:
- Pre-configured set of mods that work well together.
- Quick and easy setup without compatibility issues.
- Ready-made experience that offers a variety of mods in one package, such as adventure or tech-focused packs.
How to install Minecraft mods on Windows
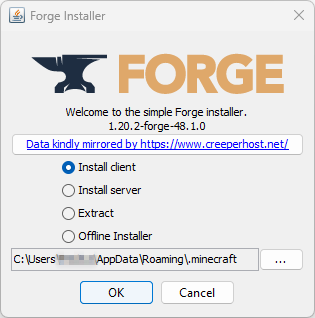
For players installing Minecraft on Windows, adding mods is simple. Like Minecraft server mod installation, you’ll first need a mod loader like Forge. To start, go to the official Forge website and download the version that matches your Minecraft version.
Be sure to select the Installer option. Once the download is complete, run the installer, choose the Install client option, and hit OK.
After installing Minecraft Forge, visit trusted websites like we’ve mentioned to find the desired mods. Download the mod file to your computer. If it’s a ZIP file, extract it; if it’s a JAR file, leave it as is.
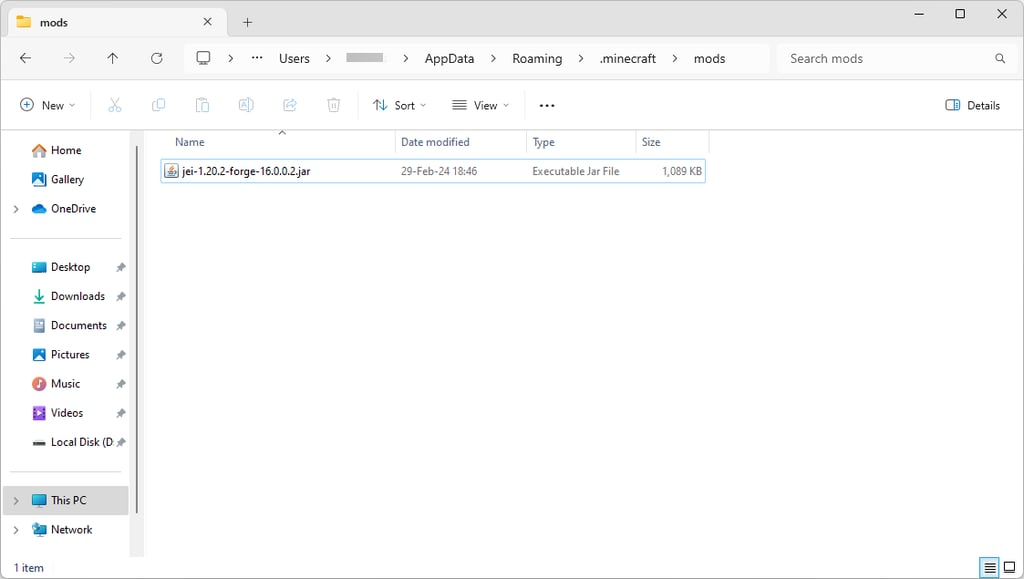
Next, open the Minecraft directory by navigating to your user folder:
C:\Users\YourName\AppData\Roaming\.minecraft
Inside the .minecraft folder, you should see a mods folder. If it’s not there, create a new folder and name it accordingly. Then, place your downloaded mod file in this folder.
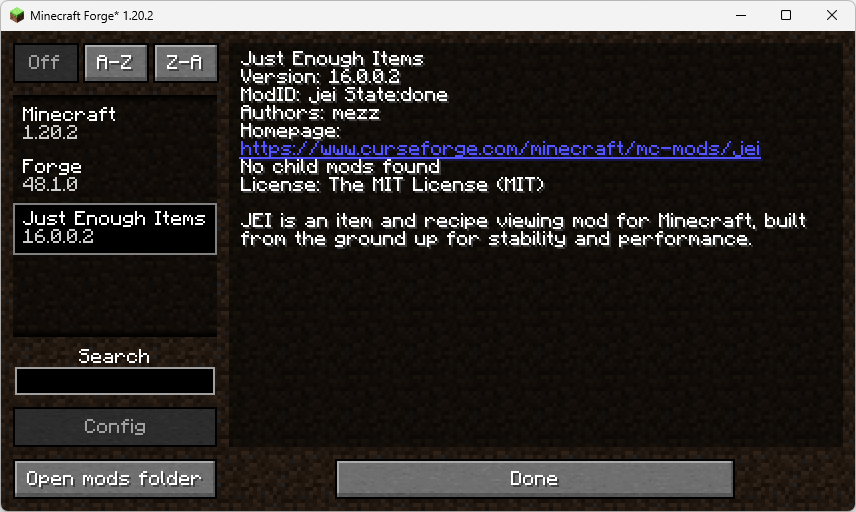
After that, open the Minecraft Launcher, select the Forge profile from the dropdown menu at the bottom left corner, and hit Play. When you’re in Minecraft’s main menu, click the Mods button. You should see all the mods you’ve installed displayed on the left.
Expert tip
If you’re looking for a specific mod and none of the websites mentioned above have it, be very careful. Mods from untrustworthy sites may contain hidden malware or viruses.

How to install Minecraft mods on macOS
For Mac users, the steps for adding Minecraft mods are nearly identical to those on Windows. You start by setting up a mod loader and downloading the mod files.
The difference is that the Minecraft client directory on macOS is located at:
~/Library/Application Support/minecraft
You can easily access it by pressing Command + Shift + G in Finder, then typing ~/Library/Application Support/Minecraft.
After that, place your mod files into the mods folder or create the folder beforehand if it doesn’t exist. Next, launch Minecraft, select your Forge profile, and see the downloaded mods in the game as usual.
Suggested reading
For server owners, consider adding plugins to your Minecraft server, as plugins can enhance server management, improve gameplay with custom features, and provide additional security.
Conclusion
If you’ve been playing Minecraft the same way, you might be tired of the standard vanilla experience. To shake things up, try out custom Minecraft mods. They can introduce a new world of features, making your gameplay fresh, exciting, and more dynamic.
In this guide, we’ve covered the steps for installing Minecraft mods and modpacks on a dedicated server, as well as setting them up on Windows and macOS. Compared to playing locally, using a server offers advantages like greater flexibility, more customization options, and the ability to build a community, making it ideal for multiplayer gameplay.
We hope this tutorial has helped enhance your Minecraft gameplay experience. If you have any questions or insights, feel free to leave them in the comments section below. Happy modding!
How to install Minecraft mods FAQ
What are Minecraft mods?
Minecraft mods are custom modifications that alter or improve gameplay by adding new features, mechanics, or content. Popular mods include Optifine (for improved graphics), JourneyMap (for mapping and navigation), and Thermal Expansion (for advanced tech and automation).
How do I find mods for Minecraft?
You can download mods from trusted platforms like CurseForge, Modrinth, and Planet Minecraft. These sites offer a wide range of mods, with filters to sort by version, mod loader, and categories to match your preferences.
Is there a specific mod loader I need?
Yes, mods require a Minecraft mod loader like Forge or Fabric. These tools handle mod installation and management, providing compatibility. Choose one based on the mod’s requirements; many mods support Forge, while others require Fabric.
All of the tutorial content on this website is subject to Hostinger's rigorous editorial standards and values.

Ariffud is a Technical Content Writer with an educational background in Informatics. He has extensive expertise in Linux and VPS, authoring over 200 articles on server management and web development. Follow him on LinkedIn.