Change domain nameservers: point to a different provider (godaddy, namecheap, and others)
May 07, 2026
/
Tomas A. & Ignas R.
/
5 min Read

Nameservers define who manages your domain’s DNS zone and are responsible for mapping domain names to IP addresses. If you switch hosting providers, your website will only work once you point the domain.
This tutorial will explain how to point a domain to a different web host by changing the domain’s nameservers. This way, you can move your site to another hosting provider while keeping the old domain name.

TL;DR
- To change domain nameservers, copy the new nameserver values from your hosting provider or DNS provider.
- Next, open your domain registrar’s DNS or domain management area, choose the nameserver settings, remove the old values, enter the new nameservers, and save the changes.
- Finally, wait up to 24 hours for DNS propagation and check the domain’s NS records to confirm the update.
How to Change Nameservers Video Tutorial
Want to watch a video instead? This video tutorial will teach you how to change nameservers at Hostinger and point a domain elsewhere.

How to Change Domain's Nameservers
1. Log in to your domain registrar’s website
2. Look for the DNS management section
3. Locate the option to change your domain’s nameservers
4. Enter the new nameserver information provided by your web host or DNS provider
5. Save the changes and allow time for the DNS changes to propagate
Keep in mind that the exact process for changing nameservers may vary depending on your domain registrar. We’ll guide you through the procedures at different providers.
Why Change Nameservers for a Domain
One of the main reasons for changing nameservers is the switch to a different hosting provider.
For example, if you’ve just moved your site to another hosting provider, the domain name might still be tied to the old hosting company and will not direct visitors to your website.
Domain Name Checker
Instantly check domain name availability.
In this case, the domain name will need to be connected to the new web host. To do so, you have several options:
- Change nameservers. The recommended method is to change the domain’s nameservers. This method transfers the domain’s DNS control to the new hosting provider without changing the registrar.
- Transfer domain. The second option is to transfer the domain from the current hosting provider to the new one. Domain transfers are most beneficial for users that want to manage everything in one place. Domain transfers might include additional charges as the domain may renew for another year. While the transfer price depends on the TLD, it typically costs around $15.
- Update the domain’s DNS A record. While this method may seem the simplest, we don’t recommend it. While the nameservers method will move all the necessary DNS records, the A record method will only change the A records. All other records, such as MX or TXT, will stay unchanged and won’t work at the new host.
Pro Tip
Make sure to check that your domain's A records are pointing correctly after changing the nameservers.
How to Change Nameservers at Different Provider
To change domain nameservers, follow the two main steps:
- Get the new nameserver values.
- Apply the new nameserver values.
Let’s cover them one by one.
First, find a list of nameservers from the new hosting provider. This information is usually provided on the company’s documentation or in the post-purchase email. Contact your current hosting provider’s customer support team to help find the information if you need help.
For example, users can find the Hostinger nameservers on the Plan Details page in hPanel:
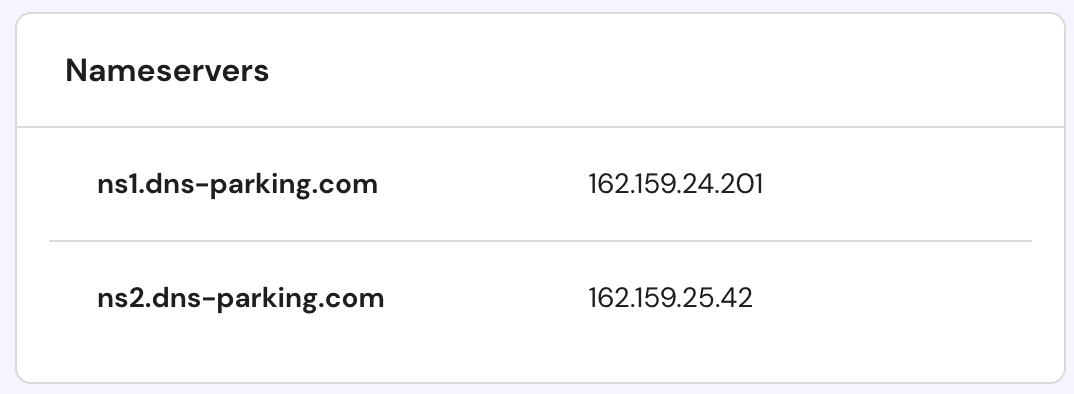
Web hosts usually provide two or more nameservers. Please take note of all nameservers because you will need to enter them into the domain registrar’s control panel.
Keep in mind that some web hosts require IP addresses for nameservers, too. Thus, we recommend noting down IP addresses as well.
The next step is to apply new nameservers. While registrar interfaces may differ, the whole process is quite similar and goes like this:
- Log in to your domain registrar. In other words, this is the place where you bought the domain.
- Look for the option to set the domain’s nameservers. Usually, you can find the needed settings in Domain Management or Domain Overview sections. From there, look for a button to Edit or Manage nameservers. You should see several fields, such as Nameserver 1 and Nameserver 2, that will most likely be filled with your current hosting provider’s default nameservers.
- Delete any existing old nameservers and enter the new settings into the appropriate fields. For example, a nameserver that starts with ns1 should be filled into the Nameserver 1 field. The same process applies to ns2, ns3, or ns4 records.
Here are a few extra tips about nameservers and their management:
- If the hosting provider only gives two nameservers and the registrar provides you with four or more fields, enter the new nameservers into the first two fields, leaving the other ones empty.
- If the hosting provider has three or more nameservers, while the registrar only allows to enter two, use the first two nameservers.
Check the following section to find nameserver management instructions for the most popular hosting providers. If your provider is missing from the list, look for the registrar’s Help or FAQ page. Alternatively, ask customer support to add the new nameservers.
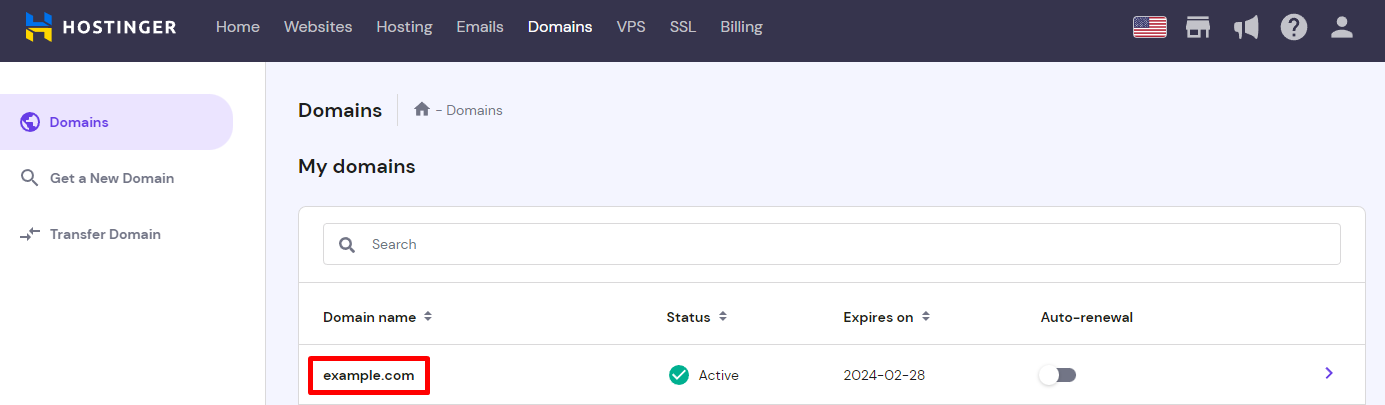
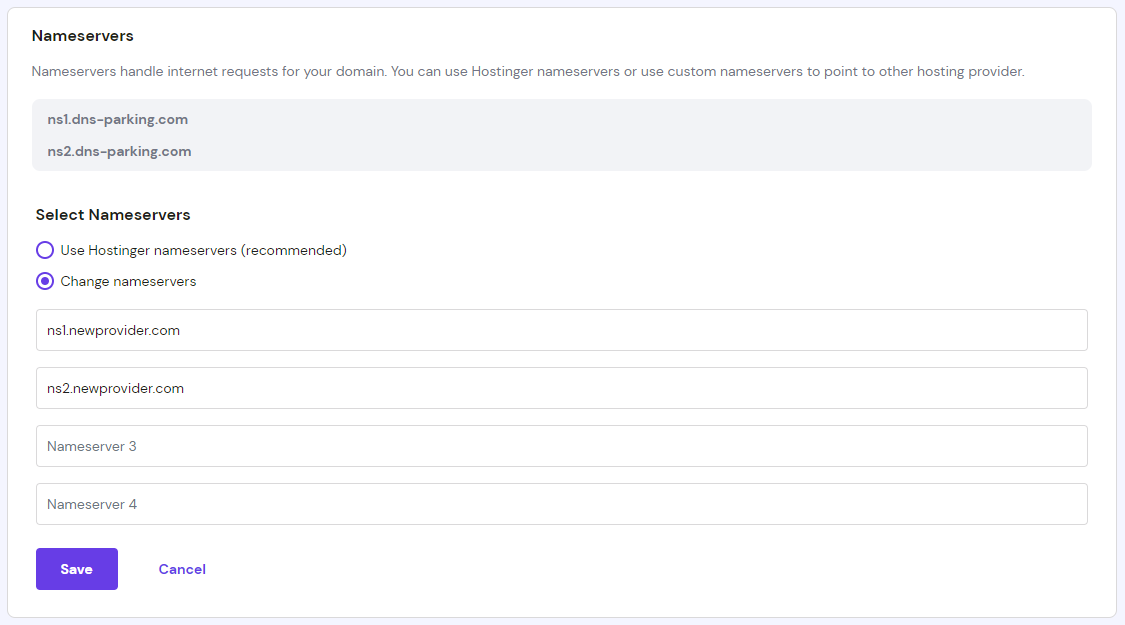
Changing Nameservers in Hostinger
At Hostinger, easily change the NS records via the DNS Zone Editor.
- Open the Domains section and select your domain.
- Then, proceed to the nameservers management page by clicking the Change button.
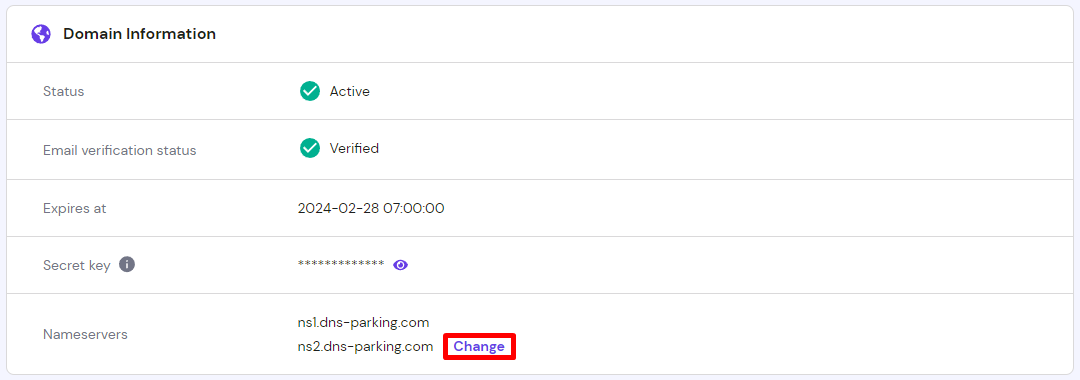
- For the last step, choose the Change nameservers option, enter new nameservers, and click Save.
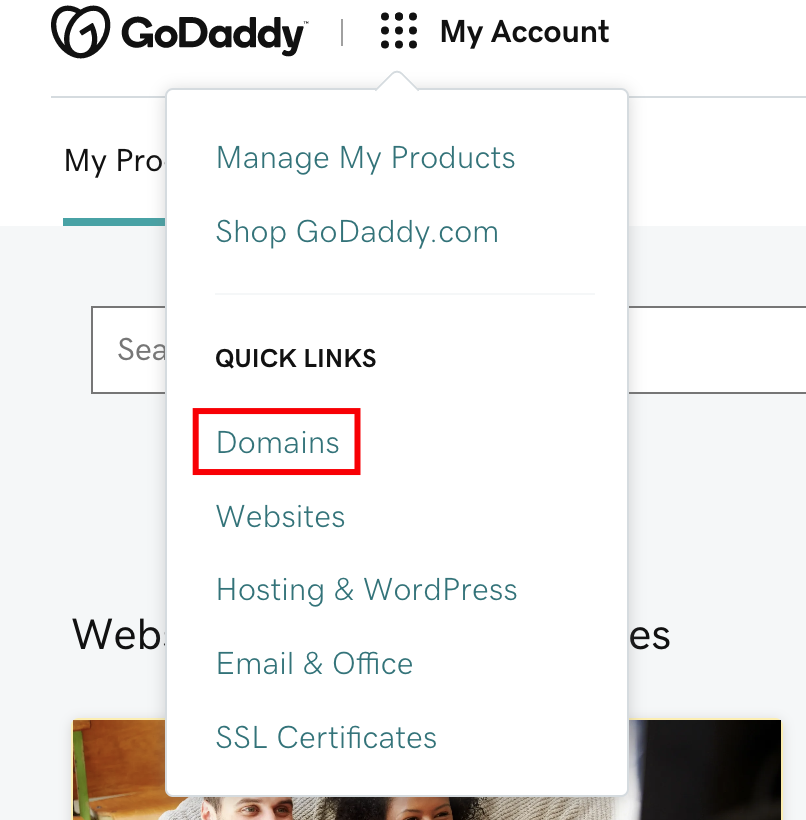
Changing Nameservers in GoDaddy
To change the nameservers at GoDaddy:
- Click the My Account icon and select the Domains quick link.
- Select the Manage DNS option from the My Domains page.
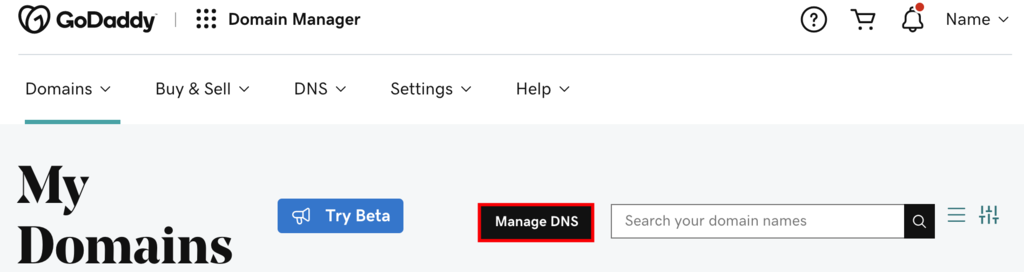
- Choose which domain to manage and scroll down to the middle of the page. Then, press Change under the Nameservers section.

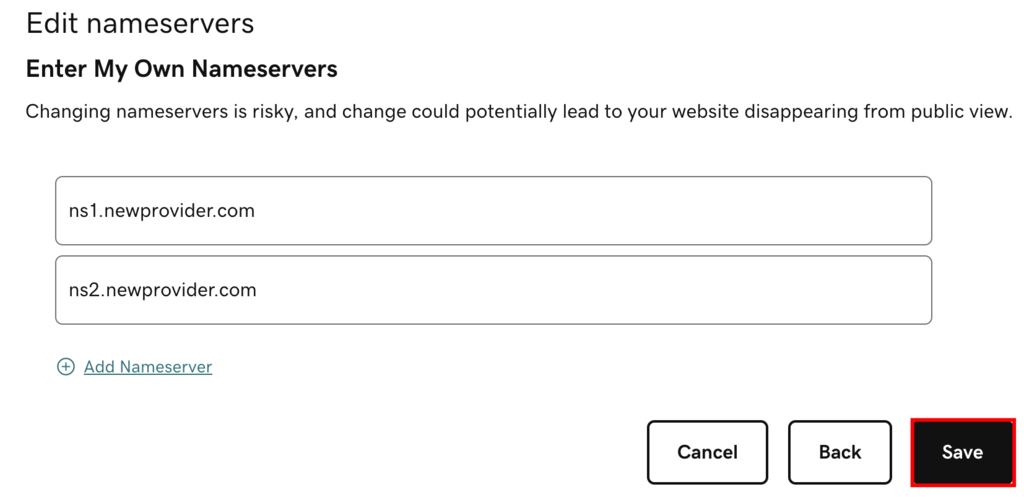
- Lastly, choose the Enter my own nameservers (advanced) option, enter new nameservers, and click Save.
Changing Nameservers in Namecheap
If you are using Namecheap, open the Domain List section:
- Click Manage next to your domain.
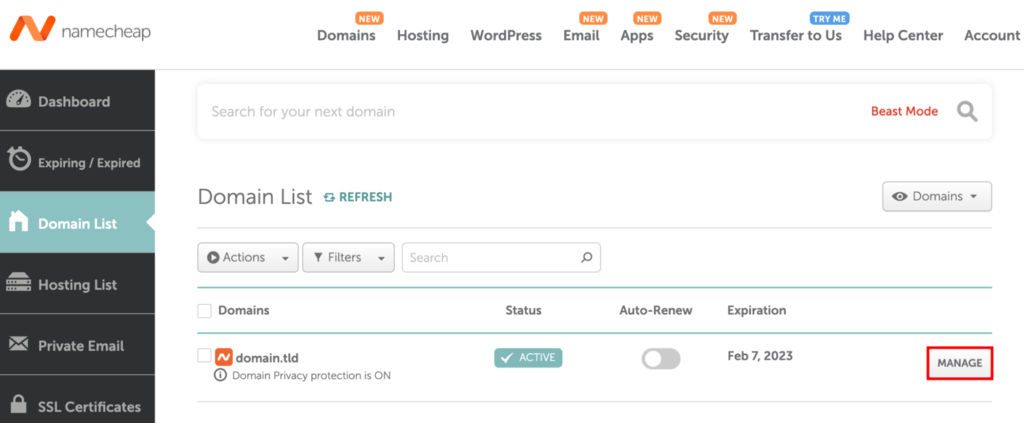
- Find the Nameservers section, select the Custom DNS option, and enter the new nameservers. Save the changes afterward.

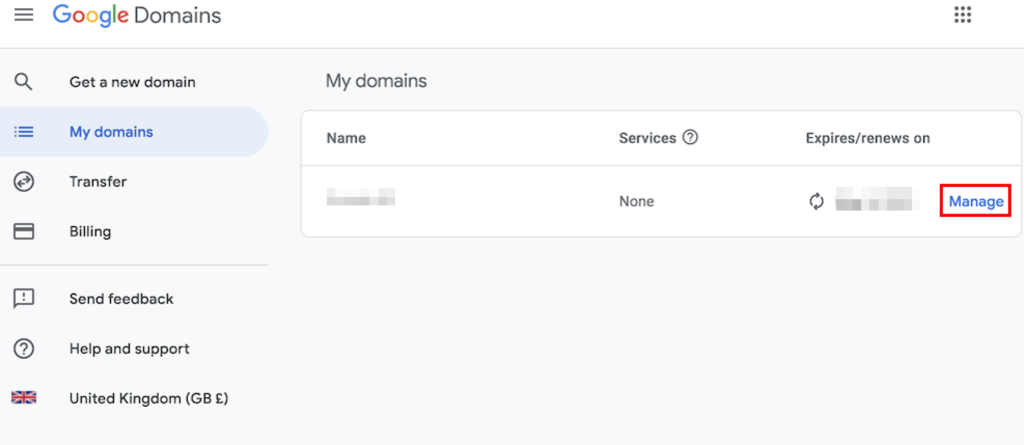
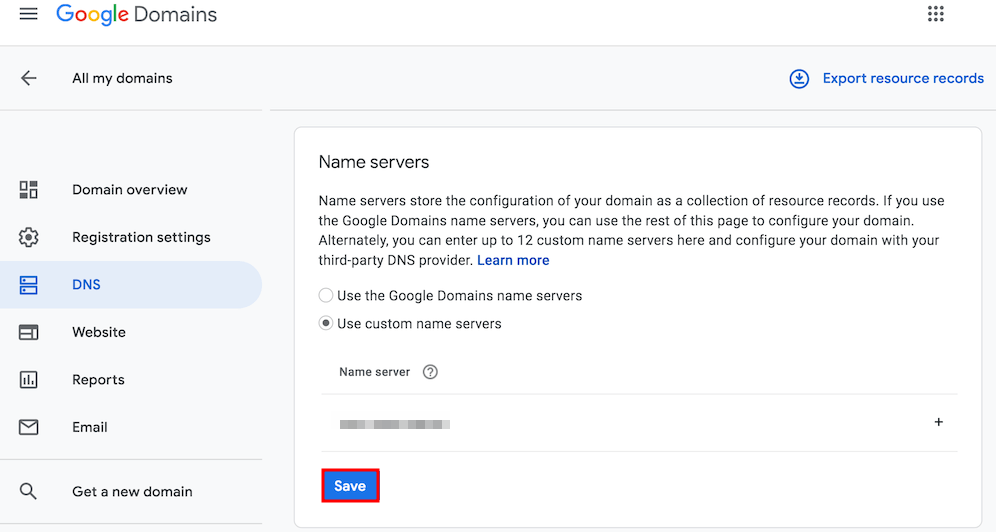
Changing Nameservers in Google Domains
With Google Domains, open the main dashboard, and select the My domains section:
- Hit the Manage button next to your domain.
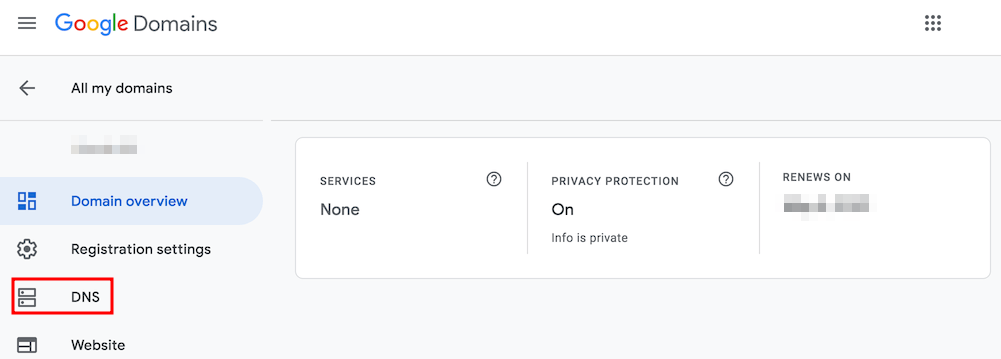
- Next, navigate to the DNS page.
- On the DNS page, click the Disable DNSSEC button. This step is necessary to change nameservers successfully.
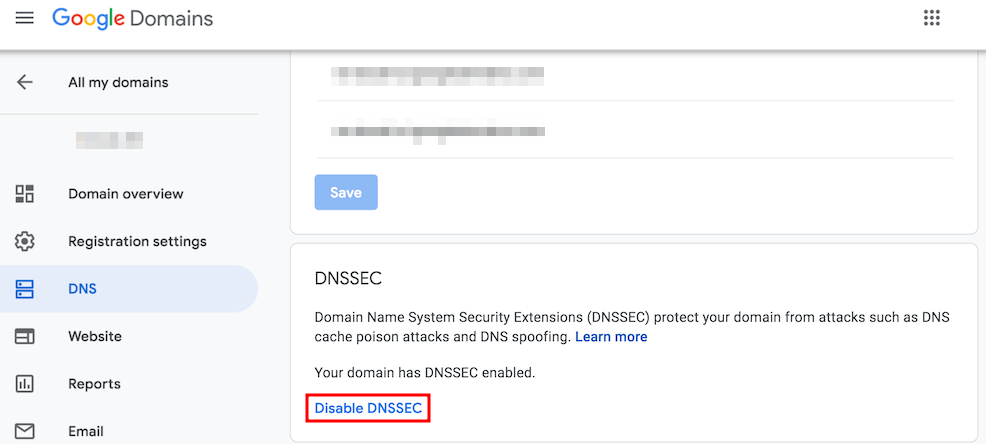
- With DNSSEC disabled, find the Name servers section and add the new nameservers. Once done, click Save.
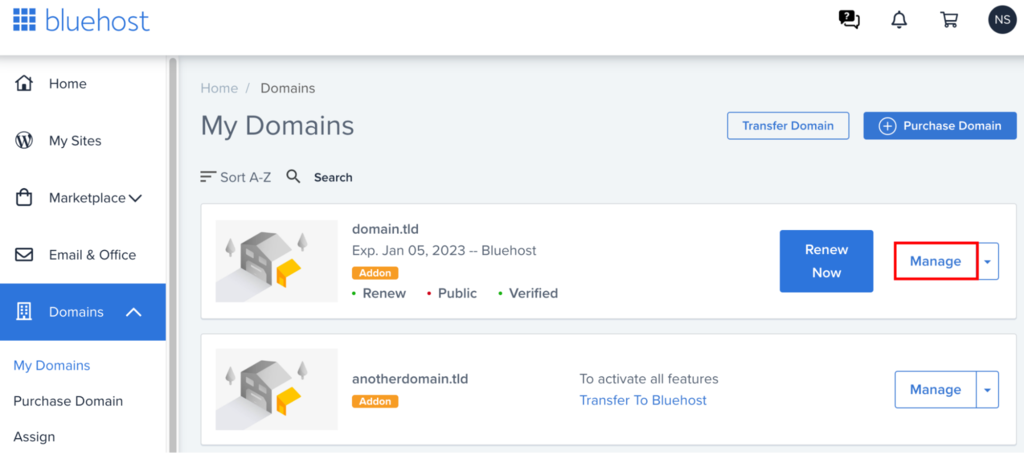
Changing Nameservers in Bluehost
At Bluehost, change nameservers by selecting the My Domains section.
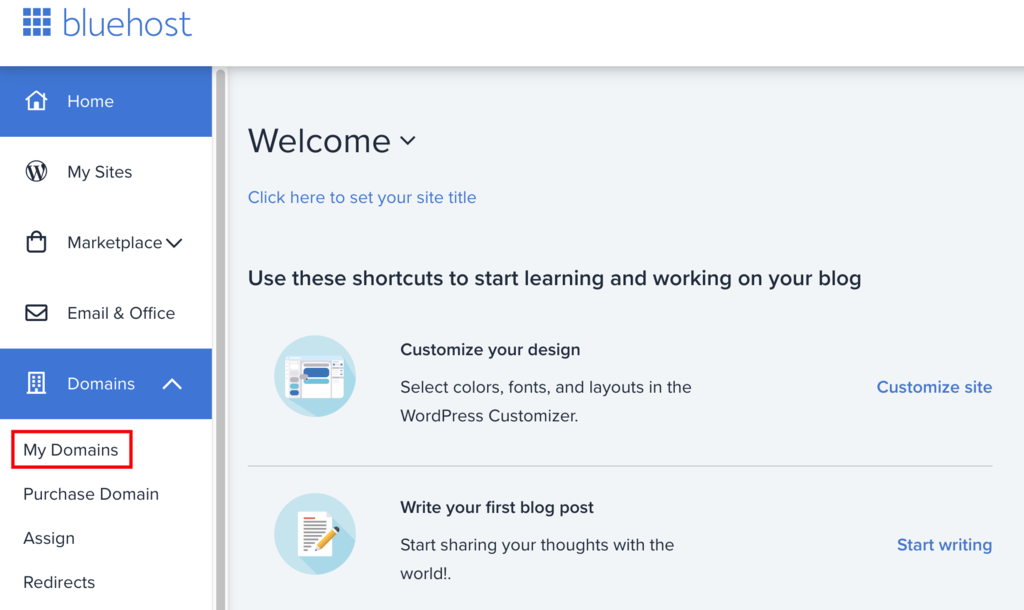
- Select the preferred domain and click Manage.
- Open the DNS section and hit the Edit button.
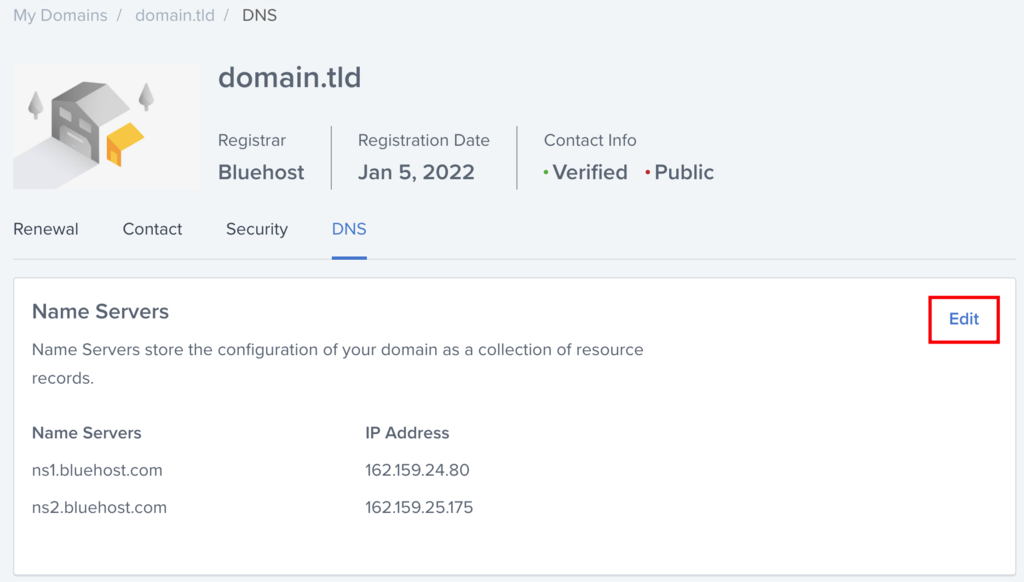
- Lastly, enter new custom nameservers and save the changes.
Pro Tip
Looking for a better, faster, and more secure Bluehost alternative? Try Hostinger.
Changing Nameservers in SiteGround
At SiteGround, select the Services → Domains section and hit the Manage button near your domain.
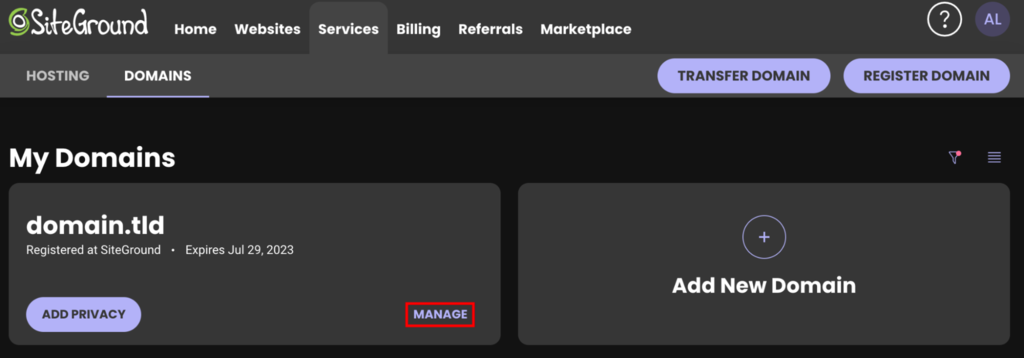
- Look for the Manage nameservers button on the right side of the screen.
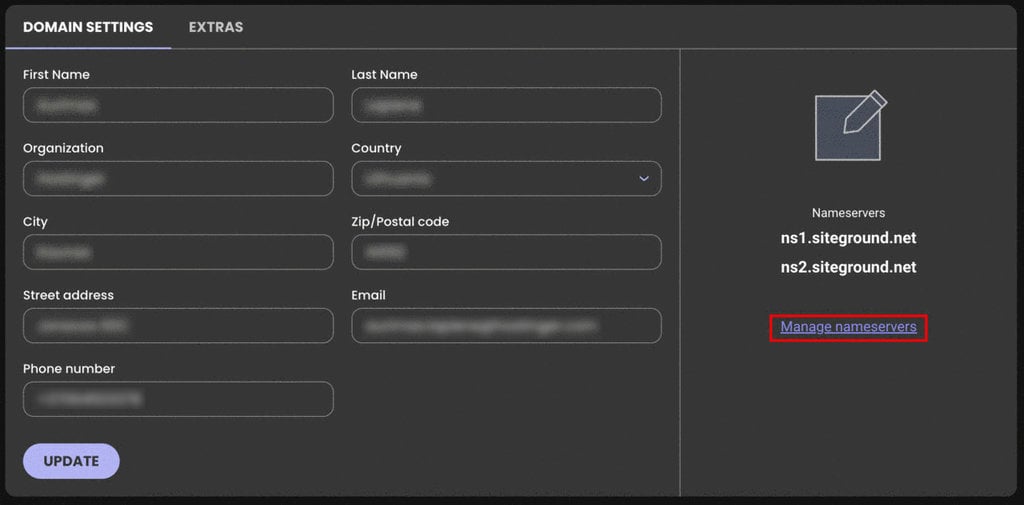
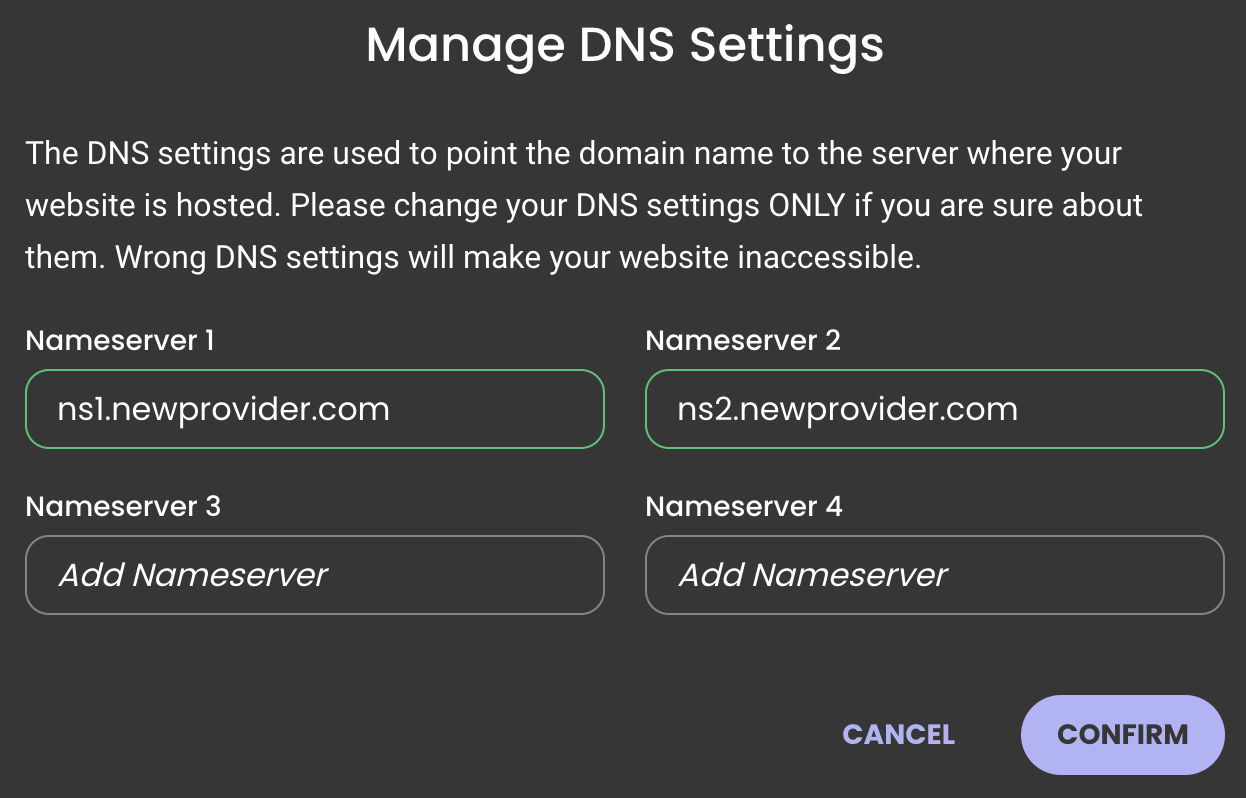
- Enter the new nameservers on the new page and click Confirm to save the changes.
Steps to Take After Changing Nameservers
Once the nameservers are set, wait for the changes to take effect. This period is called worldwide DNS propagation and can take up to 24 hours. For domains using Hostinger nameservers, the propagation status per location can be monitored right in the hPanel.
In addition, users can easily check its progress with such tools as DNS Checker. Just paste in the domain, choose NS as the DNS record type, and click Search.

The majority of locations should display the new nameservers. If some locations are not showing new nameservers values even after 24 hours, try to flush the DNS cache.

Conclusion
Changing nameservers is one of the most important steps when switching your hosting provider and pointing the domain elsewhere.
In this tutorial, we’ve explained the different steps you need to take to change nameservers for the most popular hosting providers. Let’s recap the whole process once more:
- Get the new nameserver values.
- Apply the new nameservers at the current registrar.
- Wait for the propagation process to conclude so that the website is accessible again.
We hope you found this tutorial useful. If you have any questions, feel free to leave them in the comments section below.
All of the tutorial content on this website is subject to Hostinger's rigorous editorial standards and values.

Tomas provides top-notch technical advice on a daily basis to our valued customers. He also likes to create websites and do various coding side projects.

Ignas takes great satisfaction in helping people tackle even the most complex technical issues. His current goal is to write easy-to-follow articles so that these issues will not happen at all. During his free time, Ignas likes to play video games and fix up things around his house.