How to delete IONOS account and move your services to Hostinger
Dec 22, 2025
/
Akshay K.
/
5 min Read
IONOS is a prominent web hosting company with feature-rich plans, low prices, and beginner-friendly tools. However, the IONOS termination process can be tricky and time-intensive.
Whether you’re dealing with poor customer support, a confusing interface, or other performance-related issues, you always have the liberty to cancel your IONOS contract and seek a better hosting alternative.
This step-by-step IONOS cancellation guide will ensure a smooth IONOS account removal process and help you migrate to a better web hosting provider.
Download guide to using Hostinger
How to delete IONOS account
To permanently terminate an IONOS subscription, you must carefully follow a series of essential steps. The guidelines below will help you cancel IONOS hosting effectively, ensuring no details are overlooked.
1. Backup your data
Before initiating the IONOS account deactivation process, it’s crucial to create a backup of your website data and essential files. This precaution ensures you don’t lose valuable information after your IONOS account closure.
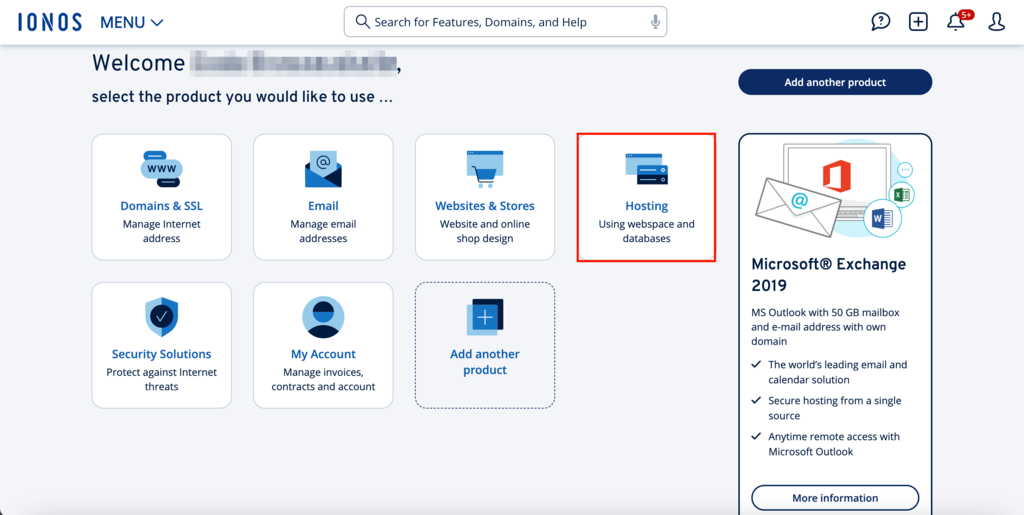
Start by logging into your IONOS account and click on Hosting in the dashboard.
In the new window that opens, go to the SFTP & SSH tab and click on Manage.
Pro Tip
If you haven’t configured your FTP account before, you will see a Configure button here instead of Manage. In this instance, click Configure and set a password for your FTP account first.
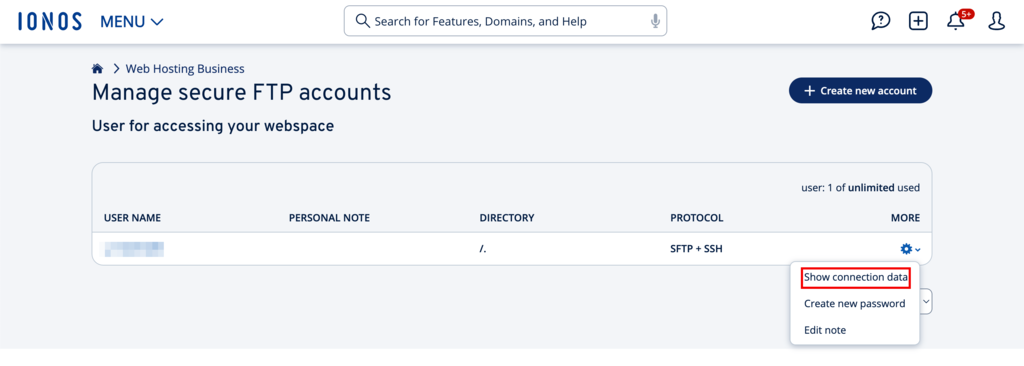
Next, click the settings icon next to your configured FTP account and then click on show connection data.
Click the Download configuration for FileZilla link on the popup window and save the file to your computer.
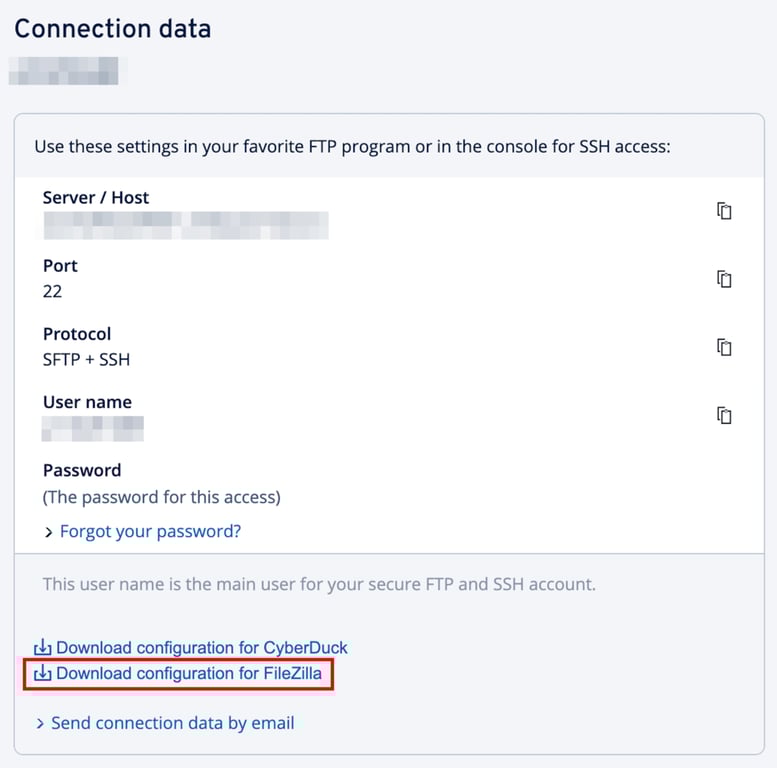
Now, open the FileZilla application on your computer – you can download and install the software from the official FileZilla website. Inside the FileZilla software, input the server/hostname, port number, FTP account user name, and password in the designated fields and click on Quickconnect.
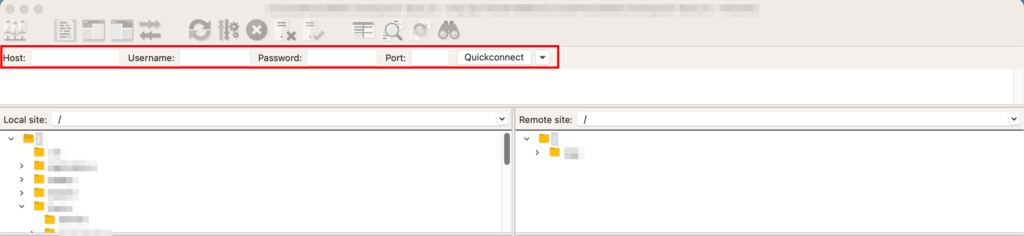
After establishing a connection to your server, you’ll notice that the left side of the window displays files from your local computer while the right side shows your website’s files and subfiles.
To backup your website, simply drag its entire set of files from the right pane to a designated folder on your local computer. As another option, you can right-click the topmost file of your website on the right-hand side and then click Download.
2. Cancel active subscriptions
With your backup secure, we can safely initiate your IONOS subscription cancellation request. First, we’ll look at the steps to end an IONOS subscription, and then we’ll move on to pausing auto-renewal for any additional domains.
Cancelling IONOS account
Let’s start with the IONOS account cancellation process.
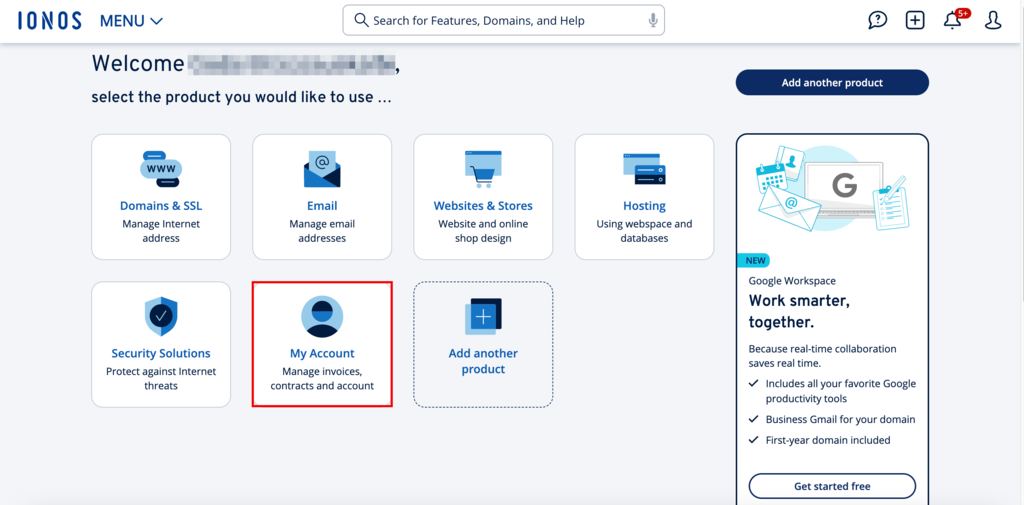
In the IONOS dashboard, click on My Account.
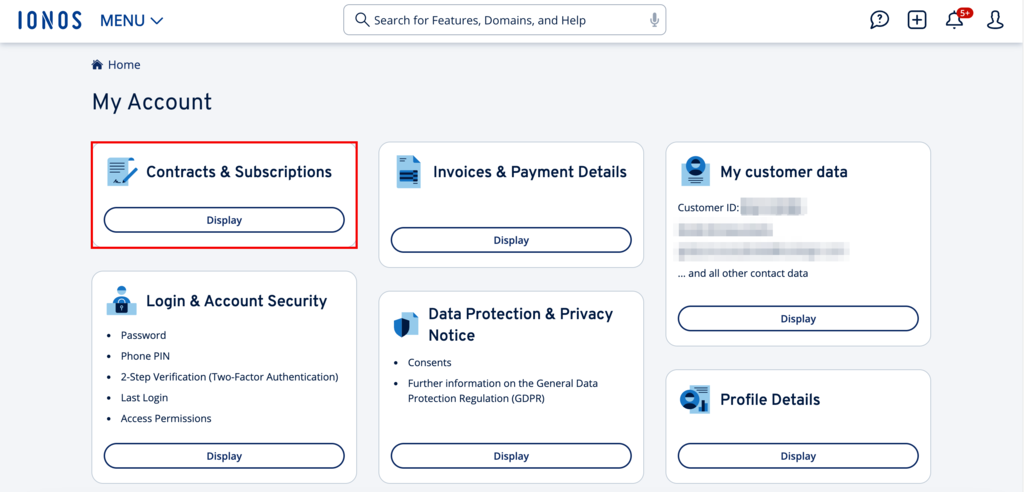
Once inside, open Contracts & Subscriptions by clicking on Display.
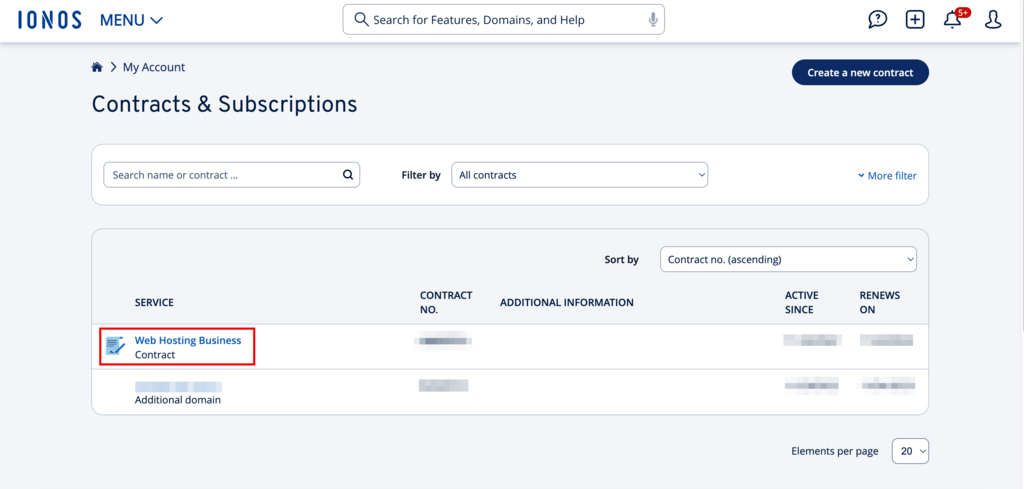
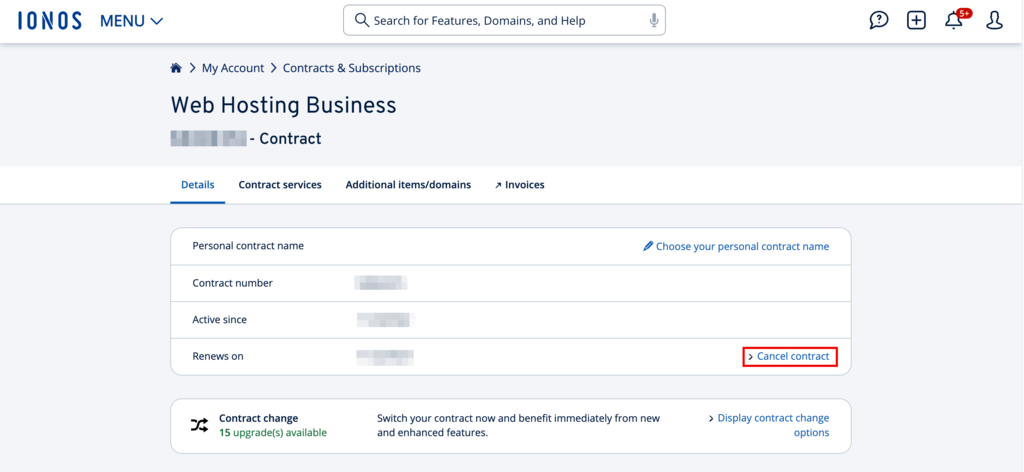
In the new window that opens, click on the contract name you wish to cancel.
Next, click Cancel contract under the contract details tab.
You will then be taken to a new window. Click on the Cancel this entire contract option.
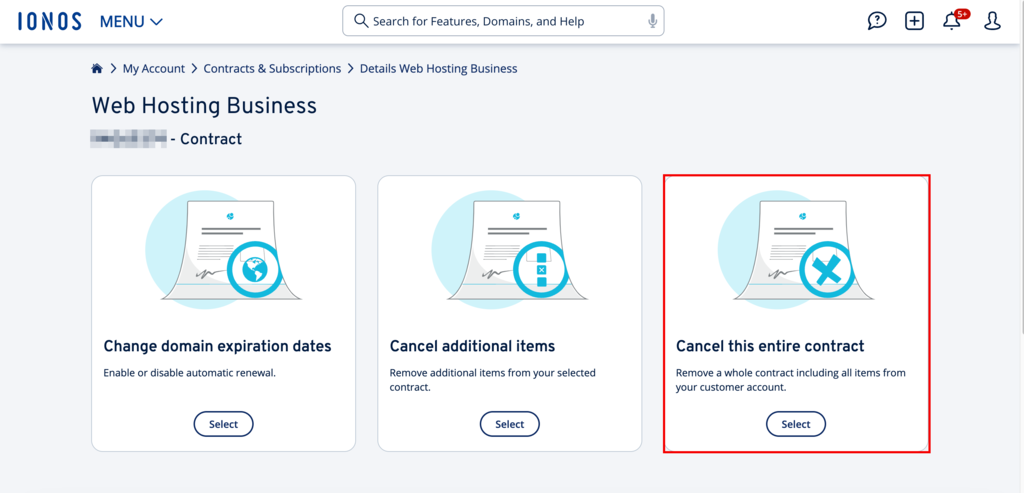
From the provided list of reasons to cancel your IONOS account, select the one you want and click Next.
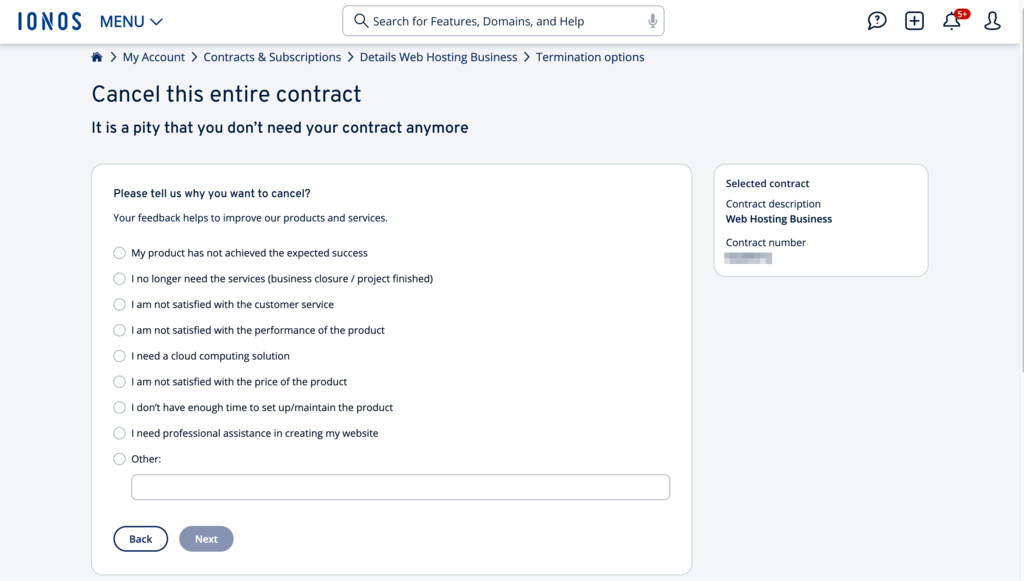
Pro Tip
Your contract may include domains or special options requiring specific cancellation details. It could involve choosing a cancellation date or cancellation type, both of which will be visible on the screen.
You’ll then be taken to a page titled Important Notes regarding your cancellation based on the IONOS cancellation policy.
Here, click Cancel Contract Now to terminate your IONOS subscription.
Pause domain auto-renewal
You must turn off automatic renewal for any additional domains you’re hosting through your IONOS account. This step ensures you don’t incur additional charges as you move to a new web host after the cancellation of your IONOS subscription.
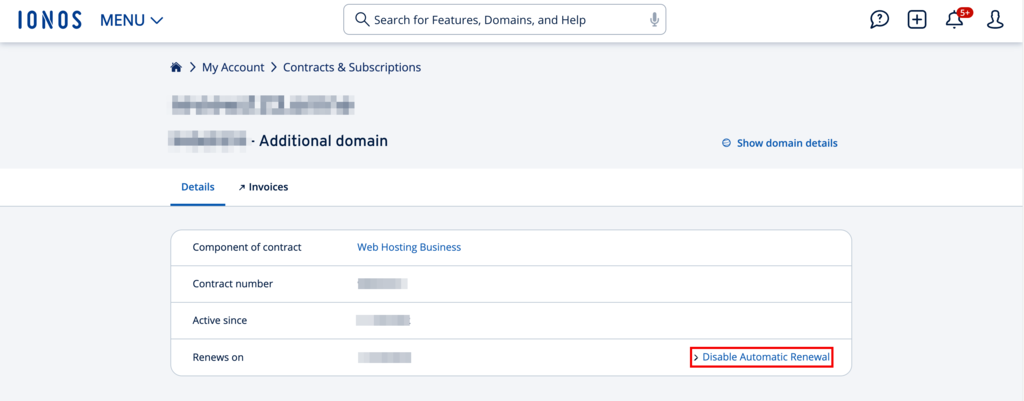
Any additional domains you own will be visible in the same grid as your contracts.
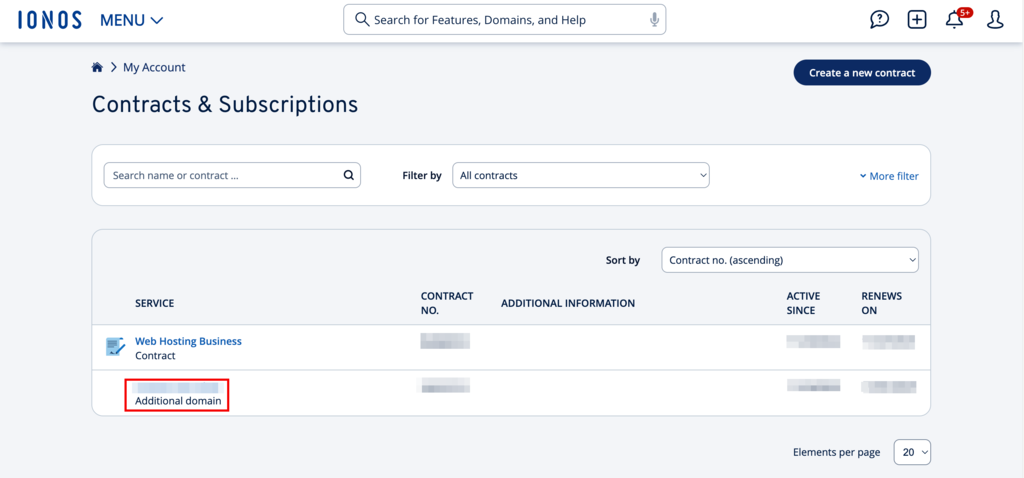
Click on the domain name you’re canceling auto-renewal for. Click on the Disable Automatic Renewal link in the new window that opens.
A pop-up will appear, prompting you to specify why you’re pausing automatic domain renewal. You can choose from the options or write your reason in the text box and click Next.
You’ll then be shown important information about deactivating automatic renewal. Click on the Change automatic renewal settings button to save your changes to the domain settings.
3. Contact customer support
The IONOS account shutdown procedure requires you to contact customer service to confirm account termination.
The web host provides multiple ways to contact customer service – phone, live chat, or email – you can pick the most convenient.
Once you make contact, the support team will guide you through the subsequent steps required to validate your IONOS account deletion request.
4. Verify your identity
Before proceeding with your IONOS account termination, the company’s customer service will typically require some form of identity verification to ensure you’re the account’s rightful owner.
This procedure may involve answering security questions, providing your customer ID, or even verifying card details such as the last four digits of your credit card.
Ensure you have all your account-related details readily available to streamline this essential step.
5. Confirm the deletion request
Once your identity is verified and you’ve communicated your intention to close your account, you must formally verify your deletion request.
At this stage, it’s important to double-check that you’ve backed up all necessary data and canceled any ongoing service or subscription tied to your IONOS account. Make sure to do so to avoid the loss of critical information or continued billing.
After confirming the deletion, IONOS will proceed with the account closure. You should receive a final confirmation message, email, or notification indicating that your account has been successfully deleted. Keep this confirmation for your records as proof of account closure.
Following these steps ensures a smooth and foolproof IONOS account closing process.
How to migrate your website from IONOS to Hostinger
After you delete your IONOS account, make sure to transfer your website to a new host to keep it online.
Pro Tip
Check out our articles on how to choose a web hosting plan at Hostinger if you need a guide to selecting one that can suit your needs.
While some hosting services charge hefty fees for transferring your site, every Hostinger’s managed web hosting plan includes a free migration service. You only need a few clicks to submit a free migration request, and our expert team will do the heavy lifting for you.
Simply follow these steps after downloading your website files from IONOS:
- Purchase one of Hostinger’s hosting plans, and you’ll start the onboarding process.
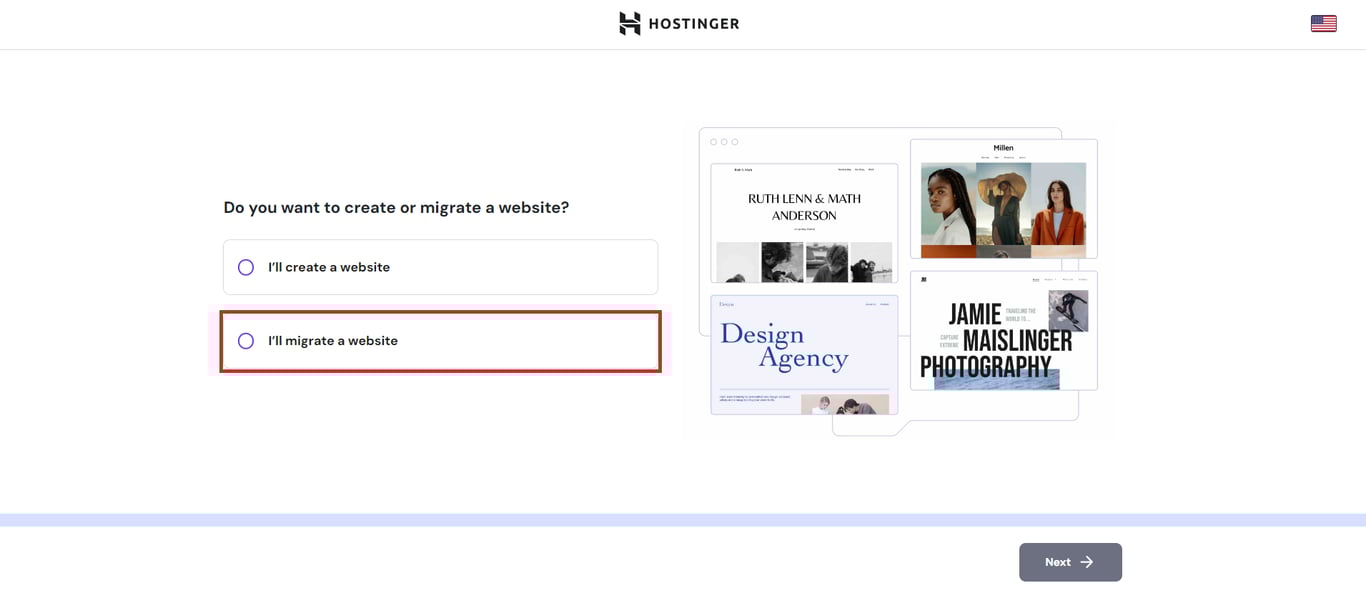
- Select I’ll migrate a website when asked, then click Next.
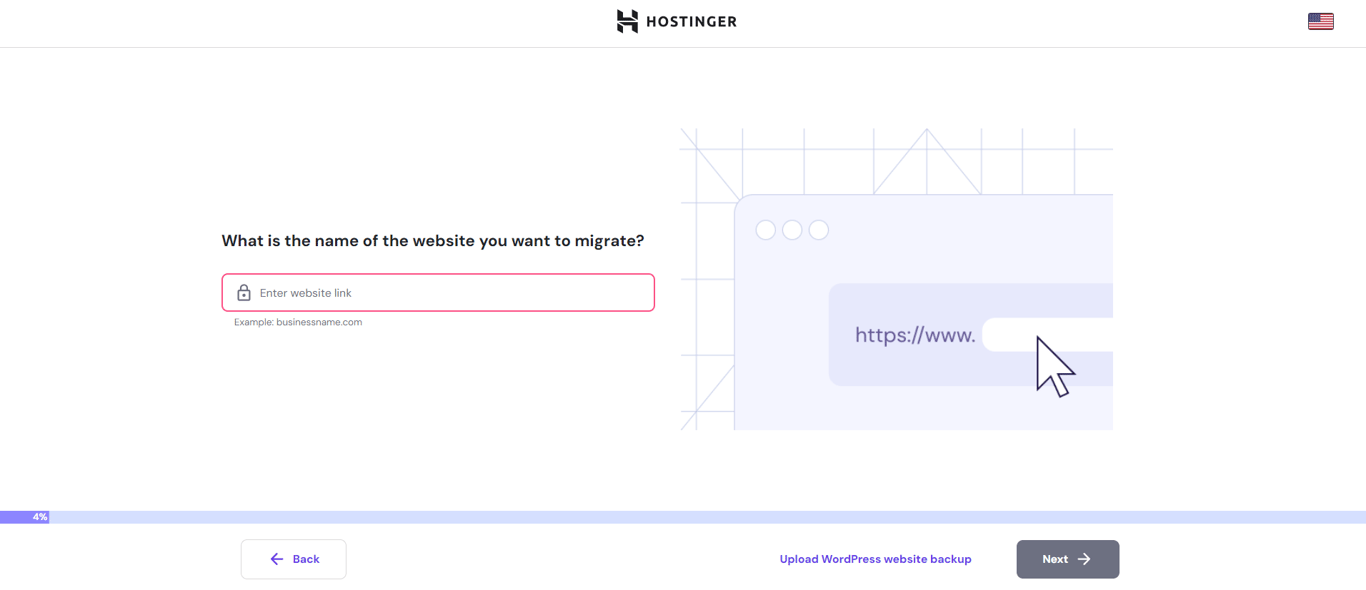
- If you’re migrating a WordPress website, click Upload WordPress website backup. Otherwise, enter your website’s URL into the box to find other options.
- Provide the necessary data to request the migration process, which will differ according to the website type you want to transfer. Just make sure to prepare your website’s files in ZIP or WPRESS, and your database file in SQL format.
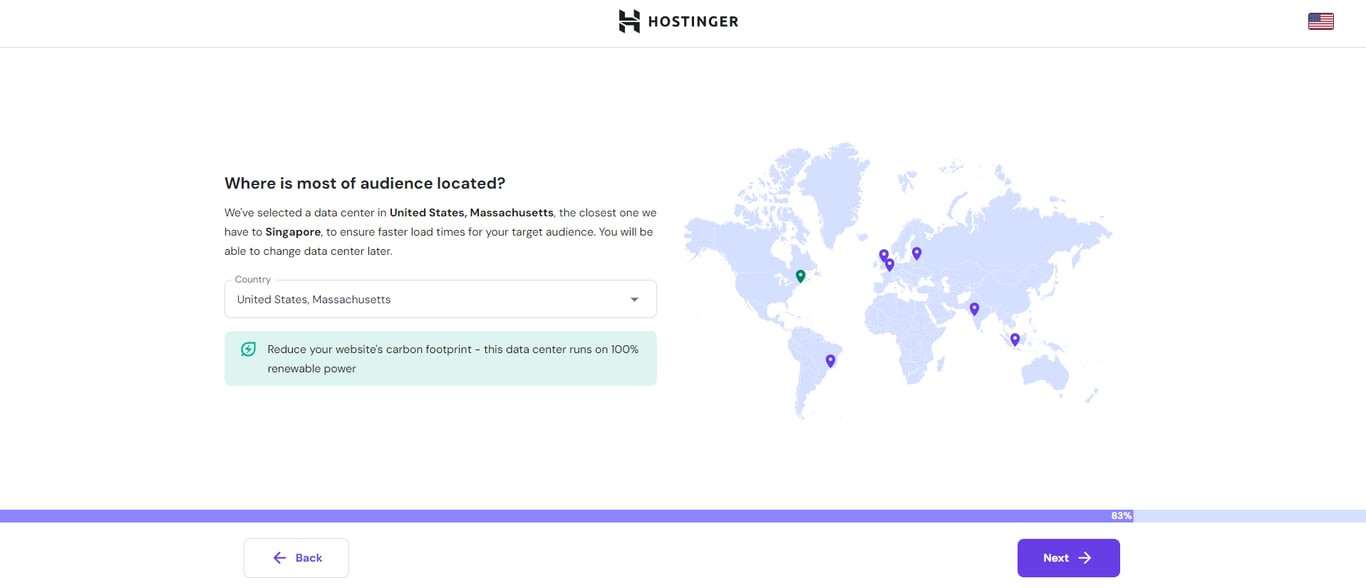
- Choose the closest data center to your target audience’s location to ensure an optimal loading speed.
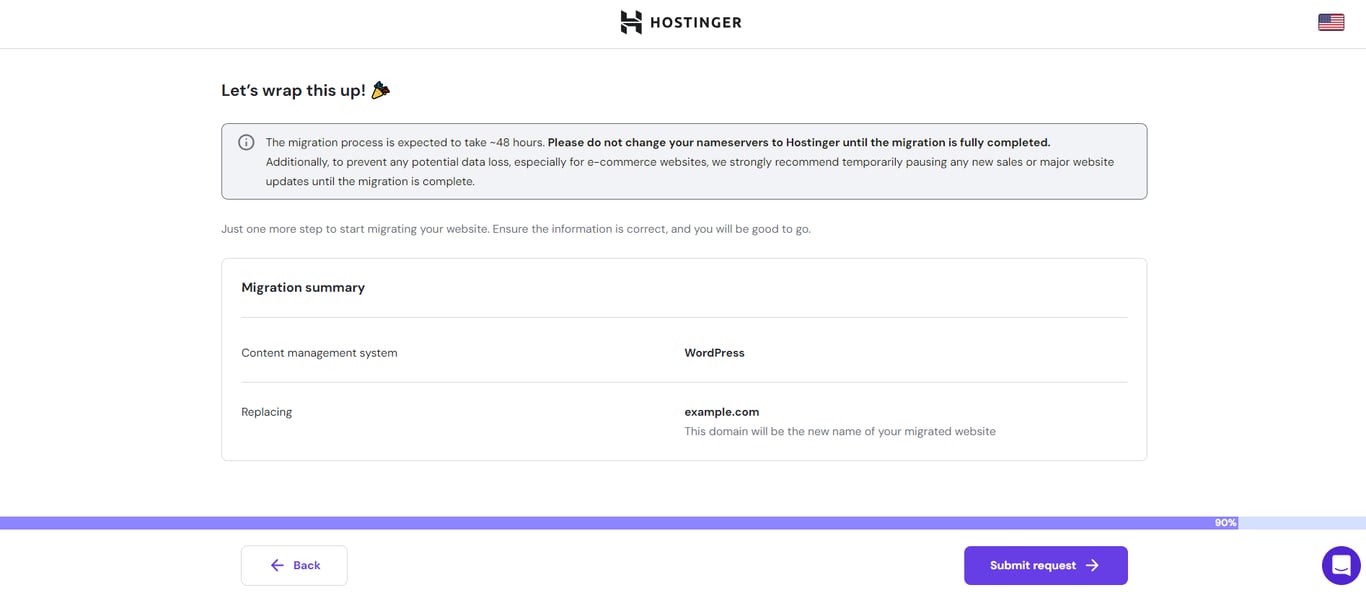
- Review the migration summary, and click Submit request if all data is correct.
That’s all it takes to migrate your site to Hostinger! Typically, the website migration process takes just a few hours. You can check the status on hPanel by navigating to Website → Migrate Website → Manage Migration Requests.
Once it’s completed, remember to point your domain to Hostinger if it’s still with IONOS. In case you’re claiming a new domain name from Hostinger, it will automatically point to your site.
Conclusion
Terminating your existing web hosting services and switching providers can be a challenge. This comprehensive guide simplifies the process by outlining the essential steps to delete your IONOS account and migrate to a better hosting service like Hostinger.
Here’s a quick recap of the steps to delete your IONOS account:
- Back up your website – secure your important files before you start the cancellation process.
- Cancel active services – check your contracts and cancel any ongoing IONOS services.
- Contact support – reach out to IONOS support to initiate the account deletion.
- Verify identity – follow IONOS’ verification steps to continue the cancellation.
- Confirm deletion – double-check backups and canceled services before finalizing the account removal.
- Switch to Hostinger – easily move your site to Hostinger with the free website migration services.
By following these steps, you’re on your way to a more satisfactory hosting experience. If you have any questions or thoughts about the IONOS hosting account termination process, please comment below.
All of the tutorial content on this website is subject to Hostinger's rigorous editorial standards and values.

Akshay is a Senior Content Writer who loves writing about technology. As a Computer Engineering graduate and a certified digital marketer, he aims to make tech easier for everyone. He also enjoys cooking, traveling, and learning new languages. Follow him on LinkedIn.