What is a sitemap and how to create one?
Jun 11, 2026
/
Nurul S. & Larassatti D.
/
10 min Read
A sitemap is a file that lists all the essential pages on your site in an organized structure. It helps search engines crawl and index your website, making the content discoverable and enhancing overall SEO performance.
There are two main types of sitemaps: XML sitemaps, which guide search engine bots through your site’s structure, and HTML sitemaps, which make site navigation easier for your visitors.
Here are the steps to creating impactful sitemaps:
- Sketch a visual sitemap to plan your website’s hierarchy and understand how pages connect.
- Generate an XML sitemap using a plugin or online generator.
- Verify your XML sitemap to ensure accurate crawling and indexing by search engines.
- Build an HTML sitemap to improve user navigation and accessibility.
- Submit your sitemap to search engines to confirm successful indexing and support ongoing web crawling.
Add your sitemap to the robots.txt file so that search engines can automatically locate it. Then, use a sitemaps report in Google Search Console to check for errors and confirm proper indexing.
Keeping your sitemap updated and error-free helps search engines crawl your website more effectively, supporting SEO growth.
Types of sitemaps
There are three types of sitemap: visual sitemap, Extensible Markup Language (XML), and HyperText Markup Language (HTML).
The visual sitemap is primarily used during the web design process to structure the site’s pages and has no direct impact on SEO. However, this article will focus on XML and HTML sitemaps to help with your site’s SEO.
XML sitemap
XML sitemaps are a technical blueprint of your website for search engines, listing all crucial URLs. It also includes the website’s last update date, change frequency, and importance level, helping search engines prioritize their indexing efforts.
An XML sitemap includes a sitemap index for larger websites with rich media content. This index file holds multiple XML sitemaps, streamlining the indexing process for better organization and efficiency.
You can check your website’s XML sitemap by typing yourwebsite.com/sitemap.xml in your browser’s search bar. If you have a sitemap, take a look at the example of how it would look:
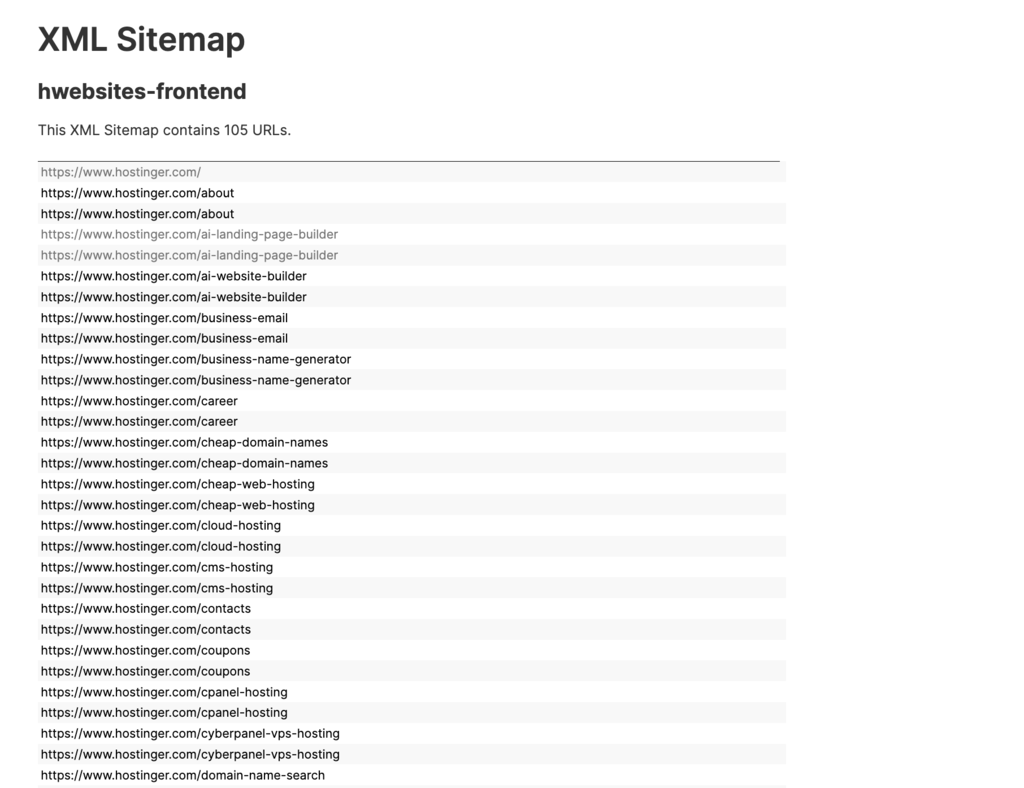
This type of sitemap helps web crawlers find and index your site’s content. Ultimately, it’s a straightforward way to boost your site’s visibility in search results.
For larger websites, a sitemap index is useful, as it breaks down the sitemap into smaller sections for easier navigation of both internal and external links.
There are also XML sitemaps for specific purposes, such as:
- Media sitemap. Helps search bots understand video and image files. A video sitemap includes the video location, title, and description, while an image sitemap consists of the image link, subject matter, and licensing information.
- News sitemap. Works best for news pages, as this sitemap specifically contains Google News articles, along with their titles and publication dates, enhancing search results visibility.
- RSS feed sitemap. Keeps search engines updated on on-site changes, beneficial for sites with dynamic content like blog posts by using internal links to signal updates.
You can find whether your website has an XML sitemap by simply typing these URLs into your browser’s address bar:
https://www.yourwebsite.com/sitemap.xml
https://www.yourwebsite.com/sitemap_index.xml
Keep the sitemap URL handy for when you upload your sitemap to the search engines.
HTML sitemap
Unlike XML sitemaps, which are search engine-specific, HTML sitemaps are created for site visitors.
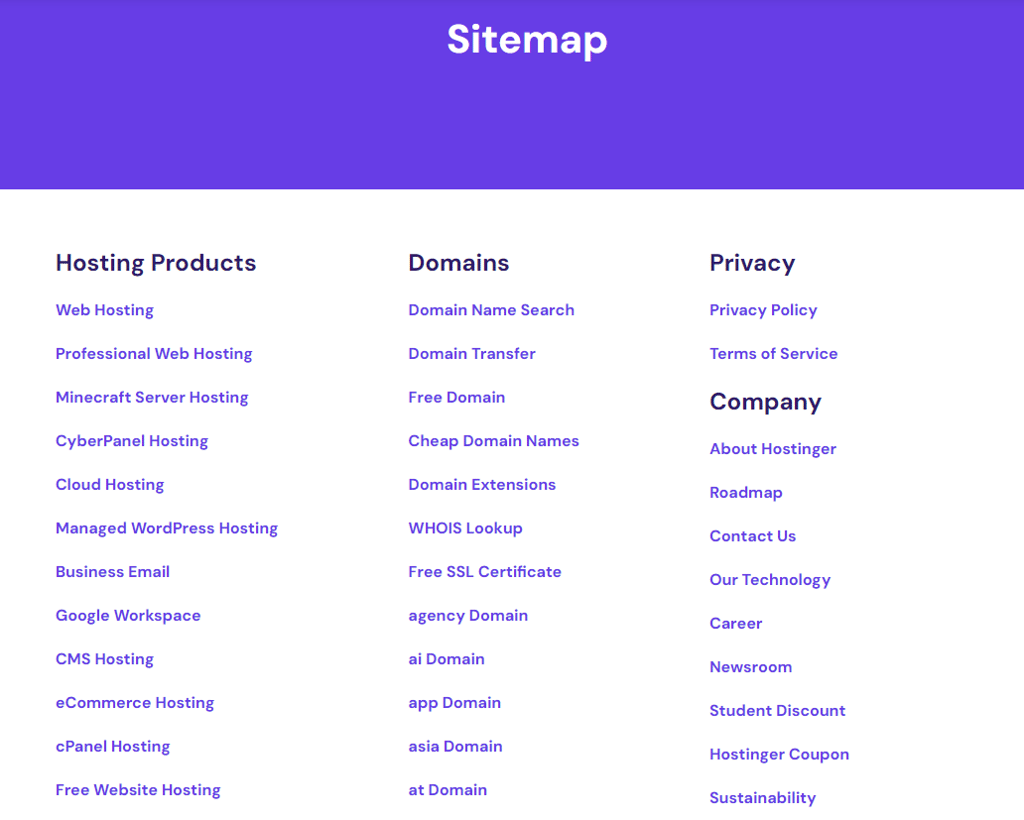
HTML sitemaps are simple web pages that show all the essential links on a website in one place. They’re like a table of contents, helping users navigate through a site and find specific pages.
These sitemaps are often linked on a website’s footer or menu for easy access. For example, refer to our HTML sitemap for a list of web hosting services, domain tools, and company info to help users search for content.
Aside from these two most common types, some websites are adopting llms.txt – a curated file that highlights valuable content for AI systems like ChatGPT and Perplexity to reference.
Unlike XML or HTML sitemaps that list all pages, llms.txt is selective, pointing AI toward only your most authoritative content. However, this remains an experimental standard with limited adoption by AI crawlers as of late 2025.
How to create a sitemap
Let’s get into the process of creating the visual, XML, and HTML sitemaps for your website.
1. Create a visual sitemap
Before creating either an XML or HTML sitemap, sketch a visual sitemap for your site layout and page hierarchy. Though this step is optional, doing so helps identify all the pages that need to be included in your XML and HTML sitemaps and organize them accordingly.
When designing the visual sitemap, keep the link depth to three clicks or less for a straightforward crawling experience, potentially boosting your search rankings.
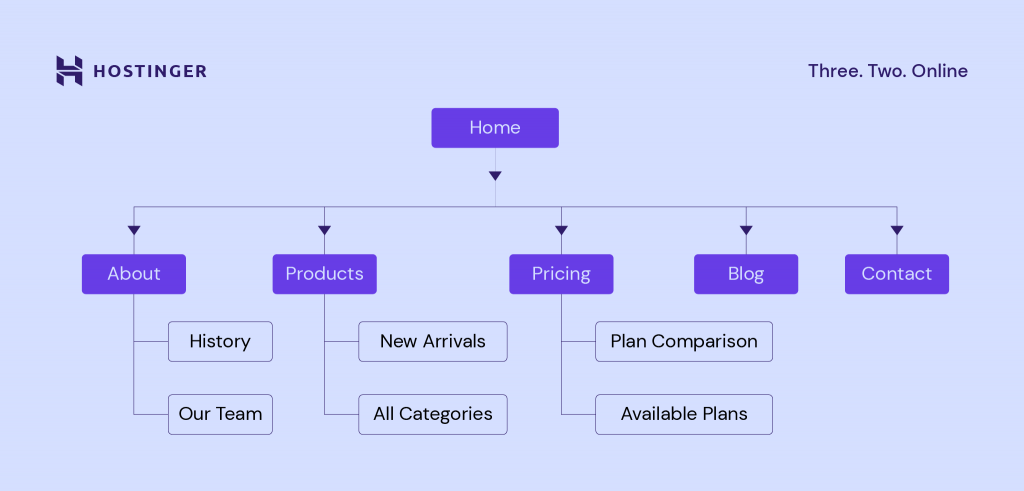
List the essential pages like About Us, Products, Pricing, and Blog. Then, list sub-categories and build the hierarchy. After creating the hierarchy, use tools like DYNO Mapper to create a visual sitemap. This helps keep the process simpler.
Below is an example of how a visual sitemap looks like:
2. Generate an XML sitemap
There are two ways to create an XML sitemap – automatically and manually. The automatic method is excellent for faster sitemap creation, making it perfect for beginners or simply structured websites.
The manual method offers more customization options and is recommended for larger or more complex websites where you need precise control over which pages are included.
Method 1: Generating an XML sitemap automatically
For a faster sitemap creation, here’s how to generate an XML sitemap automatically:
1. Choose a sitemap generator. Tools like Screaming Frog, XML Sitemaps Generator, or Dupli Checker will automatically create an XML sitemap. These tools can also help identify broken links to improve site quality.
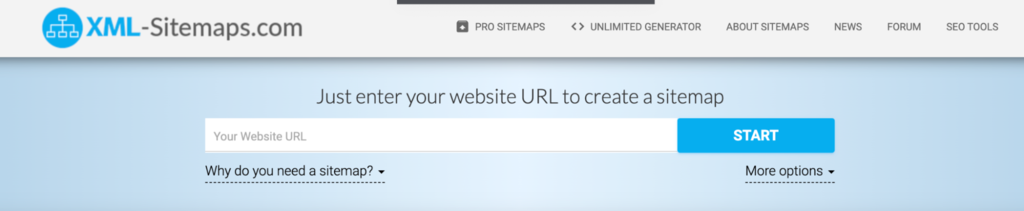
2. Add your website’s URL. Copy and paste your website URL to the generator of your choice. Here, we use the XML Sitemaps Generator. Once done, it will look something like this:

3. Download the XML file. Download or save the generated XML file.
Note that if you build a site with WordPress, the platform automatically generates an XML sitemap for you starting from version 5.5 (released in August 2020). You can access the file by simply entering the URL (like yourwebsite.com/wp-sitemap.xml) in your browser.
To gain more advanced control, like customizing which pages appear, adding image or video sitemaps, or managing multiple sitemap indexes, you can use WordPress SEO plugins like Rank Math, Yoast SEO, or All in One SEO.
Method 2: Creating an XML sitemap manually
If you want complete control over your sitemap structure, here’s how to create a sitemap manually:
- Identify content. Determine all pages, images, and videos in your website that need inclusion.
- Create the XML file. Using a plain text editor like Notepad or a specialized XML editor, create a new file with a .xml extension. This will serve as your XML sitemap file.
- Add XML tags. Start by adding the necessary XML tags to define the sitemap’s structure. These include the opening <urlset> tag at the beginning of the file and the closing </urlset> tag at the end.
- Include URL entries. Within the <urlset> tags, add individual <url> entries for each page, image, or video on your website. For each URL entry, include the <loc> tag to specify the page’s URL.
- Add extra tags (optional). Beyond the required <loc> tag, you can include additional XML tags to provide more information about each URL, like <lastmod> for the last modification date, <changefreq> for update frequency, or <priority> for relative importance. As Google largely ignores <changefreq> and <priority>, <lastmod> is the most useful to include.
- Save the file. Make sure to use the .xml extension.
Once all process is done, your sitemap would look like this:
<?xml version="1.0" encoding="UTF-8"?>
<urlset xmlns="http://www.sitemaps.org/schemas/sitemap/0.9">
  <!-- Homepage -->
  <url>
    <loc>https://www.example.com/</loc>
    <lastmod>2025-11-10</lastmod>
  </url>

  <!-- About Page -->
  <url>
    <loc>https://www.example.com/about</loc>
    <lastmod>2025-11-05</lastmod>
  </url>

  <!-- Products Page -->
  <url>
    <loc>https://www.example.com/products</loc>
    <lastmod>2025-11-12</lastmod>
  </url>

  <!-- Contact Page -->
  <url>
    <loc>https://www.example.com/contact</loc>
    <lastmod>2025-10-28</lastmod>
  </url>
</urlset>
You can tweak any parts of the file as you like, which is the strong point of creating an XML sitemap manually.
Once you have the XML sitemap file (no matter if it’s manually or automatically created), make sure to upload it to your site’s public_html folder. You can find the folder on your web hosting control panel or via a File Transfer Protocol (FTP) client.
If you’re a Hostinger user, follow these steps to upload the XML file:
1. Log in to hPanel → Websites.
2. Click the Dashboard button on the website name you want.
3. Open File Manager.
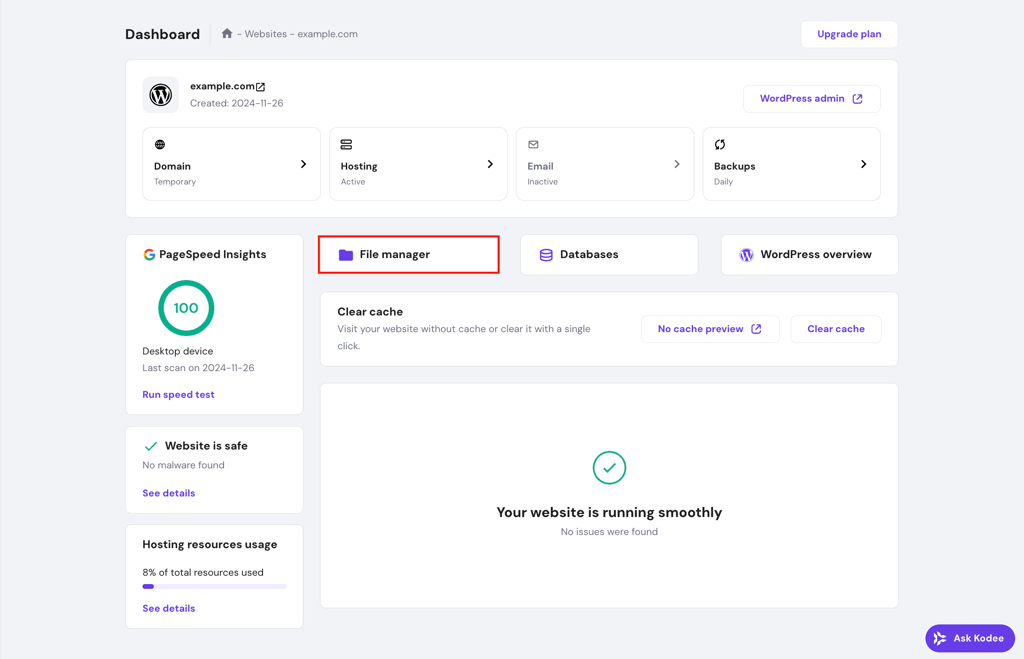
4. Open the public_html folder.
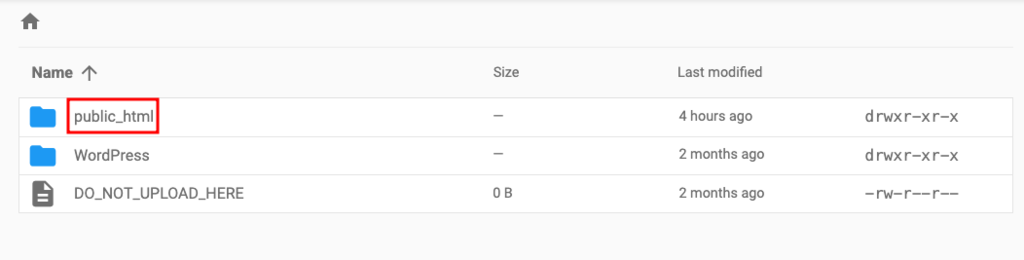
5. At the top navigation bar, choose the upward-facing arrow to upload a file.
6. Choose File to begin transferring your XML sitemap file.
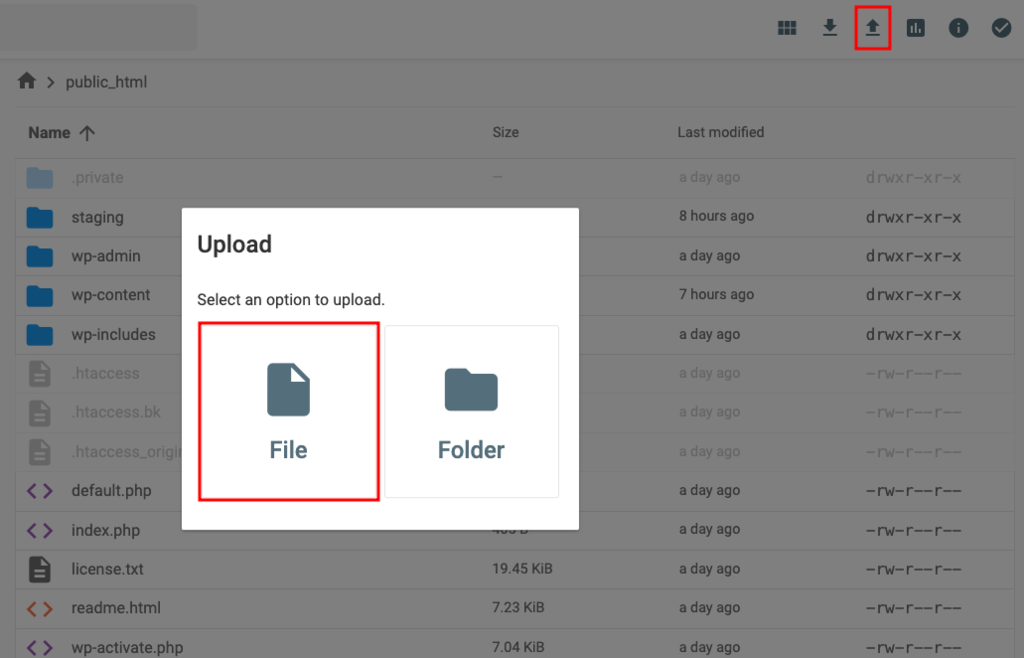
Once the uploading process has finished, you should find the sitemap file inside your public_html folder.
🚨 Make sure to verify your XML sitemap using a sitemap validator tool to ensure accurate formatting. This helps search engines process your sitemap correctly and index your pages efficiently.
3. Build an HTML sitemap
To help you create an HTML sitemap, refer to the visual sitemap we’ve discussed in the first step. The visual sitemap helps organize the links in your HTML sitemap to mirror the intuitive layout presented in the visual sitemap.
There are also two ways to create an HTML sitemap: automatically and manually.
To create an HTML sitemap automatically, use the integrated feature on your website-building platform. For example, Hostinger Website Builder generates sitemaps by default, and you can use plugins if you’re building a site with another tool.
The sitemap will be automatically generated and published when you launch the website.
Similar to XML sitemaps, manually creating an HTML sitemap requires more technical skills but offers more customization options, such as organizing for users, styling to match your site, and choosing which pages to include to fit your audience’s needs.
Here are the steps to create an HTML sitemap manually:
- List essential links. Identify key pages and content areas to include in the sitemap.
- Create an HTML page. Use a text editor or HTML editor to create a new HTML file.
- Write HTML code. Write HTML code to structure your sitemap. Begin with the <html> and <body> tags to define the document structure. Use headings (<h1>, <h2>, etc.) to organize sections and lists (<ul> and <li>) to list the links.
- Save and upload. Save the HTML file and upload it to the website’s server for visitors to access.
This is an example of what the HTML code should look like:
<!DOCTYPE html>
<html lang="en">
<head>
  <meta charset="UTF-8">
  <meta name="viewport" content="width=device-width, initial-scale=1.0">
  <title>Sitemap - Example.com</title>
</head>
<body>
  <h1>Website Sitemap</h1>

  <h2>Main Sections</h2>
  <ul>
    <li><a href="/home">Home</a></li>
    <li><a href="/about">About Us</a></li>
    <li><a href="/services">Services</a>
      <ul>
        <li><a href="/services/design">Design Services</a></li>
        <li><a href="/services/consulting">Consulting Services</a></li>
      </ul>
    </li>
    <li><a href="/blog">Blog</a></li>
    <li><a href="/contact">Contact</a></li>
  </ul>

  <h2>Additional Resources</h2>
  <ul>
    <li><a href="/privacy-policy">Privacy Policy</a></li>
    <li><a href="/terms">Terms and Conditions</a></li>
  </ul>
</body>
</html>
In this example:
- The <h1> tag is used for the main title of the sitemap page.
- The <h2> tags are used to define the main sections of the sitemap, such as “Main Sections” and “Additional Resources”.
- The <ul> (unordered list) and <li> (list item) tags are used to list the links to various pages on your website. Nested <ul> tags are used to indicate sub-sections or categories within a main section, such as the “Services” section in this example.
- The <a href=”URL”>Link Text</a> structure is used to create clickable links to the pages.
How to submit your sitemap
To submit your website to Google Search Console, you simply need to create an account, open the Sitemaps menu, paste your XML sitemap URL into the Add a new sitemap field, and hit Submit.
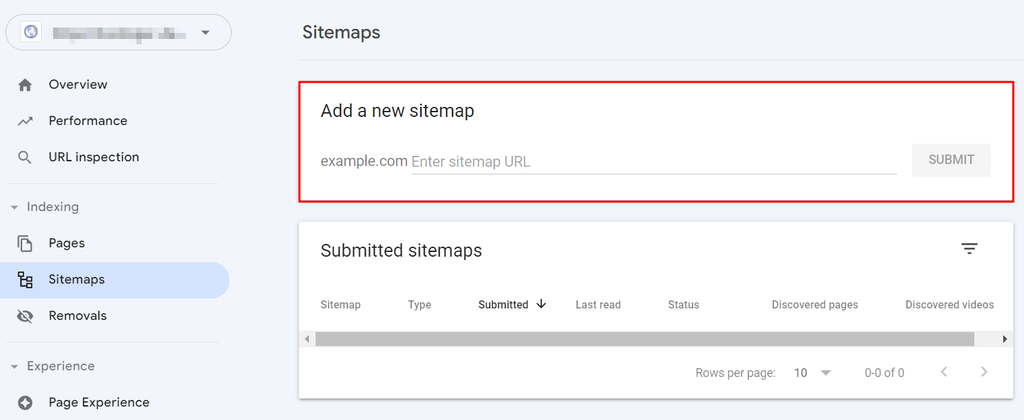
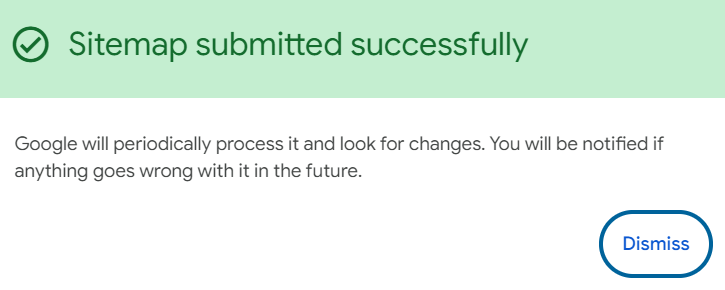
Once submitted, you’ll receive the success message.
While Google Search Console (GSC) is dedicated to Google, it’s a good idea to upload your XML sitemap file to other search engines’ webmaster tools as well, like Bing Webmaster Tools for Bing.
Why sitemap submission matters
Submitting your sitemap to search engines is essential, as crawlers continuously scan the web, follow links, and store what they find in massive indexes. Since they don’t search the entire web in real time, these indexes power the results users see.
A sitemap acts as a roadmap, helping crawlers discover important pages faster – especially on large, complex, or low-backlink websites. It also helps search engines use your crawl budget more efficiently.
Your crawl budget is the number of pages a search engine is willing and able to crawl on your site within a certain period. Smaller sites rarely hit this limit, but for websites with thousands of pages, the crawl budget determines how quickly new or updated content gets seen.
A well-structured sitemap ensures that crawlers prioritize the pages that matter most, rather than wasting time on low-value or outdated URLs.
Sitemap SEO best practices
There are two SEO best practices we recommend: adding your sitemap to the robots.txt file and checking for sitemap errors. Doing so will help search engines crawl and index your website correctly.
Add your sitemap to the robots.txt file
The robots.txt file is the first place crawlers visit when accessing a website. It informs them which pages to index. By adding a sitemap to it, they can quickly discover all the site’s URLs.
Most hosting providers offer a control panel that enables you to modify the robots.txt file. If you use Hostinger, add a sitemap via hPanel:
- Access Websites → Dashboard → File Manager.
- Go to public_html and locate the robots.txt file. If it isn’t available, click the New File button to create one.
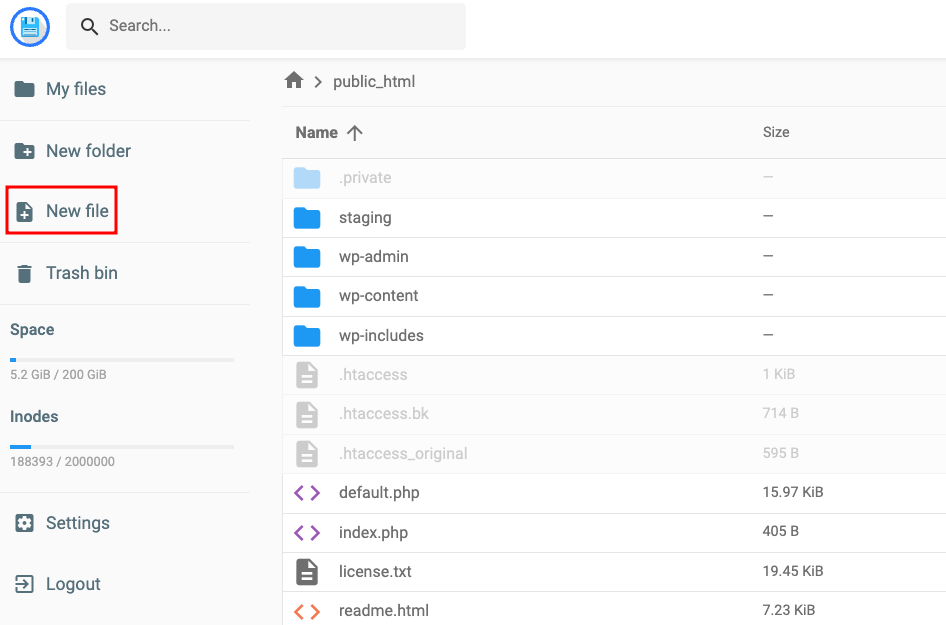
- Create a new file and name it robots.txt. It will then open the robots.txt page.
- Add your sitemap URL and click Save. Follow the example below for reference.
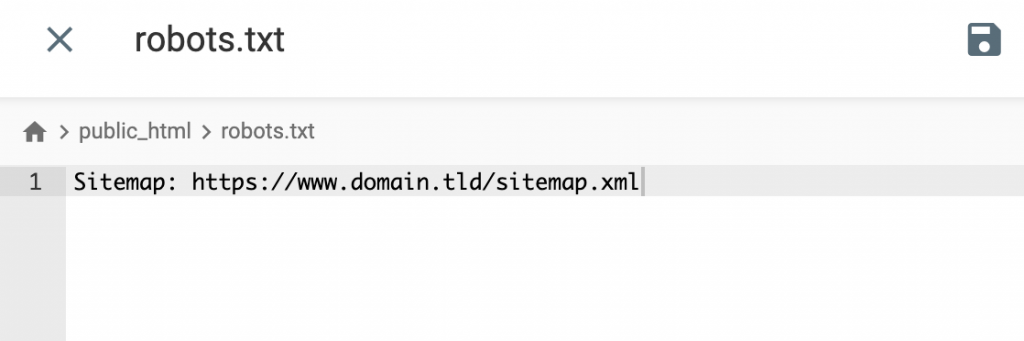
If you have multiple sitemaps, add each URL separately in a different line:
Sitemap: https://www.yourdomain.com/sitemap_1.xml

Sitemap: https://www.yourdomain.com/sitemap_2.xml
Check for errors using a Sitemaps report
Use the Sitemaps report in Google Search Console to identify potential issues. Some sitemap errors that might occur are:
- URLs not accessible. Google found the sitemap’s location but failed to crawl some of its URLs. Use the URL inspection tool to check the pages’ availability.
- URLs not followed. The submitted sitemaps have too many redirects and relative links for Googlebot to follow. Remember to use direct and absolute URLs when submitting sitemaps.
- Invalid URLs of and within the sitemap. The link is not valid due to unsupported characters or an incorrect format. For instance, the URL address may have ,com instead of .com or htps// instead of https://.
- Sitemap file too large. If your sitemap file exceeds 50MB or 50,000 URL limits, split it into multiple sitemaps. For example, you can organize your sitemaps according to the content type, like: sitemap-blog.xml, sitemap-products.xml, sitemap-pages.xml.
After that, open the Index Coverage Report to see the total number of links on your sitemap that Google has successfully crawled.

Let’s say the site has 20 pages, but when you check the report, only six of them have been indexed. This may happen because of duplicate pages, redirect URLs, or the site has exceeded its crawl budget limit.
Follow the steps below to fix errors within your sitemap:
- Log in to your Google Search Console.
- Select your website and go to the Sitemaps section.
- Check for any errors or warnings.
- Fix the errors. For URL errors, verify each URL, ensure all pages exist, and return a 200 status. Remove or fix broken URLs.
- Resubmit the sitemap.
For Hostinger users, check the sitemap and remove any unnecessary URLs via hPanel. Follow these steps to solve the problem:
- Access File Manager via hPanel.
- Go to the public_html folder and locate the sitemap.xml file.
- Right-click on it and select Edit.
- Remove the desired URL.
- Hit Save.
Inform Google about the change using the ping tool. Paste the following address in the browser using your sitemap URL:
http://www.google.com/sitemaps/ping?sitemap=http://yourdomain.com/sitemap.xml
How to make your entire website SEO-friendly
A sitemap is just one piece of the larger technical SEO puzzle. While it helps search engines understand and crawl your site more effectively, proper optimization goes beyond indexing. Your site’s overall user experience also plays a significant role in signaling search engines that your site is credible and worth citing.
So, after your sitemap is in place, focus on improving key areas of your website, including:
- Site architecture. Organize your content logically so search engines and users can easily navigate your pages.
- Page speed. Optimize images, use caching, and minimize unnecessary scripts to enhance loading times.
- Mobile responsiveness. Ensure your site looks and functions well on all devices to meet Google’s mobile-first indexing standards.
- Internal linking. Use clear, relevant links between pages to help crawlers understand relationships and boost user engagement.
To take the next step, learn how to implement an SEO friendly website design that supports better rankings and higher engagement.
All of the tutorial content on this website is subject to Hostinger's rigorous editorial standards and values.

Nurul Siregar has over 3+ years of experience in the tech industry with a passion for writing about digital marketing. Nurul enjoys reading fiction novels and making digital illustration in her free time. Follow her on LinkedIn.

Larassatti Dharma is a content writer with 4+ years of experience in the web hosting industry. She has populated the internet with over 100 YouTube scripts and articles around web hosting, digital marketing, and email marketing. When she's not writing, Laras enjoys solo traveling around the globe or trying new recipes in her kitchen. Follow her on LinkedIn