How to sell food online in 5 steps
Oct 01, 2026
/
By Ksenija
/
9 min Read

To sell food online, comply with the food regulations that apply to the location and product, test and prepare the food, set up an online storefront, choose a safe pickup/delivery/shipping model, and market the business to attract customers.
The exact process depends on what you sell and where you operate. A home-based bakery, for example, may face different rules and fulfillment challenges than a business shipping refrigerated products across a wider area.
Once those basics are clear, choose the selling and fulfillment setup that fits the product, test the full order journey, and launch with a small enough range to monitor quality and customer feedback.
1. Understand the legal requirements
Before offering your products to customers, check the food laws, permits, business registration, kitchen or facility rules, insurance, and labeling regulations that apply to your business.
Get these legal basics in place before deciding how to sell online. Doing so can prevent you from building a product range, packaging system, or sales process that your local rules do not allow.
Start by finding out where you can legally prepare your food. Depending on the product and local regulations, you may be able to use your home kitchen or need an approved commercial facility.
In the US, many states have cottage food or home food rules that allow lower-risk foods to be prepared in a private home, but the permitted foods and sales channels vary by jurisdiction.
However, the foods permitted, where they can be sold, and other conditions differ by state. These restrictions can determine which of the food business ideas are realistic for your home-based operation.
Next, identify which authorities regulate your business. Depending on where you operate, you may need a general business registration as well as permits or approvals from local health or food safety authorities.
Check these requirements directly with the relevant government agencies. A license issued in one jurisdiction may not cover your business in another.
When selling food in the US, check both federal and state or local requirements. Food prepared in a private residence doesn’t require the home to be registered as a food facility with the FDA, but state and local health rules still apply.
Other facilities that manufacture, process, pack, or hold food generally need to register with the FDA unless they qualify for an exemption.
Exemptions include certain retail food establishments, restaurants, farms, and private residences.
Shipping food to another state does not by itself determine whether your facility must register with the FDA. Registration depends on the type of facility and whether an exemption applies, while additional federal, state, product-specific, carrier, or labeling requirements may apply to interstate sales. Check the rules for your exact product and facility before accepting out-of-state orders.
Check insurance requirements and coverage separately from permits. Even when food liability insurance isn’t legally required, it can protect the business against claims involving issues such as illness, allergic reactions, or other harm associated with a product.
If you already have general business or home insurance, confirm whether it covers commercial food production rather than assuming that it does.
Finally, review the labeling requirements for each product before ordering packaging in bulk.
The information required depends on the product and where it is sold. For FDA-regulated packaged foods in the US, labeling rules can include the product name, net quantity, ingredient information, business name/address, and required major-allergen disclosure. Nutrition Facts labeling is also generally required for packaged foods, but specific exemptions are available for some small or low-volume businesses and products.
The FDA currently recognizes nine major food allergens: milk, eggs, fish, Crustacean shellfish, tree nuts, peanuts, wheat, soybeans, and sesame. If your product contains one, follow the applicable allergen-labeling rules.
2. Test and prepare your food products
Start with a small product range you can produce consistently and profitably. This makes it easier to control quality, manage costs, and learn what customers actually want before you commit to a larger menu.
When deciding which products to launch with, consider:
- Ingredient costs and availability. Choose products made with ingredients you can source reliably at a price that leaves enough room for profit.
- Preparation time. Calculate how long each batch takes and how many orders you can realistically produce without rushing or compromising quality.
- Shelf life and storage. Check how long each product stays safe and fresh, and whether it needs refrigeration, freezing, or other controlled storage.
- Delivery suitability. Prioritize products that can reach customers without losing their shape, texture, freshness, or overall quality.
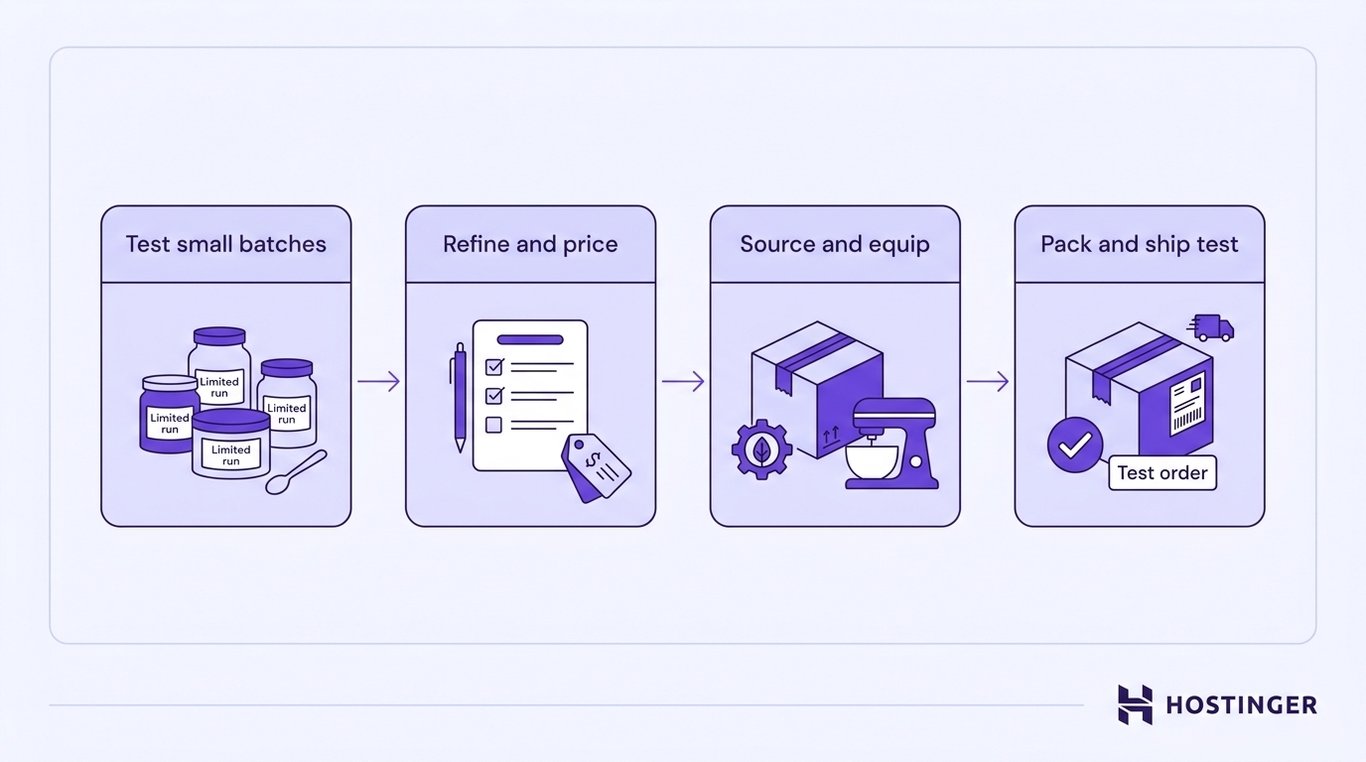
Before adding more products, test demand with small batches. Offer samples, take preorders, or sell limited quantities at local markets and events. Track which products attract the most interest and use customer feedback to adjust recipes, portion sizes, and pricing.
Set a clear preparation and storage process for every product you plan to sell. Record how it should be stored, how long it remains suitable for sale, and any temperature or handling requirements you need to follow between preparation and delivery. This is especially important for products that must stay chilled or frozen.
Once your product range is defined, buy only the equipment you need for your initial production volume.
Choose suppliers based on ingredient quality, price, minimum order quantities, delivery schedules, and reliability.
For ingredients you can’t easily substitute, keep a backup supplier in mind so shortages or delays don’t stop production.
Finally, opt for packaging that protects your products during storage and transport. Make sure it can handle the risks relevant to your food, such as crushing, leaks, moisture, heat, or cold, and that it is practical to store and use during busy order periods.
3. Set up your online storefront
You can start an online store with a traditional website or shareable product links, or a custom storefront connected to a headless ecommerce backend. In a headless setup, the customer-facing sales channel is separated from the system that manages products, payments, orders, and other commerce data.
Whichever approach fits your business, Hostinger Ecommerce can support it and give you room to add new ways of selling as your business grows.
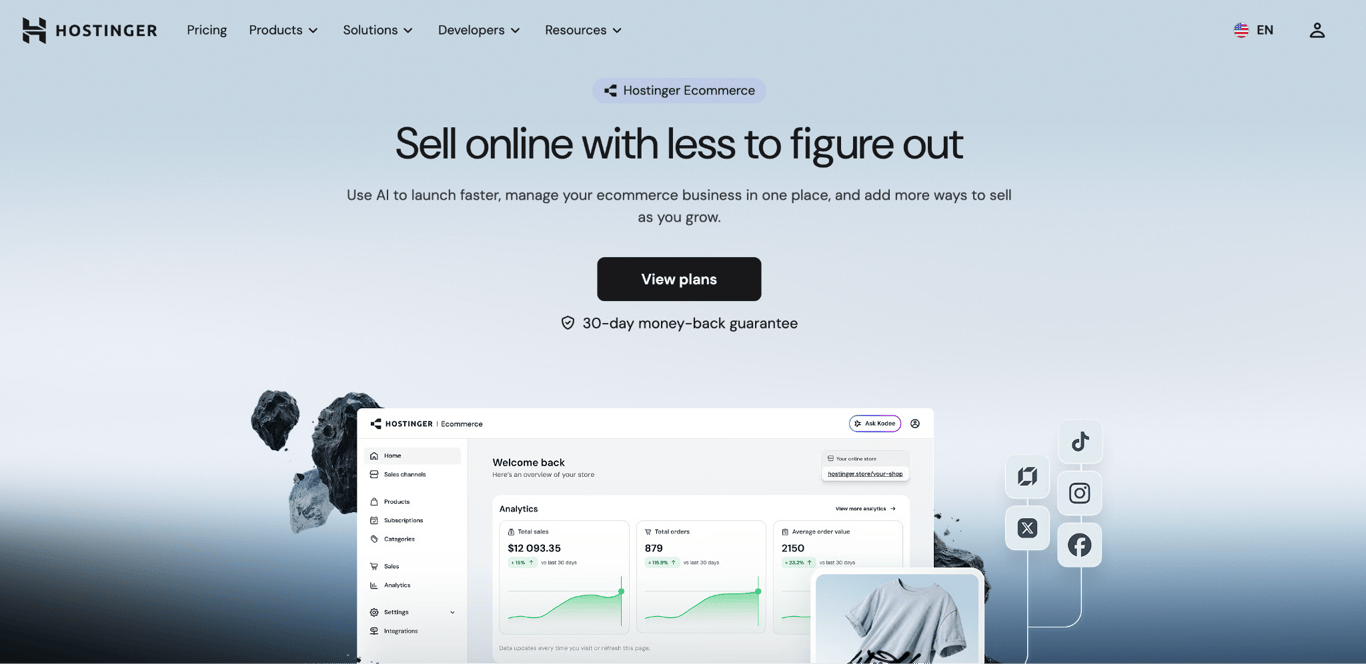
You can launch quickly by sharing product links through social media, DMs, or email, or create a branded online store with Hostinger AI Builder.
If you later need a custom storefront, you can connect one through the API while keeping your products, orders, customers, discounts, taxes, and analytics in the same dashboard.
Hostinger charges 0% transaction fees and supports 100+ payment methods, so you can offer customers multiple payment options without Hostinger taking a percentage of each sale. Payment processing fees may still apply, depending on the provider you use.
Once you’ve chosen how to sell, prepare your storefront for orders:
- Add your products. Use clear photos that show the product, portion size, and packaging customers will receive. Include ingredients, quantity or weight, available options, storage instructions, shelf life, and allergen information where relevant. When you write a product description, put the most important buying details near the top so customers don’t have to search for them.
- Set your prices. Calculate the cost of ingredients and packaging per item or batch, then add labor, payment fees, and other costs associated with each sale. Use that total as the starting point when you price a product, and check that your selling price still leaves enough profit after all expenses.
- Configure payments and checkout. Offer payment methods your target customers are likely to use and check the processing fees for each one. Add your pickup, local delivery, or shipping options and clearly show any associated fees before the customer pays.
- Test the purchase process before launch. Place orders on desktop and mobile using different product options and fulfillment methods, and use a test payment method where your platform provides one. Check prices, fees, payment flow, confirmation emails, and the order details your team will use to prepare and fulfill the purchase.
Before launching, make sure your storefront also looks like it belongs to your business. Use the same name and visual identity across your store and packaging, and create a logo that works in both places.
4. Choose how to ship and deliver your food
Choose a fulfillment method based on how far your food needs to travel and how long it can stay fresh under normal delivery conditions.
You can offer local pickup, local delivery, shipping, or a combination of these options if your products have different fulfillment needs.
Choose local pickup if your products have a short shelf life, are easily damaged in transit, or need to be eaten soon after preparation.
Set one or more collection locations, define pickup windows, and specify how much preparation time you need before an order can be collected.
For made-to-order products, such as celebration cakes or catering trays, requiring customers to select a pickup date and time at checkout can help you plan production.
Also, decide how long you’ll hold uncollected orders and communicate that policy before purchase.
Use local delivery when your food can travel for a limited period, but you want to keep delivery times predictable.
Start with a small delivery radius and calculate how many orders you can realistically complete within each delivery window.
Account for driver or courier fees, fuel, travel time, and insulated packaging when setting your delivery charge and minimum order value.
If products need temperature control, base the delivery window and packaging on the applicable food-safety requirements for that product and jurisdiction. Use suitable insulated containers or cooling materials, and verify the condition and temperature during test deliveries before selling through that route.
Consider shipping only when your products have sufficient shelf life to remain safe and maintain quality through packing, transit, and potential carrier delays.
Compare carriers based on delivery speed, service area, tracking, and cost, then calculate the total fulfillment cost for a typical order, including the shipping box, protective materials, insulation or cooling materials where needed, and the carrier fee.
Test different destinations and package sizes before setting flat-rate or calculated shipping charges.
For perishable products, plan shipping days and destinations so the food can arrive within its validated safe holding conditions, even if normal carrier delays occur. Avoid schedules that can leave temperature-sensitive packages sitting in transit over weekends or holidays.
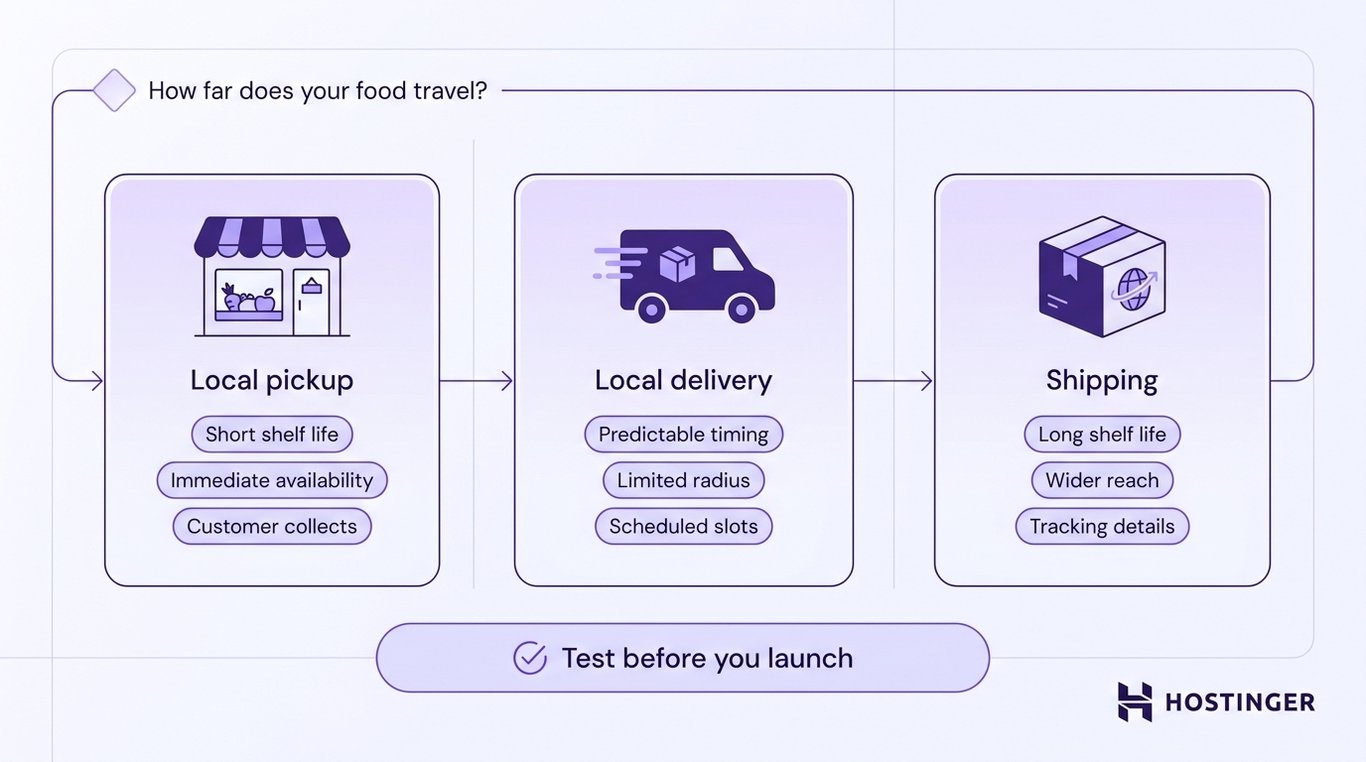
Before offering a delivery option to customers, send or transport a test order using the exact packaging and route you plan to use.
Check its condition and temperature when it arrives, how long the delivery actually takes, and whether anything leaks, melts, breaks, dries out, or is otherwise damaged.
Use the results to adjust your packaging, delivery radius, carrier, or available shipping destinations before fulfilling paid orders.
5. Market your food business
Start with two or three marketing channels that fit how your customers discover food, and track which ones actually lead to orders.
For a local bakery, that might mean Instagram, local search, and referrals, while a business shipping nationwide may get more value from SEO, email, and paid ads.
Use social media to show your products in context. Post close-up product photos, use preparation videos to demonstrate how they’re made, and announce new or limited menu items to give followers a reason to order.
Include a direct link or clear ordering instructions in your profile and posts so customers know what to do next. As your audience grows, you can make money on Instagram by turning that product-focused content into sales.
You can also make money on TikTok with short videos that showcase your products and direct viewers to your store.
Encourage word of mouth. Ask happy customers to recommend your business to friends and family. You can encourage referrals with a simple reward, such as a discount on their next order, when someone they refer makes a purchase.
Build an email list. Collect customer emails with consent at checkout and use them to share new products, seasonal menus, restocks, and preorder deadlines. Once you have subscribers, create a newsletter that focuses each email on one clear update or offer.
Follow email newsletter best practices by using a clear call to action and sending consistently when you have something relevant to share.
Help customers find your products through search. Use clear, specific terms on your product pages, like “vegan birthday cake” or “gluten-free cookie box,” so search engines can understand what you sell.
If you deliver locally, include your location where relevant, such as birthday cake delivery in Austin.
Beyond product pages, you can start a food blog with recipes, serving ideas, storage advice, and other topics related to your products. When creating these posts, write SEO-friendly content that answers questions potential customers search for and naturally leads them to relevant products in your store.
Test paid advertising with a controlled budget. Promote one product or offer to a clearly defined audience first, then compare the revenue generated with your advertising spend.
Pause campaigns that consistently cost more to acquire a customer than you can profitably afford.
Paid advertising can then become part of a broader ecommerce marketing strategy once you know which products, offers, and audiences convert.
Pro tip
Use UTM parameters (Urchin Tracking Module parameters, tags added to links to identify where visitors come from) to track your marketing results. For example, use a different UTM-tagged link for Instagram and your email newsletter. Your analytics tool can then show which channel brings more visitors and orders, helping you decide where to focus your marketing efforts.
Collect reviews from your first customers. Send a review request shortly after the order arrives, while the experience is still fresh.
Link customers directly to the relevant review or product page and ask about specific aspects such as taste, freshness, portion size, or delivery.
Display genuine reviews on your storefront to give future customers useful information as they decide what to order.
Tips for growing your online food business
Once orders start coming in, focus on what is selling, what customers are telling you, and what brings them back.
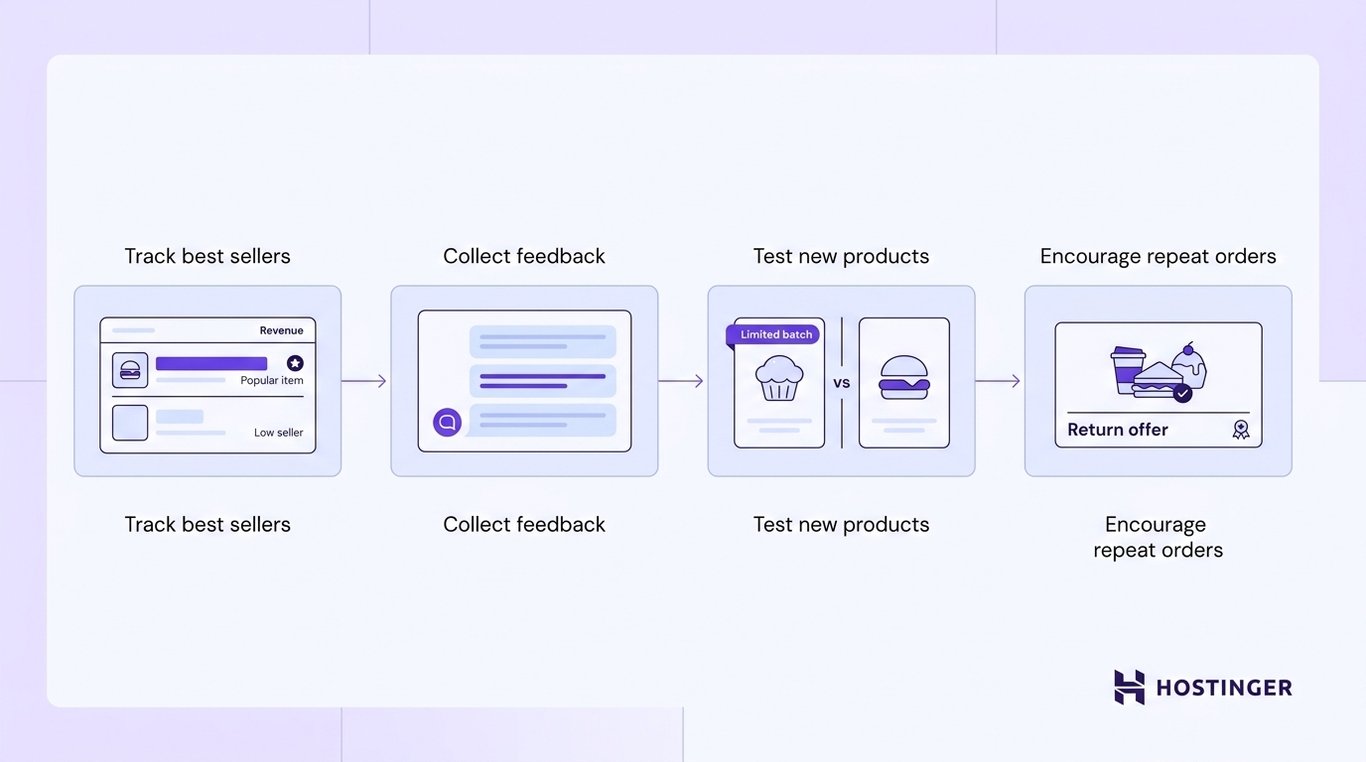
Use the following tactics to improve your product range and grow sales over time:
- Track your best-selling products. Look at which items generate the most orders and revenue, but also consider their cost and production time. A popular product with a low margin may need a price adjustment, while an item that rarely sells may be tying up ingredients and production time that could be allocated elsewhere.
- Collect and act on customer feedback. Ask customers about taste, portion size, packaging, and delivery. If the same issue comes up repeatedly, make a specific change and see whether the feedback improves. For example, you can adjust portion sizes if customers consistently find them too small, strengthen packaging if products arrive damaged, or change delivery times if freshness is a recurring concern.
- Test new products before expanding your range. Introduce a new flavor or product as a limited batch, seasonal offer, or preorder. Compare its sales and customer response with your existing products before deciding whether to keep it permanently.
- Encourage customers to buy again. Product bundles, loyalty rewards, and seasonal offers can increase online sales by giving existing customers more reasons to order again.
Next step: Build your food brand
Define what makes your products different, whether that’s distinctive flavors, premium ingredients, dietary specialization, convenience, or another clear selling point, and communicate it consistently to customers.
Use the same visual style, messaging, and tone across your packaging, online store, social media, and customer communication.
Pro tip
Create a simple brand style guide that documents your logo, color palette, fonts, and tone of voice. Even a one-page reference document makes it easier to stay consistent across packaging, your online store, and social media — especially as your business grows.
Consistency should extend to the customer experience, too. Keep product quality, packaging, delivery, and customer service dependable so the brand customers see online matches the experience they receive with every order.
As you build a brand, use customer feedback and sales data to understand what customers value most about your products, then emphasize those strengths in your packaging, store, and marketing.
Ang artikulong ito ay isang lokal na bersyon ng How to sell food online in 5 steps, orihinal na inilathala sa Ingles.
All of the tutorial content on this website is subject to Hostinger's rigorous editorial standards and values.

Ksenija is a digital marketing enthusiast with extensive expertise in content creation and website optimization. Specializing in WordPress, she enjoys writing about the platform’s nuances, from design to functionality, and sharing her insights with others. When she’s not perfecting her trade, you’ll find her on the local basketball court or at home enjoying a crime story. Follow her on LinkedIn.