How to start an online store in India: A simple 7-step guide
Mar 10, 2026
/
Emman Z.
/
10 min Read
Starting an online store means turning a product or service idea into a business that sells online. In India, many people start online stores with a small budget, no technical background, and a focus on selling either locally, across India, or to international customers.
Starting an online store involves a few clear stages, from choosing what to sell and understanding your audience to setting up your store, promoting your products, and improving performance over time.
Here’s a breakdown of the seven steps to start an online store:
- Decide what to sell online
- Figure out who your target audience is
- Build your brand
- Choose a business structure and handle registration basics
- Build your online store
- Start marketing your online store
- Optimize for growth and performance
Following these steps helps you start an online store in a structured way, avoid common beginner mistakes, and build a foundation that supports long-term growth.
1. Decide what to sell online
The first step to starting an online store is deciding what to sell, whether there is real demand, and if it can be profitable. In India, many successful online stores start with simple products or services that solve everyday needs or target a specific niche.
Begin by listing products or services you can source, create, or deliver reliably. Then check whether people are already searching for them online and how competitive the market is. For me, using Google Trends was a game-changer. It’s free and super easy to use. Just go to the Explore page, add your product keyword, and compare it with a few others.
As an example, I compared three fitness equipment products to see which had a higher search interest.

The results show yoga mats have had the highest interest over the past 12 months, making them the ideal product to sell online.
Once you’ve picked your product, think about how to source it. I’ve seen three common methods work well:
- Making your own products. Ideal for handmade items, custom goods, or digital products, with full control over quality and branding.
- Reselling products. Buying from suppliers and selling at a margin allows faster setup and wider product variety.
- Dropshipping. A low-risk option where suppliers handle storage and shipping, reducing upfront investment.
After selecting your products and sourcing method, set prices based on costs, competitor pricing, and expected margins. Transparent pricing helps you stay profitable while remaining competitive. For a complete guide on setting the right price, check out our tips on pricing a product.
2. Figure out your target audience
Knowing who you are selling to makes every other decision easier, from choosing products and pricing to deciding where and how to promote your store. Instead of trying to appeal to everyone, focus on the people most likely to buy from you.
Start by creating a buyer persona. This is a simple profile of your ideal customer that answers questions like:
- How old are they?
- Where do they live?
- What are they interested in?
- What problems does your product solve for them?
For example, if you sell reusable water bottles, your target audience in India may include students, office workers, or fitness-focused customers living in urban areas. They are likely price-conscious, mobile-first, and influenced by social media trends.
To find and understand your audience better, focus on these channels:
- Instagram and Facebook are widely used for product discovery in India. Search social media hashtags related to your product, like #ecoliving or #hydrationgoals, to see who’s posting and engaging.
- Join online communities like Reddit or Facebook groups that match your niche and observe what people discuss.
- Look at competitors’ followers on platforms like Instagram to see who’s already interested in similar products.
Once you’ve defined your buyer persona and figured out where to find them, let that guide all your decisions. Knowing your audience makes it easier to connect with them and grow your business.
3. Build your brand
Building a brand gives your online store a clear identity and helps customers trust you. In India, a strong brand is less about visuals alone and more about clarity, consistency, and reliability
Define your brand values
Start by defining your brand basics. Be clear about what you sell, who it’s for, and why customers should choose you. This guides your messaging, pricing, and how you present your products across your website and marketing channels.
I asked Eric Koenig, Founder of Twigs Paper, how he approached this for his brand.
Expert tip
The initial phase involved a deep dive into understanding our core values and how they resonate with our target audience. This foundational step shaped our brand identity that reflects our commitment to sustainability and creativity.

Choose a business name
Next, choose a business name that is simple, easy to spell, and easy to remember. Names that work well in English and look clean in writing tend to perform better online.
For example, if you sell candles with eco-friendly ingredients, business name ideas like Pure Earth Candle Co. or Forest & Wick might work.
Once you have a name in mind, check if the domain is available (for example, yourbusinessname.com). A matching domain makes it easier for your audience to find you online and reinforces your brand’s professionalism.
Personally, I use our domain name search tool to find out if the name I want is available. It’s a simple tool that shows which domain names are taken and suggests alternatives.
Domain Name Checker
Instantly check domain name availability.
Create your brand identity
With your name and values in mind, bring your brand to life visually. Consider colors, fonts, and a logo that reflects your values.
- Logo. Keep it simple yet memorable. Tools like Canva are great because they’re easy to use and have pre-made templates.
- Color palette. Use 2–3 consistent colors that match your product type and audience.
- Fonts. Choose clear, professional fonts that are easy to read on mobile devices.
A clear and focused brand helps your online store stand out, builds recognition over time, and makes customers more confident about buying from you.
For more inspiration on turning your values into a cohesive brand, read our guide on building a strong product brand.
4. Choose a business structure and register your business
Before scaling your online store, it’s important to think about how formally you want to operate. Many online stores in India start small and simple, then formalize their business only after they see consistent sales.
When you are just testing an idea or selling on a small scale, you don’t need to overcomplicate the setup. Focus first on validating demand, fulfilling orders, and understanding your customers.
As your online store grows, you can decide on a suitable business structure based on your goals, revenue, and long-term plans. This step helps you separate personal and business activities and prepares you for growth.
At a high level, business registration helps with:
- Building trust with customers and payment providers
- Managing finances more clearly
- Preparing for long-term scaling
Instead of trying to handle everything at once, many Indian founders follow a phased approach:
- Start selling online with a simple setup
- Track revenue and demand
- Formalize the business when operations become consistent
The exact registration process and requirements depend on where you are based and how you plan to operate. If you’re unsure, it’s best to review official government resources or consult a professional before making decisions related to registration or taxation.
This approach lets you move forward confidently without delaying your online store launch due to unnecessary complexity.
5. Build your online store
Building your online store is where your business idea becomes real. This step involves choosing the right tools, setting up your store structure, and preparing everything for customers to place orders smoothly.
1. Pick an ecommerce platform
Start by selecting an ecommerce platform that is easy to use and fits your budget. For most beginners in India, website builders with built-in ecommerce features are the simplest option because they handle hosting, design, and store management in one place. I recommend Hostinger’s ecommerce website builder.

It’s beginner-friendly and packed with features to run an online store, such as:
- Comprehensive store manager. From checkout to inventory tracking, you can manage your online store in one dashboard.
- AI-powered tools. Ranging from AI Image Generator to Heatmaps, these tools help elevate your online store.
- 0% transaction fees. Unlike many other platforms, Hostinger lets you keep all your profits.
- Multiple payment gateways. Offer secure payment options like PayPal, Stripe, and more to suit your customers’ preferences.
- Multilingual capabilities. If you’re planning to reach a global audience, you can easily add multiple languages to your online store.
- Google Ads app. You can promote your store with Performance Max campaigns right there from your dashboard.
In addition to the ecommerce features, the website builder comes with security and performance measures to ensure your online store runs smoothly. Starting at ₹249.00/month, it’s perfect for your first online store.
2. Create your online store
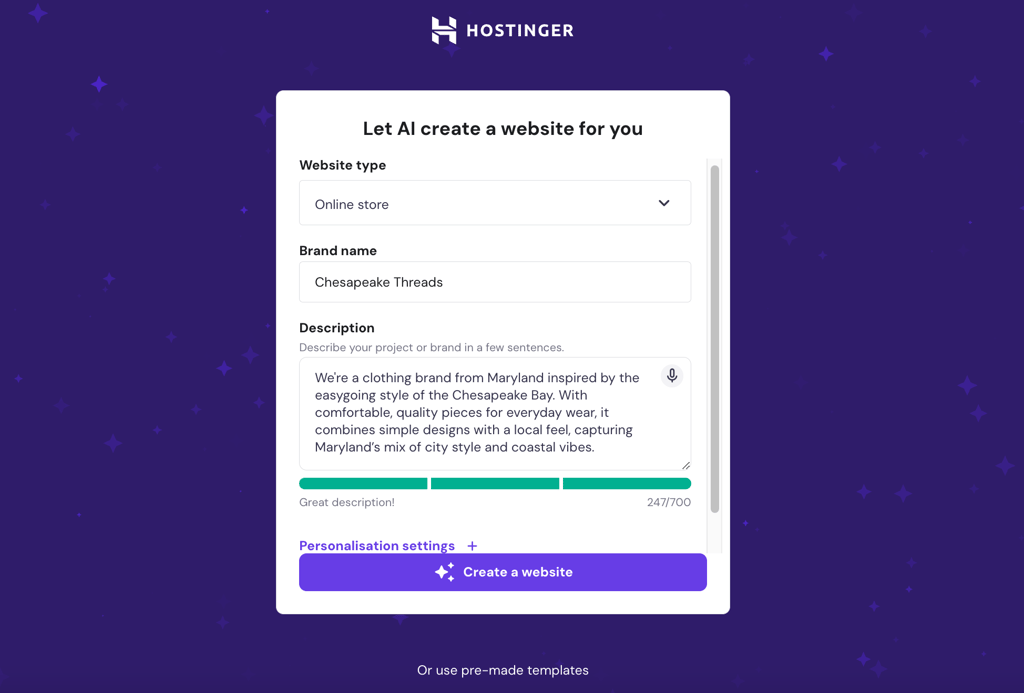
After purchasing the ecommerce website builder plan, it’s time to create the website. I recommend using AI as it makes the process a lot quicker. Here’s how I’d do it:
- Add your website type, business name, and description. Be detailed here and mention your products, location, and brand values to get a more accurate design.
- Customize the look by specifying your colors and fonts. For example, I might say, “I want earthy tones and a clean font like Montserrat.”
- Click Create a website and let the AI do its magic. In seconds, you’ll have a ready-to-use design.
The next step will take you to the online store’s preview mode.
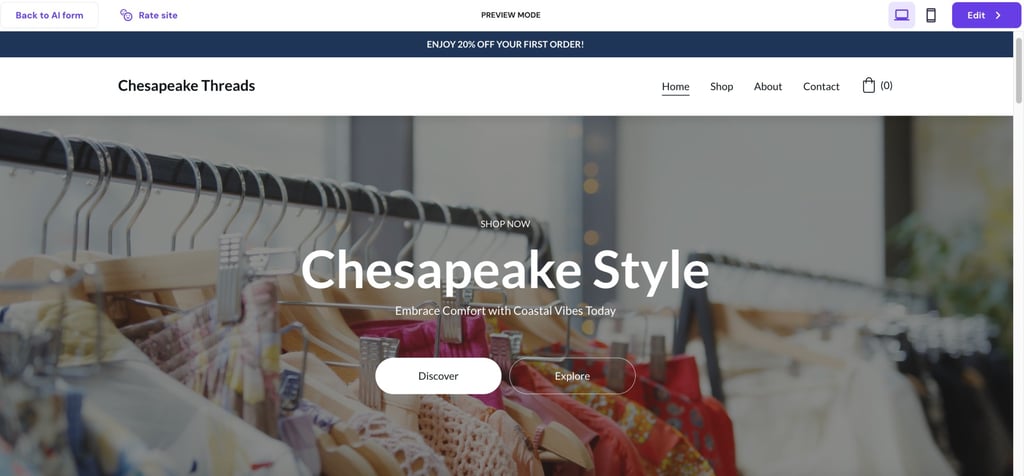
In this preview mode, you can browse the website pages. If you prefer another design, click Back to AI form at the top left. If you’re happy with how it looks, click Edit at the top right to proceed to the next step – which is setting up the online store.
Start by adding your store’s country and currency, then click Next. The setup process will take you to the Store manager.
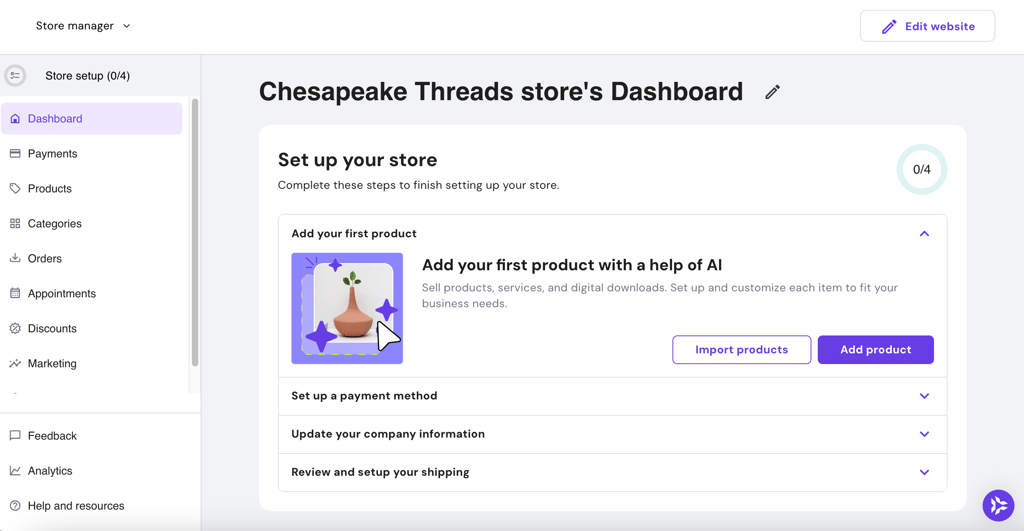
We’ll finish the online store setup in the next four steps.
3. Add products
The first step of the store setup process is adding your products – either by importing or uploading them. Go to Add product and choose your product type. If you sell physical products, you can upload multiple products at once.
Once uploaded, you can see all your products under the Products page.
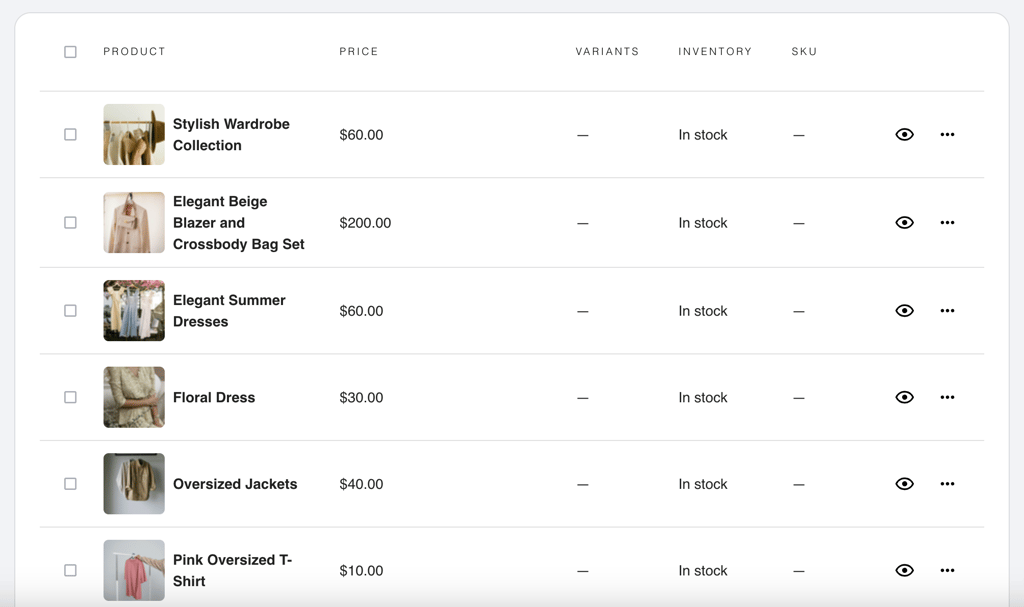
Next, you can start editing each product and add the product description, pricing, category, and other relevant information. Our guide on adding products can help you with the process and ensure you complete every step.
When editing product details, keep these in mind:
- Product category. You can start with simple categories like “New arrivals” or “Essentials”, which will help customers find specific items. As you add more products, you can create other categories for better organization.
- Product SEO. Add meta title, description, and keywords to help optimize your product page for the search engines.
Suggested reading
Take a look at our guide on product pages to learn how to change the layout, style, and more!
4. Set up payment gateways
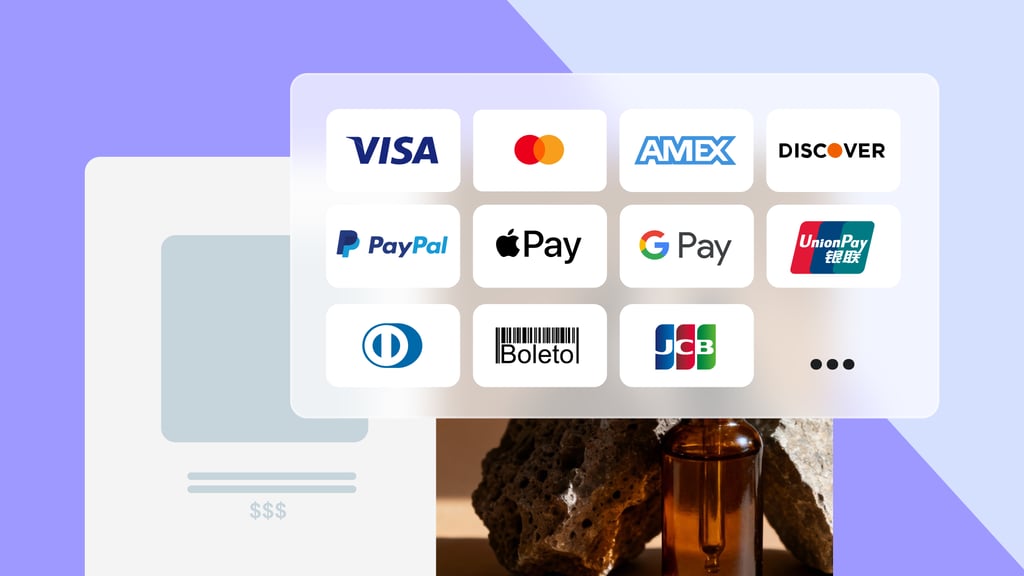
Offering multiple payment options is a top ecommerce trend because it makes shopping easier and improves the overall user experience.
Hostinger Website Builder offers various payment options, such as Stripe, PayPal, and credit and debit cards. Some regions also have preferred payment methods, such as UPI. If you plan to sell internationally, also activate international payments.
To connect with the payment gateways, go to Store manager → Payments.
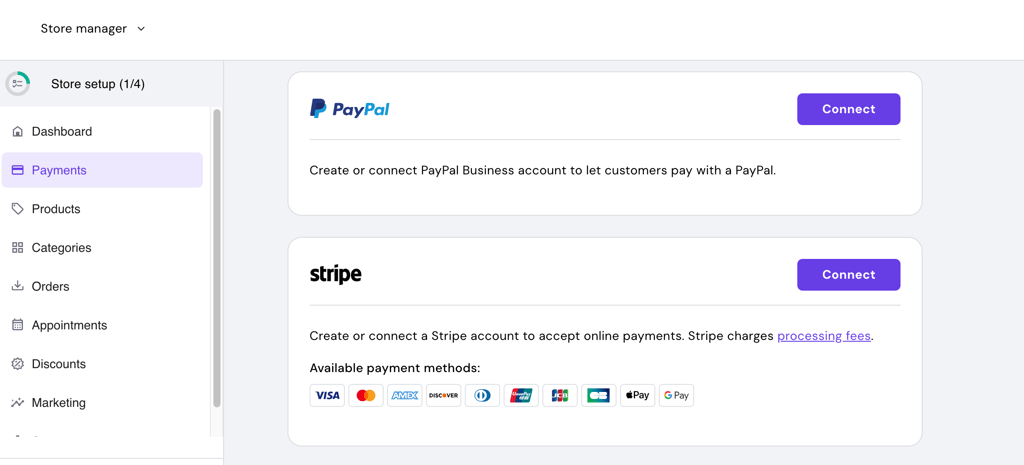
I recommend connecting as many payment gateways as possible. This gives customers more options and increases the chances of a successful transaction.
5. Update company information
The next step is to add company information to your invoices. This helps strengthen your branding and adds a professional touch to your online store. To do this, go to Store manager → Settings → Company information.
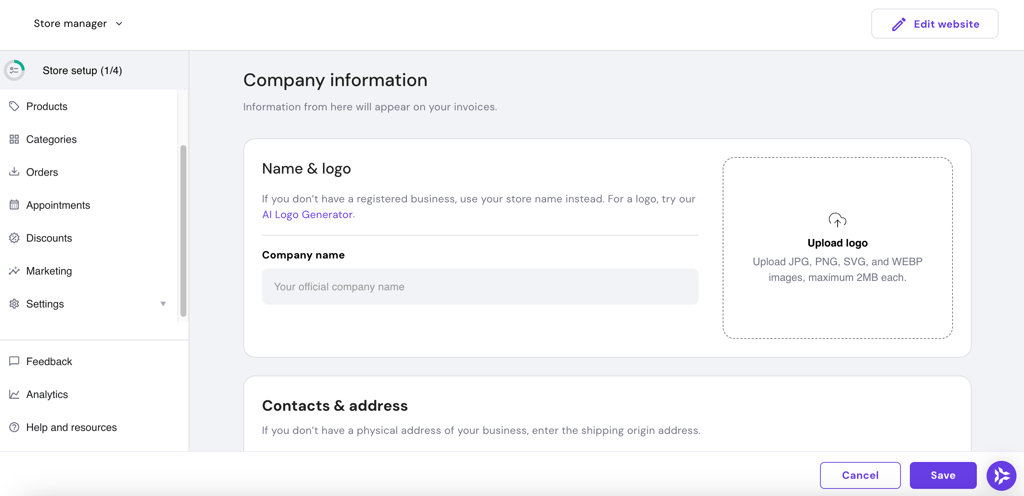
Add the business name and logo. Next, add your contact details and address. If you don’t have a physical business address, replace the address with the shipping origin address.
Once you have a purchase order, you can check and manage your invoices. Alternatively, you can create a test order to see how the invoices look.
6. Set up shipping and checkout
Let’s start by adjusting the shipping settings on your website. On the Store manager homepage, go to Settings → Shipping. Click Create zone and set up the shipping details.
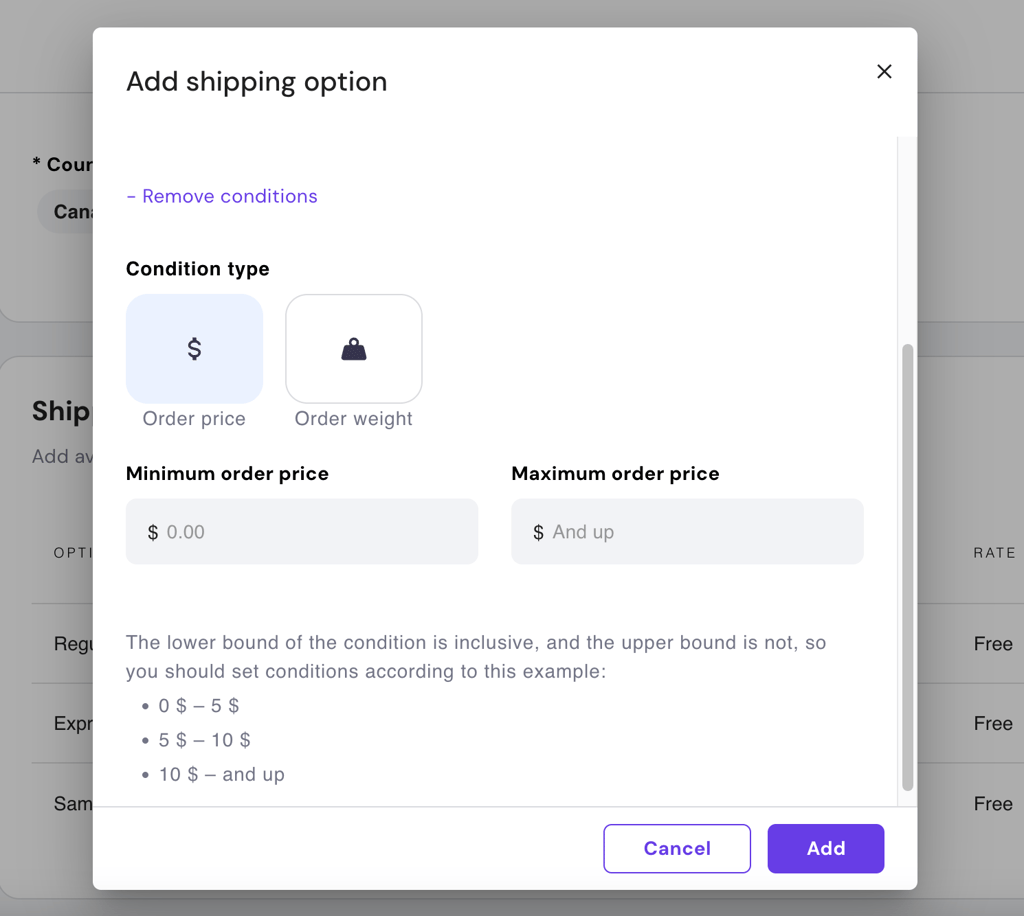
Start by creating shipping zones based on where you plan to deliver. You can set up zones for local delivery, pan-India shipping, or international orders, depending on your business model. Assign the relevant regions or countries to each zone and save your settings before moving forward. Once done, click Save and continue to customize the shipping options:
- Create and name the shipping options, e.g., regular and express.
- Add shipping rate.
- Add shipping condition type, which you can customize based on product price or weight.
Next, find reliable shipping agents that deliver to your chosen locations and add their shipping rates. You can start small by choosing your regular shipping agents, then consider a long-term shipping partnership once your business grows.
Expert tip
For payment and shipping, we partnered with eco-conscious shipping providers to minimize our environmental footprint while maintaining efficiency.
For checkout, the process starts with adding links to your store’s terms and conditions and privacy policy. To do this, go to Store manager → Settings → Checkout.
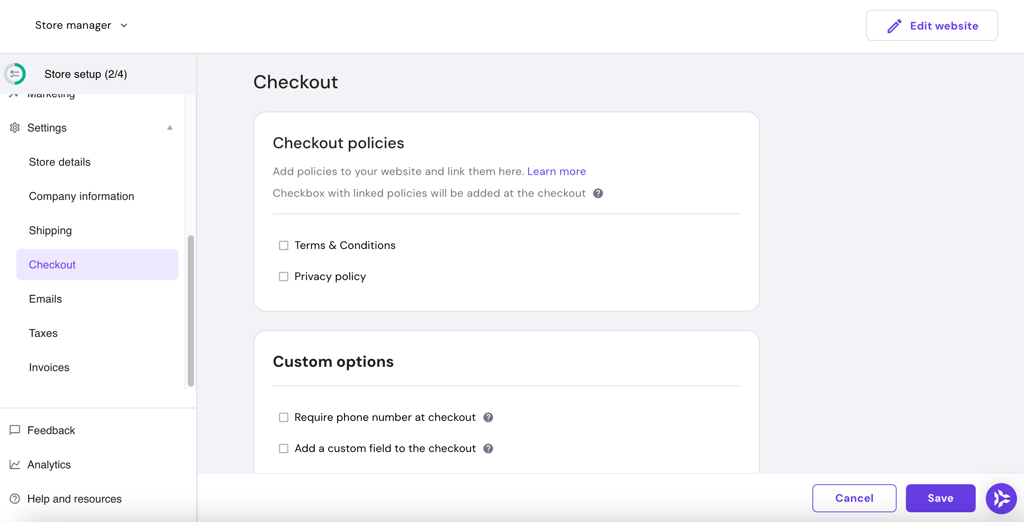
Tick the boxes for checkout policies, which include adding legal pages like Terms and conditions and Privacy policy. Once you’ve added all checkout details, click Save.
These six steps help you build your online store. Make sure that you cover all of them and, if needed, use our article on creating an online store to guide the process.
7. Launch your online store
Launching your online store brings all your hard work together. First, go over all the pages in the Store manager and check the features.
Next, click Edit website at the top right to go to the site editor page. Here, you can preview the website and connect the domain name before launching the online store.
Once you’re done, click Go live to publish the online store.
6. Start marketing your online store
Once your online store is live, marketing is what brings in visitors and turns them into customers. In India, effective ecommerce marketing focuses on visibility, trust, and consistent engagement rather than large upfront ad spend.
Start with channels that are easiest to manage and already familiar to your target audience.
Build your presence on social media
Social media is one of the primary ways Indian customers discover new brands and products. Platforms like Instagram and Facebook work especially well for online stores.
Use social media to:
- Share product photos, videos, and short demonstrations
- Announce new launches, offers, or limited-time discounts
- Highlight customer feedback or repeat purchases
- Answer questions through comments and direct messages
Consistent posting and quick responses help build trust and brand recognition over time.
Use offers and promotions strategically
Promotions give customers a reason to place their first order. Simple launch discounts, bundle offers, or limited-time deals can create urgency without hurting long-term pricing.
With Hostinger’s ecommerce website builder, you can set discount codes on the Store manager page.
Focus on search visibility
Many buyers in India search online before purchasing. Optimizing product pages, category pages, and basic website content helps your store appear in search results over time.
Clear product titles, accurate descriptions, and helpful content improve discoverability without relying entirely on paid advertising.
Stay connected with your customers
Direct communication helps turn first-time buyers into repeat customers. Order updates, follow-ups, and simple promotional messages keep your brand top of mind.
Clear and timely communication improves customer satisfaction and increases the chances of repeat purchases.
Don’t be afraid to try different strategies and learn what works best for your audience. Learn more about ecommerce marketing.
7. Optimize for growth and performance
Once your online store is running, regular optimization helps you improve sales, customer experience, and long-term growth. In India, this process works best when it stays simple, data-informed, and customer-focused.
First, collect customer feedback. Listen to what customers say about their experience and adjust based on their suggestions. I learned from Ben Read of Mercha how feedback can help increase customer satisfaction.
Expert tip
We learned valuable lessons when early customer feedback pointed out lapses in our communication process. Her feedback led us to tighten our follow-up processes and highlighted the need to balance our high-tech, high-touch approach to maintain customer satisfaction.

Second, analyze website analytics. Connect Google Analytics to your website and start measuring important metrics. This includes page views, click-through rates (CTR), and conversion rates to see which areas of your website are performing well and which need improvement.
Third, regularly update your website and product section to reflect the latest trends and customer preferences. For example:
- Add new products or seasonal items to keep your inventory interesting.
- Refresh product photos with high-quality visuals that resonate with your target audience.
- Update your website banners or homepage to reflect promotions or trending items.
By tweaking things based on feedback and keeping up with trends, you’ll keep your customers interested and set yourself up for steady growth over time.
Pro tip
When you make changes, always remember to update the website so you can view your latest changes live.
What to do next after starting your online store
Starting an online store in India isn’t overwhelming when you take it one step at a time. To recap, there are three stages of starting an online store:
- Pre-launch. Choosing what to sell, identifying your audience, building a strong brand, and registering your business.
- Launch. Creating your online store, adding your products, and ensuring everything is ready to go live smoothly.
- Post-launch. Marketing your store to attract customers and continuously improving based on feedback and trends.
When you’re ready to move beyond setup and focus on growth, learning how to scale an ecommerce business helps you increase sales, streamline operations, and expand more efficiently.
All of the tutorial content on this website is subject to Hostinger's rigorous editorial standards and values.

Emman is a Content Writer at Hostinger where she helps simplify complex topics for readers around the world. With over 5 years of experience in crafting SEO content, she’s passionate about making tech topics easy to understand. In her free time, Emman enjoys traveling and watching Formula 1 races. Follow her on LinkedIn.


Comments
3 responsesJune 11 2020
Excellent post. The first-ever blog read on Hostinger and found it useful. Nice work Thanks.
October 11 2021
Great you are ....
October 12 2021
Happy to hear we helped!