Thursday May 19, 2022
Yoga K.
Introducing the Hostinger WordPress Staging Tool: Test Your Website Before Publishing It
Before we introduced the WordPress staging feature earlier this year, users needed to create their own staging environment for site testing. Doing so required installing plugins or even contacting customer success specialists for help.
This made creating staging environments quite challenging, not to mention time-consuming.
Now, with the WordPress staging feature, users can create a staging environment directly from their hPanel, without hassle.
Since there’s more to it, let’s take a look at the benefits of this new feature and, most importantly, how to use the WordPress staging tool.
Why Should You Use WordPress Staging?
WordPress staging allows you to test changes made without affecting the live website. For instance, you can safely modify themes and test plugins on the staging environment. If something goes wrong, your website will not be affected.
WordPress staging also helps you discover bugs or critical issues before the site goes live, ensuring better functionality and user experience.
Using the WordPress staging tool available on your hPanel, you no longer need to install third-party plugins to create staging environments. The process is fully automated – from creating the staging environments to publishing any changes on a live website.
However, the WordPress staging feature is only available for specific hosting plans:
- Business Shared Hosting
- Cloud Hosting
- Business WordPress Hosting
- WordPress Pro Hosting
If you run a website using the Single or Premium Shared Hosting plans, you’ll still need to create a WordPress staging environment manually. Alternatively, you can use plugins like WP Staging.
How Does the WordPress Staging Tool Work?
Once you create a staging environment, the WordPress staging tool will create a subdomain that contains a copy of the production website.
The production and staging websites are not connected, so it is safe to make changes while in the staging environment.
How to Use Hostinger WordPress Staging Tool?
Creating a staging environment with the WordPress staging tool is very easy and can be done right from your hPanel. Let’s see how to do it step-by-step:
- Log in to your Hostinger account to access hPanel.
- Navigate to WordPress -> Staging.
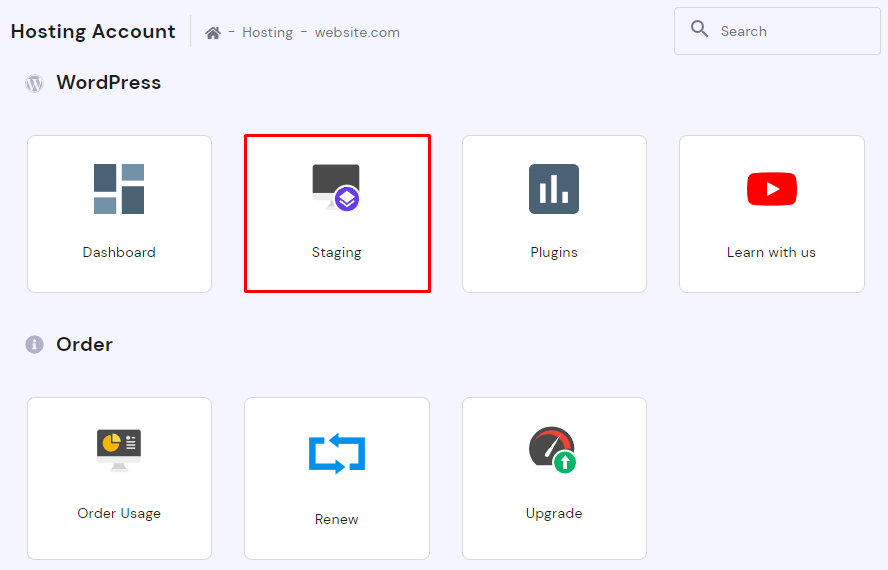
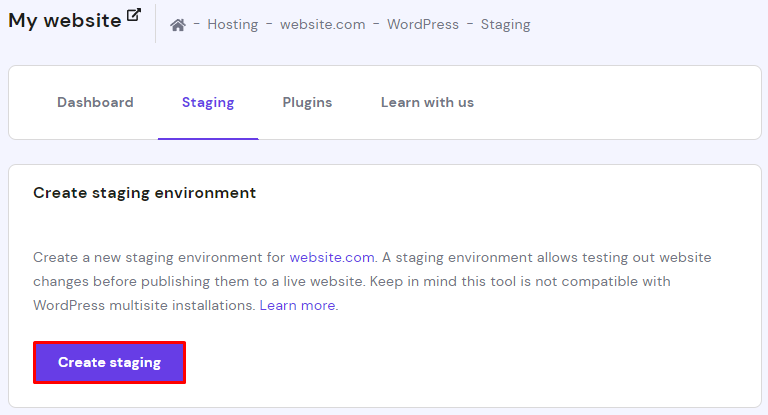
- In the Staging tab, click Create staging.
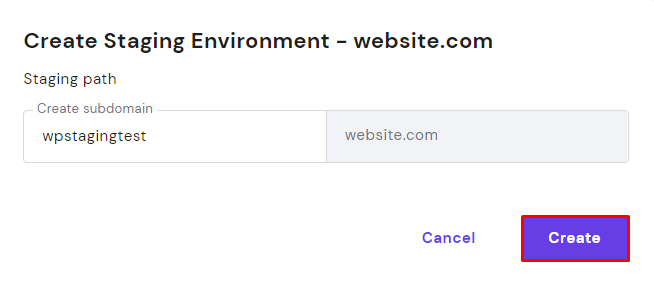
- A pop-up window will appear. Fill in the required fields to create a subdomain for the staging environment and hit Create.
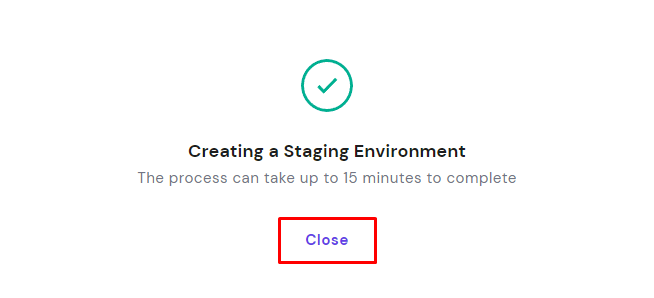
- Depending on the size of your production website, the staging environment creation may take up to 15 minutes. Once the process is complete, click Close to dismiss the confirmation message.
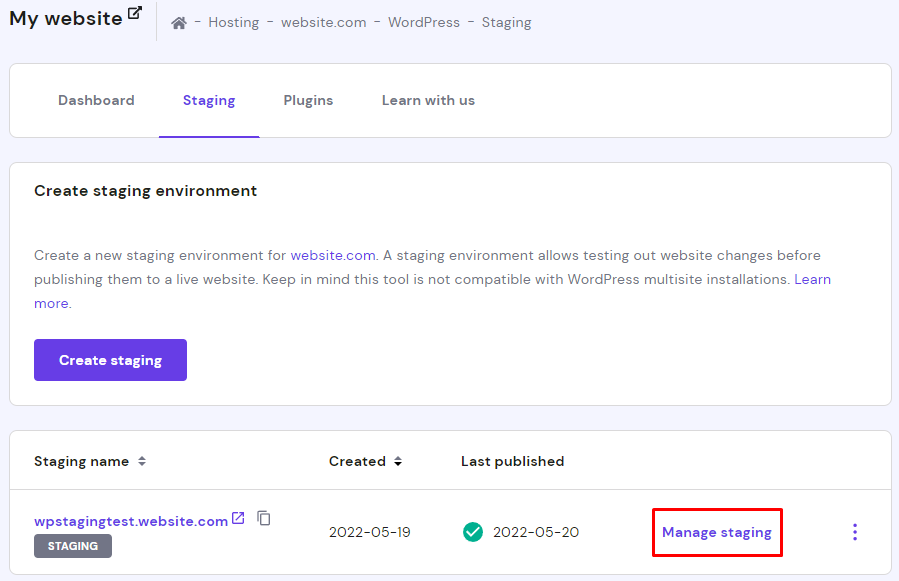
It’s that simple! Now, to use the staging environment, click Manage staging next to the desired staging site.
On the staging dashboard, access the WordPress admin area by clicking Edit staging.
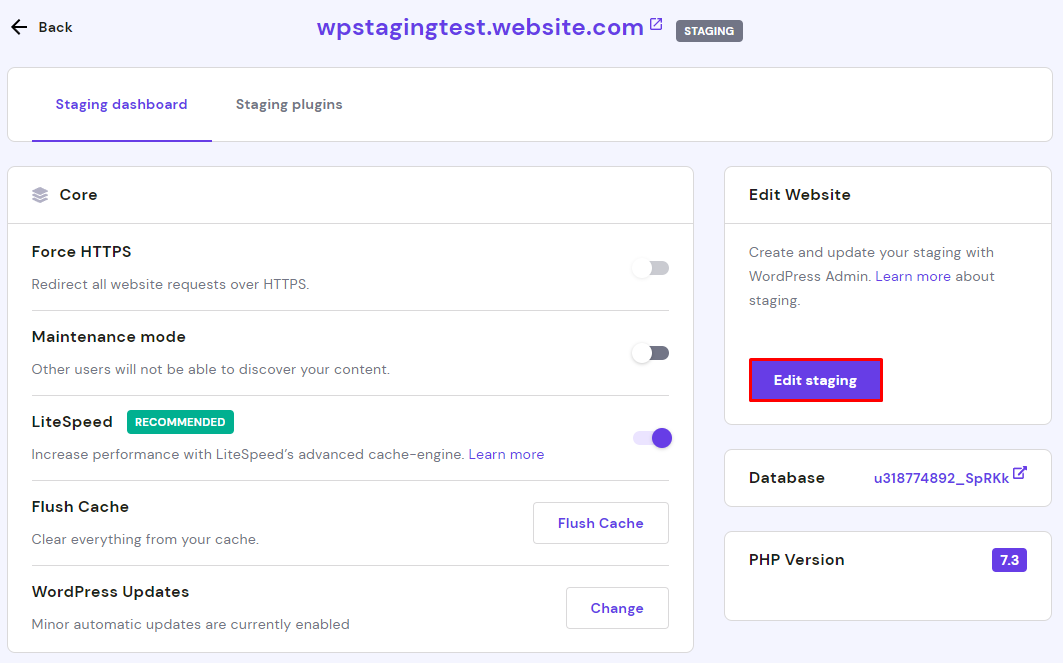
You can start making changes to your posts, pages, plugins, and themes. Once you are happy with the changes, go back to the WordPress staging page on hPanel by navigating to WordPress -> Staging.
Click the three dots icon next to the updated staging site and select Publish.
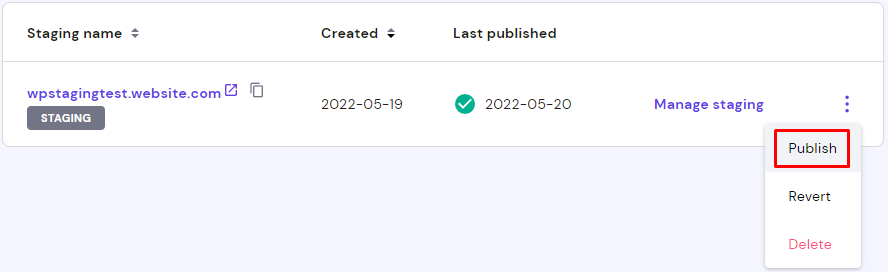
A pop-up window will appear asking you to confirm your changes. Click Publish to finish the process.
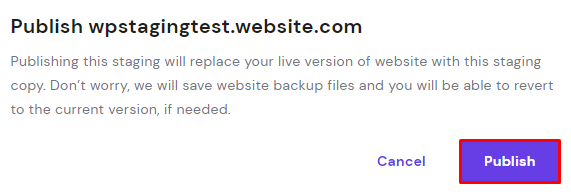
The tool also creates a backup automatically before publishing the staging environment, so you can easily revert the changes if necessary.
That’s it! The Hostinger WordPress staging tool makes modifying and publishing the staging environment that simple.

Information Technology and web development are Yoga's passions. He loves nothing more than sharing his experience with readers, and helping them to understand the world of IT. In his spare time, Yoga likes to make music and learn to code. He is always looking for new challenges, and enjoys pushing himself to learn new things.