What is a public API?
Aug 27, 2025
/
Aris S.
/
9 min Read
A public API (application programming interface) is a mechanism that enables everyone on the internet to integrate external tools into their website or application. It works by providing endpoints that users can use to request specific services or data from the server
Developers use public APIs for their efficiency, simplicity, and large datasets, which enables them to enrich their applications without developing everything from scratch. Public APIs are free and available for everyone to use, unlike private or internal APIs
You can use a public API in five simple steps:
- Find a public API on a website or platform like GitHub.
- Read the API documentation to learn more about its specification, functionality, and requirements.
- Sign up for an account on the API provider’s website to obtain the endpoint and authentication key.
- Test your API functionality by sending a request to the server using a tool like cURL or Postman.
- Integrate the public API into your application by inserting the functions into the back end.
Let’s learn about public API, where to find one, and how to integrate it into your application in more detail
What is a public API?
A public API (application programming interface) is a mechanism for accessing a third-party service, tool, or data.
For example, you can integrate the Hostinger API into your custom application to manage your Hostinger account, including purchasing and
setting up a virtual private server (VPS).
How does a public API work?
To understand how a public API works, let’s use a restaurant as an analogy
Think of a restaurant where anyone can walk in and get the food they want. This is similar to a public API, where developers can use it to access different data or services
Using a public API is like ordering at a restaurant; there’s a specific process to follow, with different parts working together to fulfill your request. Let’s break it down one by one.
Endpoints
In a restaurant, you order a particular food by selecting a menu item. It is a way to tell the chefs in the kitchen what you want to eat
In APIs, menu items are similar to endpoints – URLs specifying what services, tools, or data you want to access. They are specified at the end of the API’s base URL like so:
api-provider.com/service
HTTP methods
Your application uses HTTP methods to specify the request to interact with an API. This is similar to talking with the server in a restaurant when ordering
Here are the HTTP methods, their functions, and equivalent analogies:
| Method | Meaning | Analogy |
| GET | Retrieve data | Checking the order status or menu |
| POST | Create new data | Placing an order |
| PUT/PATCH | Update data | Changing the existing order |
| DELETE | Remove data | Cancelling order |
API response
API responses are the information the server returns upon receiving your requests, written in the JSON format. It might contain a list of data or the request’s status
In a restaurant, this is similar to a receipt you get after placing, changing, checking, or cancelling your order. It might look like this:
{
"order_id": 123,

  "item": "Cheeseburger",

  "status": "preparing"

}
Rate limiting
The rate limiting is a system that sets the maximum number of requests an API can process. It is crucial to prevent the API from being overloaded, which can cause issues like unresponsiveness or downtime
This rate-limiting feature is similar to a restaurant policy that only allows a specific number of orders within a particular time frame
API keys
API keys are authorization tokens that the provider uses to verify the requests’ validity and legitimacy. This system improves security and is crucial for tasks like rate limiting because it allows the API provider to track each requester.
API keys are similar to restaurant reservation proof, which verifies who you are and when you’re allowed in.
Why do developers use public APIs?
Developers commonly use public APIs for various reasons, such as:
- Efficiency. Developers can add features like maps or a payment gateway to their applications without developing them from scratch, saving time and effort.
- Ecosystem integration. Public APIs enable developers to integrate popular platforms with their applications. For example, they can allow sign-ups using a Google account.
- Faster prototyping. Prototyping an application requires developers to quickly and dynamically add features, and APIs allow them to do it almost instantly.
- Scalability. Since the API developers manage the services, you don’t need to maintain them and can focus on your application.
- Data access. Application developers can use public APIs to integrate readily available and real-time data with minimal effort.
Public API use cases
Public APIs power many of the features we use every day. From embedding maps to processing payments, here are some of the most common ways developers put them to work:
- Search and discovery. Let users search for and access specific content from external platforms. For example, the YouTube API allows applications to search for videos, retrieve details, and embed them directly.
- Weather. Provide users with real-time weather updates and forecasts. For example, the OpenWeatherMap API allows you to display current conditions, multi-day forecasts, and weather alerts.
- Maps. Embed interactive maps and enable location-based services in your application. For example, the Google Maps API supports address lookup, directions, and nearby place searches.
- Payments and eCommerce. Facilitate secure online payments and manage store transactions. For example, the Stripe API enables credit card processing, subscription billing, and order handling.
- Social media and messaging. Integrate social interactions and communication features. For example, the X API allows posting content, fetching user data, and tracking engagement metrics.
- Service management. Streamline user authentication, scheduling, or customer support. For example, the Hostinger API helps streamline purchase, product management, and information retrieval.
Comparing API types
Aside from public, there are other types of API for different use cases. Here’s their comparison.
Public API vs private API
A private API is similar to the public one in that parties outside the provider can use it. However, the private API is limited only to eligible users, such as subscribers or partners
In contrast, a public API lets anyone use it for free as long as they have the endpoint and a valid authentication key
Public API vs internal API
An internal API is only available for the developers or organizations that built it. It is designed specifically for their needs and is used to integrate different services, tools, and features within a project
For example, an application with a microservice architecture often uses an internal API to distinguish user requests and forward them to specific services, such as authentication or database operations.
How to get started with a public API?
The steps to use and integrate a public API might differ slightly depending on the provider. However, the general procedure is similar.
1. Find a public API
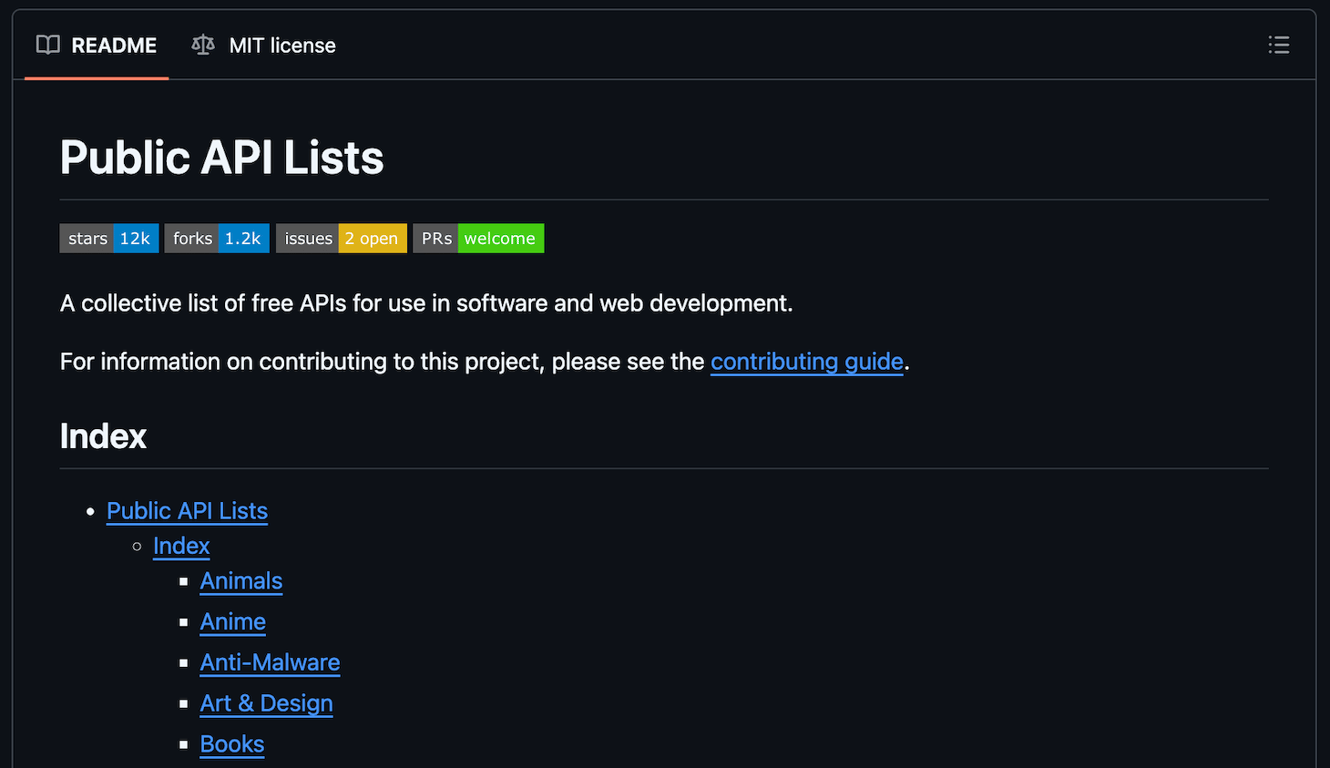
Let’s begin by finding a public API that fits your needs and preferences. There are several repositories where you can explore different public APIs, including the Public API list on GitHub
To choose the right public API, consider the following key factors:
- Reputability. A reputable API from a renowned company or one with positive user reviews is reliable and secure, ensuring peace of mind.
- Features. Since public APIs offer different features and functionality, choose one that covers your application’s needs.
- Documentation quality. A comprehensive documentation helps you understand how the API works and simplifies integration and troubleshooting.
- Rate limits. If your application requires frequent API calls, choose a public API with a higher rate limit to ensure it remains responsive during traffic spikes.
- Community and support. A robust community and support streamlines the API integration process, as you can easily ask for help if needed.
- Authentication and security. The ideal API should provide a secure authentication method that meets your application requirements, such as OAuth or an API key.
- Licensing and policy. If you use the API services or data for commercial purposes, ensure that the license allows such usage.
2. Read the API documentation
Reading the API documentation is crucial to understanding how it works and how to integrate it into your application correctly.
This is because the documentation contains essential information about the public API, such as:
- Base URL. The main address of the API provider you will use for accessing the endpoints, like api.hostinger.com/v1/.
- Endpoint. The address from which your application can access specific services or data. It is located at the end of the base URL, like api.hostinger.com/v1/endpoint/.
- Authentication. The method the API uses to authenticate your application. You must use the correct one to connect with the endpoint.
- Supported methods. The HTTP method your application can use to request data or services from the API.
- Formatting. The structure of the API response. It differs depending on the API, and you must understand it to display the data correctly on your website.
- Parameters. Mandatory and optional variables that are specified in the API request to query specific data.
- Status code. Messages indicating the status of your API call, whether it is successful or not. This is crucial for troubleshooting and creating a handling mechanism.
3. Sign up and generate an API key
To obtain the endpoint and API key, we must create an account in the API provider’s platform. The process should be similar regardless of the provider, but the actual steps might slightly differ.
For demonstration, here’s how to create a Hostinger account and obtain an API key from it
- Open the Hostinger account creation page.
- Enter your email address and password. Hit Sign up.
- Access the hPanel using your new Hostinger account.
- Click the profile icon and select Account Information.

- Go to the sidebar → API.
- Click the New token button. This will open the API key creation window.
- Enter a name for your token and set an expiration date. Hit Generate.
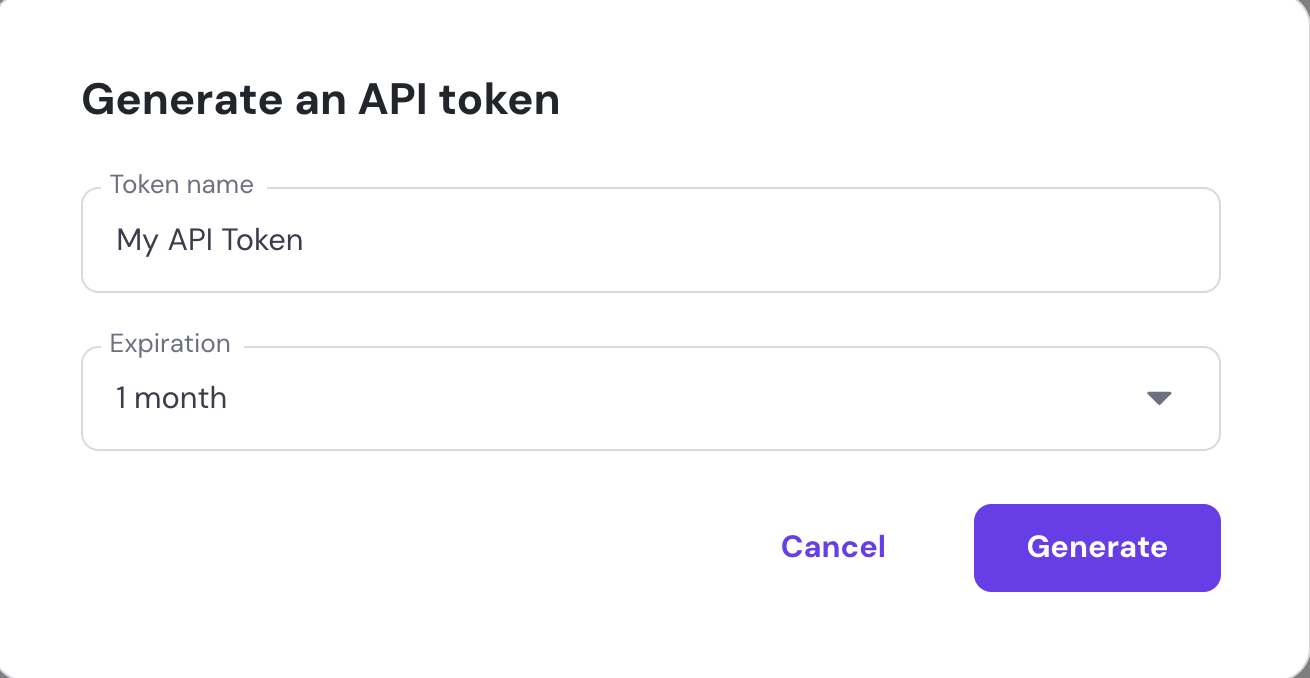
Choosing token expiration date
The shorter your API token expiration date, the more frequently you must update it. However, it helps improve security because the authentication key will be less likely to be compromised.
Once you obtain the API key, store it in a safe location, as we will use it later. Note that API providers commonly block you from viewing the key again after closing the token generation page for security reasons
4. Test the API using Postman or cURL
The easiest way to test the API is to use the cURL command, a utility that lets you use different HTTP methods to send a request to a server, which in this case is the API endpoint.
To test the API using cURL, simply open your computer’s terminal or command prompt and run the following syntax:
curl -X method "URL" \ -H "Authentication: API-key"
Replace method with the actual HTTP method and URL with the endpoint address. For example, your command may look like this:
curl -X GET "https://developers.hostinger.com/api/vps/v1/virtual-machines" \ -H "Authentication: Bearer abcd123efgh456"

Note that your API specification may require you to include more information about the request in your command. Refer to your API’s documentation to learn more about its testing guidelines
Another popular method of testing an API is to use Postman. This software offers a graphical user interface and more comprehensive features than cURL, making it suitable for performing complex API testing with multiple endpoints. Here’s how to do it:
- Download and install Postman on your computer.
- Open the Postman client. Optionally, create an account if you want to save your testing progress. For simple testing, you can skip the account creation process.
- From the dashboard, select your preferred HTTP method.
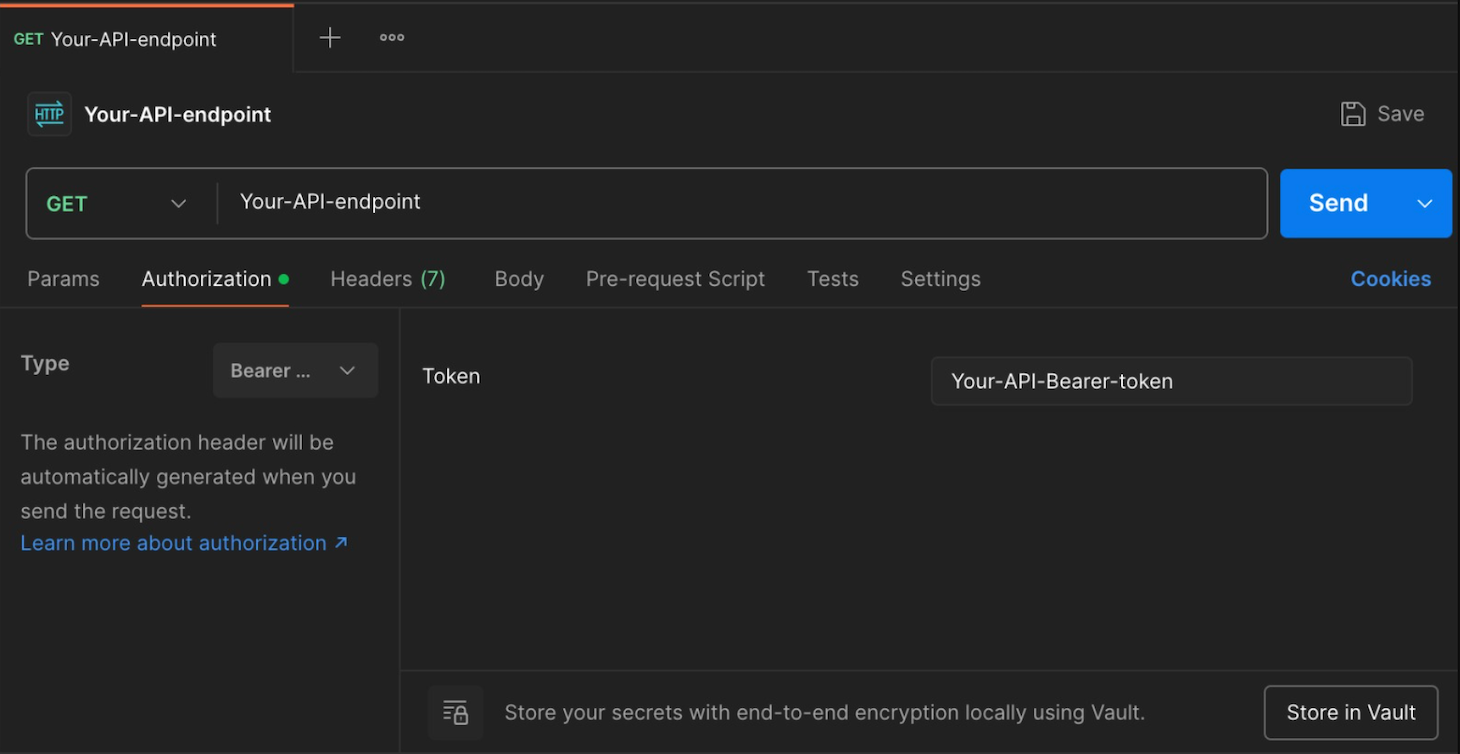
- Enter your API endpoint in the designated field.
- Click the Authorization tab and select the authentication method based on your API specification.
- Enter the credentials into their respective fields.
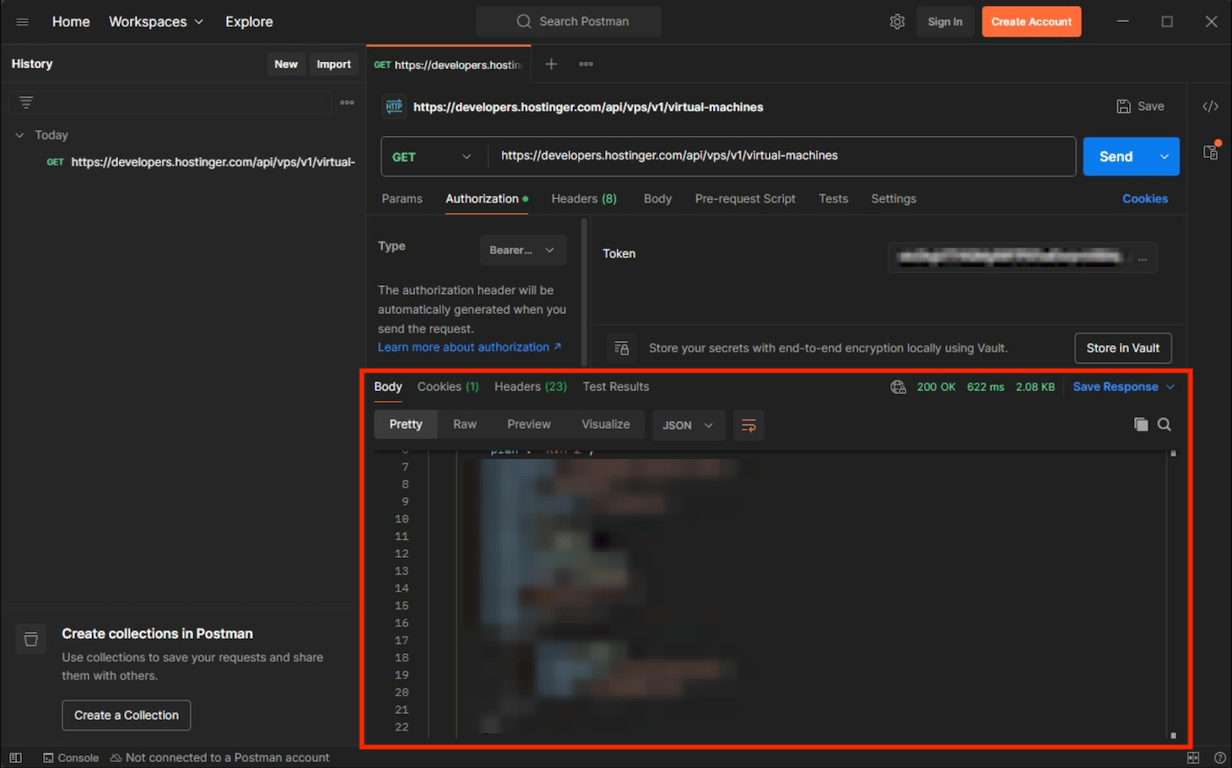
- Hit Send to send the API request.
If the API call is successful, you will see the JSON response at the bottom of your Postman client
5. Integrate the public API into your project
Integrating the public API into your project involves different steps depending on the API type, your project’s structure, and the programming language or technology you use
Typically, you integrate the API on the back end of your application and call it from the front end. Here are the components to achieve it:
- Authentication token. The API key typically resides in your project’s environment variable and is called into your application’s code using dotenv. To avoid exposure, your application’s main files shouldn’t explicitly contain this token.
- The API proxy code. The component that connects your application with the API’s endpoint to fetch data. It also contains the parameters you will use in the API request.
- The back-end callback. The part of your application’s front end that calls the API function from the back end.
- Data formatting code. The component of your application’s front end that reads and formats the fetched JSON data.
For example, we have a simple Express.js + HTML website that integrates with the Hostinger API to fetch and display your Linux VPS hosting resource metrics

The API proxy code looks like the following:
app.get('/api/metrics', async (req, res) => {
const { vmId, date_from, date_to } = req.query;

  if (!vmId || !date_from || !date_to) {

    return res.status(400).json({ error: 'Missing parameters' });

  }

  const url = `${API_BASE_URL}/api/vps/v1/virtual-machines/${vmId}/metrics?date_from=${date_from}&date_to=${date_to}`;

  try {

    const response = await fetch(url, {

      headers: {

        'Authorization': `Bearer ${BEARER_TOKEN}`

      }

    });
Meanwhile, the back-end callback function looks like this. It resides in our website’s index.html file:
const res = await fetch(`/api/metrics?vmId=${vmId}&date_from=${dateFrom}&date_to=${dateTo}`);
        const data = await res.json();
In the index.html, we also have the following code to read and format fetched JSON data into a simpler, more human-readable format:
results.innerHTML = `
          <div class="metric">
            <h3>CPU Usage</h3>
            ${data.cpu_usage.usage[ts]} ${data.cpu_usage.unit}
          </div>
          <div class="metric">
            <h3>RAM Usage</h3>
            ${formatBytes(data.ram_usage.usage[ts])}
          </div>
          <div class="metric">
            <h3>Disk Space</h3>
            ${formatBytes(data.disk_space.usage[ts])}
          </div>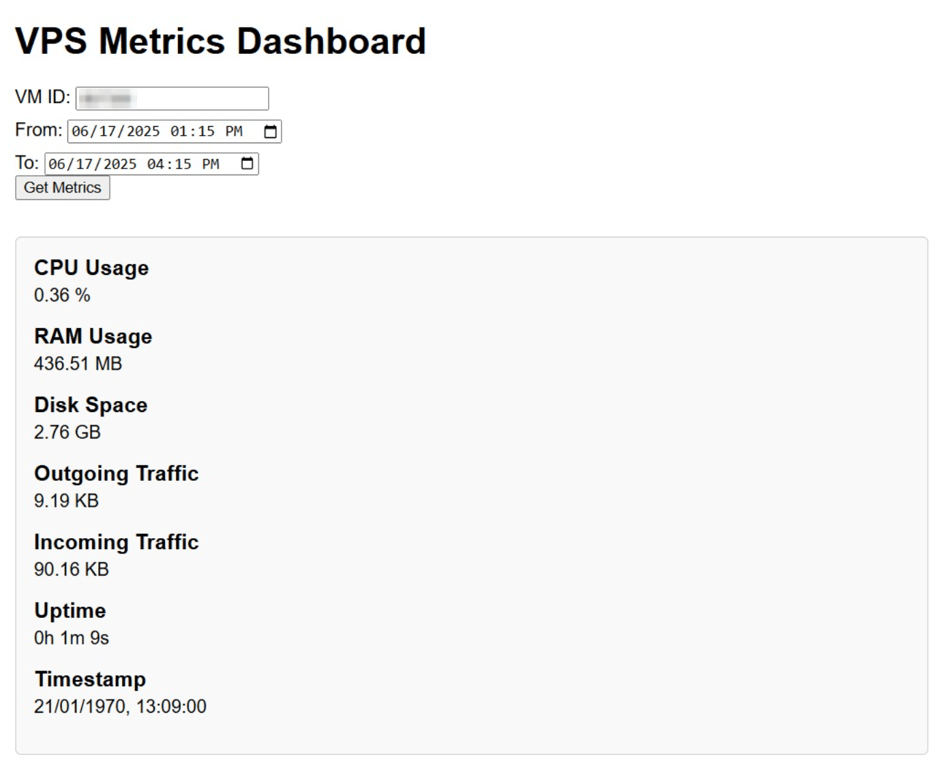
Several API providers may also have software development kits (SDKs) that offer pre-packaged tools and libraries for streamlining the integration process. For example, Hostinger API’s SDKs let you easily connect our hosting services with your PHP, Python, or TypeScript applications.
Where to find public APIs?
Various websites, repositories, and platforms offer a catalog of public APIs. Here are some of the most popular ones.
- Rapidapi. The world’s largest public API marketplace with over 40.000 APIs across various categories, including eCommerce, cybersecurity, and social media. It also offers a custom-made API with specific functionality for enterprises.
- Free-APIs. A repository with an extensive index of APIs from various developers and companies, including Google and Trello.
- Postman. A highly popular public API portal featuring a large selection of APIs. It offers extensive documentation and a built-in feature for testing, making it suitable if you want to assess an API in depth.
- GitHub. This platform contains several catalogs of various community-curated public APIs. While excellent for searching niche APIs, it can be difficult to navigate since it is not designed for such a purpose.
Conclusion
A public API is an excellent solution for easily integrating rich data sources or ready-to-use features into your application
Aside from improving development efficiency, a public API helps minimize fatal errors that can cause malfunctions or downtime because you don’t need to alter your application’s code significantly.
Before implementing an API in your application, test it first to better understand how it works. We recommend the Hostinger API for testing and learning because it is free, offers various endpoints, and has comprehensive documentation. You can also integrate the Hostinger API into applications that support Model Context Protocol (MCP) like Claude to enable AI-based hosting management. To learn more about the steps, check out our setting up an Hostinger API MCP server tutorial.
All of the tutorial content on this website is subject to Hostinger's rigorous editorial standards and values.

Aris is a Content Writer specializing in Linux and WordPress development. He has a passion for networking, front-end web development, and server administration. By combining his IT and writing experience, Aris creates content that helps people easily understand complex technical topics to start their online journey. Follow him on LinkedIn.