How to set up a VPS in 6 steps
May 22, 2026
/
Justina B. & Valentinas C.
/
8 min Read

Setting up a VPS means preparing your server, connecting to it via SSH, updating the system, creating a safer user account, securing remote access, and configuring a firewall.
You don’t need to be a sysadmin to handle it. With the right plan, a terminal, and a bit of focused time, you can get a clean, secure server ready for hosting a website, app, or game server.
If you’re a beginner who has just bought a VPS and needs to configure it, here are the steps:
- Choosing and provisioning a VPS plan.
- Connecting to your VPS using SSH.
- Updating your server.
- Creating a new non-root user.
- Securing SSH access.
- Configuring a firewall.
What do you need before setting up a VPS?
Before you start, gather a few things so you’re not hunting for them mid-setup. Most of these come from your hosting provider once you’ve purchased a plan.
Here’s what you’ll need:
- Your VPS IP address.
- The root username, or the default user your provider set up.
- The root password or your SSH credentials.
- An SSH client or terminal app on your local computer.
- The operating system you chose during provisioning.
- Basic command-line access, or willingness to copy and paste.
If you’re use Hostinger’s VPS hosting services, you’ll find your VPS IP, hostname, and password inside hPanel under your VPS dashboard. We also recommend that you understand some basic Linux commands before you start, since you’ll be typing a lot of them shortly.
1. Choose a VPS hosting plan
Choosing a VPS means selecting the plan, server location, operating system, and server resources before deployment. The right setup depends on whether you’re hosting a small blog, a game server, a SaaS app, or something else entirely.
Here’s what’s worth thinking about before you click “buy”:
| Factor | Recommendation |
| CPU and RAM | A basic blog or static site runs on 1 vCPU and 1-2 GB RAM. Apps with heavier traffic or databases benefit from 2+ vCPU and 4 GB RAM or more. |
| Storage | NVMe SSD is faster than a regular SSD. Check how much space your project actually needs. |
| Data center location | Pick one close to your audience for lower latency. |
| Operating system | Ubuntu and Debian are the friendliest for beginners. AlmaLinux, Rocky Linux, and CentOS are solid alternatives if you’ve used them before. |
| Backups or snapshots | Look for plans that include automatic backups so you can roll back if something breaks. |
| Security features | A built-in firewall, DDoS protection, and malware scanning save you setup time. |
If you’re not sure which operating system to pick, go with Ubuntu or Debian. Both have huge communities, clear documentation, and beginner-friendly package managers, so you’ll find a fix fast when something doesn’t work.
AlmaLinux and Rocky Linux are solid picks too, but they make more sense in specific cases. Go with them if your team already runs Red Hat systems, or if you need long-term enterprise-style stability for a business workload.
With Hostinger VPS hosting, you choose your OS at checkout and can swap it later in the dashboard if you change your mind. Just keep in mind that switching the operating system wipes all data on the server, so back up anything important first.
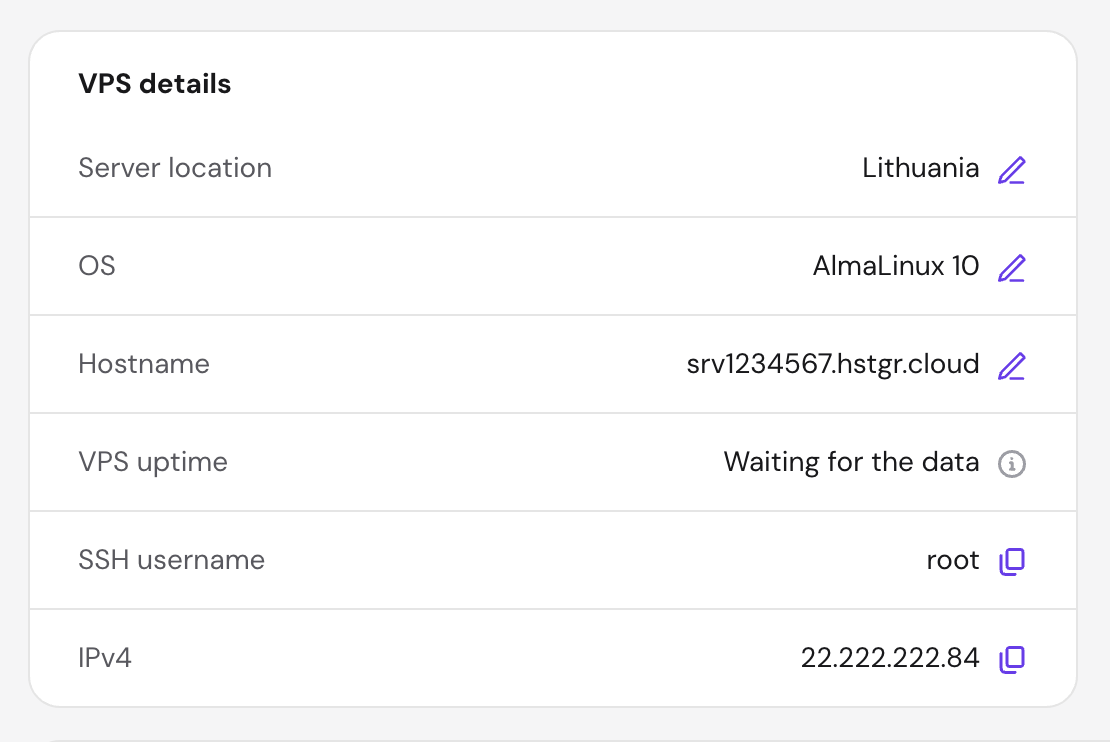
Once you complete the purchase, you’ll get an email with your VPS dashboard link, where you’ll find the IP address, root password, and other connection details you need for the next step.

2. Connect to your VPS using SSH
SSH lets you remotely log into your VPS and manage it from your own computer, the same way you’d open a terminal locally. You’ll use it for almost every step that follows, so getting comfortable with it now pays off.
Your provider gives you an IP address, a username like root, and a password. How you connect depends on your operating system.
Connecting from macOS or Linux
Open the Terminal app and type:
ssh root@your_server_ipReplace your_server_ip with an actual IP address you got after buying a VPS plan. The first time you connect, you’ll see a message asking you to verify the server’s fingerprint. Type yes and press Enter.
Then enter your root password. Heads up: nothing will appear on screen while you type the password, not even asterisks. That’s normal. Press Enter when you’re done.
Connecting from Windows
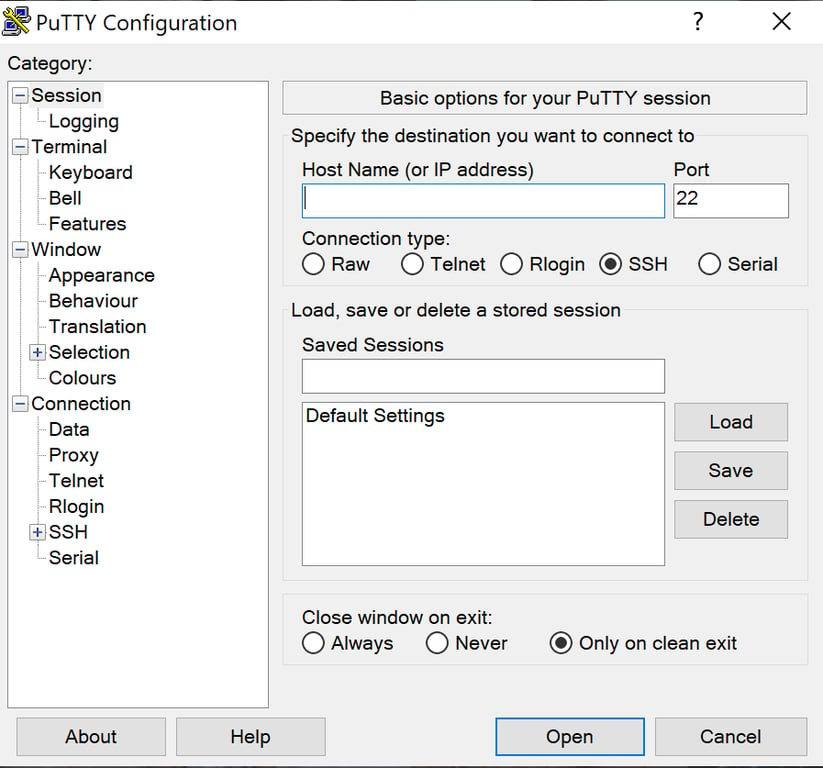
Windows users have two easy options. You can use PuTTY to connect through SSH, a free SSH client with a simple interface. Or you can use Windows Terminal, which supports SSH directly, using the same ssh root@your_server_ip command syntax as on macOS and Linux.
For PuTTY, paste your VPS IP into the Host Name field, keep port 22 selected, and click Open. Log in as root and enter your password when prompted.
Using the Hostinger Browser Terminal
If you don’t want to install anything, Hostinger users can open a terminal straight from hPanel. Go to your VPS dashboard and click Terminal. It opens an SSH session in a new browser tab, already logged in as root.

This is the easiest option for beginners because there’s nothing to configure. Once you’re in, you can start running basic SSH commands like ls, cd, and pwd to find your way around.
3. Update your VPS
Updating your VPS installs security patches and refreshes the package list, so you’re not running outdated software. Always do this before installing anything else or changing settings.
On Ubuntu or Debian, run:
apt update
apt upgrade
The first command refreshes the list of available packages, and the second installs the updates. Press Y when prompted to confirm.
On AlmaLinux, Rocky Linux, or CentOS, use:
dnf update -yIf the update installs a new kernel or major system component, you’ll need to reboot. Just type reboot and press Enter. Your SSH session will disconnect, and you can reconnect after a minute or two.
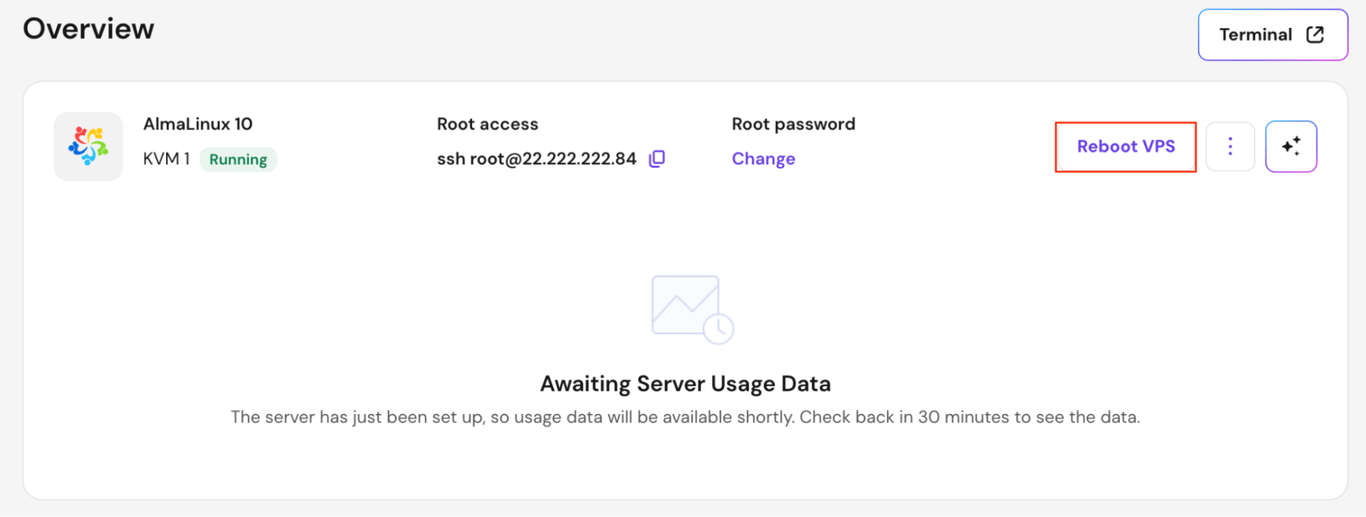
Hostinger VPS customers can reboot their server directly from hPanel’s VPS dashboard.
4. Create a new non-root user
Running everything as root is risky because root has unrestricted access to your server. One typo in a command can wipe critical files, and a compromised root password gives an attacker full control of the server.
The fix is to create a new user with administrator rights using sudo privileges. You’ll do daily work as that user and only switch to root when you genuinely need to.
On Ubuntu or Debian, create the user and add them to the sudo group:
adduser your name
usermod -aG sudo yourname
Replace yourname with whatever username you want. You’ll be asked to set a password and fill in a few optional details.
On AlmaLinux, Rocky Linux, or CentOS, the equivalent group is wheel:
adduser yourname
passwd yourname
usermod -aG wheel yourname
Before you log out of root, open a second terminal window and test the new user with ssh yourname@your_server_ip. If you can log in and run sudo whoami, which should return root, you’re set.
Testing first prevents you from locking yourself out after you change root login settings in the next step.
5. Secure SSH access
Securing SSH means making it harder for attackers to break in, even if they figure out your IP. The three biggest wins are switching to key-based authentication, disabling root login, and optionally changing the SSH port.
Set up SSH key authentication
SSH keys are far safer than password-only login because they’re long, random, and can’t be guessed by brute force. The setup takes a few minutes, and you’ll log in faster afterward since you skip the password prompt. See how to set up SSH keys on your VPS.
On your local computer (macOS/Linux), generate a key pair:
ssh-keygenPress Enter to accept the default location. You’ll then be asked to set a passphrase. Enter a strong passphrase for extra security, or press Enter twice to skip it. Then copy the public key to your VPS:
ssh-copy-id yourname@your_server_ipWindows doesn’t include ssh-copy-id, so you’ll need to copy the key manually:
- Generate a key with ssh-keygen in Windows Terminal (or use PuTTYgen for PuTTY).
- Display your public key: cat ~/.ssh/id_rsa.pub (or copy from PuTTYgen).
- Log in to your VPS as the new user you created earlier. If you’re currently in a root session, switch to: su – yourname.
- On your VPS, create the .ssh directory and add the key:
mkdir -p ~/.ssh
nano ~/.ssh/authorized_keys
Paste your public key, save with Ctrl+O, exit with Ctrl+X, then set permissions:
chmod 700 ~/.sshchmod 600 ~/.ssh/authorized_keysOnce your key works, you can disable SSH password authentication so only key-based logins are allowed. This blocks the vast majority of automated login attempts.
Disable root login
Before you change anything here, keep your current SSH session open and confirm your non-root user can log in from a second terminal. Testing first stops you from getting locked out if something in the config goes wrong.
Open the SSH config file:
sudo nano /etc/ssh/sshd_configFind the line that says PermitRootLogin. It may start with a #, which means it’s commented out and not active. Remove the # if present, and change the value to no:
PermitRootLogin noSave the file with Ctrl+O, then exit with Ctrl+X. Restart SSH to apply:
sudo systemctl restart sshNow open a new terminal and confirm you can log in as your non-root user. If that works, root login is safely disabled.
Change the SSH port
Changing the SSH port is optional and works best as an extra layer, not your main defense. The default port 22 is the first one attackers scan, so moving SSH to a custom port reduces noise in your logs but isn’t a substitute for keys and strong passwords.
If you want to go further, here’s how to change the SSH port on your VPS.
6. Configure a firewall for your VPS
A firewall controls which services on your VPS can receive traffic from the internet. Without one, every open port is exposed, even ones you didn’t realize were listening.
Use the Hostinger VPS Firewall
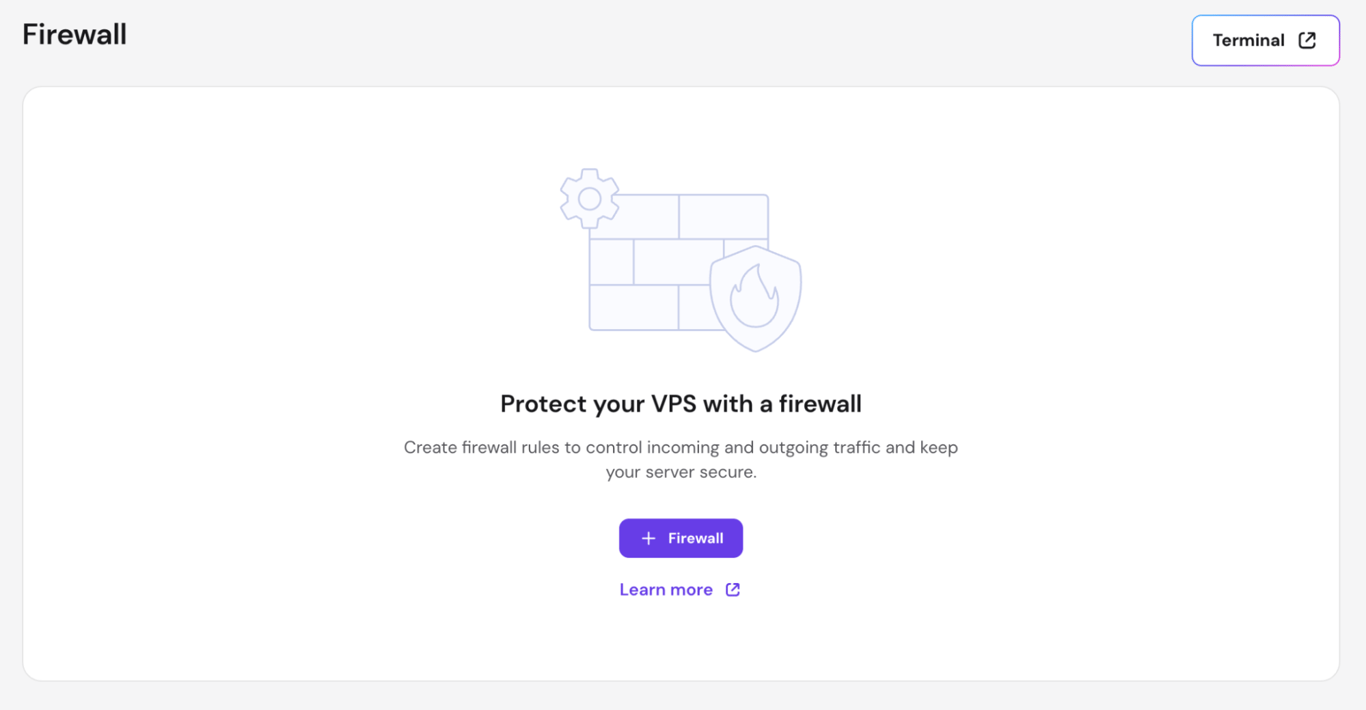
If you’re on Hostinger, the easiest option is the built-in firewall in hPanel. Go to your VPS dashboard, open the Security section, and click Firewall. You can create rules through a visual interface without touching the command line.
For most setups, you’ll want to allow inbound traffic on:
- Port 22, or your custom SSH port.
- Port 80 for HTTP.
- Port 443 for HTTPS.
Use UFW on Ubuntu or Debian
UFW, short for Uncomplicated Firewall, is the friendliest command-line firewall for Debian-based systems. To configure UFW firewall rules for a basic web server:
sudo ufw allow OpenSSH
sudo ufw allow 80
sudo ufw allow 443
sudo ufw enable
Double-check that you’ve allowed SSH before enabling UFW, or you’ll lock yourself out of your own server. Also, if you’ve replaced your SSH before, replace OpenSSH with your custom port number, for example, sudo ufw allow 2222.
Use firewalld on AlmaLinux, Rocky Linux, or CentOS
On Red Hat-based systems, firewalld is the default:
sudo firewall-cmd --permanent --add-service=sshsudo firewall-cmd --permanent --add-service=ssh
sudo firewall-cmd --permanent --add-service=httpssudo firewall-cmd --reload
For a custom SSH port, replace sudo firewall-cmd –permanent –add-service=ssh with sudo firewall-cmd –permanent –add-port=your-port.
Add Fail2Ban as a bonus layer
Fail2Ban monitors your logs for repeated failed login attempts and automatically blocks the offending IP. It’s optional, but worth adding to most setups.
On Ubuntu, install it with sudo apt install fail2ban. On AlmaLinux, Rocky Linux, or CentOS, Fail2Ban lives in the EPEL repository, so you’ll need to add that first: sudo dnf install epel-release, then sudo dnf install fail2ban. Then start the service with sudo systemctl enable –now fail2ban.
How to host a website after setting up your VPS
Once your VPS is updated, secured, and reachable, you can host a website on a VPS by installing a control panel, pointing your domain to the server, enabling SSL, and uploading your site files.
Install a control panel
A control panel gives you a visual interface for managing websites, databases, and email instead of doing everything through the terminal. CyberPanel, Webmin, and HestiaCP are popular free options for beginners.
Hostinger users can also manage server-level settings like backups, firewall rules, and OS changes directly in hPanel. However, if you want to manage your websites using a virtual interface, you must install a separate control panel via hPanel.
Point your domain to the VPS
You’ll need to point a domain name to your VPS by updating its A record to match your VPS IP address. The change usually takes a few minutes to a few hours to propagate worldwide.
Enable SSL
An SSL certificate encrypts traffic between your site and visitors, which is required for HTTPS and for ranking well in search. Most control panels include free Let’s Encrypt SSL with a one-click installer.
Alternatively, for Hostinger VPS users, you can install SSL using Certbot by running a few commands.
Upload or migrate your site
If you’re starting fresh, upload your site files through your control panel’s file manager or via SFTP. If you’re moving an existing site, your control panel likely has a migration tool that handles the transfer in one step.
What can you do after setting up a VPS?
With the six setup steps done, your VPS is ready for whatever you want to build, whether that’s a personal site, a SaaS app, a Discord bot, or a Minecraft server. The next priority is keeping it that way.
Set up automatic backups if your plan supports them, schedule regular system updates, and review your firewall rules every few months. For a deeper checklist of hardening steps, see how to improve VPS security over the long term.
From here, most people branch in one of two directions. If you want a live website on the server, head to the website hosting walkthrough above and start with a control panel.
If you’re running an app, a bot, or a game server, the next step is to install your stack and restrict access to the ports it actually needs.
A VPS rewards a bit of upfront care with years of reliable hosting. You’ve already done the hard part.
All of the tutorial content on this website is subject to Hostinger's rigorous editorial standards and values.

Justina is a Content Writer passionate about marketing, with a background in social media and customer success management. She also loves reading books, traveling and exploring new places as well as cooking, and trying out new recipes. Follow her on LinkedIn.

Valentinas Čirba, Hostinger's Head of VPS, is a seasoned product leader specializing in VPS products with over ten years of experience. He's an expert at setting product strategy, leading cross-functional teams, and making smart decisions to deliver innovative solutions. Valentinas is committed to creating products that not only meet business objectives but also truly serve the customer. Follow him on LinkedIn.