What is a minimum viable product? And how do you build one?
Jun 02, 2026
/
Matleena S.
/
7 min Read
A minimum viable product (MVP) is the simplest version of a product you can create that still solves a core problem for your users. It has just enough features to be useful and helps you test if your idea works in the real world. By building an MVP, you avoid spending too much time and money on features people might not need or want.
This approach is a smart way to start product development, especially if you want to learn from real end users as you go. MVP development lets you gather honest user feedback early so you can improve your product based on actual needs.
When building your MVP, follow these steps:
- Identify the problem you’re solving
- Define your target audience
- Map out the user journey
- List and prioritize features
- Choose the right type of MVP
- Select your tools/tech stack
- Build and launch
- Collect feedback and measure metrics
- Iterate based on real data
What is minimum viable product (MVP)?
An MVP (minimum viable product) is a product version with just enough features to satisfy early users and provide feedback for future development. It helps businesses test ideas quickly and efficiently while minimizing costs and risks.
What is the meaning of MVP in business?
In business, creating an MVP usually means launching a basic version of your product with just the core features and functionalities.
Instead of building everything at once, you focus on the most important features that solve a real problem. This helps you avoid wasting time and money on ideas that might not work.
MVPs are widely used in startups and tech companies, where testing ideas quickly and cheaply is crucial to success.
What is the difference between an MVP product and an MVP business?
An MVP product refers to the simplified version of the product, which focuses on core features and user experience.
An MVP business, however, includes the entire strategy surrounding that product, like target market, business model, and customer acquisition plan.
While the product is the tangible prototype, the business MVP tests the viability of the business idea as a whole.
What is the purpose of a minimum viable product?
The primary purpose of an MVP is to validate your product idea with real users, reduce the risk of failure, and gather early feedback. This approach helps you avoid wasting resources on unnecessary features and directs your development efforts based on real user data.
Building an MVP is a key part of good software design. It ensures that product development stays focused and efficient.
In which stage is a minimum viable product created?
A minimum viable product is created in the early stages of product development, typically after initial prototyping when core design and functionality are defined.
At this stage, the MVP acts as a functional prototype that allows you to test your core idea quickly and gather early user feedback. Building an MVP in this phase helps validate the concept before investing time and resources in full-scale development.
This approach is therefore closely connected to software prototyping – a process focused on creating early models of a product to explore ideas, test usability, and refine features.
Types of MVPs
There are several types of minimum viable products, each suited for different stages of development, budgets, and goals. The right MVP type for your project depends on how much you want to invest upfront, how quickly you want to test your idea, and the level of detail needed to engage your users.
Low-fidelity MVPs are quick and inexpensive to create, perfect for early validation without heavy technical work. High-fidelity MVPs, on the other hand, offer a more polished experience and closer simulation of the final product, but require more time and resources.
Note that the development process will vary slightly depending on the type of MVP you choose, so it’s important to pick the one that fits your current needs and resources.
Low-fidelity MVPs
Low-fidelity MVPs include things like:
- Explainer video – A simple video that explains your product concept to gauge interest.
- Landing page – A basic website that showcases your idea and collects user sign-ups.
- Wizard of Oz MVP – A front-end that looks automated but is powered by manual work behind the scenes.
- Concierge MVP – You manually deliver the service to a few customers to test the demand.
High-fidelity MVPs
Some examples of high-fidelity MVPs include:
- Single-feature app – A working app that focuses on one main feature to solve the core problem.
- Clickable prototype – An interactive demo that simulates the product’s user interface without full functionality.
- Piecemeal MVP – A product built by combining existing tools and services to mimic the full solution.
Read this article for real-life examples of different types of MVPs.
How to build an MVP?
Building your first MVP can feel overwhelming, especially when you’re unsure what to focus on and how to avoid common mistakes.
Luckily, our list below covers the essential steps you need to keep in mind, from understanding the problem to launching your product and improving it with real user feedback.
1. Identify the problem you’re solving
Many new builders jump straight into building without fully understanding the problem.
Take time to clearly define the specific issue your MVP will address. Talk directly to potential users and ask about their struggles and frustrations related to your idea. Confirm that the problem is urgent and worth solving.
Remember – if your MVP doesn’t solve a real problem, it won’t gain traction.
2. Define your target audience
Trying to serve everyone is a common MVP mistake.
Instead, narrow down your audience to a specific group that really needs your solution. Detail their characteristics, habits, and pain points. This focus lets you tailor your MVP features precisely, making it more likely to resonate and succeed with early users.
3. Map out the user journey
Visualize the exact steps your target users will take to use your MVP.
Keep the flow simple – identify only the essential interactions that lead to solving the problem. Mapping this out early helps you avoid adding unnecessary features and keeps your MVP focused on delivering clear value quickly.
4. List and prioritize features
It’s tempting to add many features “just in case,” but an MVP needs to be lean.
Write down every feature idea, then evaluate which ones directly contribute to solving the core problem. Cut everything else.
Ask yourself: Can users still achieve their goal without this? Prioritize features that provide the most value, which will help you launch faster and smarter.
5. Choose the right type of MVP
MVPs don’t always mean fully functioning apps.
Depending on your idea, a low-fidelity MVP – like a landing page, explainer video, or manual process – might be enough to test demand and collect feedback.
Choose the MVP type that answers your biggest question with the least effort, so you avoid spending time building features users don’t want.
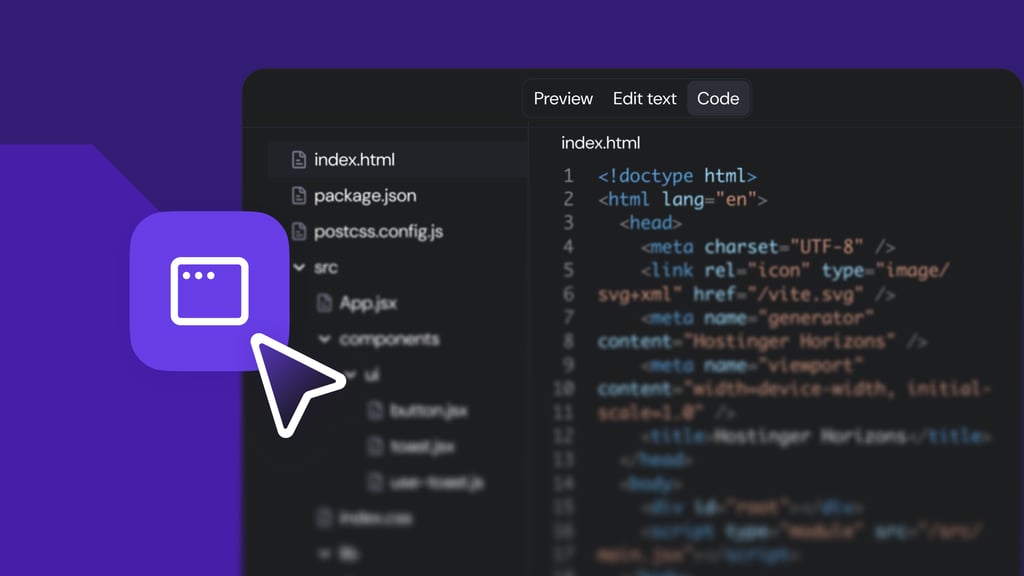
6. Select your tools or tech stack
Picking the right tools can save you time and money and allow you to adapt quickly as you learn more from users.
If you’re new or working solo, AI MVP builder like Hostinger Horizons are ideal. These types of tools let you build and adjust your MVP quickly without technical skills or a big team.
Simply describe what you want to create or adjust, and AI does the rest.

7. Build and launch
In this phase, don’t aim for perfection – focus on creating a simple, usable product that tests your core idea.
Test your MVP internally for bugs and usability, then launch it to a small group of early adopters willing to provide honest feedback. Early launches help you learn quickly and avoid building features no one needs.
8. Collect feedback and measure metrics
Use surveys, interviews, and basic analytics tools right after launch to understand how your MVP is performing.
Focus on whether users solve their problem, not just on how they feel about your design. Tracking real user behavior helps you gather actionable insights for improvement.
9. Iterate based on real data
Avoid guessing what users want next. Use the data and feedback to fix issues, improve features, or remove what doesn’t work.
If your MVP consistently misses its goals, don’t hesitate to pivot or change your approach based on what you’ve learned rather than pushing forward blindly.
What are some examples of MVP products?
Many successful companies started with an MVP to quickly test their ideas and gather user feedback. Here are three notable examples that show why MVPs are so effective in validating product concepts:
Airbnb
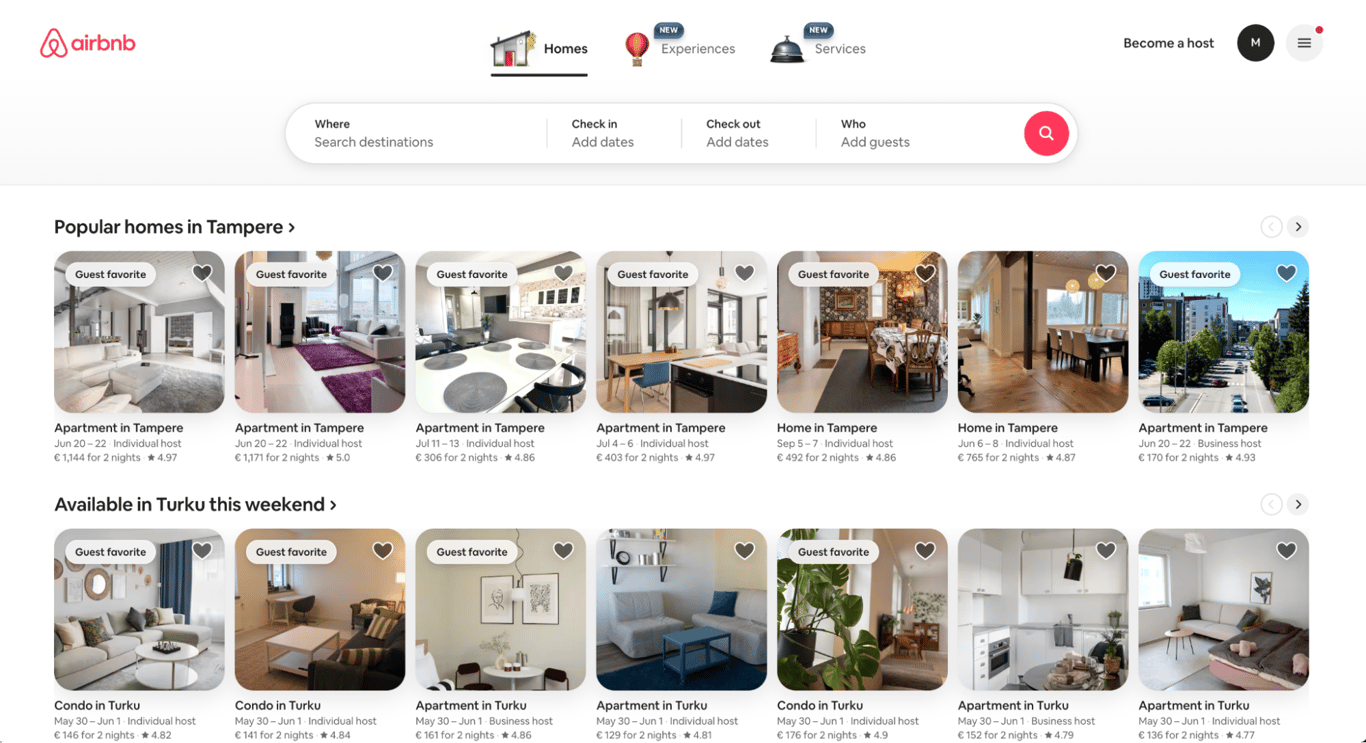
Airbnb founders began by renting out air mattresses in their own apartment and created a simple website to offer this service. This MVP helped them confirm there was real demand for affordable, home-based lodging before building a full platform.
A tip for your MVP: Start with what you have and test demand on a small scale before building complex features. A simple landing page or basic service can save you time and money while validating your core idea.
Spotify
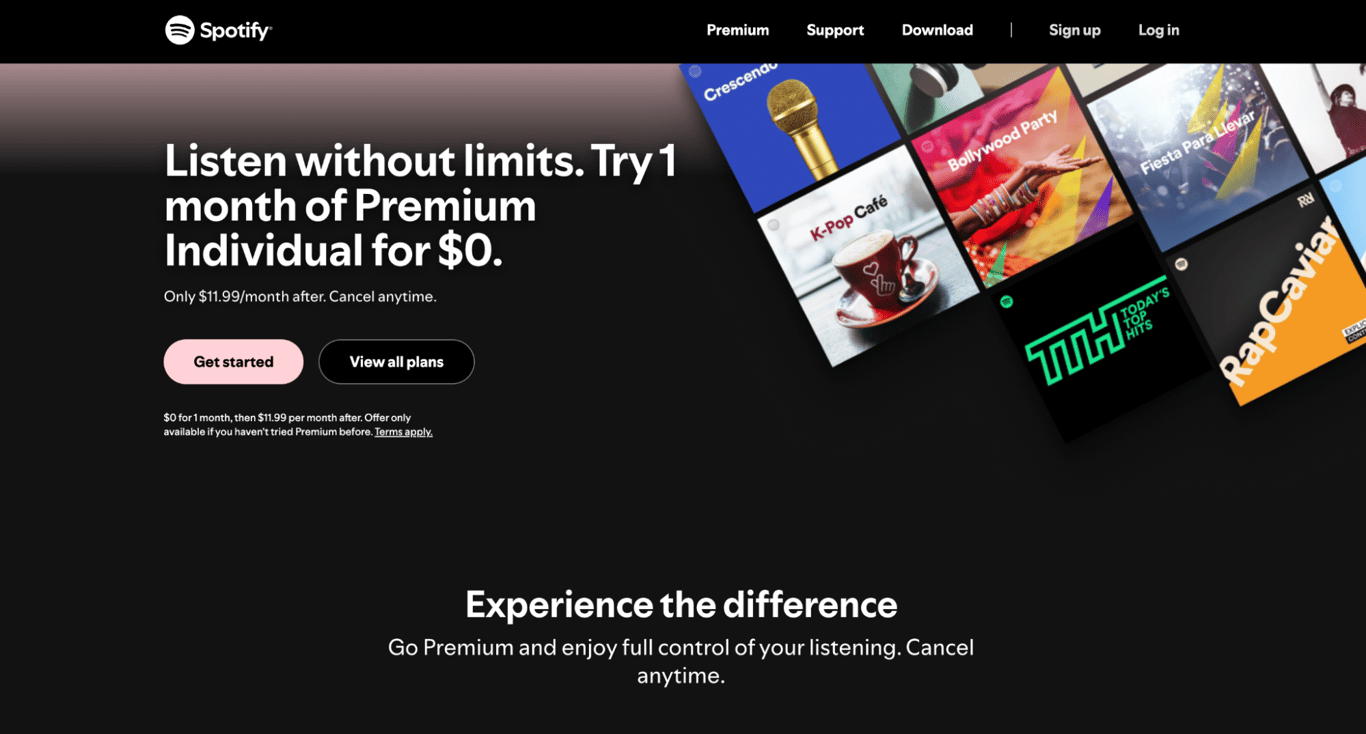
The popular music platform initially launched as a basic music streaming app that focused on core features like song playback and playlists. By starting simple, Spotify tested user interest and refined its offering based on actual usage, avoiding the cost of building a fully featured product upfront.
A tip for your MVP: Identify your product’s essential feature and build that first. Test with real users to understand what matters most, then iterate instead of trying to build everything up front.
Dropbox
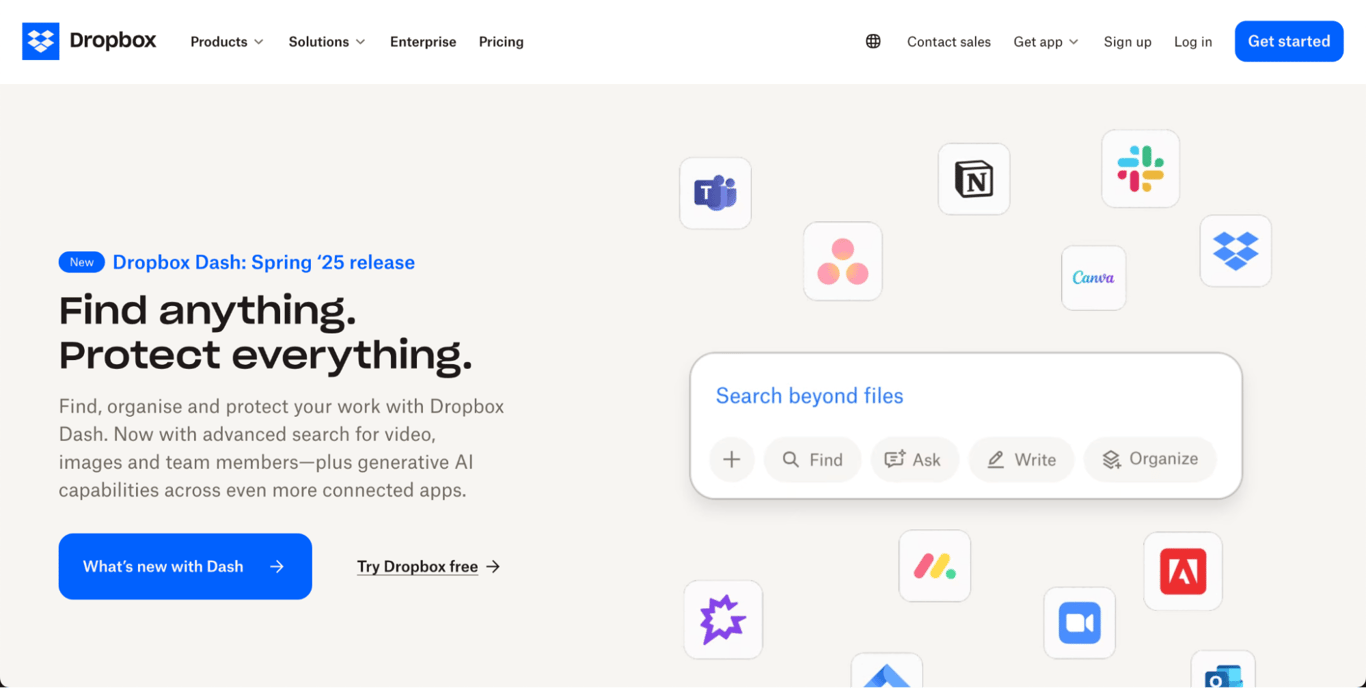
Instead of building the entire product first, Dropbox released a clear explainer video demonstrating how the service would work. This helped gauge user interest and collect early sign-ups, proving demand before investing heavily in development.
A tip for your MVP: Use low-fidelity MVPs like explainer videos or mockups to validate your idea quickly. This lets you gather feedback and measure demand without building a working product first.
What comes after an MVP?
After your MVP has validated your product idea, the next step is to build on that foundation by developing a more refined version of your product.
- The Minimum Marketable Product (MMP) is the next iteration designed to deliver enough value to attract a wider audience and generate revenue. It includes improved features based on early feedback.
- The Minimum Lovable Product (MLP) goes a step further by focusing not only on functionality but also on creating a product that delights users and encourages loyalty.
From here, scaling your product depends on validated learning – using real user data and feedback to guide what to build next. This approach helps you avoid unnecessary risks and invest in what truly matters.
At this stage, you’ll face a crucial choice: pivot or persevere.
Pivot means changing your strategy or product direction based on insights from your MVP.
And by deciding to persevere, you’ll continue to improve and scale the current idea because it’s showing promising results.
Making the right decisions not just when creating your MVP but also when moving forward is a sure way to keep your product aligned with market needs and to lay the foundation for long-term success.
All of the tutorial content on this website is subject to Hostinger's rigorous editorial standards and values.

Matleena is a seasoned Content Writer with 5 years of content marketing experience. She has a particular interest in emerging digital marketing trends, website building, and AI. In her free time, Matleena enjoys cups of good coffee, tends to her balcony garden, and studies Japanese. Follow her on LinkedIn