How to use Plesk: understanding the Plesk control panel for easy website management
Dec 22, 2025
/
Aris S. & Valentinas C.
/
8 min Read
Plesk is a hosting control panel that offers a beginner-friendly graphical user interface and various features that simplify web management tasks.
In this article, we will explain how to use Plesk to help you get started with the control panel. You will learn how to install and use it to manage your websites, domains, and email accounts.
This Plesk tutorial will also explore the best practices for using the control panel to improve your website management efficiency.

How to use Plesk
In this section, we will explain how to install Plesk on your VPS using Hostinger’s custom-built control panel, hPanel. You will learn how to install and use it with VPS hosting to manage your websites, domains, and email accounts.
1. Getting started with Plesk
Since Plesk is license-based, you must purchase the control panel and a web hosting plan before installing it on your servers. At Hostinger, you can do so directly from the hPanel’s VPS plan management menu.
Create a backup of your VPS files before changing its operating system since the following steps will wipe all its data
If you’ve purchased a Plesk hosting plan from Hostinger, you can simply choose Plesk during the setup process.
If your plan didn’t come with Plesk, however, follow these steps to change your VPS operating system:
- On hPanel, click VPS on the left side menu.
- Select the VPS you want and click on Manage.
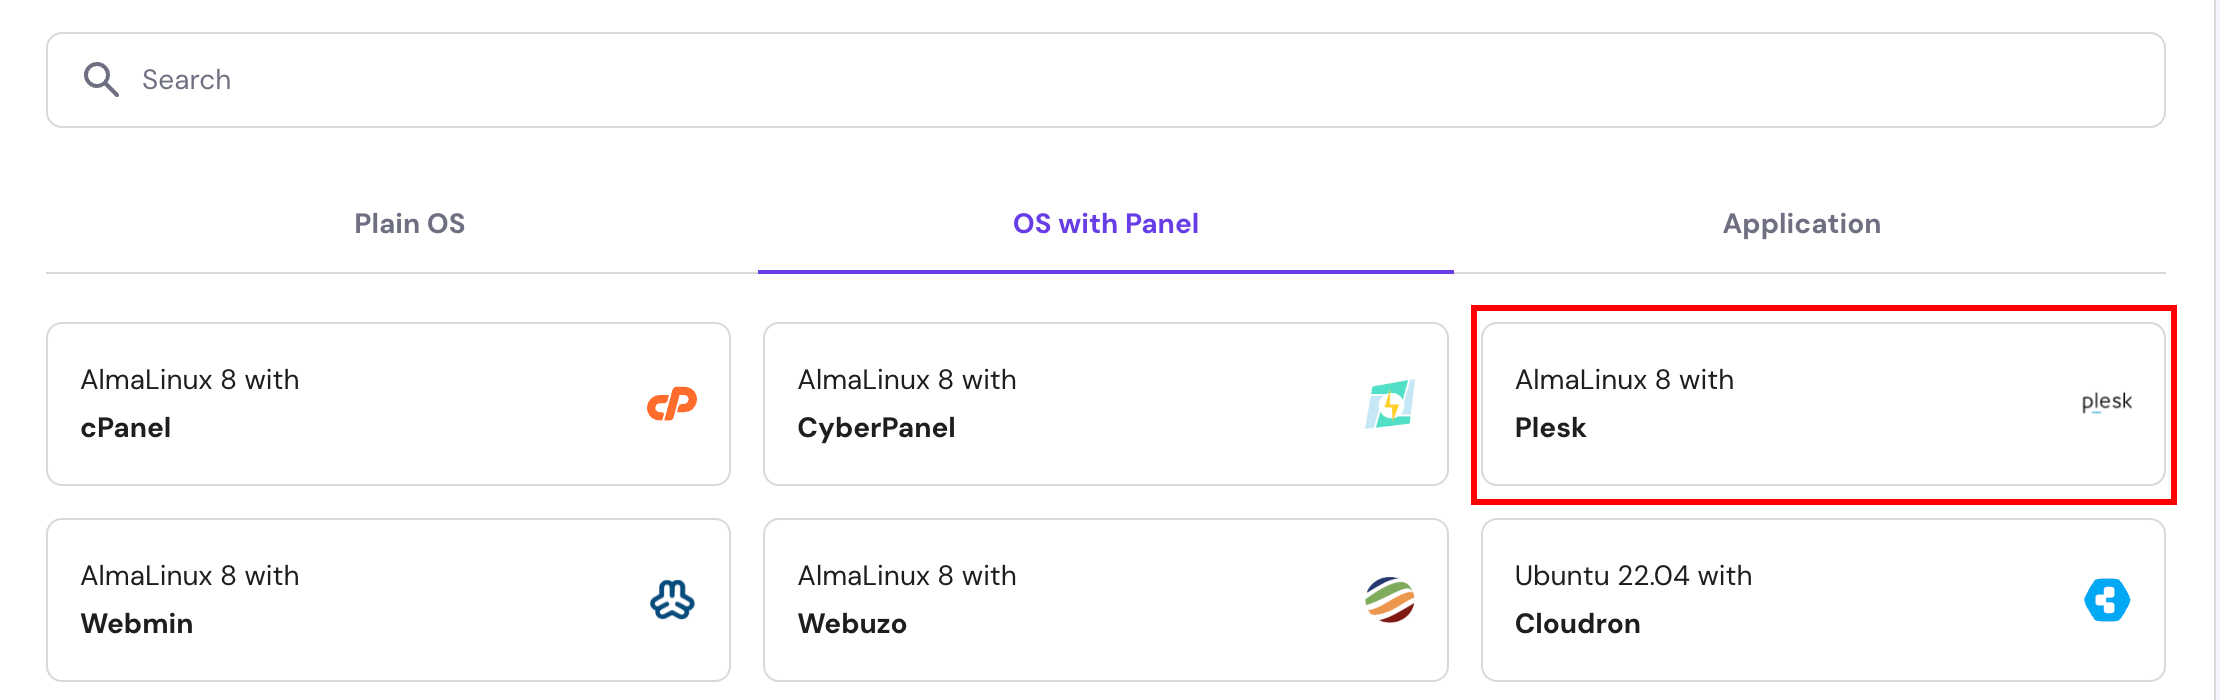
- From the sidebar, navigate to OS & Panel → Operating System.
- Either search for Plesk and click it or select it under the OS with Panel tab. Then, click on Change OS at the bottom of the page.
If you haven’t purchased Plesk yet, you can navigate to OS & Panel → Licenses on the left side menu to buy it. Once bought, you can verify if the license is configured properly by asking Kodee, our AI assistant, “Check if the Plesk control panel license is assigned to my current VPS.” You can also ask Kodee to reset your control panel password through chat.
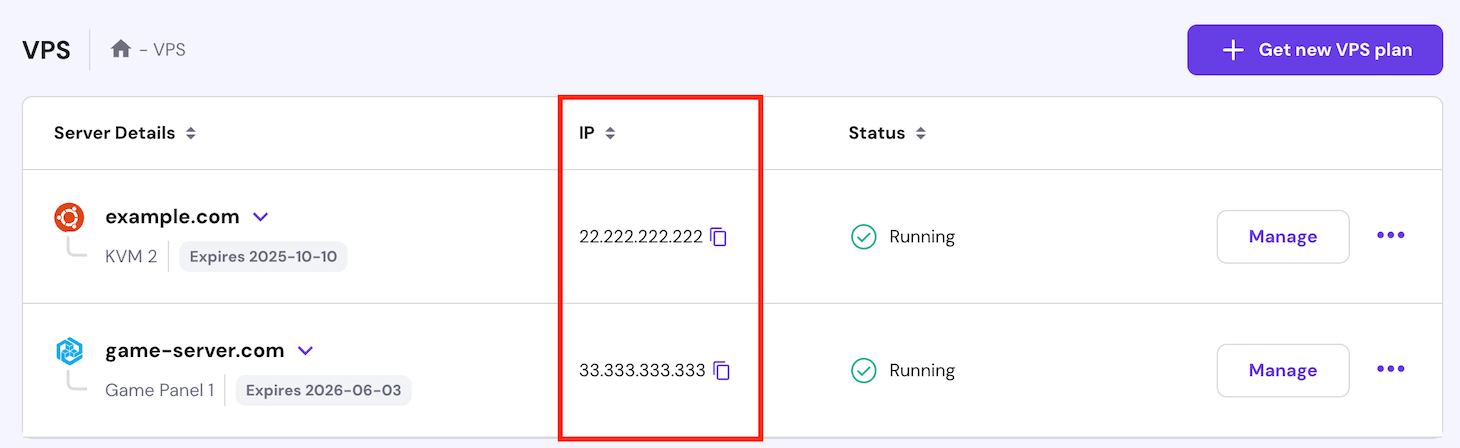
Once installed, enter https://example:8443 in your browser’s address bar to access your Plesk control panel. Replace example with your server’s domain or IP address. This information is available on the hPanel’s VPS list menu.
After entering your VPS username and password, you will be redirected to the main dashboard. The Plesk interface offers two viewing modes, which you can choose from the Interface Management menu.
The Service Provider view lets you manage customers, service plans, and reseller accounts, making it suitable for a web hosting provider. In this tutorial, we will use the Power User interface as it is designed for personal use.
Regardless of the interface, the dashboard will have the following areas:
- Sidebar – presents all items you can manage, including websites, domains, email accounts, and Plesk settings.
- Main menu – shows the selected items’ settings, such as the database and file manager shortcuts for your website.
- Top bar – contains a search bar, the logged-in username, notifications, and a help button.

2. Managing domains and emails in Plesk
After setting up a Plesk server, add a new domain. If you don’t have one, you can easily purchase a new domain from us, as Hostinger is also an ICANN-accredited registrar. Before buying, check the domain name availability using the following tool.
Domain Name Checker
Instantly check domain name availability.
Click Add to Cart on your chosen domain name and complete the purchase process. Then, open Plesk and follow these steps to add it:
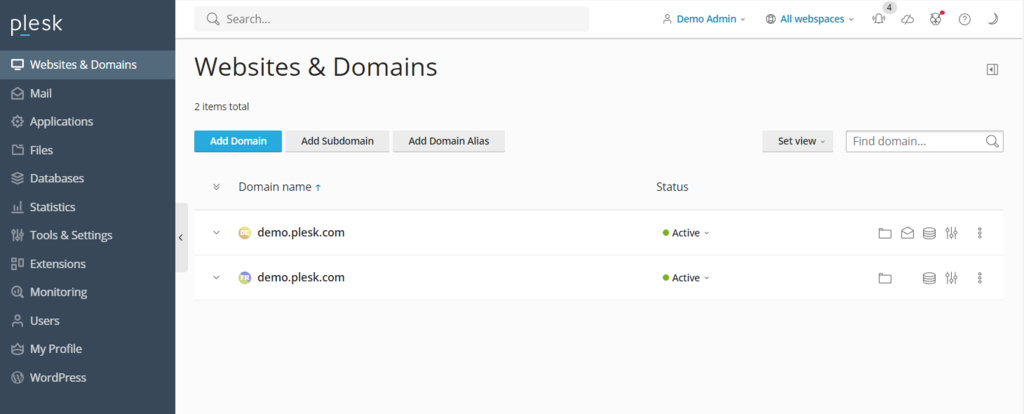
- On the sidebar, click Websites & Domain.
- Click Add domain → Blank website.
- Enter the required information, like your domain name and webspace settings. Click Add Domain to confirm.
- Plesk will show your new domain’s configuration menu. Click on Hosting & DNS → DNS.
- Point your domain to your VPS hosting using the information in the Records tab. Your domain should be accessible within 24 hours after the DNS propagation process is completed.
Managing multiple domains is simple since users can configure them on a single screen. Click the domain name to manage its SSH access, security features, and domain-based email account.
To create a new email account, click the Mail tab → Mail Accounts → Create Email Address to create. Enter your desired local part, set a new password, and click Ok to finish the process.
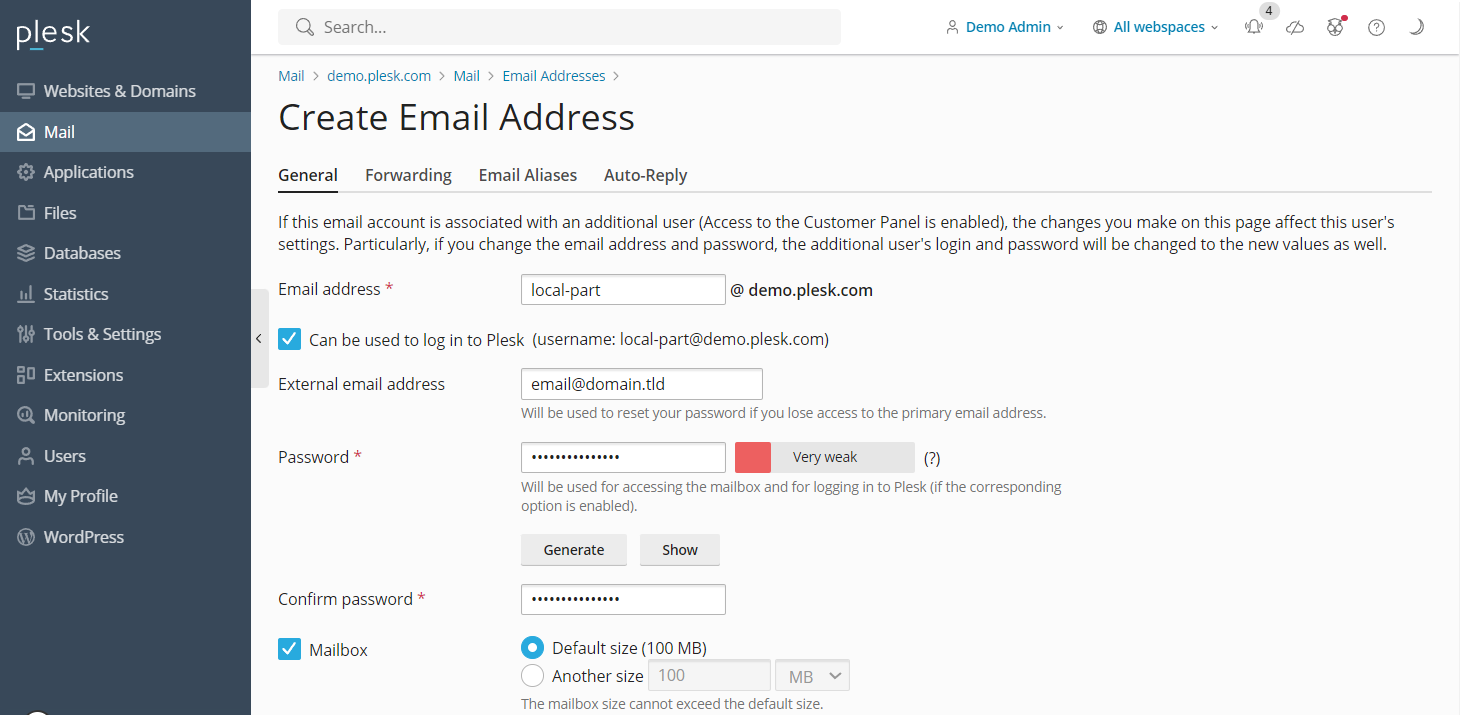
You can also change the mail settings from the same menu, like enabling the service and applying Secure Sockets Layer (SSL) certificates. To create emails for other domain names, navigate to Mail on the sidebar.
3. Managing websites in Plesk
The steps on how to use Plesk to set up a website will depend on the development method – manual coding, using a built-in editor, or utilizing content management systems (CMSs).
Plesk supports various content management systems, including WordPress, Joomla, and Drupal. We will use WordPress since Plesk offers a toolkit that generates databases and admin accounts for a quicker setup process.
For another CMS, install the platform via Applications on the sidebar. Otherwise, follow these steps to create a new WordPress website on a Plesk server:
- From the sidebar, select Websites & Domains. Select the domain name you want to create the website on.
- Click PHP settings and check the PHP support box. Click Apply and OK. Skip this step if the box is already checked.
- Return to the domain settings menu and select Install Application → WordPress.
- Enter the information and click Install.
- After the installation process is complete, you will be redirected to the WordPress configuration page. Click Log in to open your website’s admin area.
To access the WP toolkit, click the WordPress icon on your domain name. You can manage databases, plugins, themes, and SSL certificates from this menu.

Moreover, Plesk offers File Manager that lets you easily modify your website’s files without an FTP client. It also has a website staging tool, allowing you to test changes before deploying them to the live page.
Pro Tip
Instead of creating a new website, you can transfer an existing one using Plesk. Read Plesk’s website migration guide to learn more about the process.
4. Managing server settings in Plesk
When it comes to Plesk server management, you can modify its settings directly from the control panel. For example, you can change users’ permissions via Restricted Mode Settings, which helps prevent unauthorized modifications of your Plesk server.
This setting also enables or limits features for the administrator, like action log, remote API, server reboot, and IP restriction management. You can also configure permissions for hosting, PHP, web server, mailing, and DNS management.

To enable it, go to Tools & Settings on the sidebar and select Restricted Mode Settings under the Plesk category. Check the features you want to allow for the administrator and click the Enable Restricted Mode box.
Plesk also lets you easily create a backup of your server’s settings and user data using the Backup Manager. To access this feature, navigate to Tools & Settings → Tools & Resources → Backup Manager.
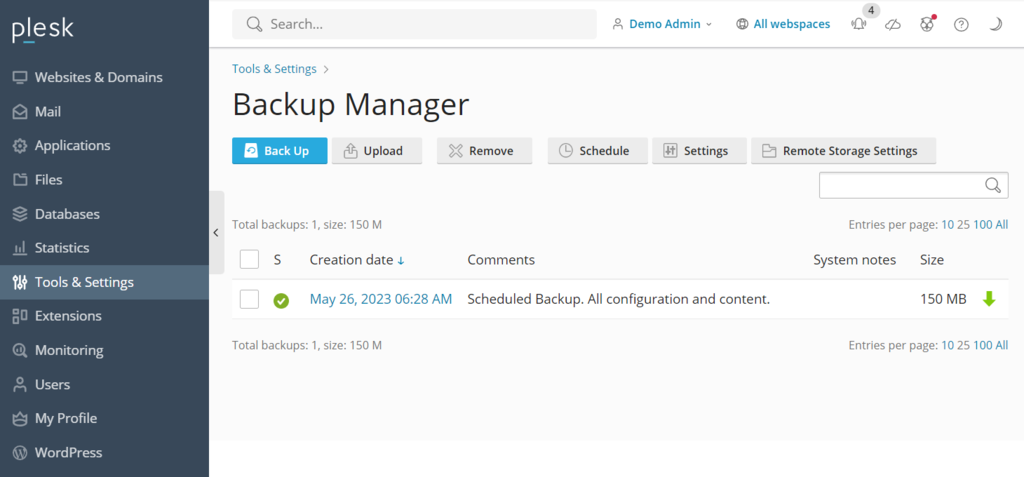
You will see a list of your previous backups, which you can click to restore the data. To create a new one, click Back Up, select the data, storage directory, and its type. Click OK to confirm.
Plesk offers two website analytics to help your server optimization task – Grafana and Plesk 360. You must sign in and connect your account to use Plesk 360, while Grafana is installable directly from your Plesk server dashboard.

To install it, go to Monitoring on the sidebar and select Use Built-In Monitoring at the bottom of the screen. From this screen, you can monitor your server’s disk usage, running services, memory consumption, and network load to gain insights into its performance.
5. Integrating advanced Plesk features
The Plesk extensions catalog offers over a hundred add-ons, enabling users to expand the control panel’s functionality. They are from different categories, like web development, security, server tools, and site editing.
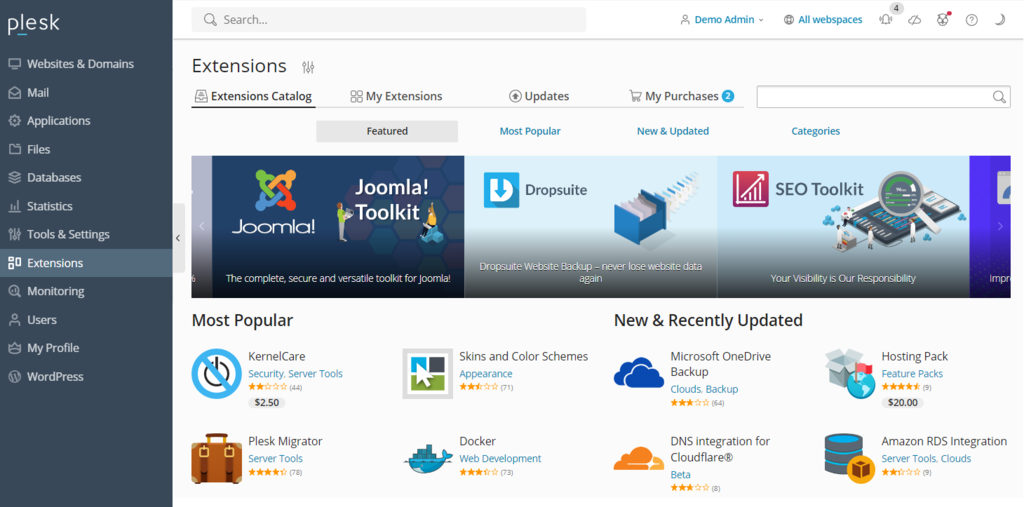
To install an add-on, navigate to Extensions on the sidebar, search for the tool you need, and click Get it Free. For paid ones, you can purchase them directly from the Plesk dashboard.
Plesk also includes a command-line interface (CLI) for integrating and managing third-party applications. It is also commonly used to manage server settings, accounts, websites, and services.
In Linux servers like Hostinger’s VPS, the CLI is located in the /usr/local/psa/bin directory. To use it, connect to your Plesk server using SSH and execute the command utility using the following syntax:
plesk bin <utility name> [parameters] [options]
Alternatively, use the following command to run the utility from any directory:
/usr/local/psa/bin/<utility name> [parameters] [options]
For example, here’s a command for showing all action log entries from specific data until today in a JSON format:
plesk bin action-log --show -since YYYY-MM-DD -json
Best practices for using Plesk
In this section, we will explain the best practices for using Plesk to help you efficiently manage your websites.
Keep your Plesk installation up to date
Since Plesk releases patches and features regularly, ensure your installation is up to date. There are several benefits of using the latest version of Plesk:
- You don’t need to upgrade to the latest major release every year.
- New features, tools, and improvements are immediately accessible.
- Security vulnerabilities are always patched in the newest version.
- Speed and performance improvements.
- User data protection.
Depending on your web hosting provider, you may use Plesk Onyx or Obsidian. Compared to the deprecated Onyx, Obsidian has an improved UI, more features, and regular updates.
At Hostinger, we use Obsidian to ensure optimal security and performance. Plesk Onyx users can reuse their licenses to upgrade to Obsidian for free.
Utilize Plesk’s automation features
Plesk’s automation feature lets users schedule cron jobs to manage their servers, including running PHP scripts, executing custom commands, and fetching URLs. It helps save time and effort, enabling you to focus on other tasks.
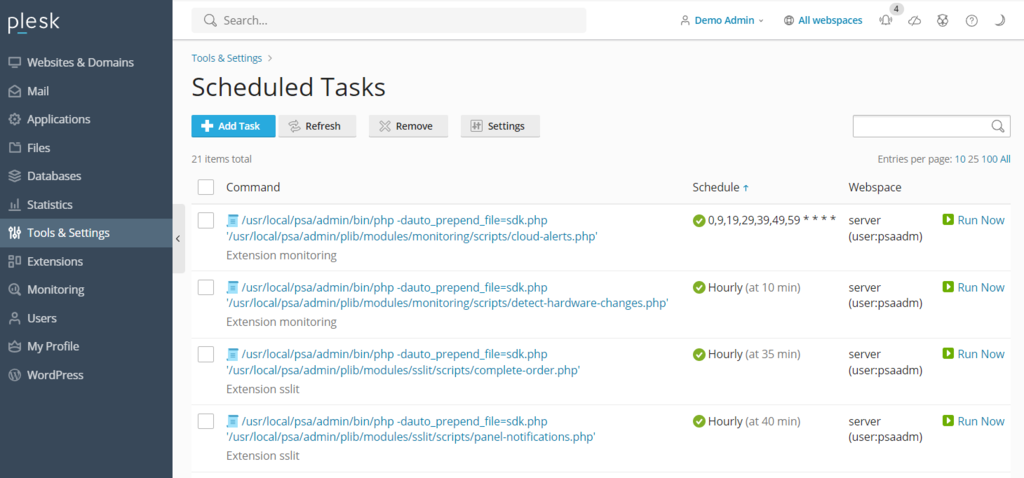
Plesk also lets users automate tasks like updating and backing up data. Automating these tasks ensures you have the latest security patch and data reserves in case of cyber attacks.
In addition to the control panel, Plesk lets you automatically update other software in your VPS, including WordPress plugins and themes.
Take advantage of the Plesk security features
When managed poorly, a virtual private server is prone to security vulnerabilities. Plesk offers features that help users strengthen their server security with minimal effort. Some of the notable ones include:
- SSL it! – lets users purchase and install SSL certificates directly from the Plesk control panel.
- Firewall – blocks the connection to users’ VPS, which may compromise its security.
- Server Name Indication (SNI) – secures users’ email conversations to prevent unauthorized parties from spying.
- Self-repair kit – detects and automatically fixes issues related to VPS, mailing clients, DNS, and databases.
Customize your Plesk dashboard to suit your needs
Plesk offers an intuitive and beginner-friendly user interface out of the box. However, you can customize it to better suit your needs and workflow. To customize Plesk, go to Tools & Settings → Plesk Appearance.
For a personalized user experience, Plesk offers several customization options, including:
- Changing the administrator interface’s default language.
- Adding a custom button that redirects users to another web page.
- Replacing the default Plesk logo and title with your branding.
You can also modify Plesk’s CSS stylesheet to change decorative elements, such as color scheme, background, and font. Read the using custom theme guide to learn more about the steps.
Use Plesk’s community resources
If you are still unsure how to use Plesk, refer to its community forum, where users can ask questions or find resources to help resolve their issues. This forum has various discussion topics, including Plesk for different operating systems, WP toolkits, and extensions.
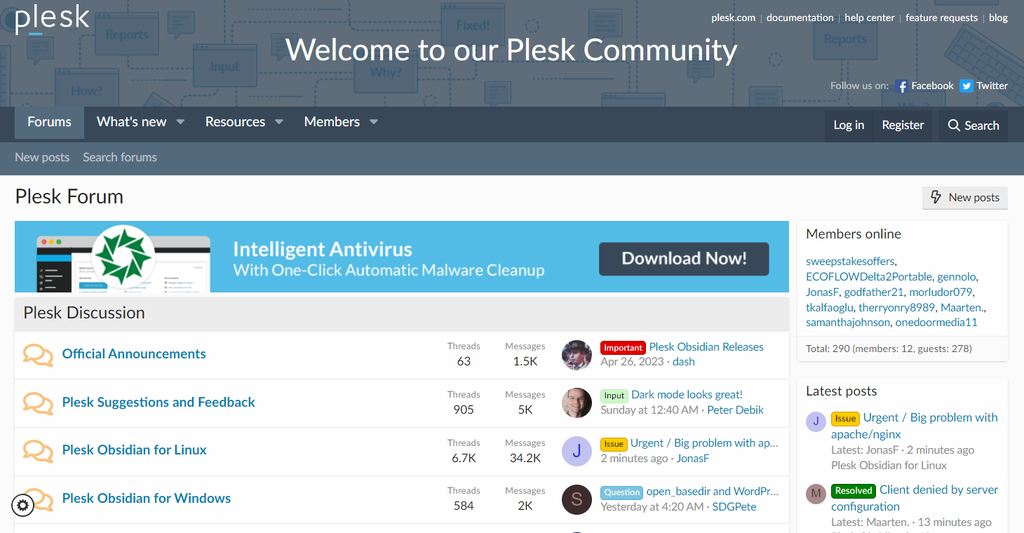
The community resources provide assets and instructions on various management tasks in Plesk. In addition, Plesk has official documentation explaining how to use the control panel.
Conclusion
Plesk is a web hosting control panel offering comprehensive features to simplify website management tasks. Hostinger users can purchase and install this control panel directly from their VPS operating system management menu.
To access the Plesk dashboard, enter https://example:8443 in your web browser, replacing example with your VPS domain or IP address. Then, enter your username and password to enter the control panel.
Navigate to the sidebar to find the items to configure, such as websites, domains, and email accounts. Then, modify their settings and save the changes from the dashboard’s main menu.
In addition to the built-in features, Plesk lets users install extensions from the dashboard or use the CLI to install third-party applications.
To improve your website management efficiency, use Plesk automation features and customize its appearance to suit your needs. Also, check the community forum for easier Plesk troubleshooting.
How to use Plesk FAQ
In this section, we will answer several questions about how to use Plesk to help you understand more about the control panel.
Do I need technical skills to use Plesk?
Managing VPS requires hosting and server management knowledge regardless of the control panel. However, Plesk offers an intuitive and simple graphical user interface and its own dedicated file manager, which makes the task easier for users with minimal server management experience.
Can I manage multiple websites with Plesk?
Yes, website management with Plesk is easy. Go to the Websites & Domains to see the list of your current websites and click on them to open the management menu – all on the single dashboard.
What applications can I install with Plesk?
Plesk lets you install official and third-party applications for analytics, web development, and security. You can install them using the extensions catalog or via Plesk CLI with an SSH client like Putty.
Is it possible to monitor server health with Plesk?
Yes, but the server health monitoring feature is only available on the older version, Plesk Onyx. The newer Plesk Obsidian uses Grafana, which lets you monitor your server resource usage and running services.
All of the tutorial content on this website is subject to Hostinger's rigorous editorial standards and values.

Aris is a Content Writer specializing in Linux and WordPress development. He has a passion for networking, front-end web development, and server administration. By combining his IT and writing experience, Aris creates content that helps people easily understand complex technical topics to start their online journey. Follow him on LinkedIn.

Valentinas Čirba, Hostinger's Head of VPS, is a seasoned product leader specializing in VPS products with over ten years of experience. He's an expert at setting product strategy, leading cross-functional teams, and making smart decisions to deliver innovative solutions. Valentinas is committed to creating products that not only meet business objectives but also truly serve the customer. Follow him on LinkedIn.