To set up Hostinger Email on Gmail for your smartphone, make sure that:
-
You have created an email account with Hostinger Email
-
Your domain is pointed to Hostinger
-
The correct Hostinger Email MX records are added to your domain’s DNS zone
Then, proceed with the steps below 👇
👉 Gather the Hostinger Email Account Details
Gather the configuration details of your email account:
|
IMAP (incoming) |
POP3 (incoming) |
SMTP (outgoing) |
|
Host: imap.hostinger.com Encryption: SSL Port number: 993 |
Host: pop.hostinger.com Encryption: SSL Port number: 995 |
Host: smtp.hostinger.com Encryption: SSL Port number: 465 |
If you’re not completely sure about your email password, you can easily reset it.
👉 Set Up Hostinger Email on Gmail for Android
Step 1 – Install the app
First, make sure you have the Gmail application installed on your device.
-
For iOS (iPhone, iPad) download from app store.
-
For Android download from the playstore.
Once installed, open the Gmail app on your Android device.
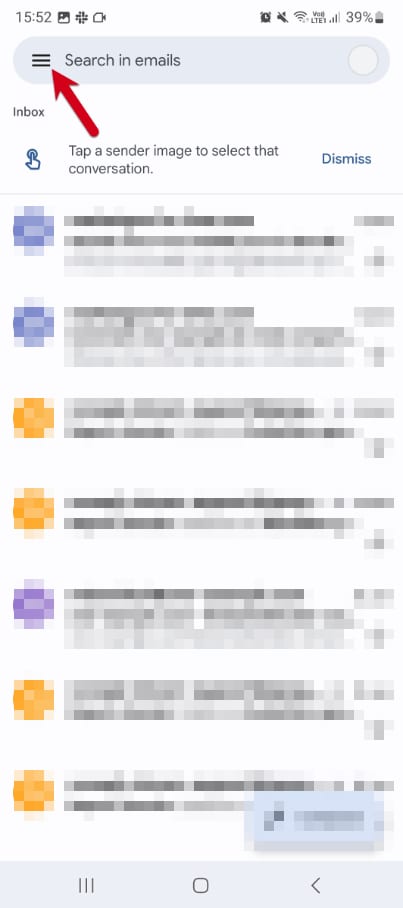
Step 2 – Go to Settings
Tap the menu icon in the top left corner to expand the sidebar.
Scroll to the bottom and tap Settings.
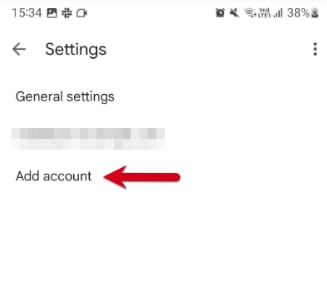
Step 3 – Tap “Add account”
Tap on Add account to start the email setup process.
Step 4 – Choose “Other”
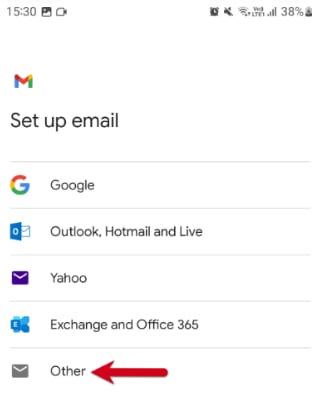
Select Other as the type of account you want to set up.
Step 5 – Enter your email address
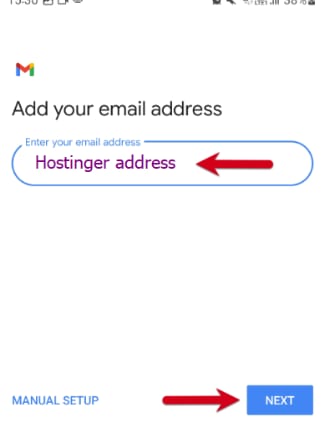
Type in your full Hostinger email address (e.g., yourname@yourdomain.com).
Tap Next.
Step 6 – Choose IMAP

Select IMAP when asked for the account type.
Step 7 – Enter your email password
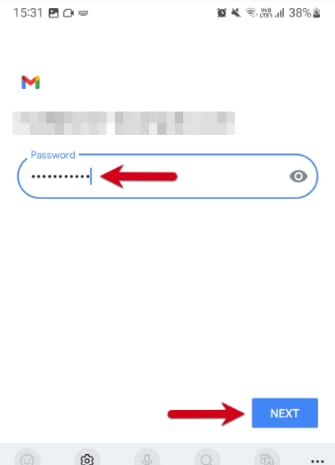
Enter the password you use to log in to your Hostinger Webmail.
Tap Next.
Step 8 – Configure the incoming server
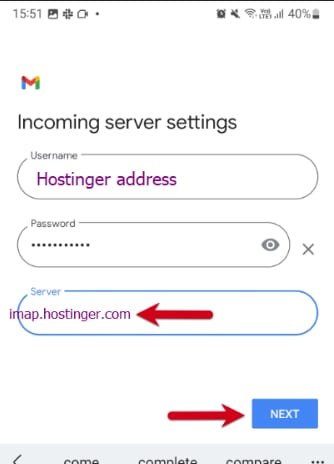
Set the incoming mail server to:
imap.hostinger.com
Tap Next.
Step 9 – Configure the outgoing server
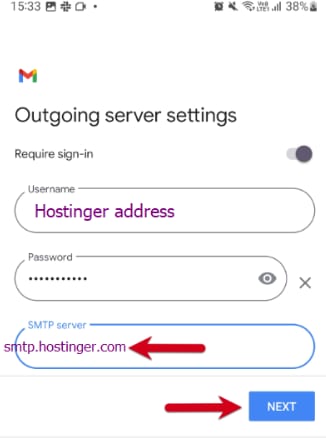
Set the outgoing mail server to:
smtp.hostinger.com
Tap Next.
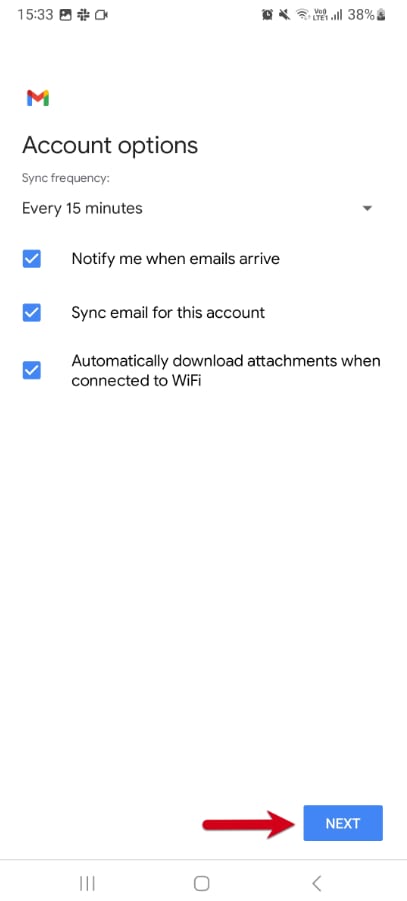
Step 10 – Choose account options
Adjust how often Gmail checks for new mail, whether you want notifications, and other sync settings. Uncheck anything you don’t need, then tap Next.
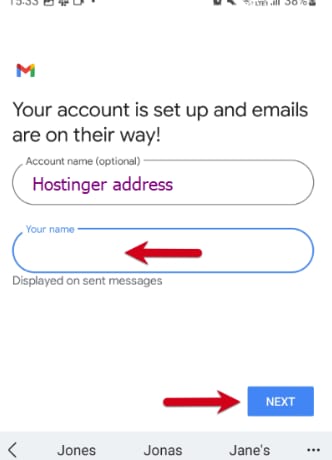
Step 11 – Finish setup
That’s it! Your Hostinger email account is now added and ready to use in the Gmail app, so you can choose to add a name to the address and complete the setup by hitting Next.
Troubleshooting
Most errors are related to having entered incorrect parameters into your email client. In those cases, it is highly recommended to reset your password and re-enter the parameters one more time, making sure that the IMAP or POP3 and SMTP settings match with those from the table above.