How to install Ubuntu on desktop (laptop or pc)
Apr 28, 2025
/
Ignas R.
/
5 min Read
Choosing which Linux distribution to install can seem challenging as there are many versions to choose from, and each of them offers very different features. One popular distribution to consider is Ubuntu.
It is arguably one of the best Linux distributions available. It is simple to use, easily customizable, and scalable based on users’ needs.
This article will go over the two methods of installing Ubuntu with GUI on your PC or laptop. We will also include the requirements and all the needed configuration settings for installing Ubuntu.

Requirements for Installing Ubuntu on Desktop
To install Ubuntu on a desktop, your computer has to meet these requirements:
- 2 GHz dual-core processor or better
- At least 4 GB of RAM
- 25 GB of free disk space
- USB port and a USB stick with at least 4GB capacity
Keep in mind that these installation methods work only with desktop computers and won’t suit VPS users as we are installing Ubuntu with a graphical interface. If you prefer a command-line interface, consider opting for a VPS solution instead.

How to Install Ubuntu Wiping Out the Old Operating System
Wiping out all the data from the hard drive is the cleanest way to install Ubuntu Desktop. This way, users delete old operating system files and install a fresh Ubuntu version.
Check out the comparison table below for the differences between applying this method and the virtual machine.
| Ubuntu Linux on VM | Ubuntu Linux on physical hardware | |
| Scalability | Can run multiple Ubuntu installations simultaneously | Can run one Ubuntu installation |
| Support | Hardware needs to support virtualization for VM to work properly | Ubuntu will work on a broader range of hardware |
| Performance | Performance is usually much slower and dictated by the host system | Performance is typically much better because the operating system runs directly on the physical hardware |
| Development | VMs allows the deployment of testing environments based on the user’s needs. This is extra useful for software development and testing | Reconfiguring the operating system is a long and tedious task. Usually, it will include complete reinstallation of the operating system |
To summarize, the VM Ubuntu installation will suit Ubuntu software testers better. In comparison, casual users will benefit more from installing Ubuntu on physical hardware due to its maximum performance and stability.
1. Download Ubuntu OS From the Official Directory
The first step to install Ubuntu natively is to download the official Ubuntu OS ISO file.
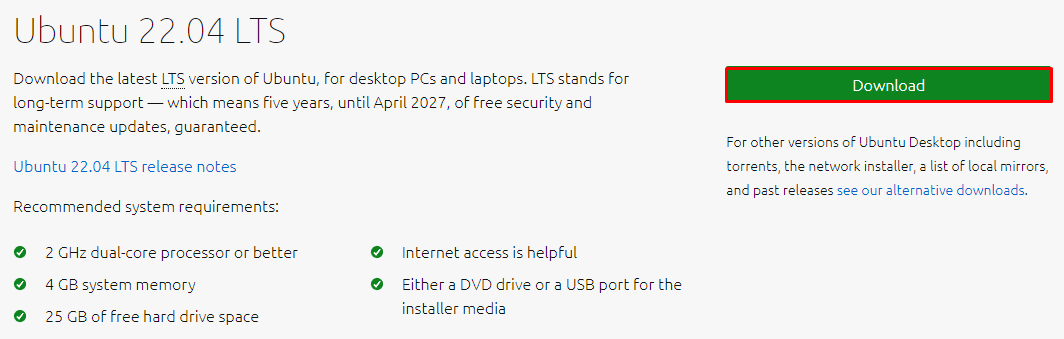
Users can also choose between Ubuntu Server and other Ubuntu flavors. However, the main Ubuntu Desktop version has all the essential features a beginner needs.
2. Create a Bootable USB
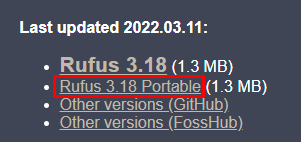
After downloading the ISO file, you will need to create a bootable USB drive, which will be used to install Ubuntu. To do so, you will have to use third-party software, such as Rufus. We recommend downloading the portable version as it won’t require any installation and will be ready to use right away.
Just open the executable file, and Rufus will start. Once done, ensure that the USB drive is plugged in and select the Ubuntu ISO file.
Important! For the partition scheme, select GPT if you are using a newer computer. Otherwise, go with MBR.
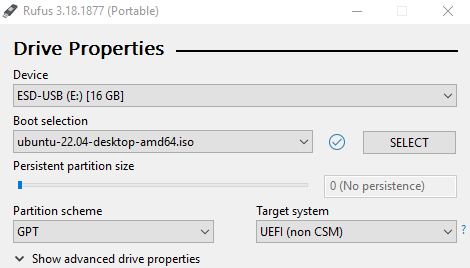
As for Format Options, leave the default file system and cluster size values and click on START.

Important! Creating a bootable USB stick will wipe out all the data from the USB drive. Make sure to back it up before proceeding.
Give it around ten minutes, and the bootable USB drive will be ready.
3. Install Ubuntu OS From the USB
With the Ubuntu bootable drive ready, proceed with the installation. For that, restart your computer and access BIOS. Usually, BIOS can be reached by pressing the DEL or F2 keys on the keyboard whenever a similar screen shows up:
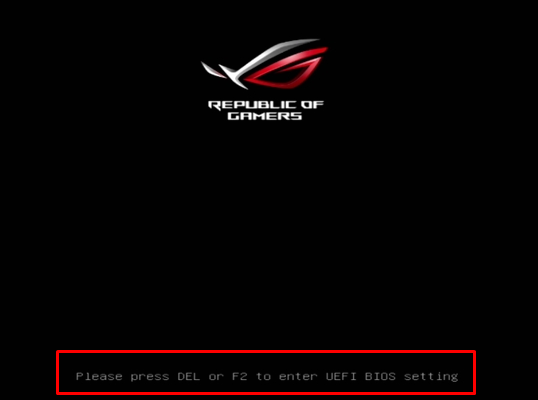
Pro Tip
In case you missed the BIOS screen, restart your computer and try again.
Once in BIOS, look for the boot menu and set the order to make the USB drive the first one on the list. It should look like this:
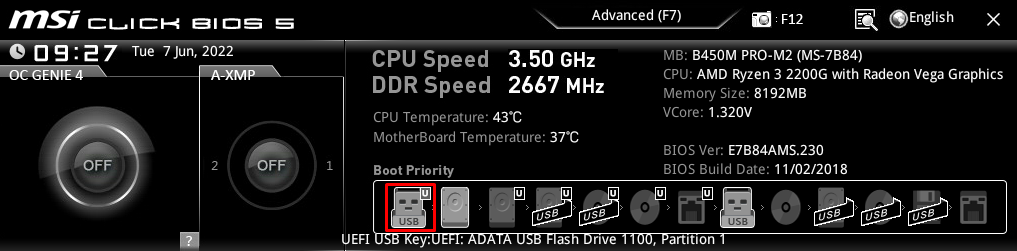
Now save and close BIOS. Give it a few minutes, and the Ubuntu installer should start. Once it begins, proceed to the next section about the Ubuntu installer.
How to Install Ubuntu on Windows Using VirtualBox
If you don’t want to wipe your hard drive completely, go with the VirtualBox installation method. This will install Ubuntu inside a virtual machine, making it completely independent of the primary system.
This method is excellent for those who want to test out different Linux distributions or install third-party software packages for Ubuntu.
Pro Tip
The virtual machine installation method allows you to install Ubuntu alongside other operating systems on the same computer.
1. Download and Install VirtualBox
Start by downloading the newest version of Oracle VirtualBox. Once done, open the executable file and proceed with the installation.
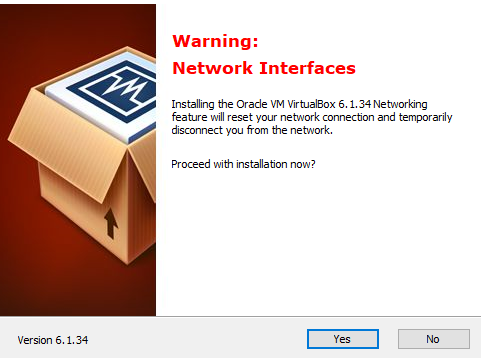
When asked about network interfaces, select Yes. Note that the internet connection might go down for a few minutes during the installation.
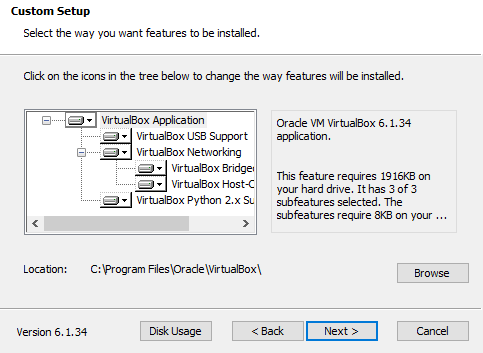
Next, proceed with the default installation settings.
2. Download and Install Linux ISO
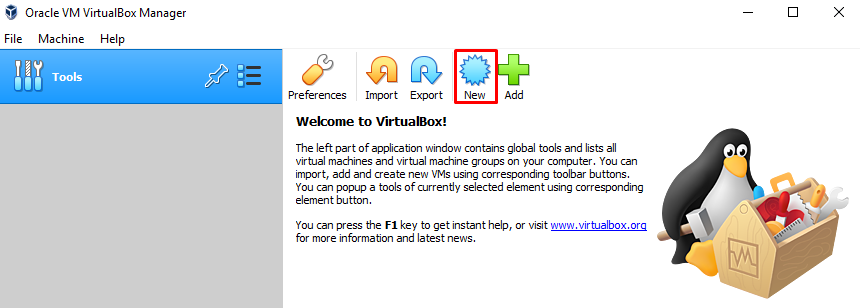
After installing VirtualBox, open it by using the desktop shortcut and select New to create a new virtual machine.
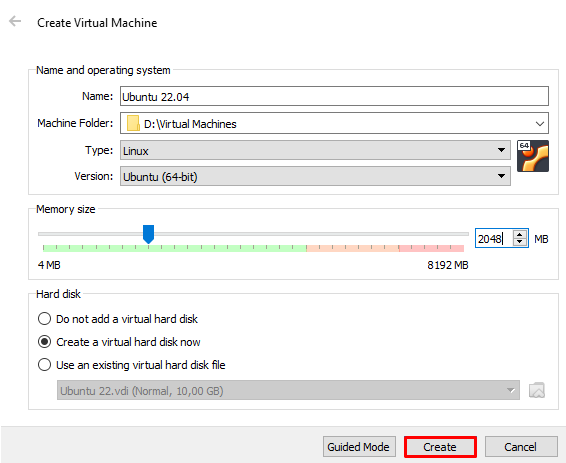
Specify the virtual machine name and select the amount of RAM to be assigned. We recommend giving half the amount of the main system. For example, if the computer has 8 GB of RAM, assign 4 GB to the virtual machine.
There is also an option to specify a virtual hard disk since it’s a fresh installation – go with the default settings and click on Create.
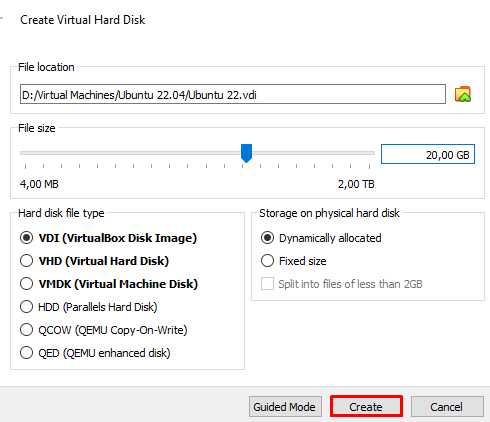
Next up, choose the file location for the virtual machine, specify file size and click on Create. We will be keeping the default hard disk file type and dynamically allocated storage. Dynamic storage saves a lot of space because it grows as the data inside the virtual disk increases. On the other hand, fixed storage takes up the full amount right from the start.
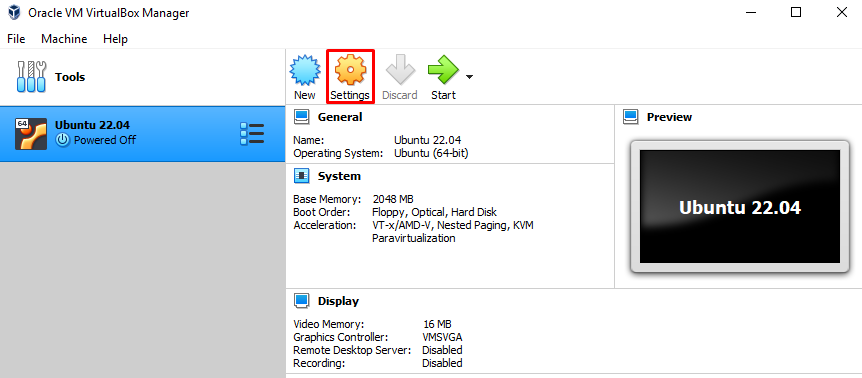
The virtual machine is now created. However, it will show an error message about no boot device. To fix it, select Settings, as you will need to assign the Ubuntu ISO file downloaded earlier.
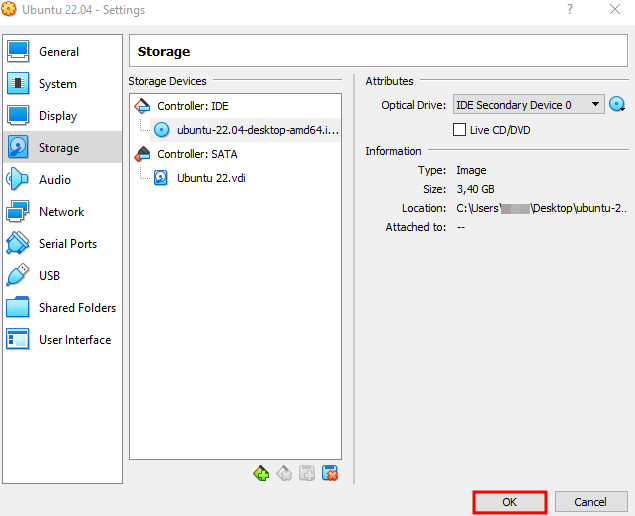
Once in the settings, open the Storage section and assign the ISO file to the Controller: IDE.

The end result will look like this:
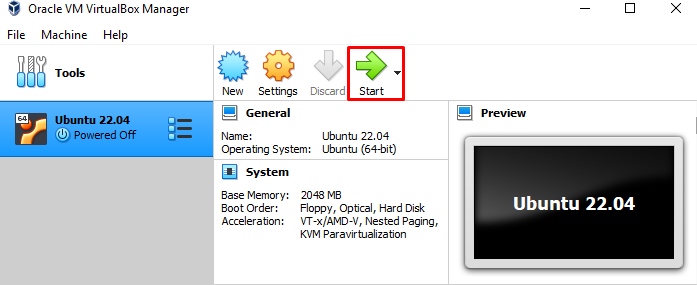
Now, you can start the virtual machine without any issues.
Give it a few minutes, and the Ubuntu installer should start. Then, proceed to the next section about the Ubuntu installer.
How to Proceed With Ubuntu Installer
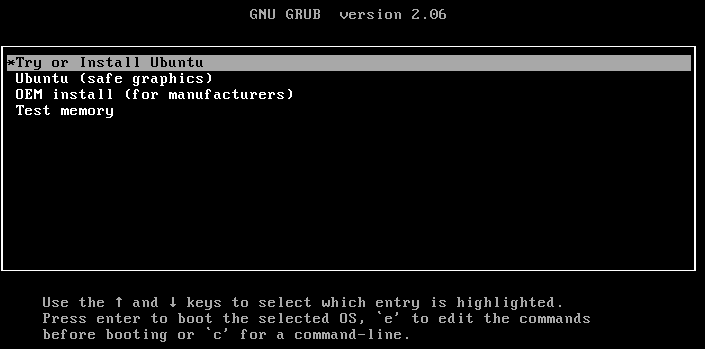
When the system boots to the new Ubuntu installation screen, select the Try or Install Ubuntu option.
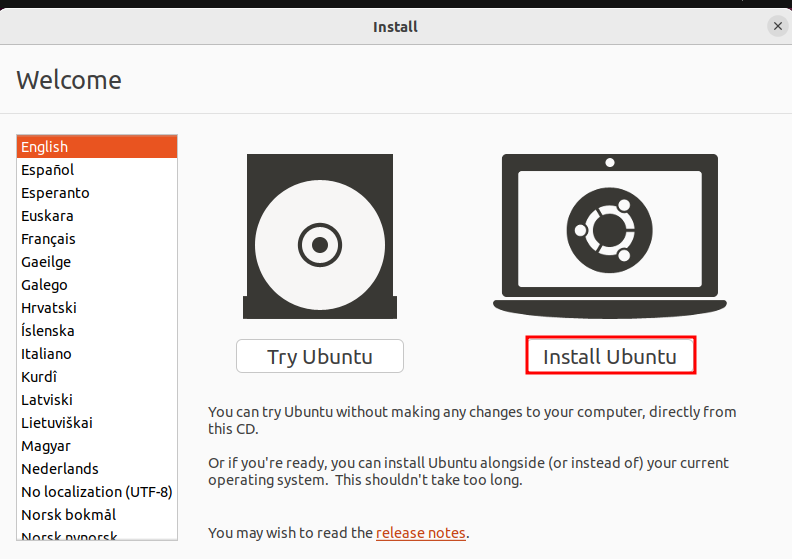
Select the installer language and choose the Install Ubuntu option in the next step. There is also an option to test Ubuntu. In that case, none of the hard drive files would get wiped. However, we are proceeding with the full installation.
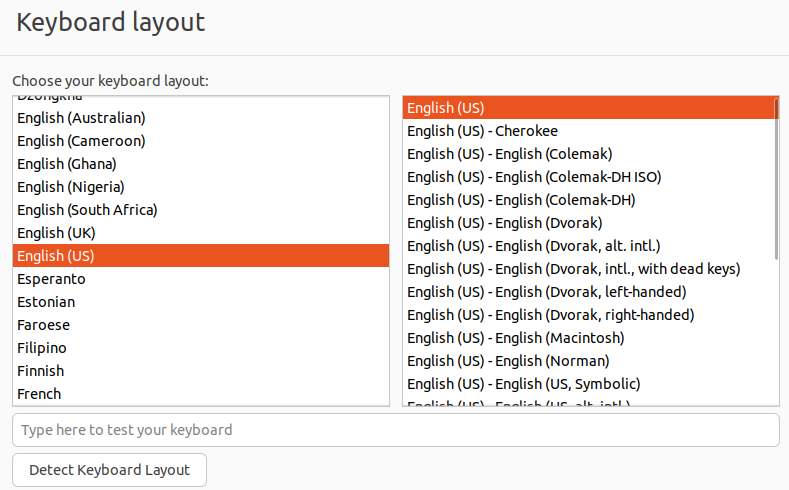
Choose the preferred keyboard layout and continue.
Now you can choose between the Normal and Minimal installations. We recommend sticking with the Normal installation since it offers more helpful utilities and software packages. Additionally, select the option to download updates to get the latest possible version.

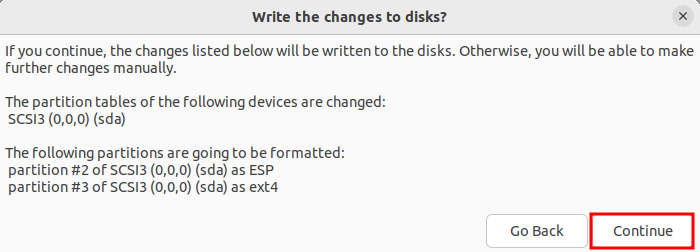
For the Installation type, choose Erase disk and install Ubuntu.
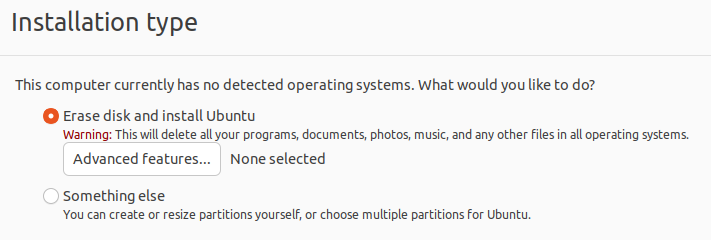
When asked about partition, click on Continue.
Next up, select the timezone.

Lastly, fill in the name, username, and password.

After clicking continue, Ubuntu installation will start. Give it about 20 minutes and restart the computer after installation is done. Once the computer boots up, you should see the default welcome screen.
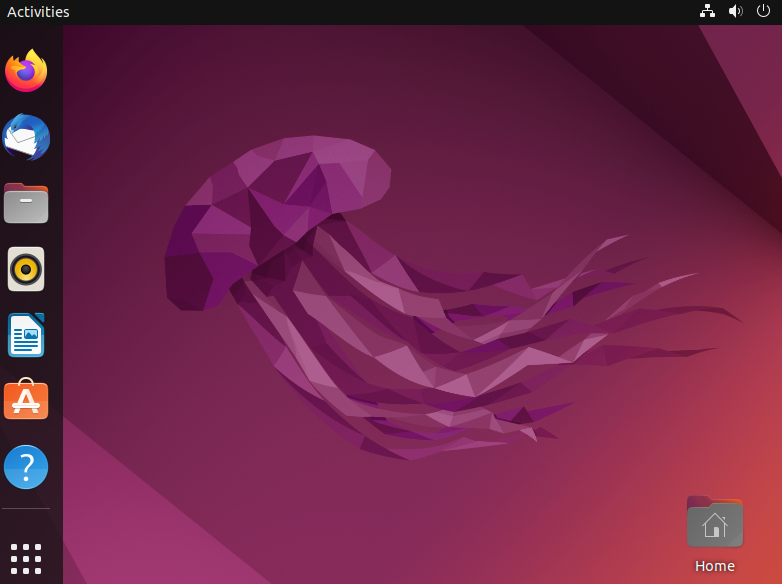
Congratulations – you have successfully installed Ubuntu on your computer.
Conclusion
Due to its simplicity and versatility, Ubuntu is often the go-to choice for an operating system. Although, not all Linux beginners might know how to install it.
In this tutorial, we’ve covered the main points of Ubuntu installation:
- Requirements to install Ubuntu Linux on a desktop computer.
- How to make a bootable Ubuntu USB device with Rufus.
- How to install Ubuntu on a physical Windows machine by wiping out the old operating system.
- How to install Ubuntu on a virtual machine by using Oracle VirtualBox software.
We hope that you have learned the main aspects of installing Ubuntu. If you have any questions, leave them in the comments section below.
Suggested Reading
How to Install Python Pip on Ubuntu
Learning Ubuntu: Set Timezone (3 Easy Methods)
How to Install Redis on Ubuntu
How to Install Node.js and NPM
How to Check Ubuntu Version Using GUI and Terminal Commands
How to List Installed Packages on Ubuntu
How to Configure Ubuntu Firewall
All of the tutorial content on this website is subject to Hostinger's rigorous editorial standards and values.

Ignas takes great satisfaction in helping people tackle even the most complex technical issues. His current goal is to write easy-to-follow articles so that these issues will not happen at all. During his free time, Ignas likes to play video games and fix up things around his house.