How to use PuTTY to access your server
Aug 18, 2025
/
Linas L.
/
3 min Read
SSH, or Secure Shell, is a secure protocol for connecting to a remote server. To establish an SSH connection, you will need an SSH client app like PuTTY and credentials like the server’s IP address, SSH port, SSH username, and SSH password.
In this guide, you will learn how to use PuTTY SSH terminal to connect to your hosting account or to a virtual private server. That way, you can access and manage your remote machine by executing various commands.
Download ultimate SSH commands cheat sheet
How to Manage Your Files via SSH – Video Tutorial
Watch to find out the advanced method of managing your files via SSH.

How to Download PuTTY
PuTTY is most commonly used on Windows. However, it is also available on Linux and Mac. Here is how you can get the putty download on different operating systems.
Windows
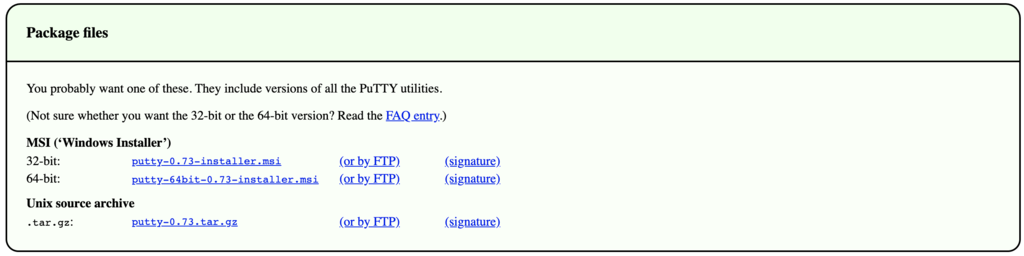
Download the latest version of PuTTY SSH from the official website. Be sure to select the right bit version for your computer. Once the file is downloaded, run the installer to start the setup.
Linux
Most people use the preinstalled OpenSSH on Linux. However, PuTTY on Linux is used more for debugging and connecting to serial ports and to raw sockets.
On Debian, use the following command:
sudo aptitude install putty
Followed by the tools installation command:
sudo aptitude install putty-tools
MacOS
Like Linux, the macOS comes with a command-line SSH client already installed. But to download PuTTY, open the terminal window and use the commands below.
To install PuTTY for MacOS:
brew install putty (or) port install putty
Requirements For Set Up
Before setting up an SSH connection using PuTTY, you will need the following information:
- Server IP Address
- SSH port
- SSH username
- SSH password
If you are a Hostinger user, there are two ways to find this information, depending on your hosting plan:
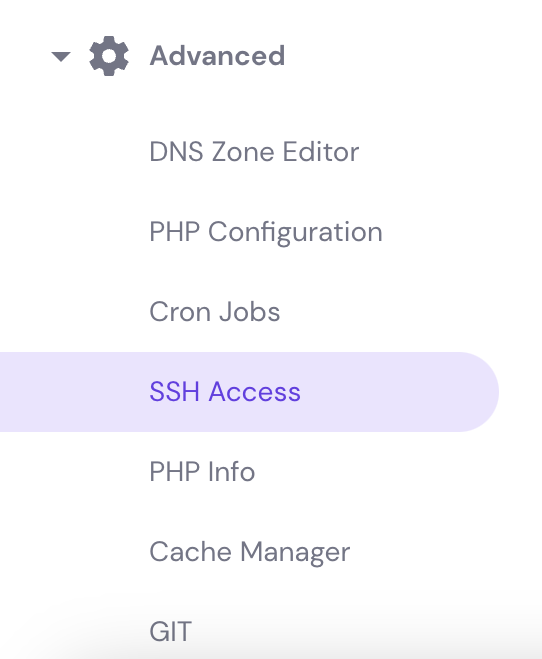
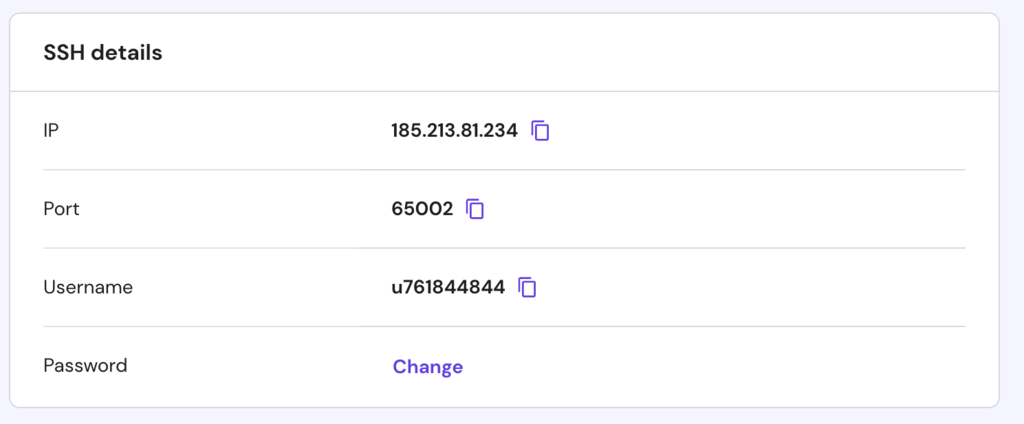
- Shared, WordPress, and Cloud hosting — go to the SSH Access menu under the Advanced category. Here you will see all the login details that you need. If you forgot your password, easily reset it via the FTP Accounts menu.
- VPS plan — the credentials are located in the Server tab of hPanel, under SSH Details. In case you don’t know what your password is, scroll down to the Root Password section, and create a new one.
Alternatively, ask Kodee, our AI-powered assistant, to change your password for you. Access it via your VPS dashboard’s left sidebar, then type a prompt like “Please change my VPS’ password. Here’s the new password: [your new password].”

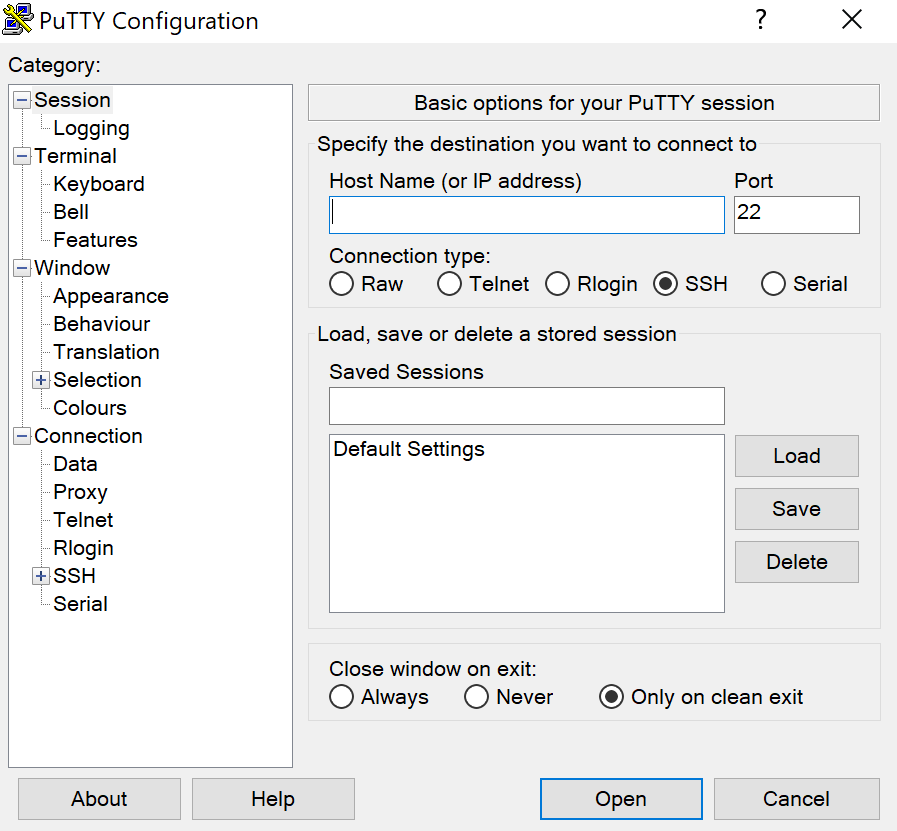
How to Establish SSH Connection Using PuTTY
After getting all the SSH connection information, follow the following steps:
- Launch the PuTTY SSH client, then enter your server’s SSH IP and SSH Port. Click the Open button to proceed.
- A login as: message will pop up and asks you to enter your SSH username. For VPS users, this is usually root. However, for shared hosting users, you will need to enter a predefined username like u721233450. After entering your username, press Enter.
- Type your SSH password and press Enter again. For security reasons, the screen won’t show the password but will register what you type.
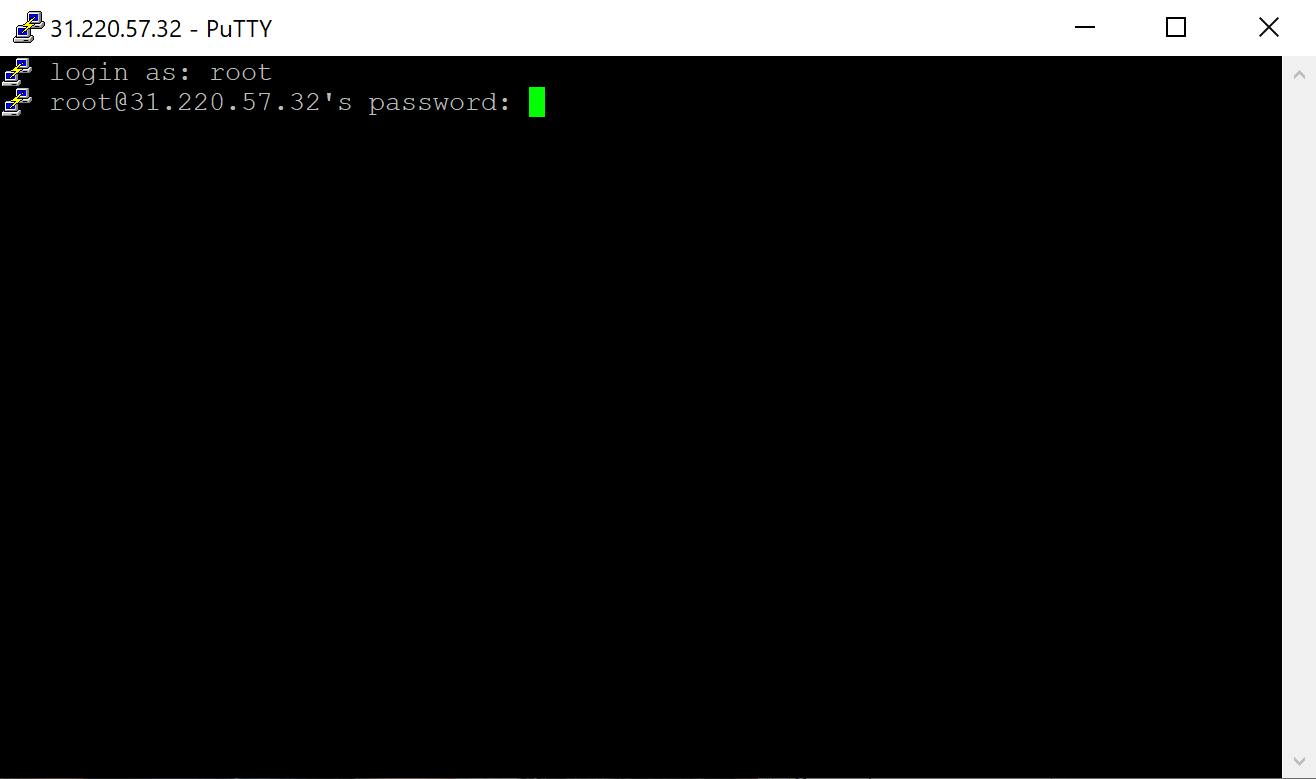

Congratulations! You have successfully connected to your account using the PuTTY SSH client. You can list all available SSH commands by executing help via the terminal.
How to Use PuTTYgen
PuTTYgen is a tool that creates SSH key pairs. PuTTY stores these key authentications in its .ppk format files. With Windows, you will use the PuTTYgen.exe graphical tool, while with Linux, you will use the command line.
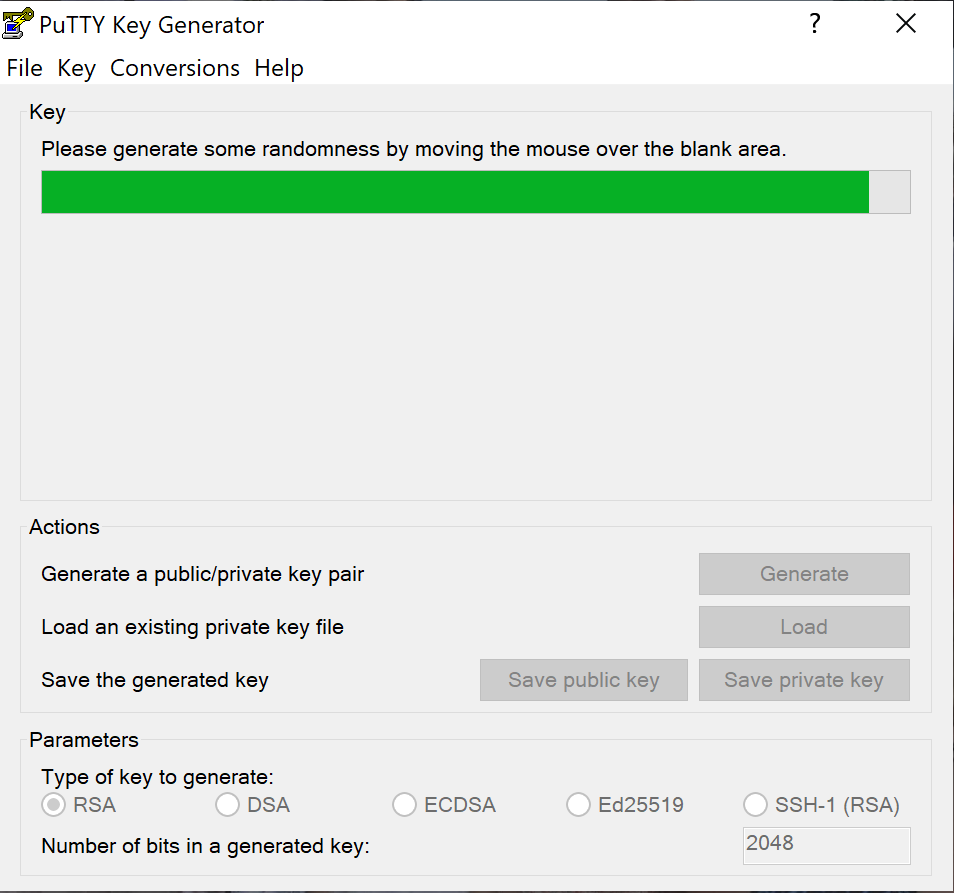
To begin, locate PuTTY and open PuTTYgen.
To create a new key pair, click the Generate button near the bottom and begin to move your mouse around within the window. Continue moving your mouse until the green progress bar is full.
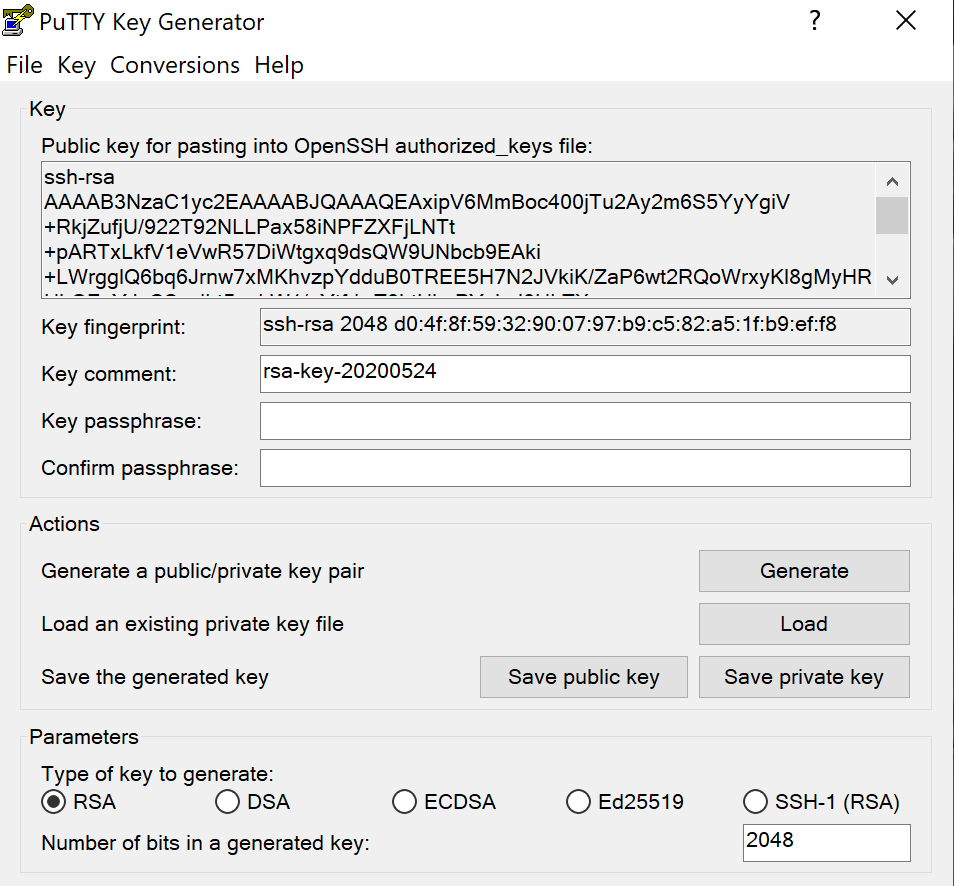
After it is complete, your public key will appear in the window.
It is recommended to use a passphrase as well as save your private key.
Install Public Key on Server
To grant access to an account, you will need to add the new public key to the file named ~/.ssh/authorized_keys.
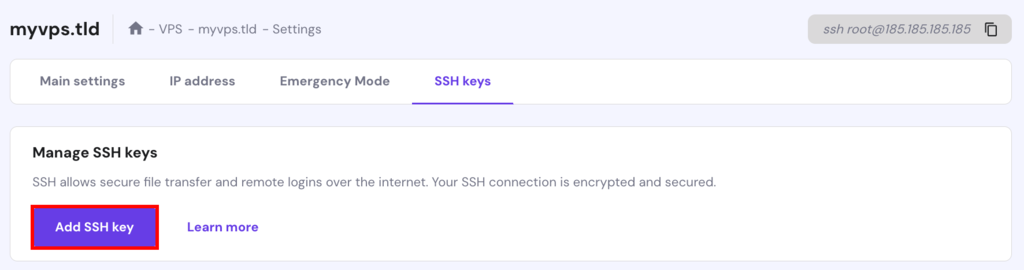
First, install the public key. Then, log into your server and locate the authorized_keys file. Edit the file and insert the new public key into the file. Save the file and test to see if the login works. Alternatively, if you have a VPS, you can add your public SSH key via hPanel:
Hostinger VPS customers can use Kodee to verify if you’ve added a public SSH key. Simply ask, “What’s my public SSH key on VPS?” If Kodee returns a key, you’ve successfully set it up.
Conclusion
SSH connection comes in handy when you have to access your server or hosting account remotely, and PuTTY is one of the SSH clients that can help you do the task. Remember that you need to know the SSH credentials to establish a connection using PuTTY.
Once you are connected, you can use basic SSH commands and start managing your server. We hope this article helps you to use the PuTTY client to connect to your hosting account.
Suggested Reading
How to Use Linux Screen for Effective Terminal Management in 2025
All of the tutorial content on this website is subject to Hostinger's rigorous editorial standards and values.

Linas started as a customer success agent and is now a full-stack web developer and Technical Team Lead at Hostinger. He is passionate about presenting people with top-notch technical solutions, but as much as he enjoys coding, he secretly dreams of becoming a rock star.