Feb 16, 2026
Linas L.
3min Read
Do you own a custom domain email, but want to use Gmail as the main platform to manage all messages? You’ve come to the right place. Stick with us and discover how to integrate your custom domain address with Gmail.

When you buy hosting, chances are you’ll get a free business email right out of the box. However, it might take time to get used to because the interface is different from Gmail’s.
There are numerous options available for setting up a professional email account. While purchasing a Google Workspace account is one alternative, requiring an investment with plans starting at $6.99/month per user, other email services offer more budget-friendly solutions, with some starting as low as $0.39/month.
Luckily, it’s possible to use Gmail with your own domains for free. That way, you can have the best of both worlds — a custom domain email with the convenience of Gmail’s interface. You also don’t have to log in to different platforms to manage your personal and business emails.
Using Hostinger Email? If you’re having trouble setting it up, we have a quick guide just for you!
Now that you know why it’s convenient to integrate Gmail with a custom domain, let’s take a look at the steps to set it up:
Before we can set up a Gmail account to work with a custom domain, first you need to create a domain-based email. In case you haven’t made one, refer to our tutorial to know how to do so.
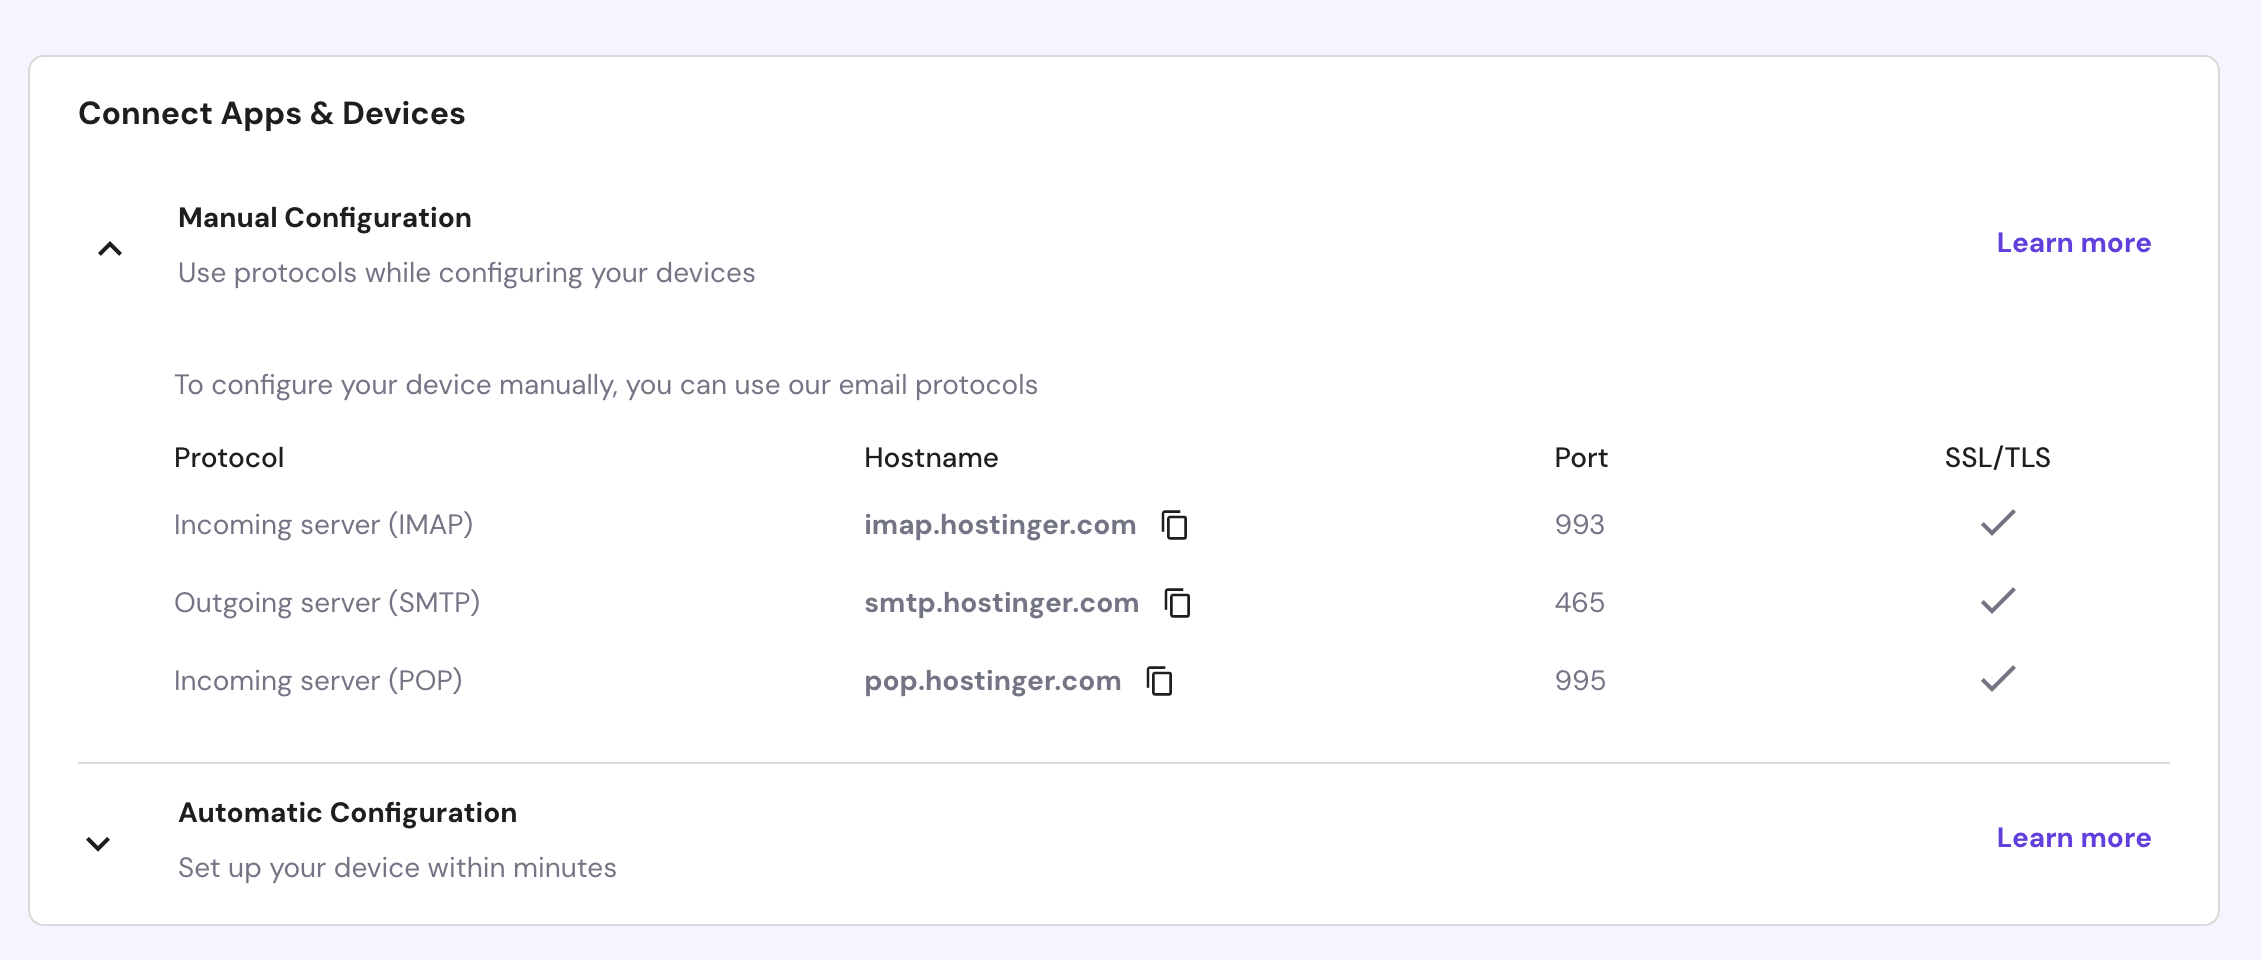
After creating the email, you need to collect its POP3 and SMTP details. To locate the email protocols in Hostinger’s hPanel, do the following:

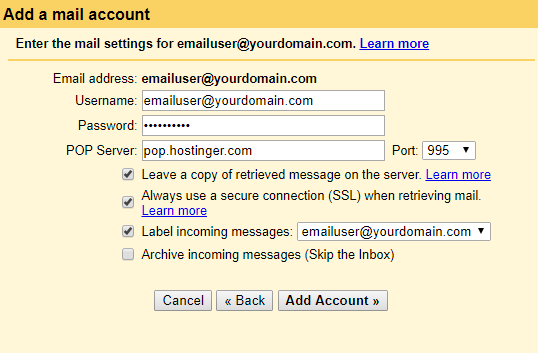
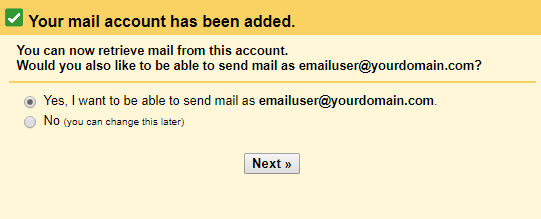
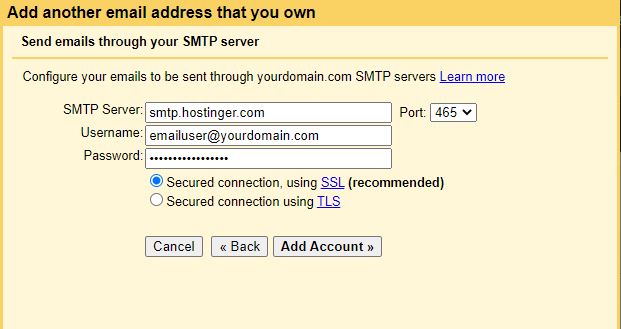
Now that we have the necessary data, it’s time to set up the Gmail account so it can receive messages sent to your custom domain email. Here’s how:

Getting the best of Gmail’s interface with the perks of having a personalized domain can be costly, but it doesn’t have to be. In this tutorial, we have learned how to integrate the best of both worlds by tweaking the settings of a Gmail account.
Let us know in the comments below if this guide is useful.
Learn how to check if port 587 is open and establish more secure connections between your mail client and server.
All of the tutorial content on this website is subject to Hostinger's rigorous editorial standards and values.

Linas started as a customer success agent and is now a full-stack web developer and Technical Team Lead at Hostinger. He is passionate about presenting people with top-notch technical solutions, but as much as he enjoys coding, he secretly dreams of becoming a rock star.
To organize your emails, first review your inbox. Then set up folders, labels, and filters to automatically sort messages. Archive ...

An email alias is an additional email address that delivers messages to your main inbox instead of creating a new ...

Email encryption protects email messages by turning readable content into encoded ciphertext that only an authorized recipient can decrypt. It ...