If you are having trouble accessing your website, checking your IP is a good troubleshooting step. An IP block is not always the main cause — but it is one of the most common, especially if you are experiencing any of the following symptoms:
- Unable to access your website or WordPress admin.
- Unable to log in to hPanel.
- Unable to connect to File Manager.
- Unable to connect via SSH (common for VPS users).
- Any other sudden inaccessibility to your hosting services.
It can be quickly ruled out by following the steps below. Learn what to do if you can’t access your website, hPanel, or WordPress admin because your IP address has been blocked by Hostinger’s firewall.
Why can an IP be blocked?
Hostinger uses an automated firewall and third-party security tools to protect our servers from malicious traffic. If your IP address is associated with suspicious activity — such as repeated failed login attempts, high request volume, or previous reports from other websites — it may be automatically flagged and blocked.
This can happen even if you are a legitimate user. Common reasons include:
- Your device or network was previously affected by malware that sent suspicious requests.
- You share a network (office, school, or public wifi) with someone whose activity triggered the block.
- A plugin or tool on your website sent an unusually high number of requests to the server.
Your IP has a history of abuse reported through third-party databases like AbuseIPDB, Greynoise, or Bitninja.
Troubleshooting a blocked IP
Step 1 – Confirm your current IP address
Before contacting support, confirm what your actual IP address is. Your IP can change, especially on mobile or home connections, so do not rely on a previously noted address.
Visit What is My IP while connected to the same network you use to access your website or hPanel.
Step 2 – Check your IP reputation
You can check whether your IP has been flagged in security databases. This will help you understand the severity of the block and what options are available to you.
We recommend checking the following tools:
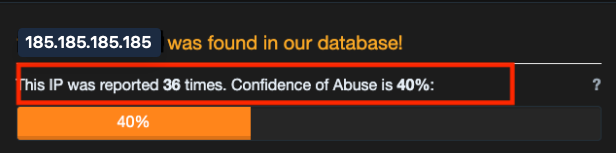
- AbuseIPDB: shows reports submitted by websites and services across the internet.
- Greynoise: shows whether your IP has been identified as a scanner or bot source.
- MXToolbox Blacklist Check: useful if you are also having email delivery issues.
Once you have your abuse confidence score from AbuseIPDB, use the following guide:
- 0–15%: Low risk. Start a chat with Kodee, our virtual assistant, and it can process the unblock automatically.
- 16% and above: Our team is unable to unblock this IP. We recommend submitting a delisting request (Step 4), contacting your ISP for a new IP address (Step 5), or using a VPN as a temporary workaround to access your website or hPanel.
Step 3 – Request an unblock
If your score is 0–15%, start a chat with Kodee, our virtual assistant. Kodee can process the unblock automatically without needing to escalate to our support team.
- Your current IP address (from whatismyip.com)
- The domain or website you are trying to access
- The error message you are seeing (for example: ERR_CONNECTION_TIMED_OUT or ERR_CONNECTION_REFUSED)
Our team will review your case against the firewall and security tools. Please note that there is a chance the block may not be removed depending on our findings.
NOTE
- If the same activity that triggered the block continues — for example, repeated failed login attempts — your IP may be automatically blocked again.
- If many of your clients from the same location experience IP blocking and cannot access your website, check step 7.
Step 4 – Submit a delisting request
If your IP has a high abuse score but you believe the reports are inaccurate or outdated, you can dispute them directly with AbuseIPDB.
- Go to AbuseIPDB.
- Search for your IP address.
- Scroll to the bottom of the results and click Report / Contest these reports.
- Fill in the form explaining that the reports are inaccurate and request removal.

AbuseIPDB will review your request. This process may take several days. Once your score drops significantly, contact our support team to re-evaluate the block.
Step 5 – Request a new IP address from your ISP
If your IP has a high abuse score that cannot be disputed, the most reliable solution is to get a new IP address from your Internet Service Provider (ISP).
For home or mobile users:
- Restart your router — some ISPs assign a new IP automatically after reconnecting
- If that does not work, contact your ISP and ask them to assign you a new dynamic IP address
- Let them know your current IP has been flagged in a security database
For business or static IP users:
- Contact your ISP and request a new static IP address
Step 6 – Improve your IP reputation
If your block has been removed or you have obtained a new IP address, we recommend taking steps to prevent your IP from being flagged again.
- Avoid repeated failed login attempts to your website or hPanel.
- Make sure plugins or third-party tools on your website are not sending excessive requests to the server.
- If you send emails from your hosting account, set up SPF, DKIM, and DMARC records to verify your identity and improve email deliverability.
- Remove any malware from your website — malicious scripts can send requests in the background without your knowledge.
- If you use shared Wi-Fi or an office network, be aware that other users on the same network can affect your IP reputation.
If you suspect a plugin or tool caused the issue, you can review your access logs in hPanel under Websites → Manage → Logs to identify unusual traffic patterns.
Step 7 – Use Cloudflare to keep your website accessible
If your website needs to remain accessible to visitors while the IP issue is being resolved or many of your clients from the same region/country are experiencing this issue, you can enable Cloudflare’s proxy on your domain. When the proxy is active, visitors connect to Cloudflare’s servers instead of directly to your hosting server, so the block does not affect them.
This is a workaround, not a permanent fix — you will still be unable to access hPanel or your server directly from a blocked IP.
For hPanel access while your IP is blocked, connect using mobile data or a VPN as a temporary measure.