If you use Hostinger Website Builder and want to export your website’s content to a WordPress site, follow the instructions below.
Note that not everything can be exported. For example, you can’t export website styles and layout, online store, integrations, forms, collected submissions, or SEO settings.
You can export regular pages, texts, images, and other files. Find out more about the file types supported by WordPress 💡
Before You Begin
Add a WordPress website to your hosting plan
Make sure you already have a WordPress website setup. If not, you can set one up at Hostinger by following this guide: How to add a WordPress website. The WordPress version must be 6.5 or higher, and the domain name must be propagated.
Customize WordPress settings
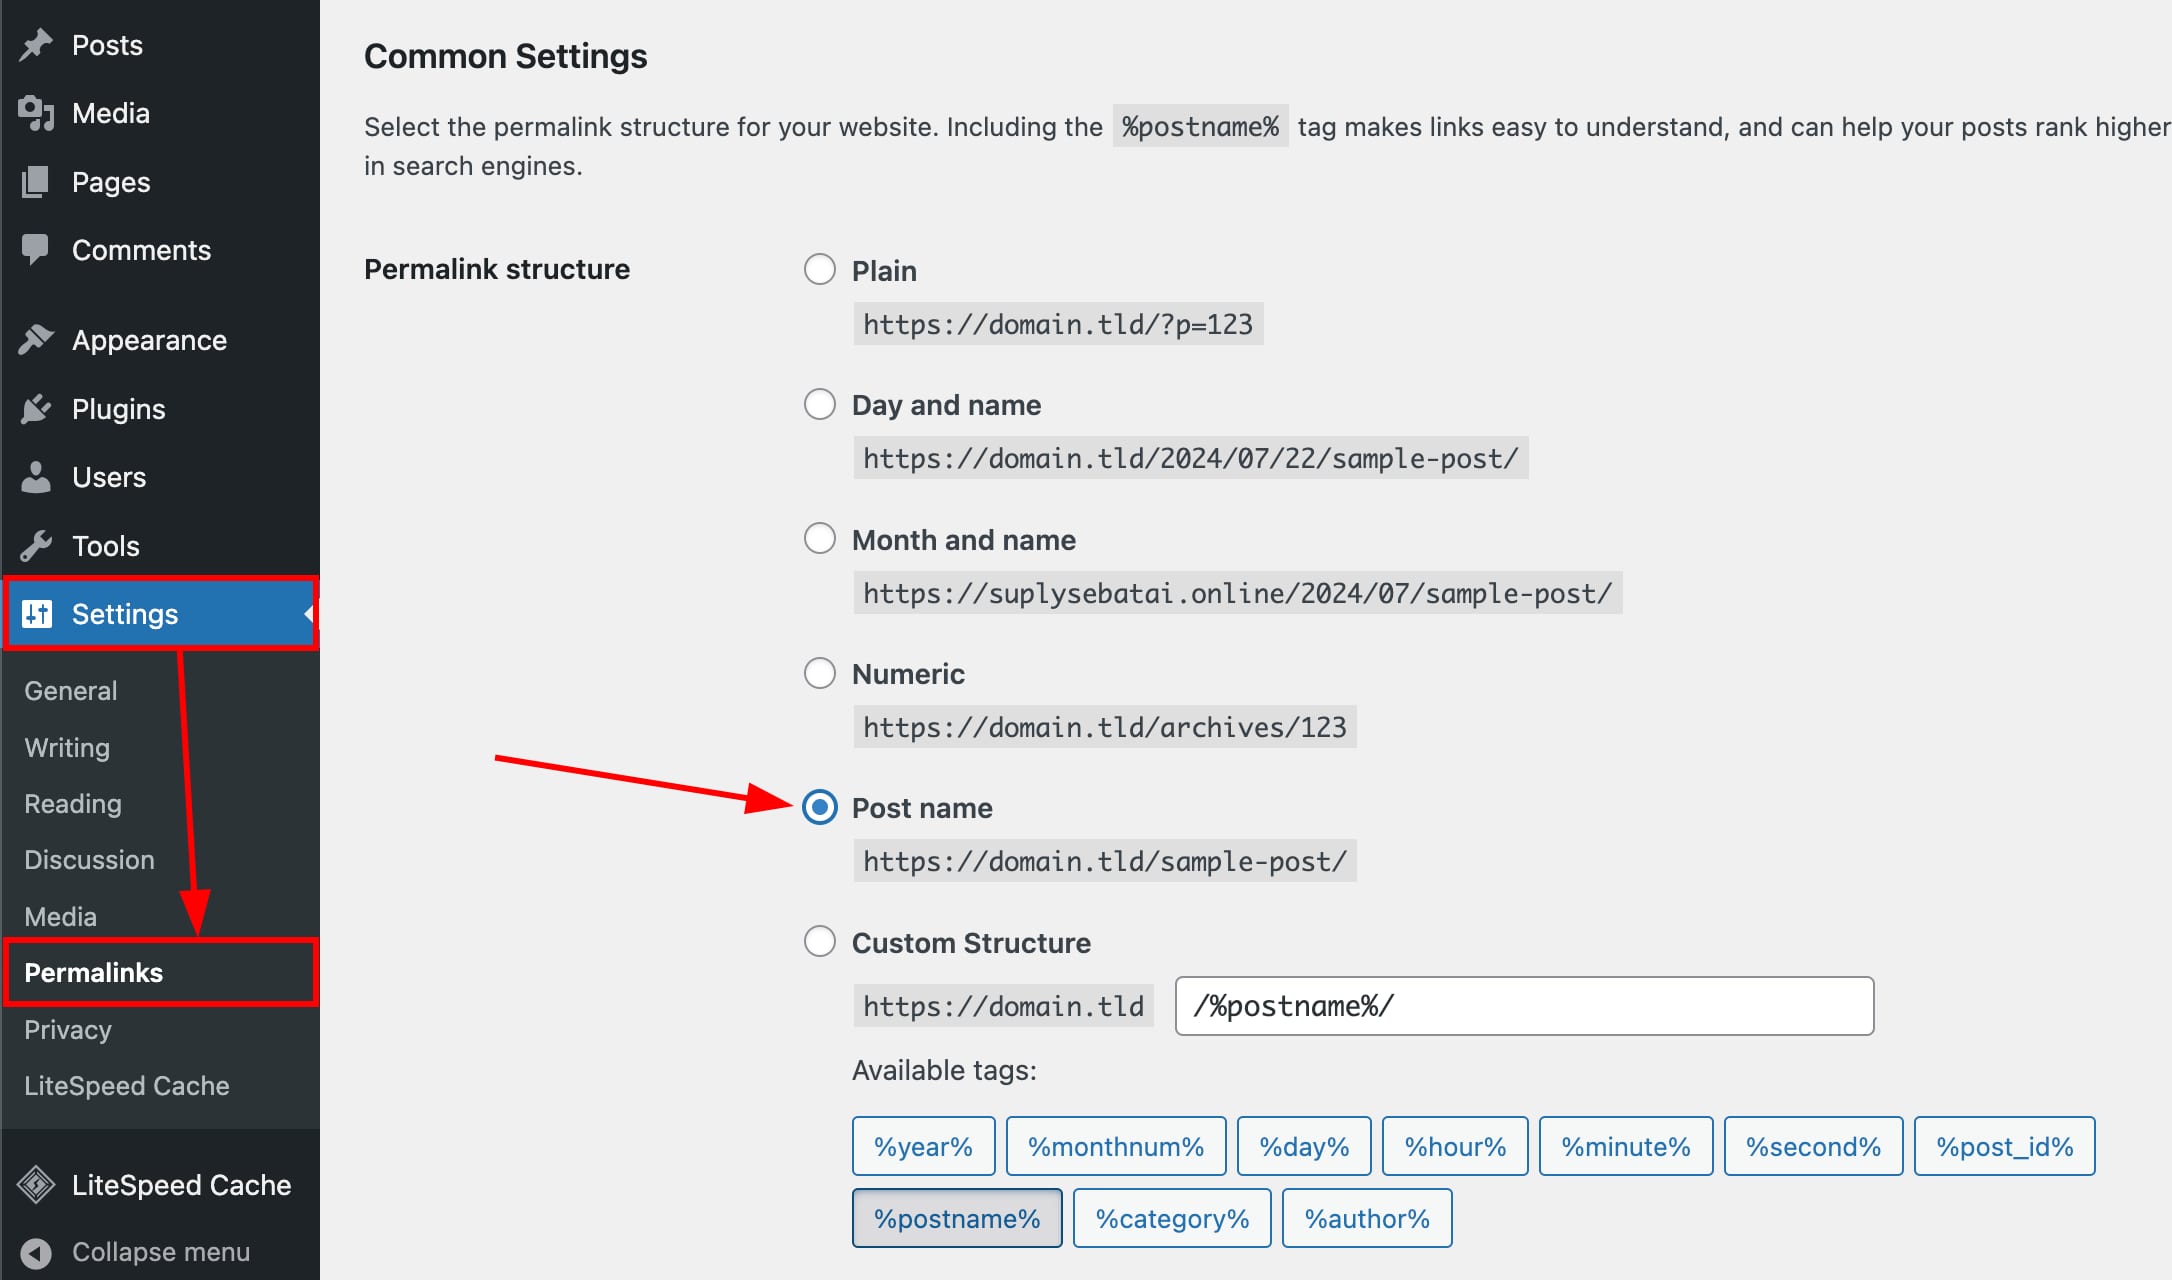
Reset your WordPress website’s permalinks structure to post name as in step 1 in this tutorial:
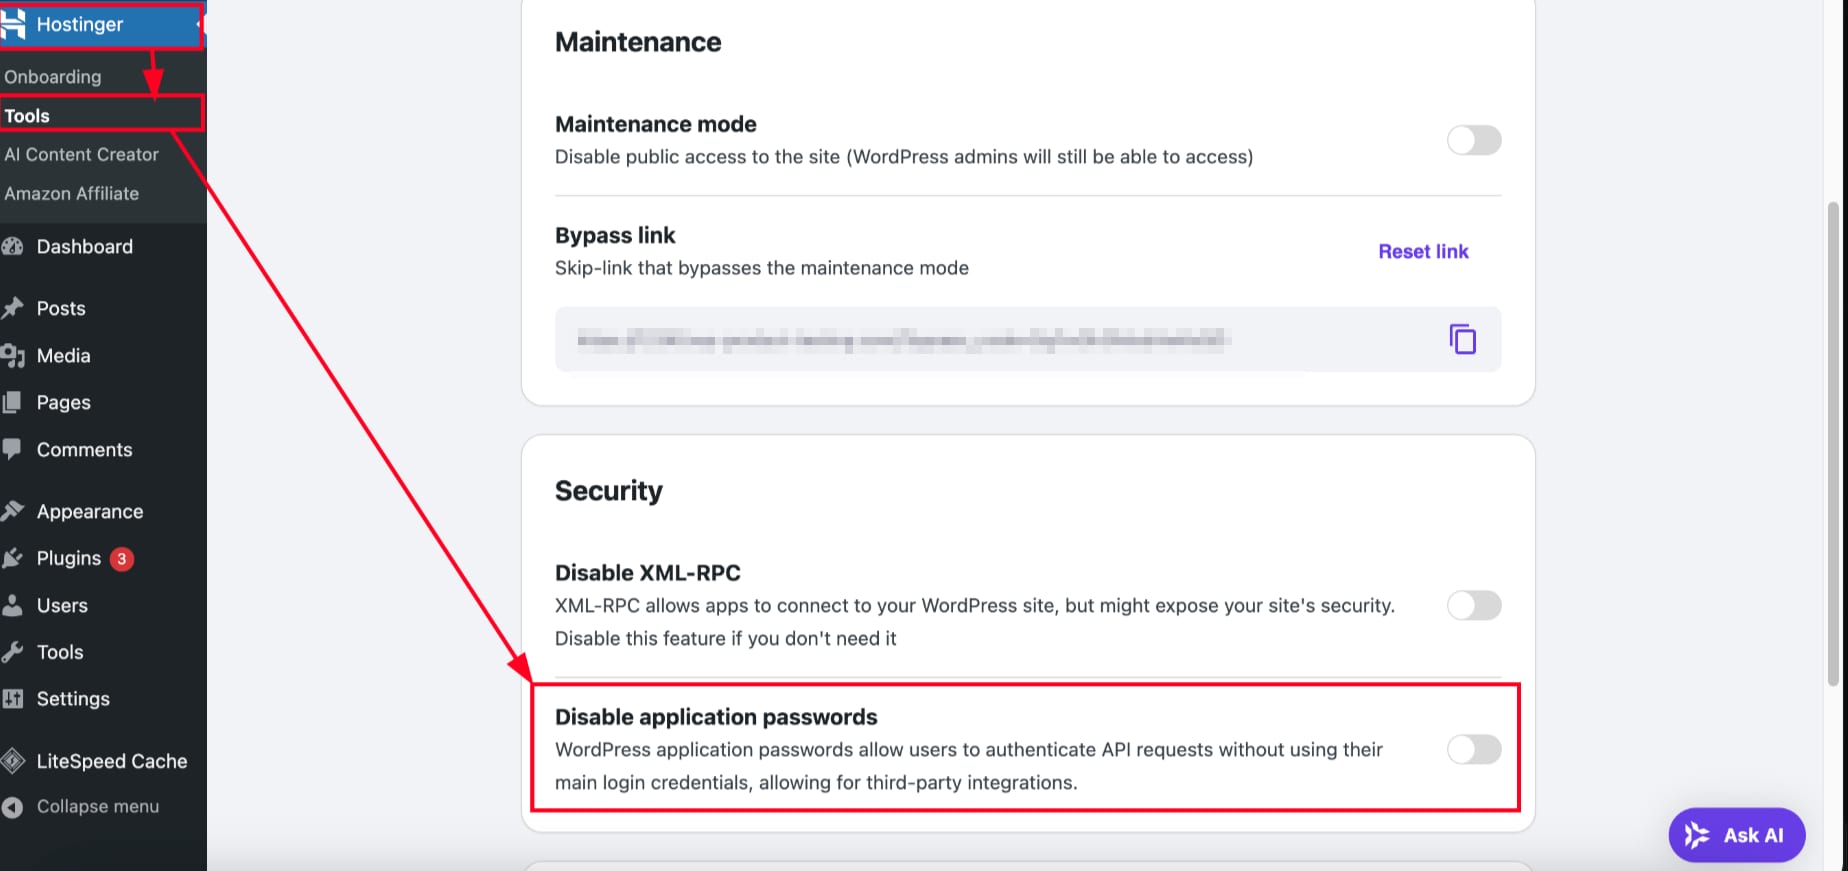
Access your tools section and check the “Disable application passwords” box:
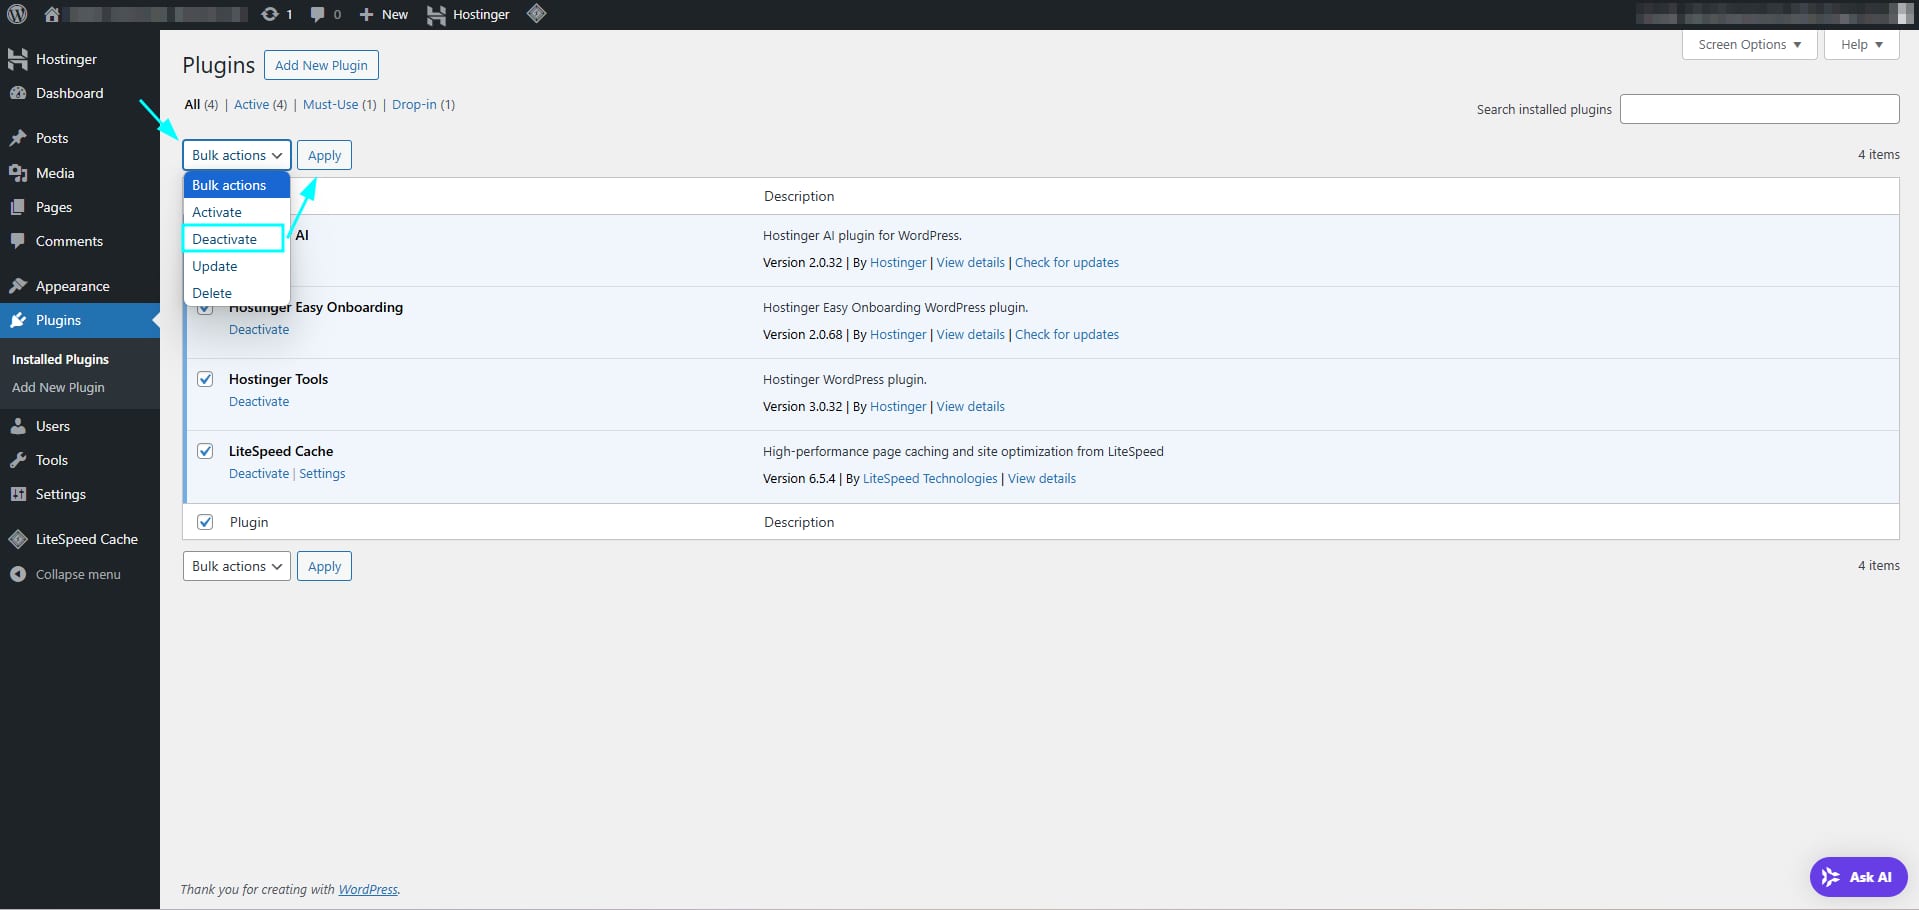
Make sure you disable your plugins as below:
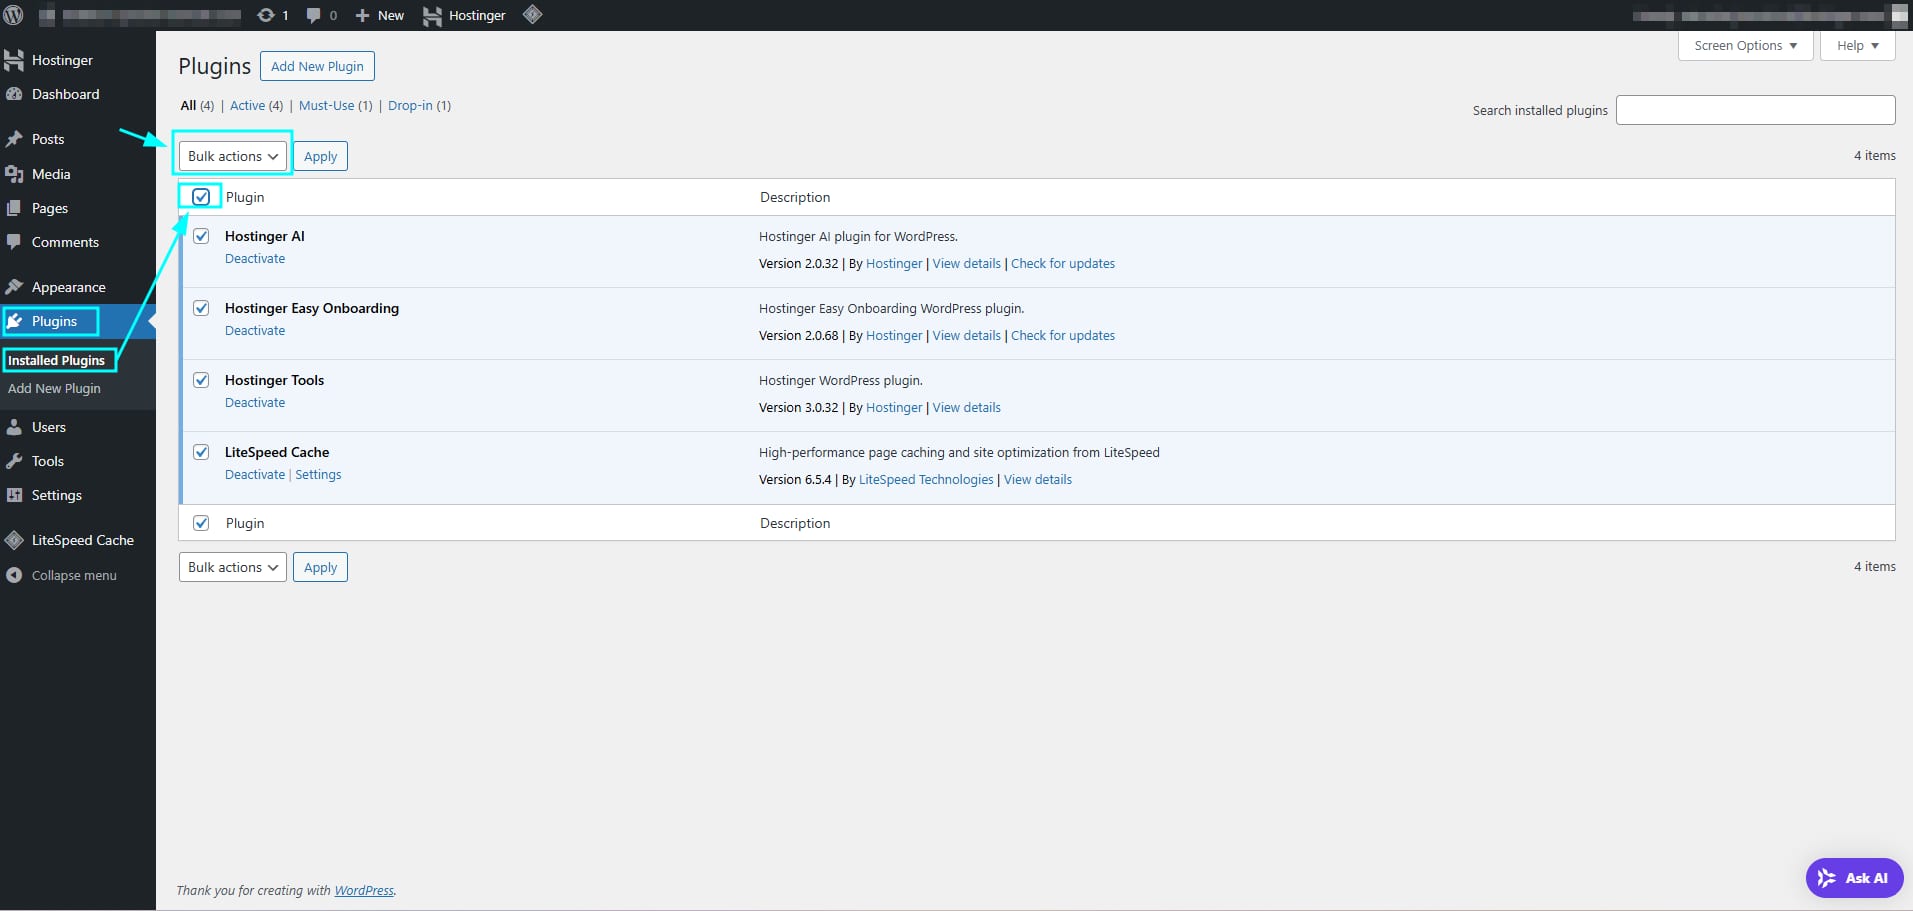
Select all the plugins, click on “Bulk Actions”, select “Deactivate,” and click on Apply:
Once the above is done, you can proceed with exporting the content from Hostinger Webiste Builder.
Export content from Hostinger Website Builder
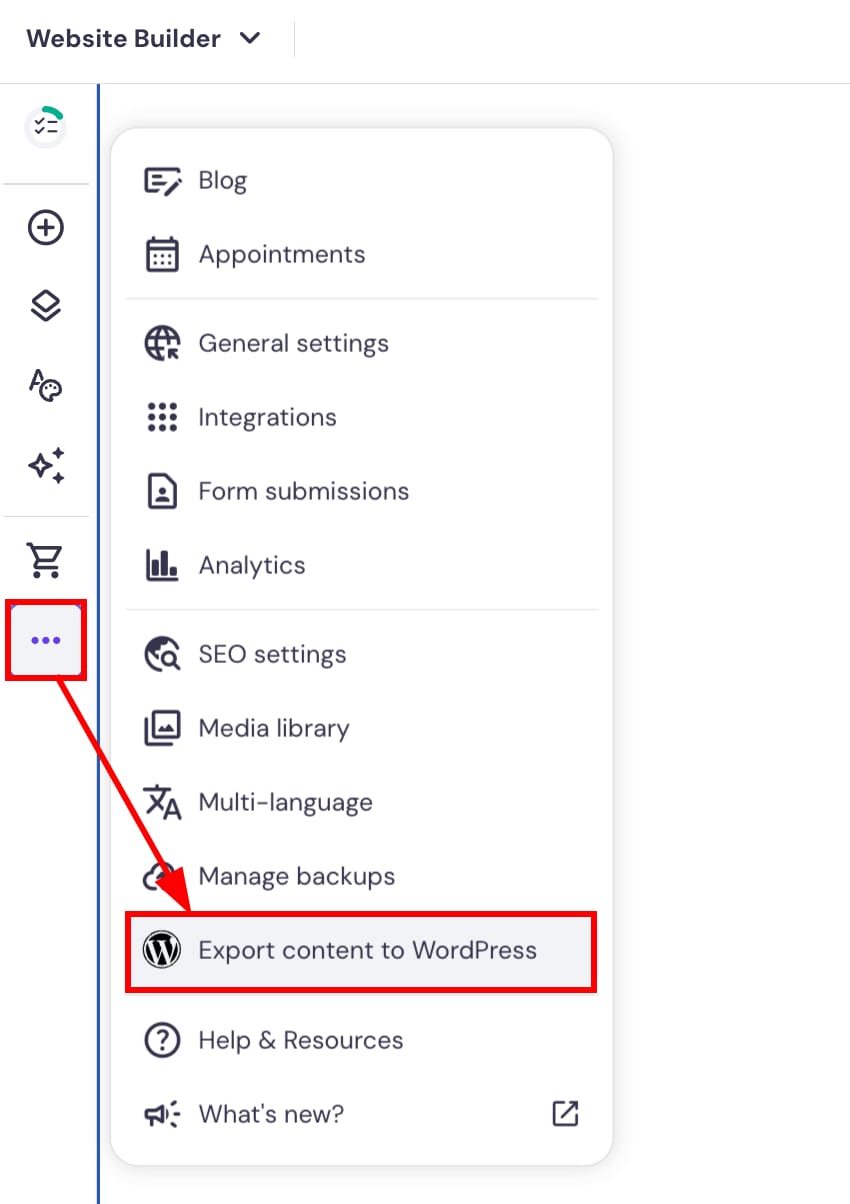
In the builder’s editor, click on the ellipsis (⋯) button on the sidebar to open settings and select Export content to WordPress:
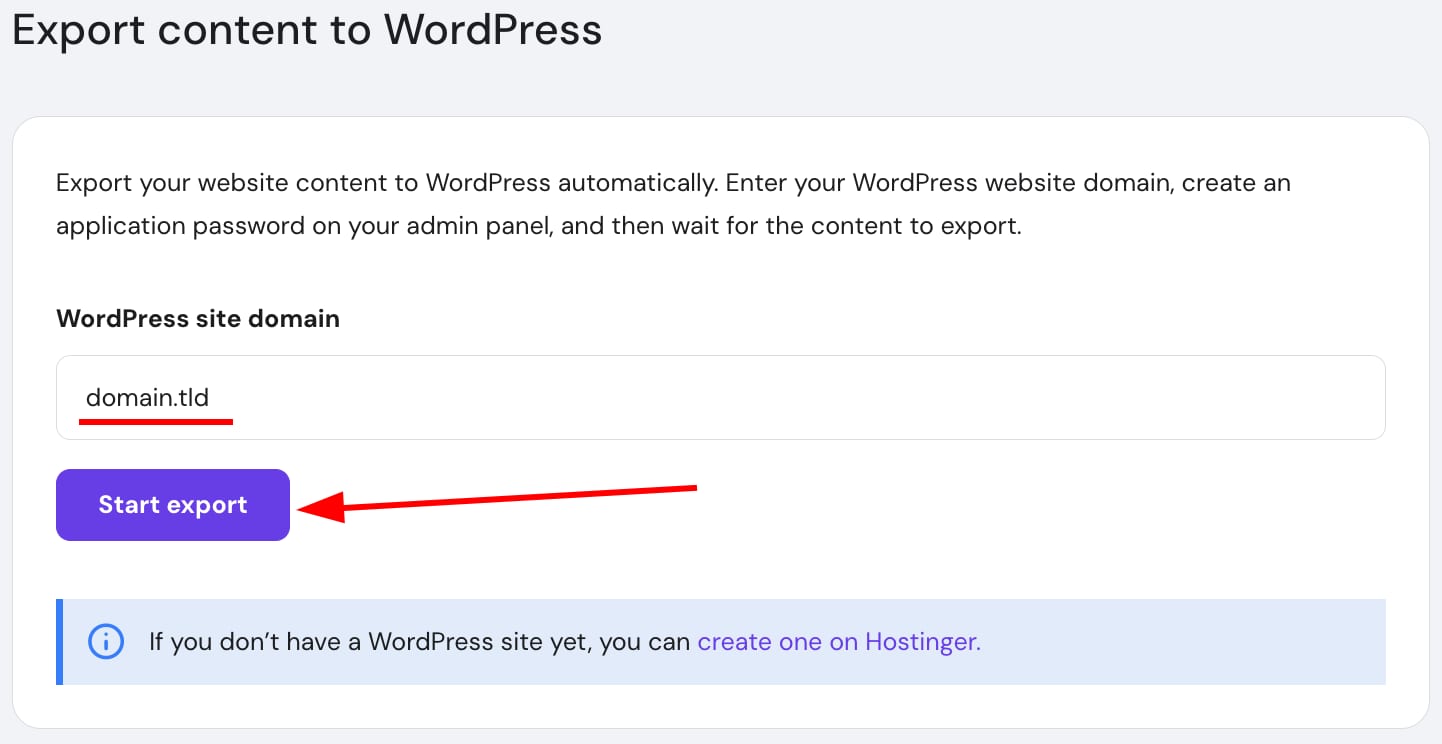
Insert the destination domain name that’s already linked to your WordPress website and click on Start export:
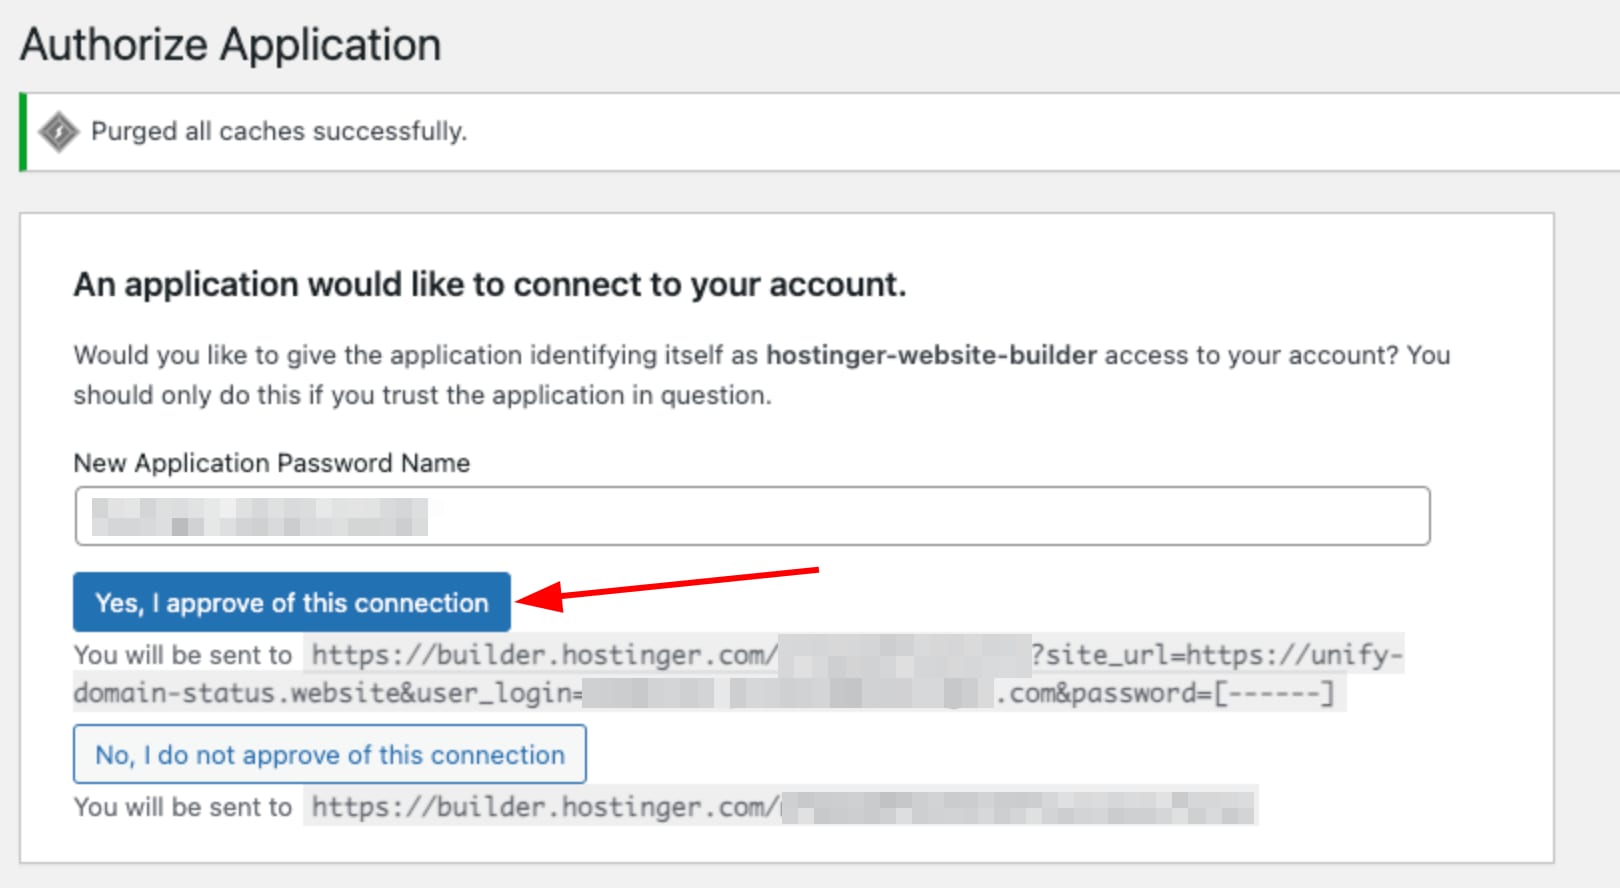
You’ll be redirected to the WordPress admin panel, where you must create a new application password. This password will be used only for the content export application. Once that’s done, click on Yes, I approve of this connection:
Once the export is completed, click on Go to WordPress site:
Finally, due to security reasons, it’s recommended that you revoke the application password.
Failed Exports
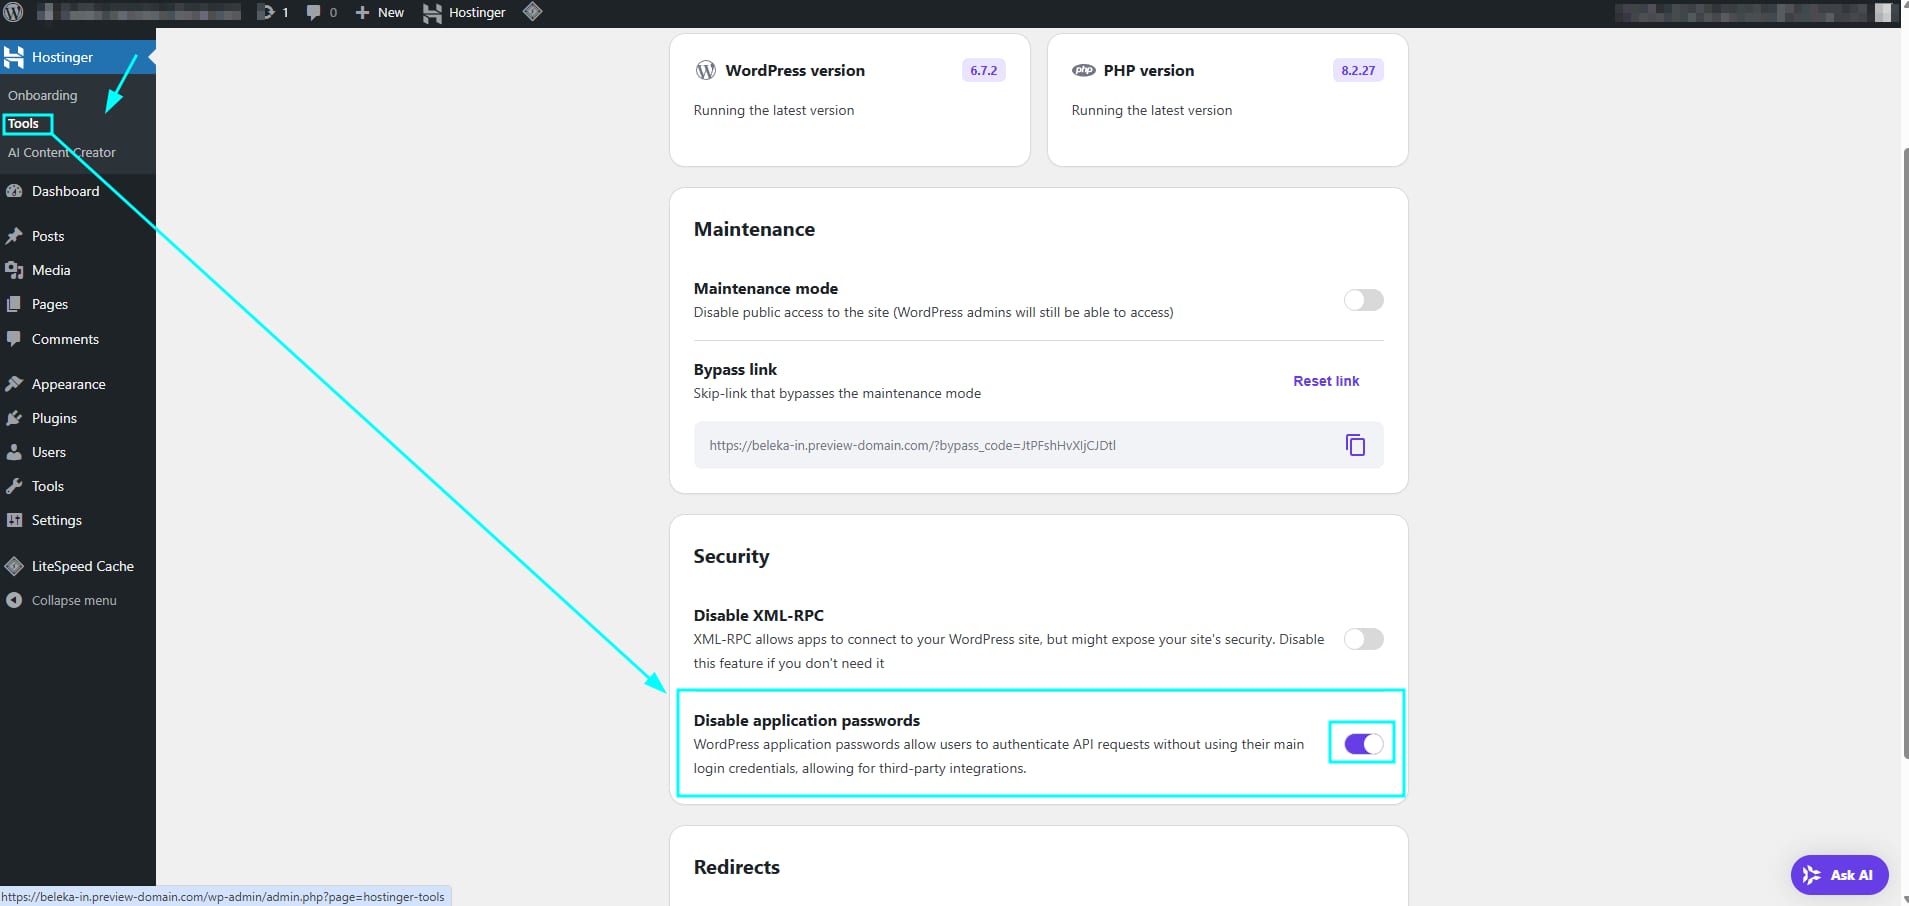
The export might fail due to the application password feature, which is required for the export process, and is disabled on the WordPress site you are trying to export the Builder website to. This usually results in the following error: The selected WordPress does not have application passwords enabled. Activate them first to continue with the export.
You can enable this by going to your WordPress website’s admin dashboard, clicking on Hostinger Tools plugin and following as per the image below: