Hostinger provides automated backups and manual snapshots for your Virtual Private Server (VPS) to capture its state and revert changes if needed. While both features protect your data, they serve different purposes:
- Backups: Automated weekly backups (and daily if enabled), stored separately from your server. Up to four are retained, two daily and two weekly.
- Snapshots: A manual, on-demand capture of your entire VPS . Only one can be stored at a time, it is deleted if you reinstall the OS or restore from a backup, and it expires after 20 days.
In short: use snapshots for quick, temporary checkpoints before making changes, and rely on backups for ongoing, scheduled protection of your data.
Before you start
Before performing a restoration on your VPS from a backup or snapshot, consider the following.
- Data overwrite: Restoring from a snapshot or backup will completely overwrite all current content on your VPS.
- Irreversible action: Once initiated, a backup or restoration cannot be stopped, canceled, or reverted.
- During that time, the server may present variations in availability and performance.
- Server lock: To ensure data integrity, the VPS is locked during backup or restoration and cannot be managed until the process finishes.
- Permanent changes: Restorations are irreversible. To keep specific files, download them via an FTP client like FileZilla before proceeding.
How to manage Hostinger VPS backups
To access your backup settings:
- Go to hPanel → VPS
- Click Manage next to the server name.
- Select Backups & Monitoring → Snapshots & Backups from the left sidebar.
Enable or disable backups
By default, your VPS is backed up automatically every week. To change this setting:
-
Click on Manage Schedule.

-
Select your preferred frequency:
-
Daily: if not purchase yet, you will get the payment options in the next steps. Alternatively, you can click on the Upgrade button to purchase daily backups.
-
Weekly: enabled by default.
-
Turn off auto-backups: Any changes made to your VPS will not be backed up. Existing backups will still be available during the retention period.
-
-
Click Save to apply the changes.

NOTES
- The scheduled backup time is fixed and cannot be customized.
- Backup creation can take between 10 minutes up to a few hours depending on the backup size.
- Turning off backups may be disabled while a backup creation is in progress.
- Turning off backups does not cancel ongoing actions.
Restore the server from a backup
- Locate the desired backup from the provided list.
- Click Restore next to the specific date. Note the estimated time to restore.
- Wait for the process to complete. Your VPS will be locked during this time.
NOTES
- Each new daily or weekly backup replaces the oldest one, ensuring two of each type are available at a time.
- If a specific date is not listed, a backup for that time does not exist.
- Restoration speed can vary between 10 minutes up to a few hours depending on the backup size.
- Once started, the restoration cannot be stopped; you must wait for completion before taking further actions.
How to manage VPS snapshots
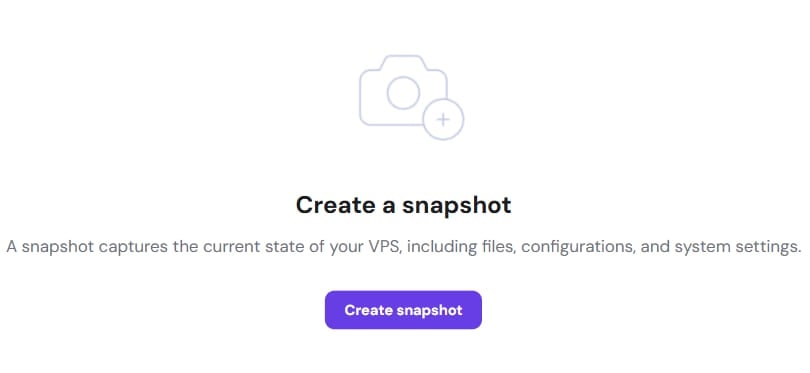
A snapshot allows you to capture the entire state of your VPS at a precise moment. You must generate these manually.
- In the Snapshots & Backups page, click Create Snapshot.

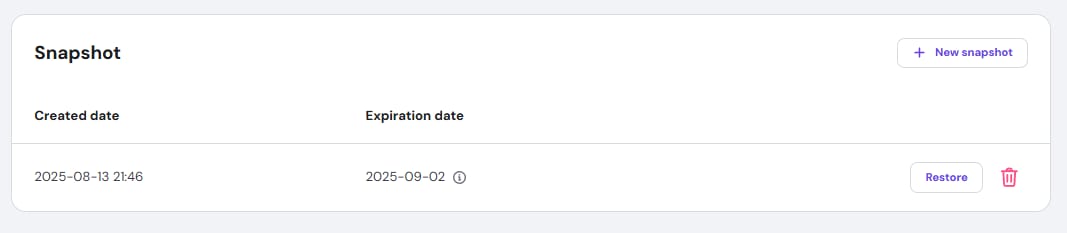
- Once created, the snapshot appears above the backups list.

- You can use this entry to restore your VPS to that moment or permanently delete it if you no longer need it.
NOTES
- Only one snapshot is stored at a time; creating a new one overwrites the previous one.
- Snapshots are automatically deleted after 20 days.
- Changing or reinstalling your VPS operating system will permanently delete any existing snapshot.
How to monitor backup or restoration status
To track the progress of a backup or restoration in real-time:
- Go to hPanel → VPS → Manage → Backups & Monitoring → Latest actions.
- Look for the
backup_createor orbackup_restoreentry to view the current status.


NOTES
- After restoring your server from a backup or snapshot, it will be brought back to the state it was at the moment of backup/snapshot creation, reverting any changes made afterward.
- Downloading backups or snapshots directly to a local device is not supported. Instead, use SFTP.
Troubleshooting Hostinger VPS backup and restoration issues
If you encounter issues during or after managing your Hostinger VPS backups or snapshots, follow these steps:
- Wait for completion: Backup and restoration actions lock your VPS. You must wait for the process to fully complete before attempting any other actions, as the server will be inaccessible during this time. Estimated durations can vary based on server resources; a longer waiting time does not necessarily mean an action is stuck. You can monitor the status Latest actions section of VPS management on hPanel.
- Clear browser cache: If hPanel indicates your VPS is still locked after the action is completed, clear your browser cache or open hPanel in an incognito or private window to refresh the status.
- Restart your VPS: Once the action is finished, restart your VPS to ensure all services initialize correctly.
- Emergency mode: If the issue persists after restarting or the VPS is not responding, enable the emergency mode to access the
/mntdirectory and perform a manual fix.
Managing your Hostinger VPS backups and snapshots ensures you can recover quickly from configuration errors or data loss. Once the process finishes, your server will return to the exact state it was in at the moment of the capture.