How to self-host Buzz app by Block on a server
Sep 15, 2026
/
By Ariffud M.
/
9 min Read
To install Buzz communication app by Block, set up the prerequisites, download and install Buzz, configure your domain and secrets, enable secure access with HTTPS, and register as the first member.
While you can install Buzz on your computer and join an existing community as a regular member, self-hosting it on a virtual private server (VPS) gives you full control over your conversations, identities, and files by keeping them on infrastructure that you manage.
Follow these steps to self-host Buzz and configure your server:
- Connect to your server and set up Docker.
- Download the Buzz files.
- Generate secrets and configure the .env file.
- Start Buzz’s services using Docker Compose.
- Enable HTTPS with Caddy.
- Register as the first member and connect.
- Configure automatic backups.
Some VPS providers, including Hostinger, offer a Buzz application template that lets you deploy Buzz on your server in just a few clicks. This approach is faster and easier than running all the commands manually.
Prerequisites for installing Buzz
Before installing Buzz open-source team chat app, prepare a Linux VPS with the recommended specifications, a domain that points to your server, and a Buzz identity key in both npub and hex formats.
- Linux VPS. Your Linux VPS needs at least two CPU cores and 4 GB of RAM to run Buzz reliably. Ubuntu Long Term Support (LTS) releases receive security updates for five years, and Docker’s official installation instructions target Ubuntu, making it the simplest choice for this deployment. Before continuing, prepare your server to host an app like Buzz.
- Domain. You need a domain name to access the Buzz relay securely over the internet. Make sure you point the domain to your VPS’s IP address. If your VPS provider offers a free subdomain, you can use that instead, as it typically already points to your server.
- Buzz public key. You’ll register as the relay owner with a Buzz identity key, which acts as your identity in the Buzz workspace. Instead of a username and password, Buzz uses a key pair that the app generates for you.
You’ll need the public key in two formats:
- Hex for the server configuration file.
- npub for member registration.
Follow these steps to generate your Buzz identity key:
- Go to the official Buzz website and download the desktop app for your operating system.
- Install and open the app, then select Create a new identity key on the welcome screen.
- On the community join screen, select Copy your public ID. This is your npub key, which starts with npub1 followed by a long string. Save it in a text file.
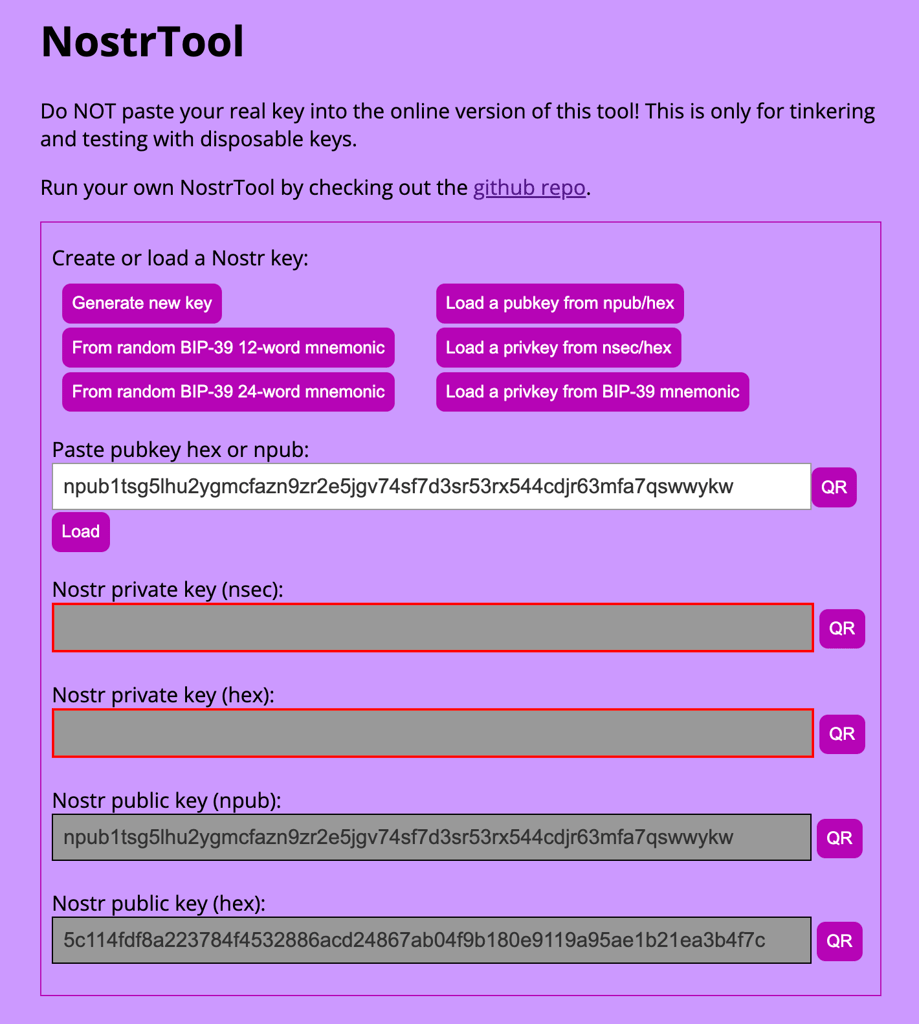
- Open the NostrTool page to convert the npub key.
- Select Load a pubkey from npub/hex, paste your npub key into the Paste pubkey hex or npub field, and click Load.
- Copy the value from the Nostr public key (hex) field at the bottom of the page and save it in the same text file.
How to self-host Buzz with Docker Compose
You can self-host Buzz with Docker Compose, which starts its four required services, the relay, PostgreSQL, Redis, and MinIO, with a single command. This removes the need to install and configure each service separately.
The Buzz relay handles messages and ties everything together; PostgreSQL stores message and search data; Redis supports real-time features, and MinIO stores shared files and images.
1. Connect to the server and install Docker
Open a terminal on your computer and connect to the server over SSH. Replace your-server-ip with the IP address provided by your VPS provider:
ssh root@your-server-ip
Update your server’s software:
sudo apt update && sudo apt upgrade -y
The apt update command checks for available package updates, while apt upgrade installs them. These are two of the most common commands for managing a Linux server.
Next, install Docker on your server. Once done, install the Docker Compose plugin:
sudo apt install -y docker-compose-plugin
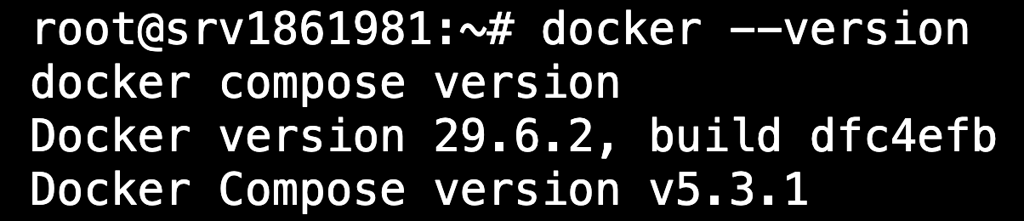
Verify that both are installed correctly. Each command should return a version number:
docker --version
docker compose version
2. Download the Buzz deployment files
Buzz’s production deployment files are available on GitHub. Clone the repository with the git command, then open the deployment folder:
git clone https://github.com/block/buzz.git
cd buzz/deploy/compose
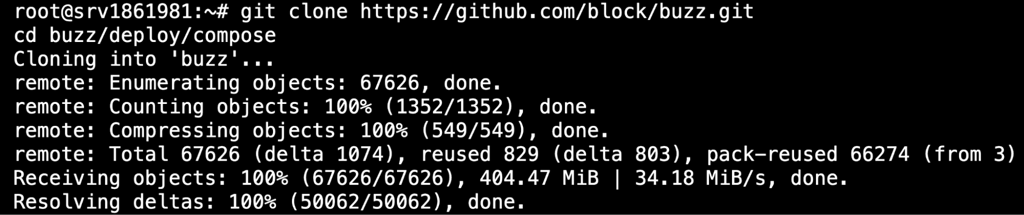
You’re now in the buzz/deploy/compose folder, which contains the files needed to run Buzz on a production server.
To view all files in the folder, run:
ls -a
3. Generate secrets and configure the environment
Buzz uses an environment file (.env) to store your domain, owner key, and passwords for each service. You need to add these values before starting the relay.
First, generate seven random secrets by running the following command seven times. Save each result in a text file, labeled with the field it belongs to, because you’ll add them to the configuration shortly:
openssl rand -hex 32
Copy the environment template, then open the new file with the nano text editor:
cp .env.example .env
nano .env
In the .env file, update three groups of values: your domain, owner public key, and secrets.
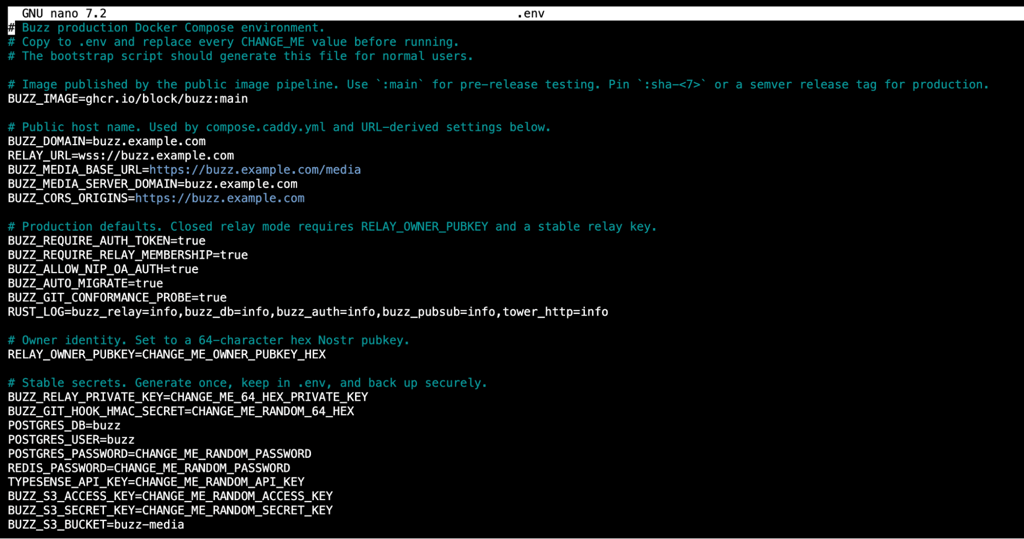
- Domain. Update the following five lines. Replace the placeholder domain in each line with your actual domain:
BUZZ_DOMAIN=buzz.example.com
RELAY_URL=wss://buzz.example.com
BUZZ_MEDIA_BASE_URL=https://buzz.example.com/media
BUZZ_MEDIA_SERVER_DOMAIN=buzz.example.com
BUZZ_CORS_ORIGINS=https://buzz.example.com
- Owner public key. Find the following line and replace the placeholder with the 64-character hex key you generated before:
RELAY_OWNER_PUBKEY=CHANGE_ME_OWNER_PUBKEY_HEX
- Secrets. Replace the remaining CHANGE_ME placeholders with the random values you generated earlier. Use a different value for each variable:
BUZZ_RELAY_PRIVATE_KEY=CHANGE_ME_64_HEX_PRIVATE_KEY
BUZZ_GIT_HOOK_HMAC_SECRET=CHANGE_ME_RANDOM_64_HEX
POSTGRES_PASSWORD=CHANGE_ME_RANDOM_PASSWORD
REDIS_PASSWORD=CHANGE_ME_RANDOM_PASSWORD
TYPESENSE_API_KEY=CHANGE_ME_RANDOM_API_KEY
BUZZ_S3_ACCESS_KEY=CHANGE_ME_RANDOM_ACCESS_KEY
BUZZ_S3_SECRET_KEY=CHANGE_ME_RANDOM_SECRET_KEY
Leave all other values, including ports, the database name, bucket name, and log levels, unchanged because they’re already configured correctly.
To save the file and close nano, press Ctrl+X → Y → Enter.
4. Start the Buzz services
Start the Buzz relay, database, cache, and file storage with a single docker compose command:
docker compose up -d
The first run may take a few minutes because Docker needs to download the required images. Once it finishes, verify that every service is running:
docker compose ps

Each service should show a status of Up or healthy. It’s normal for the minio-init service to show Exited because it runs only once to create the storage bucket, then stops.
If the relay shows Restarting, check its logs:
docker compose logs relay
A leftover placeholder in the .env file is the most common cause. Check for any remaining placeholders with these commands:
grep CHANGE_ME .env
grep buzz.example.com .env
If either command prints any lines, reopen the .env file and replace the remaining placeholders.
5. Enable HTTPS with Caddy
Your Buzz relay is running, but it isn’t secure for public access yet.
The separate compose.caddy.yml configuration file adds Caddy, which gets a free TLS certificate from Let’s Encrypt, routes traffic to the relay, and keeps your database and file storage inaccessible from the internet.
Caddy uses the domain you already set in the .env file, so you don’t need any additional configuration. Stop the Buzz services, then restart them with Caddy:
docker compose down
docker compose -f compose.yml -f compose.caddy.yml up -d
Open your domain in a browser to verify the setup. If Caddy configured the certificate correctly, your browser should show Connection is secure without any warnings.
If the page doesn’t load or shows a certificate error, check the Caddy logs:
docker compose logs caddy
The most common causes are DNS propagation delays or blocked firewall ports. When configuring Uncomplicated Firewall (UFW) on your server, make sure ports 80 and 443 are open.
6. Add yourself as a relay member and connect
Buzz blocks all connections by default, so you need to register yourself as a member before you can connect.
Run the following command and replace npub1yourkeyhere with your actual npub key:
docker compose exec relay buzz-admin add-member --pubkey npub1yourkeyhere

Open the Buzz desktop app on your computer. It should still display the community join screen.
Enter your relay URL using the wss:// prefix, followed by the domain you configured in the .env file. The prefix tells the app to connect securely through your HTTPS setup. For example:
wss://buzz.example.com
The app should connect and display your workspace. If the connection fails, check that you entered the URL correctly and verify that the relay is running:
docker compose ps
7. Set up automatic backups
Most of your Buzz workspace data, including messages and metadata, is stored in the Buzz relay’s PostgreSQL database. Without backups, you could lose that data if something goes wrong.
First, create a backup folder and test a manual backup:
mkdir -p /backups
cd /root/buzz/deploy/compose
docker compose exec -T postgres pg_dump -U buzz buzz > /backups/buzz-test.sql
ls -la /backups/
The buzz-test.sql file should have a size greater than 0 bytes. If it does, the backup was created successfully.
To automate backups, open your crontab:
crontab -e
Choose nano if prompted to select an editor. Then add the following line at the bottom of the file. This example creates a backup every night at 2:00 AM based on your server’s clock (most VPS providers default to UTC):
0 2 * * * cd /root/buzz/deploy/compose && docker compose exec -T postgres pg_dump -U buzz buzz > /backups/buzz-$(date +%Y%m%d).sql
To save the file, press Ctrl+X → Y → Enter. The database will now back up automatically every night.
How to deploy Buzz with Hostinger’s application template
To deploy Buzz with Hostinger’s template, open the Buzz application page and select your preferred VPS plan. KVM 2 at A$ 13.09/month with two vCPU cores and 8 GB of RAM is a good starting point for day-to-day performance.
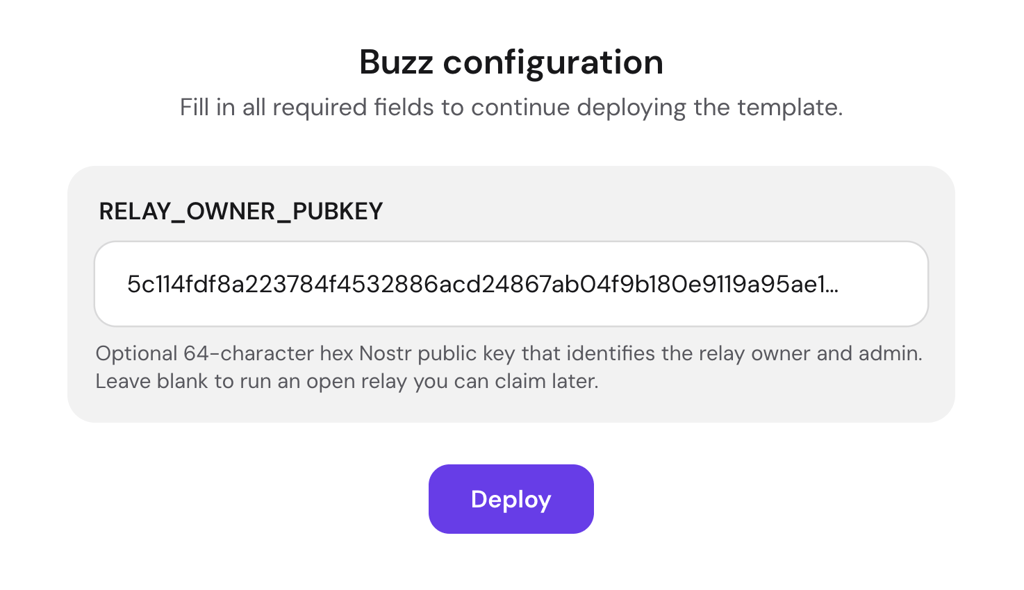
After choosing the server location closest to your team and completing your purchase, you’ll be prompted to enter your 64-character hex public key (the one you generated from the Buzz desktop app using NostrTool).
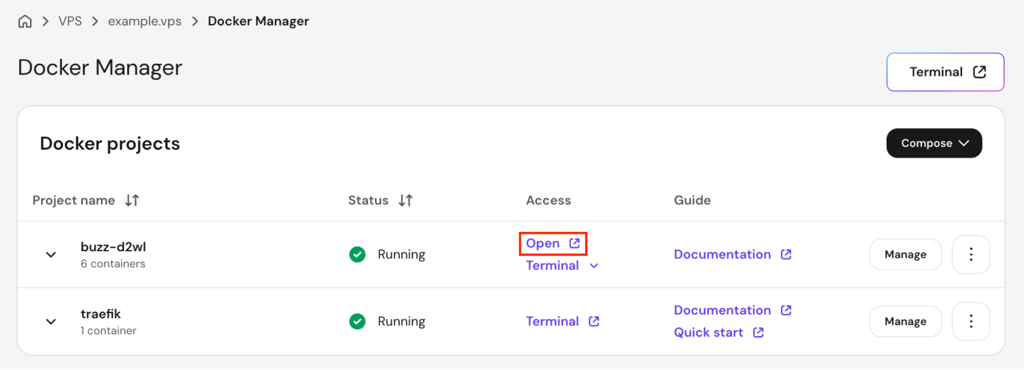
The template installs Ubuntu, Docker, and all required Buzz services automatically. When the installation finishes, you’ll be redirected to the Docker Manager page. Hover over Open to view your Buzz domain.
Next, open the Buzz desktop app and enter your relay URL using the wss:// prefix followed by your domain. For example:
wss://buzz-ab12.srv1234567.hstgr.cloud
If you already have a Hostinger VPS, you can also switch to the Buzz application template. Keep in mind that changing the operating system reinstalls the server and permanently removes all existing data. Back up your VPS before continuing.
To switch to the Buzz template:
- Open Hostinger dashboard and go to VPS → Manage → OS & Panel → Operating system.
- In the Change OS section, search for Buzz and select it.
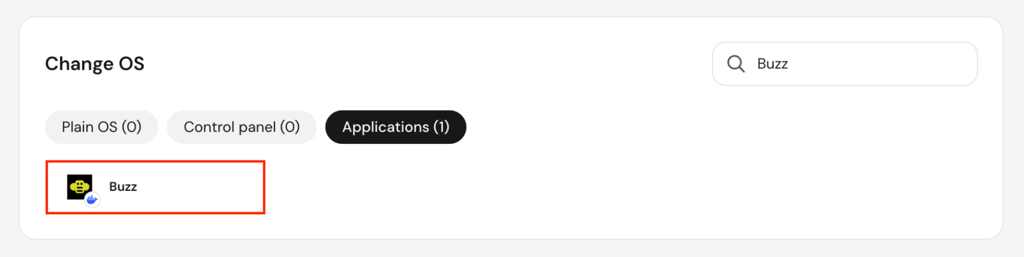
- Enter your 64-character hex public key when prompted, then follow the remaining setup instructions.
When the installation finishes, open the Docker Manager page to find your Buzz domain. Then connect from the Buzz desktop app using wss:// followed by your domain.

Why install Buzz on your own server
Self-hosting Buzz gives you full control over the relay, your workspace data, and who can join.
- Your data stays on your server. The Buzz relay stores every message and activity event in its PostgreSQL database, and any uploaded files in a separate MinIO store. When you host the relay yourself, the database runs on infrastructure you manage instead of Block’s servers or another third party’s infrastructure. No one can access, analyze, or delete your workspace data unless you give them permission.
- You control who joins. The relay’s member list determines who can connect. You can add or remove people and AI agents with the add-member and remove-member commands, so there’s no approval process, waitlist, or external platform policy between you and your team.
- You set your own rules. A self-hosted relay lets you decide what agents can do, how long to keep data, which services the relay can connect to, and when to update to a newer version. When you use someone else’s relay, they control those decisions.
However, self-hosting Buzz isn’t for everyone. If you just want to use Buzz without managing a server, download the desktop or mobile app and join a relay that accepts new members. You’ll still be able to communicate with other members and AI agents without dealing with Docker, configuration files, or backups.
How to troubleshoot Buzz installation issues
Most Buzz installation issues come from leftover placeholder values in the environment file, an incorrectly formatted owner key, or blocked firewall ports. Here’s how to identify and fix each of these problems:
- The relay restarts with “BUZZ_GIT_HOOK_HMAC_SECRET must be at least 32 characters.” One or more secrets in your .env file still use placeholder values. Run grep CHANGE_ME .env to find them. Generate a new random value for each placeholder with openssl rand -hex 32, update the file with nano .env, and restart the services with docker compose -f compose.yml -f compose.caddy.yml up -d.
- The relay restarts with “RELAY_OWNER_PUBKEY required.” The owner key is missing or uses the wrong format. The relay requires the 64-character hex string, which contains only letters and numbers, not the npub version. If you pasted a key that starts with npub1, convert it to hex on the NostrTool page, update the value in the .env file, and restart the services.
- The desktop app can’t connect. Verify that your domain points to the correct IP address by running ping followed by your domain on your computer. Then confirm that Caddy is running by using docker compose ps on the server. If both look correct, make sure your firewall allows traffic on ports 80 and 443. These ports must be open for HTTPS traffic to reach the relay.
- The mobile app shows a QR code that disappears immediately. The pairing service may be unreachable. Make sure the Caddy Compose file is included in the startup command and that the /pair path is routed correctly. Check the Caddy logs for routing errors with docker compose logs caddy.
How to update Buzz to a newer version
To update Buzz to the latest version, pull the newest source code and service images.
Run these commands on the server:
cd /root/buzz
git pull
cd deploy/compose
docker compose -f compose.yml -f compose.caddy.yml pull
docker compose -f compose.yml -f compose.caddy.yml up -d
Updating the services won’t affect your stored messages, files, or database records. Your data remains intact because Docker stores it in volumes that are separate from the running services.
What to do after installing Buzz
Now that your Buzz relay is running, the next steps are to add your team, organize the workspace, and secure the setup.
- Manage members. Ask each new member to generate a Buzz identity key in the desktop or mobile app, then add them using their npub key. You can also list or remove members:
# Add a new member
docker compose exec relay buzz-admin add-member --pubkey npub1yourkeyhere

# View all registered members
docker compose exec relay buzz-admin list-members

# Remove a member
docker compose exec relay buzz-admin remove-member --pubkey npub1yourkeyhere
- Add AI agents. Buzz lets you connect AI agents through its ACP harness, which works with tools such as Goose, Codex, and Claude Code. Each agent gets its own identity key and joins channels as a member. Buzz also keeps a full audit trail, so you can track what each agent did and where.
- Secure the workspace. The production deployment enables membership enforcement and authentication by default. Review the BUZZ_REQUIRE_RELAY_MEMBERSHIP and BUZZ_REQUIRE_AUTH_TOKEN values in your .env file and confirm that both are set to true. Keep your relay URL private until you’ve added your team.
- Protect the server. Your Buzz relay is only as secure as the server it runs on. Follow basic VPS security practices, such as setting up SSH key authentication, configuring firewall rules, enabling automatic security updates, and restricting root access.
There are also many ways to use your new Buzz workspace, from setting up team workflows to running AI-assisted code reviews. Check out the top Buzz use cases for practical ideas on what you can do next.

Ariffud is a Technical Content Writer with an educational background in Informatics. He has extensive expertise in Linux and VPS, authoring over 200 articles on server management and web development. Follow him on LinkedIn.